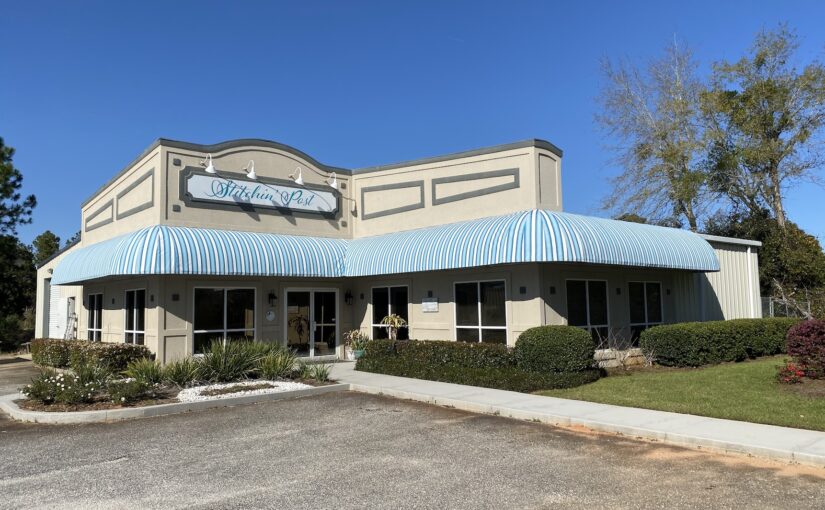
How many yards of fabric does it take to sew an awning for a commercial building? It depends on the size of the building, of course. But for Sailrite® customer Rick Smith, the answer is nearly 90 yards. Put another way, that’s over 1,000 square feet of fabric!
How did he get the opportunity to sew such a massive project? Ironically, by taking his couch to an upholstery shop.
Rick and his wife live in a coastal Alabama town that is often hit by hurricanes. It can take years to remedy all the damage in the town after a serious storm. When Rick visited the town’s most popular upholstery shop in early 2022, he got a firsthand look at some of the lingering damage from a 2020 hurricane.
“Their awning had been destroyed by Hurricane Sally,” Rick said of the shop. “I asked them about replacing it, and they hired me on the spot.”
This popular upholstery shop had been so busy with orders for customers that no one who worked there had the time to repair the 136-foot by 8-foot awning. The project promised to be a huge undertaking, but it wasn’t the first awning Rick had ever sewn. It wasn’t even his first time sewing professionally.
Now retired from a career in marketing and communications — including running his own advertising agency for 18 years — Rick does projects for his small sewing business.
He learned how to sew growing up, and was fortunate to have not just one, but five teachers. “I grew up in a big family of sewers. I’m the youngest of nine kids, and my mom and four sisters sewed professionally,” he told us. “[They sewed] everything from wedding dresses to industrial upholstery and factory garment jobs.”
Despite his early start in the hobby, Rick didn’t do much sewing for nearly 40 years. Instead, he sailed competitively in his spare time — a pastime that began during his college days. Rick has owned more than 11 sailboats in his life, including a Beneteau 423 sailboat he and his wife purchased in 2012.
Unlike the other sailboats, the Beneteau was not for racing. Instead, the couple dreamed of becoming liveaboards. This sailboat would be their new home.
Preparing for Life on the Water
For a successful liveaboard life, however, Rick would need to dust off his sewing skills and get a sewing machine that could handle marine environments. Enter the Sailrite® Ultrafeed® LSZ Sewing Machine.
Rick often admired the marine-friendly machine in the pages of boating magazines. “I liked that the LSZ was ruggedized for such an environment, was a serious heavy industrial machine, had a walking foot, was portable and capable of using without power,” he said.
It was the perfect machine for the nautical life that the couple envisioned. But looking at something in a magazine isn’t the same as seeing it in person, and Rick was hesitant to make a purchase without seeing the LSZ firsthand.
Luckily, two of his friends decided to go to the United States Sailboat Show in Annapolis, Maryland. Sailrite sets up a booth at the show every year to meet fellow boating enthusiasts, answer questions and demonstrate Sailrite products.
Rick’s friends brought him sewing machine brochures from the show and told him their impressions of the LSZ. Convinced that the machine was quality, Rick bought an LSZ of his own in 2014.
With his new machine, Rick made a few updates to the Beneteau sailboat. “The bimini was the first replacement, and I added the dodger and side curtains.” After those projects were done, Rick and his wife planned to get their life on the water underway.
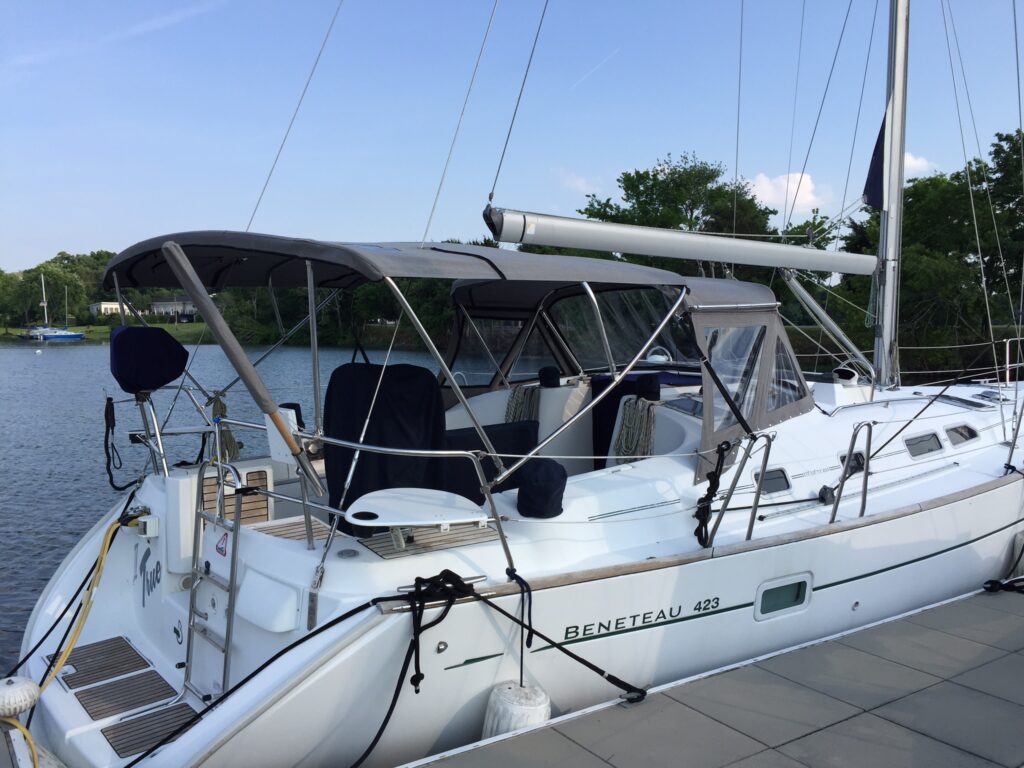
“At the time I first purchased the LSZ, I fully expected to pack the machine in the lazarette of my 43-foot sailboat and live a life in the Caribbean, doing needed repairs and projects for myself plus picking up occasional repair jobs along the way,” Rick told us.
But the best-laid plans don’t always pan out. Unfortunately, health issues forced the couple to rethink their arrangements. They sold the Beneteau in 2018 and instead decided to make a favorite vacation spot in coastal Alabama their home.
Although they sold their sailboat, the couple kept their Ultrafeed. That turned out to be the right call. They quickly discovered that there was no shortage of paid sewing work up for grabs in their new hometown.
“I live on the Gulf Coast near the Florida panhandle. Storms and extreme sun cause lots of damage, so there’s lots of demand for repairs and overstitching. Many fabricators don’t want to do repairs, so I seem to stay fairly busy,” Rick said.
In addition to these small repair jobs, Rick has also made biminis, dodgers and covers for others’ boats, as well as repairing sails. And he’s no stranger to creating custom cushions and enclosures for outdoor spaces.
Thanks to the easy availability of sewing work in his area, Rick can create a totally custom schedule. In fact, that’s what he likes most about his small DIY business. “I get to pick the jobs. … If the job isn’t a good fit for me, I can turn it down. Without having a storefront or a formal business, I can do jobs at a price that leaves [me and my customers] both happy.”
Tackling the Awning Project
It was this freedom and flexibility that led Rick to the awning project at the upholstery shop in early 2022. Although it was a huge project that required dozens of yards of Sunbrella® awning fabric, he was prepared. The couple’s garage pulls double duty as a spacious sewing studio, which Rick has optimized for large projects.
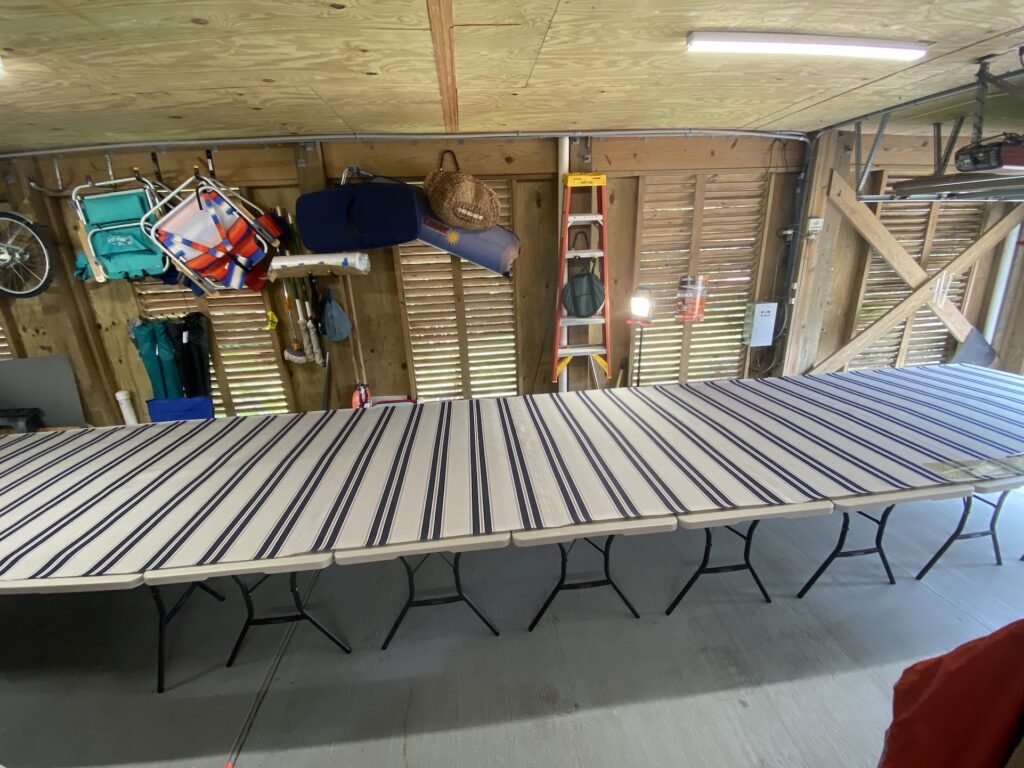
“I have 12 30-inch by 72-inch poly folding tables, plus my machine and two smaller tables, that allow me to set up a sewing surface that runs 32 feet from one end of my garage to the other. I can move out my truck and assemble the tables in 10 to 15 minutes. My sewing table is on wheels, so I can roll it to the tables at whatever point I need it.
“When finished, I can remove and fold [the tables] and repark my truck in the garage in less than another half hour. I have 12 4-foot LED shop lights in that section of my garage, so it gets lit like a science lab when I sew.”
Having a great workshop like Rick’s certainly helps. But every sewing project has its challenges — and this awning was no different. Rick had to fit multiple yards of heavy awning fabric through the throat of his LSZ every time he needed to sew a seam. “I was very careful and methodical on how I staged the assembly,” he said. “I had the smaller panels of every seam to the inside of the machine.”
Before starting work, Rick estimated that the whole project would take about 48 hours. “Actual hours were more like 50 hours to complete through assembly and took four people a total of six hours to install,” Rick said. “The total time in days and weeks was one week in prep, two weeks in cutting and assembly, and a day for installation.”
Although Rick did all the patterning, cutting and sewing by himself, installation wasn’t a one-person job. He had to call in some help. “Luckily, my helpers to install were all friends who were happy to work for lunch and beer,” he laughed.
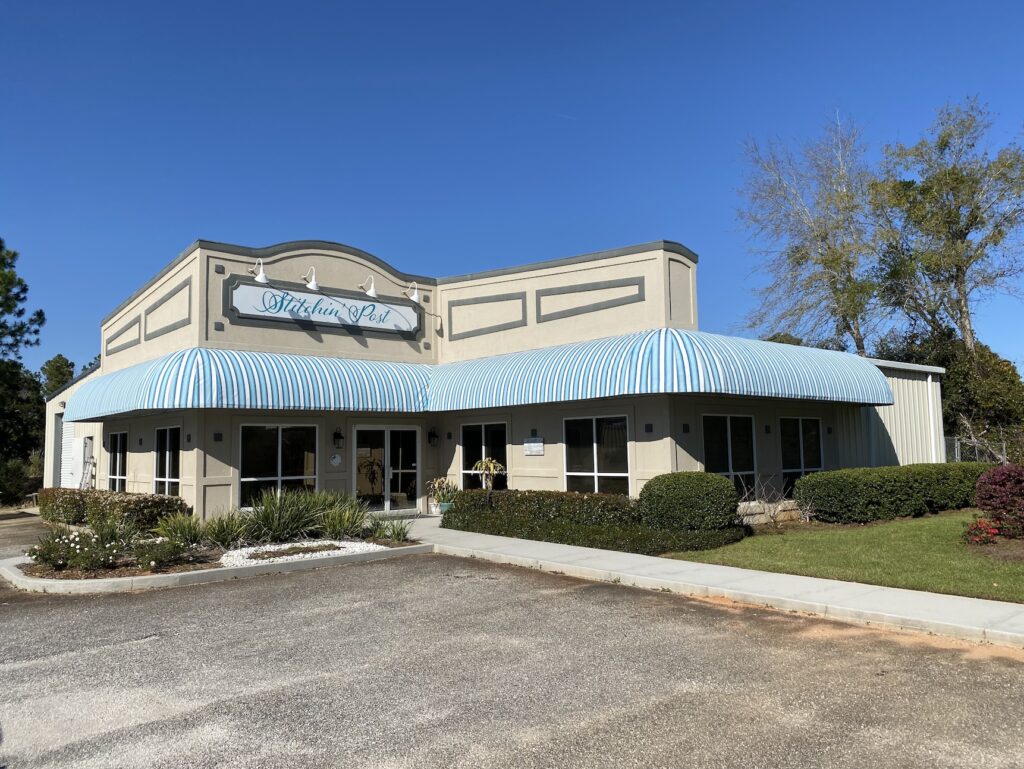
Once the awning was installed, though, the friends discovered a problem with the E-Z Lace that held the awning to its frame.
Rick gave us some background on the issue. “This is the fourth awning I’ve done using E-Z Lace. Each one was one I could pattern myself and had no issues using just the lace without adding fabric for a lace pocket. This one was different. … The [frame] tubing was 1-1/2-inch square aluminum. With just 2-1/2 inches of fabric on the E-Z Lace, measurement proved to be too critical for a good fit.”
Unfortunately, that meant the awning needed to come down for repairs. But Rick was more than up to the challenge of adding a fabric pocket and moving the lace up by 2 inches. And since he had the awning back in his garage studio, he decided to make it even better by adding topstitching.
Upgrading the Sewing Studio
But topstitching would call for a sewing machine size upgrade. “I simply did not have room in the LSZ throat to do topstitches on that many rolled panels,” Rick explained. That conundrum turned out to be the reason he’d been looking for to splurge on a Sailrite® Fabricator® Sewing Machine.
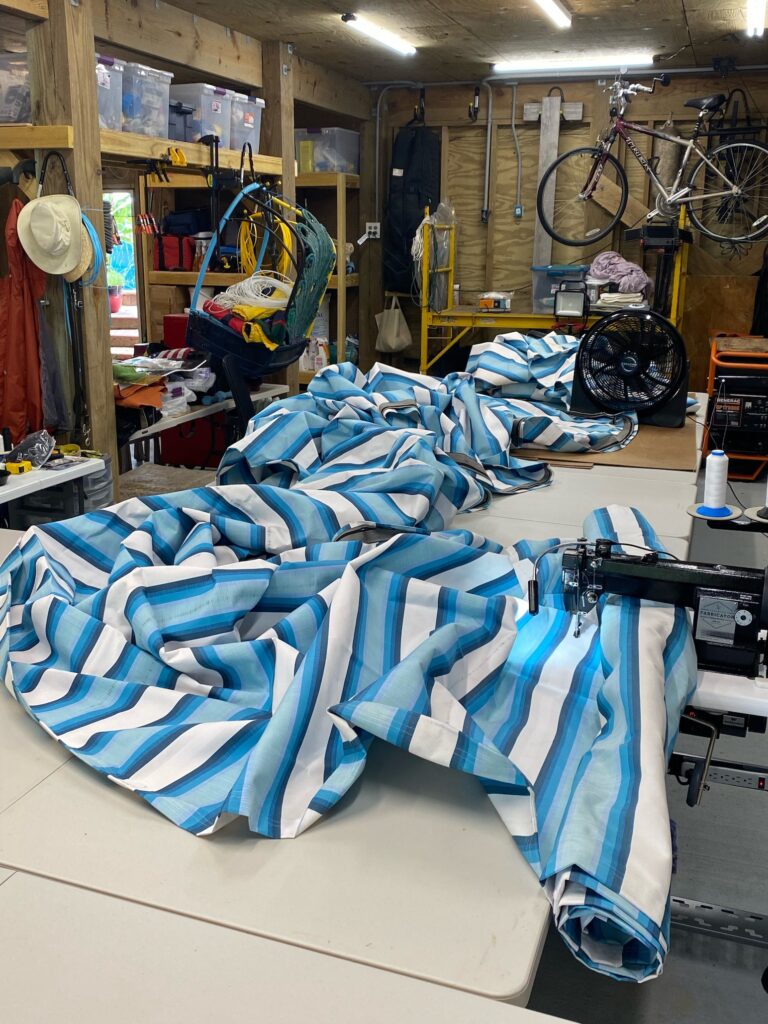
Rick ordered his Fabricator only a few days before we reached out to interview him for this blog. Since then, he’s been hard at work with his new machine. “Now that I have the freedom and room in the machine, I’m adding topstitching over all 38 panels to sleep well at night when the eventual hurricane blows through,” he told us. “My customer didn’t ask me to do this, but they have been so good to me, and I feel blessed to give them a project they are proud to brag about.”
From what Rick has told us about his hard work on the project, we’re not surprised that the folks at the upholstery shop love the new awning! And they’re paying their gratitude forward: “The upholstery shop is weekly sending me business for jobs in canvas they choose not to do,” Rick said.
Between these paid projects and his personal to-do list — which he said includes “two smaller awnings, a long list of re-covering jobs my wife has been patiently waiting for me to start, then some patio enclosures to be finished by year-end” — Rick will never be without a job for long. Now that his workshop is outfitted with an Ultrafeed and a Fabricator, he’s prepared for every project that comes his way.
Thanks for sharing your story, Rick! We’re excited to see what you make next, and we wish you all the best for your future projects.
Who We Are
Sailrite is your one-stop DIY shop! We are a passionate crew of do-it-yourselfers who strive to equip you with the supplies and how-to knowledge you need to tackle your next project. Do you want to learn upholstery, leatherwork, canvaswork, hobby sewing, bag making or more? We have the fabric, tools, hardware, sewing machines and notions you need to master any DIY. And even if you’ve never sewn before, our tutorials and how-to videos are designed for beginners and experienced crafters alike.
Start your DIY journey today: www.sailrite.com

Great story.
I plan to share it with some retirees I know who have never been self starters, but who will see how a small business can evolve.
Ahoy Rick, I loved reading the story about the awning project. The photos were instructive as well. I’m glad you shared the thought process that ultimately precipitated the decision to add the Fabricator to your sewing fleet. Top stitching does make all the difference in making the final project look totally professional.
I like having multiple LSZ machines……one threaded up in white and the other in black. I can do QUICK repairs while Sea Scouts wait if I can save that bit of extra time it takes to change thread color. The Scouts are happy when I can get them back out on the water quickly. Also I use that back-up machine for teaching Scouts to sew.
I have a sailboat and want to make replacement cushions and a new bimini.
i want to purchase an Ultra feed sewing machine .
I want to do small jobs for other boaters as well.
Rick’s story is very inspirational.
What an inspirational story! Love the awning and how the stripes are mitered perfectly at each rounded corner. A true craftsman and artisan. WOW
Kudos on a job well done!! And that’s a great work space you’ve created for yourself.
I have the Fabricator with stand and would love to know about adding the casters. I’ve thought about it but worried about the integrity of the stand if I just screwed some on the bottom of the legs. Did you modify the stand in order to add those casters? Thanks!
Hi Deb. I have pics I’ve shared with Sailrite giving them permission to share along with my contact information. I have the standard K-leg table for both the LSZ and fabricator. I put wheels (as shown) on the LSZ and it worked great. When I got the fabricator I did the wheels as I first assembled the table.
The only thing I’ve had to adjust to is locking the wheels on the fabricator. At first and until I got accustomed to it, using the knee lift for the presser foot would cause the machine to scoot.
I enjoyed reading your story. The awning looks fantastic! I currently have a LSZ-1 and just added on the new WorkerB Power Pack and love it.
Loved this story. Thought we did good, just making a new awning for hammock cover, could certainly not consider a project of this size. Well done Rick, really look fabulous.