DIY Sun Protection for Paddling Pooches

You’ve probably heard someone use the saying, “the dog days of summer,” to talk about the hottest and most humid days of the year. But did you know that this phrase originated in Ancient Rome?

You see, the astronomers of the time noticed that the sweltering weather coincided with the period that the star Sirius, also called the “dog star,” was visible in the night sky. The astronomers thought that Sirius was adding its heat to the sun’s to make the days hotter. They started calling this period “the dog days of summer” after the dog star, and the nickname stuck.

Today, this phrase usually refers to a period from early July to early August, when temperatures tend to skyrocket in the Northern Hemisphere. And the heat doesn’t just bother humans. Our dogs are just as vulnerable — if not more so — because of their higher body temperatures and fur coats.

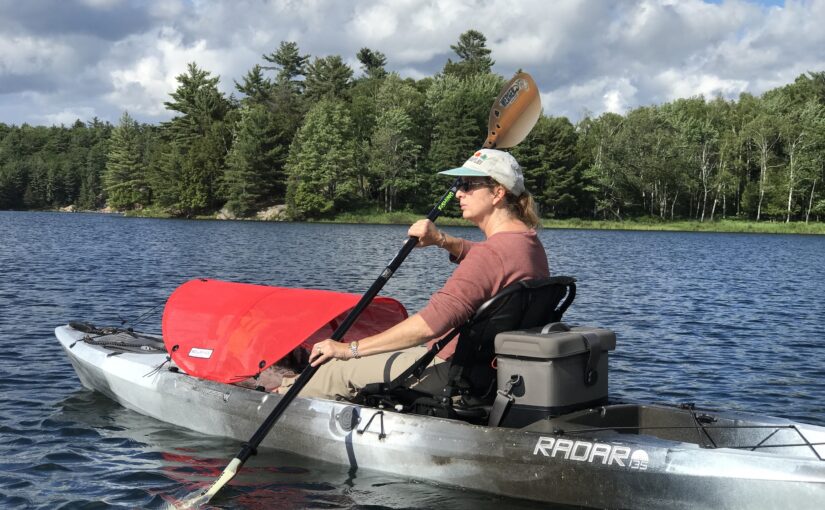
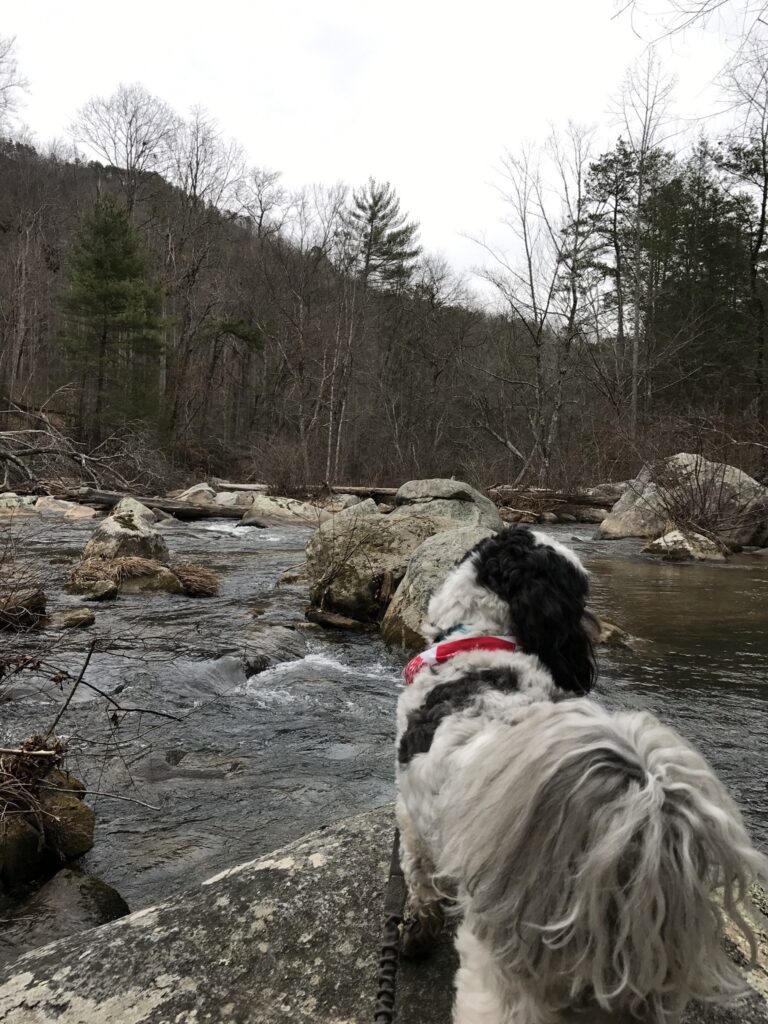
Sailrite customer and small-business owner Katrina Fairchild frequently ran into this problem in 2017 when taking her therapy dog, Harley, kayaking with her. A sweet Shih Tzu, Harley is the perfect size to sit on the bow of Katrina’s kayak and take in the sights and smells of the outdoors while Katrina paddles.

A Shih Tzu dog looking at a river.
On or off the kayak, Harley loves exploring the outdoors.

But while Katrina could paddle for hours under the hot sun thanks to hats, sunglasses and sunscreen, Harley didn’t have much fun on these excursions. Katrina told us more: “[Harley] and I are pretty much inseparable. [He] is with me in stores, hotels, in the car (unless it’s too hot), restaurants, hiking, biking and on the water. He’s very tolerant of most things except one: the sun.”

Sitting on the bow of Katrina’s kayak, Harley had nowhere to hide from direct sunlight or high temperatures. “Harley would display discomfort by constant agitation after just a short time on the water,” Katrina said. “He panted like he’d just run around in the sun. Even if I poured water on him or dipped him in the river, he still couldn’t relax.”

Harley’s discomfort was contagious. “This intolerance of getting too much sun and its reflection off the water while kayaking prevented me from enjoying my relaxing time paddling. I had to rush back to shore too soon,” Katrina said. “I also had to fix this problem.”

As the saying goes, necessity is the mother of invention. Katrina needed to make sure that Harley was safe so she could enjoy her time outdoors. She was proud to tell us that she did indeed fix the problem — with help from Sailrite® and the Ultrafeed® LS Sewing Machine.

Inventing the WoofShade®

So, how did Katrina address the issue of taking a dog kayaking in high heat? “[In 2017], I developed a prototype of what became [the] WoofShade.”

What’s a WoofShade? It’s Katrina’s invention to protect paddling pups like Harley from excessive heat and direct sunlight. It’s a portable, dog-sized shade — the first shade designed to attach to paddle-powered watercraft like kayaks.

This slideshow requires JavaScript.

Katrina told us more about developing the WoofShade. “I went through about three months and two prototypes of design and testing. Deciding on the shape was probably the most challenging.”

At the end of the prototyping, she had settled on a large-diameter circle with flexible internal wires that allow the shade to bend. When attached to the front of a kayak, canoe or paddleboard, the shade becomes a self-supporting tent that perfectly accommodates small- to medium-sized dogs without blocking the paddler’s view of the water in front of them.

But size wasn’t the only consideration. Katrina also had to find the perfect fabric. “I needed a high-quality, marine-grade, perforated mesh material that was see-through and provided ventilation for the dog,” she said. She didn’t have too far to look to find exactly what she wanted. “Once I saw a sample of the Phifertex® [Standard Vinyl Mesh Fabric], it was a no-brainer.”

The fabric, which has a 70% shade factor and good breathability, is ideal for applications that get heavy use outdoors. The fabric is also easy to sew — a helpful feature since Katrina hadn’t sewn for quite some time.

“I learned to sew in the ’70s as a child on my mother’s [home] sewing machine, which I still have,” she told us. “I was motivated by wanting more clothes for my Barbie® dolls.”

Once her dolls had full wardrobes, however, Katrina didn’t do much sewing until she started prototyping the WoofShade in 2017. In fact, she sewed the prototypes on the same machine her mother taught her to sew on years earlier.

Although she had to relearn how to sew after decades and her home machine wasn’t quite strong enough for the job, Katrina’s determination to keep Harley safe kept her going. She eventually finished a usable prototype and wasted no time seeing if Harley liked it.

This slideshow requires JavaScript.

“As soon as I used my first prototype, [Harley] was able to relax enough to sleep for almost the entire duration of the kayak trip. This, in turn, made my paddling much more enjoyable because I knew Harley was comfortable and safe,” Katrina shared. Now, “he is eager to get in the boat and gets situated quickly in his usual position under the shade.”

Manufacturing WoofShades With the Ultrafeed LS

Thanks to Katrina, Harley isn’t the only lucky dog to have a personal shade. “Once I realized how many other paddlers are accompanied by their dogs, I then decided to market [the WoofShade].” She built a website and an Etsy shop to share her pup-protecting product with the world. Other dog-owning paddlers loved the idea, and Katrina started receiving orders right away.

But filling those orders wasn’t an easy task. Her home machine didn’t have the power to consistently sew the tough materials that the WoofShade called for.

“For the first few years I battled with my [home sewing machine] to make her work for high-demanding, thick material, but she kept fighting back and won. … I was wasting too much time and churning out too many expletives,” Katrina laughed. “I knew I had to get the right machine for the job.”

The right machine turned out to be the Sailrite Ultrafeed LS. Katrina discovered Sailrite while researching her options for heavy-duty machines.

“Sailrite kept popping up as I looked at different companies and products,” she said. Her research and testimonials from other Ultrafeed owners convinced her that the LS was the best machine for her needs.

“I trusted Sailrite to sell the right, high-quality, semi-heavy-duty machine that I noticed a lot of hobbyists and small business owners were using. And it wasn’t too expensive,” Katrina told us. She purchased her LS in 2020 and has been happily using it to run her small business ever since.

The Ultrafeed turned out to be a wise investment. “[My LS] has elevated my sewing abilities and skills. It never lets me down — it’s a workhorse,” Katrina said.

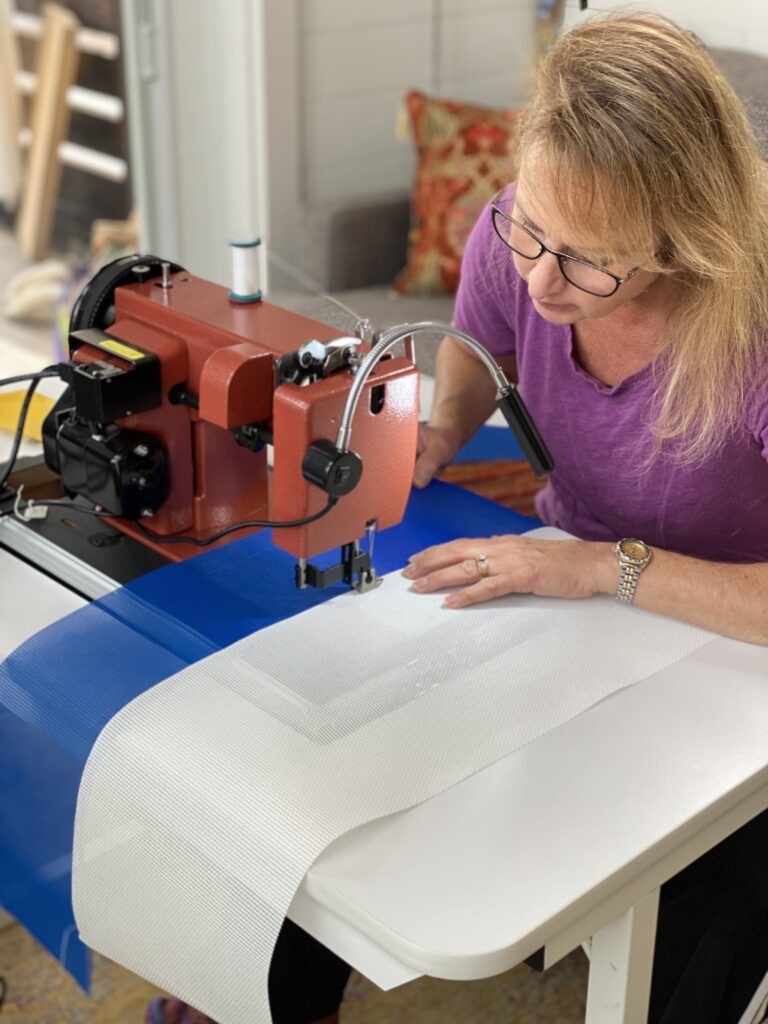
A woman using a sewing machine.
The LS makes it easy for Katrina to sew Phifertex shade material.

She’s also found Sailrite to be a reliable supplier of the Phifertex shade material she uses, and a few Sailrite tools have made their way into her sewing room. But while it’s “fun and inspiring to look at all the supplies and parts that Sailrite sells” and pick out a new tool now and again, deep inventory isn’t the only thing that keeps Katrina coming back.

When we asked what Katrina likes so much about Sailrite, she said this: “Quality and excellent customer service. Over the years I’ve needed help … Sailrite has yet to let me down.”

In particular, Katrina mentioned that she loved Sailrite’s videos on setting up and using an Ultrafeed. “Not only is there a video for just about everything I needed to know, but each is well done and informative,” she said.

More Time for Outdoor Exploration

After Katrina purchased her LS and watched several Sailrite videos to get up and running, making the WoofShade not only became easier, but quicker too — which was exactly what she wanted.

“I run this company part time,” she told us. “[The WoofShade] has proven to be a seasonal product, which I don’t mind because I enjoy doing so many other things.”

As we’ve already seen, Katrina especially loves being outdoors. Her goal is to get outside every day. “Anything in nature is my happy place,” she said.

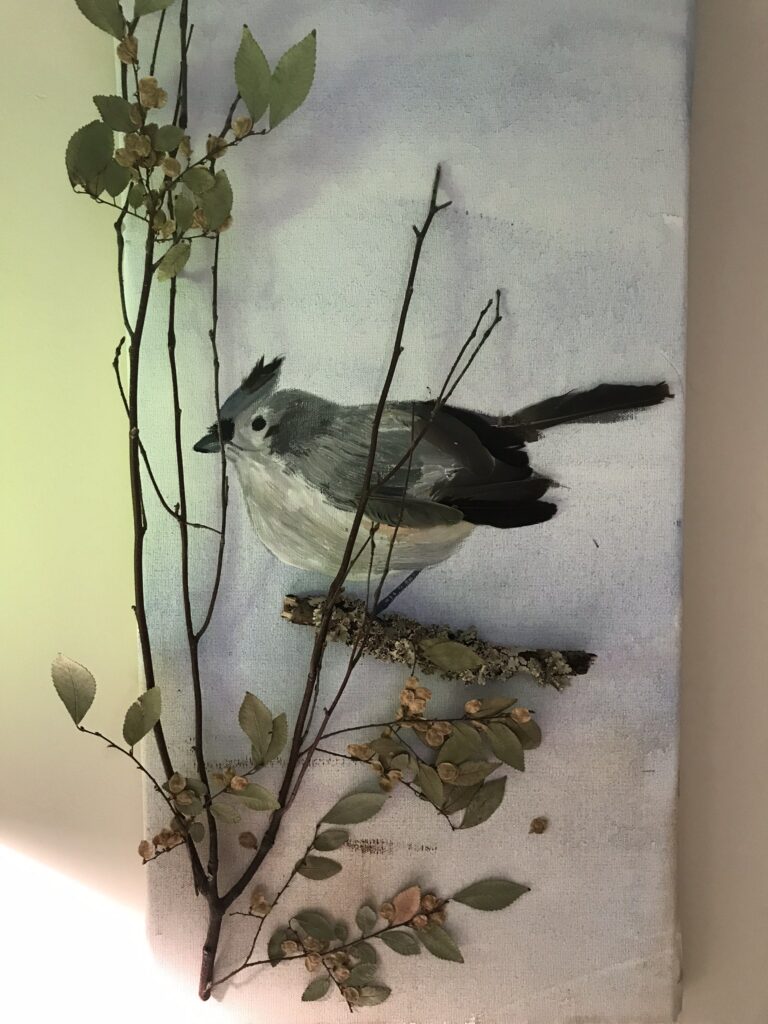
Among her other outdoor hobbies are “hiking, biking [and] walking.” She also told us that crafts and painting make her happy, especially when she can incorporate interesting natural items into her artwork.

A painting of a bird accented with a real tree branch.
Katrina used real branches to give this bird painting a 3D effect.

In addition to land-based outdoor activities, Katrina has experience with other types of boating besides kayaking. She’s dabbled in waterskiing and using powered watercraft, but those didn’t catch her attention as much as using paddle-powered boats.

“Paddling has become my absolute favorite because the boats are quiet, easily transportable and allow me to connect with the feel of water that I love,” she shared. “Kayaks are especially my favorite because I’m closer and more a part of the water than in a canoe.”

Her preference for kayaks over canoes has a humorous origin. “My first experience with paddling was 32 years ago when my then-boyfriend rented a two-person canoe to paddle the Buffalo River in Arkansas. We dumped with the first Class II rapids, cursed at each other, got married and then bought separate kayaks,” Katrina laughed.

While her home state of South Carolina offers waterways to paddle, Katrina prefers to travel a bit farther for kayaking adventures. “I … go out of state because I don’t find that South Carolina offers enough of the kind of paddling I like, which is quiet lakes or Class I rivers. I go to North Carolina quite a lot, but recently went all the way up to the Adirondacks in New York.”

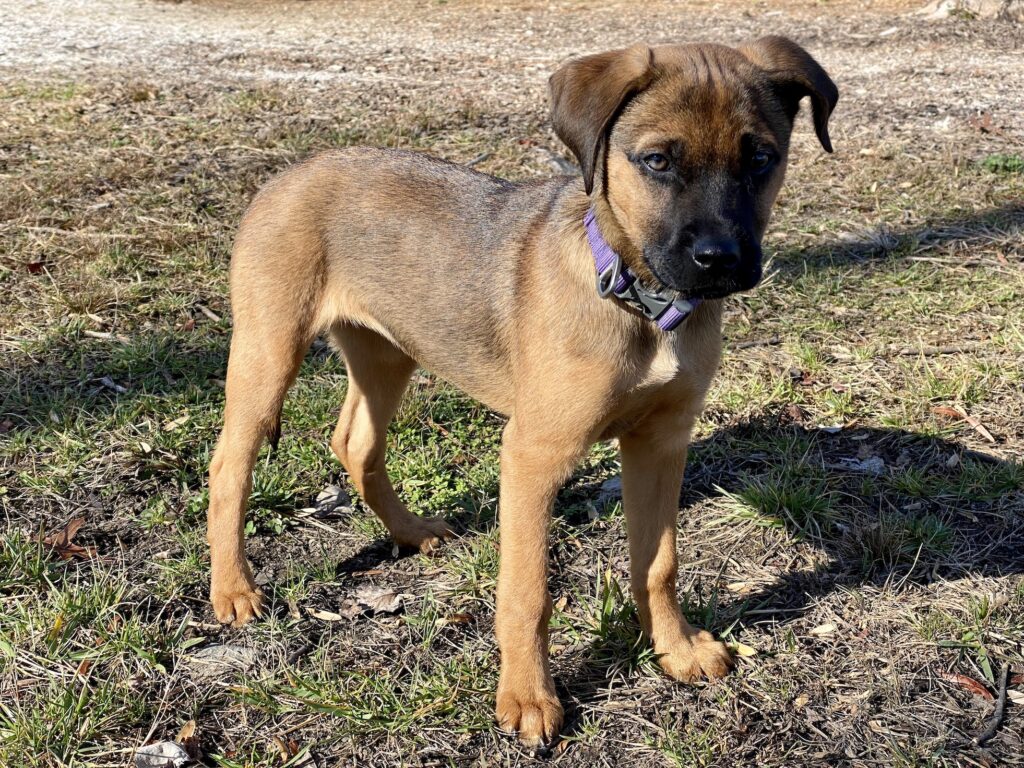
Of course, Harley goes with Katrina and her husband on these out-of-state adventures. And a new addition to their little family will soon be going with them. “I have recently adopted a rescue puppy that is half German Shepherd,” she told us.

A young puppy.
Katrina’s adorable rescue puppy, Sky.

The puppy, appropriately named Sky by her nature-loving parents, has some skills to master before she’ll be ready for long outdoor excursions. “We’re working on the proper hiking etiquette,” Katrina said. “As soon as [Sky] learns to behave, I’ll be teaching her to trot alongside my bike.”

Sky will also have to learn how to be on the water before she can go paddling. “I need to get her on a boat sooner than later. The rocking motion is probably the scariest to overcome,” Katrina said.

Sky will be much larger than a Shih Tzu when fully grown, so a sit-on-top kayak won’t be the best option for her. Katrina will have to expand her fleet of watercraft to accommodate Sky. “Yes, I will be buying a canoe,” she laughed.

Having a larger dog will mean a larger boat for Katrina … but could it also mean a larger WoofShade? Many other paddlers have requested a shade that can cover large dogs, and Katrina says that is the biggest challenge she’s faced with her invention to date.

“I’ve tried to accommodate the large-dog-breed owners’ request for a taller WoofShade. However, a taller shade … will impede the line of sight of the paddler,” she shared. “After a multitude of prototypes, we have found that the best way to take your large or tall dog paddling is in a canoe, in which case our current single-size WoofShade will provide the dog coverage without obstructing the paddler’s view.”

This makes sense. Large dogs will have plenty of space under the shade if they sit down inside of a canoe rather than on top of a kayak. Still, we have a feeling that Katrina’s love of innovation will lead her to a kayak-friendly shade for large dogs eventually.

Katrina’s Parting Advice for DIYers

After all, Katrina loves coming up with new ideas. She told us that the “constant challenge to [her] mind” is her favorite part of her DIY lifestyle. “I hate being bored, so I’m always coming up with small and large projects to keep me motivated and stimulated,” she said. Whether it’s painting, sewing or collecting eye-catching nature finds, Katrina always has a project going — and plenty of inspiration for her next one.

She had a lot to say about ideas, including how to make an idea like the WoofShade into a real product. It’s great advice for any DIYer who isn’t sure where to start making their own product concept come to life.

“I’ve had many ideas over the years, but they were just that — ideas. It wasn’t until I did an actual prototype, which I used many times, that the idea became reality.” That’s a great roadmap for creating a new product. Start with a prototype of your idea, test it thoroughly and work out problems in the design along the way.

Once you’re ready to share your design with the world, what then? Katrina had advice on launching a small business too. “Like many other small-business owners will say, start small and think big. At first, keep it small and manageable. Keep your day job. If it’s still fun, or at least pleasing to do, then consider growing it.”

Katrina has hit on a fundamental aspect of a successful DIY lifestyle or career: If you enjoy what you’re doing and you feel the level of work is manageable, you’ll be able to enjoy your creative hobby or business over the long run. Katrina would know: She’s been happily running her small business part time since 2017.

“It’s sometimes hard to believe that I’m still making WoofShades after almost six years,” she said. “At one point I temporarily closed my shop, but the demand kept coming so I reopened it. I continue to make them because of this: If there are still dog owners who care enough to protect their paddling pets, then I will continue to help and sell WoofShades.”

We love that sentiment, Katrina, and we’re happy that your small business fits into your active lifestyle so well! Sailrite is proud to provide you with the tools and materials you need to help keep dogs like Harley and Sky safe and comfortable outdoors. We wish you all the best for many more years of DIY innovation and outdoor adventure!


Who We Are

Sailrite is your one-stop DIY shop! We are a passionate crew of do-it-yourselfers who strive to equip you with the supplies and how-to knowledge you need to tackle your next project. Do you want to learn upholstery, leatherwork, canvaswork, hobby sewing, bag making or more? We have the fabric, tools, hardware, sewing machines and notions you need to master any DIY. And even if you’ve never sewn before, our tutorials and how-to videos are designed for beginners and experienced crafters alike.

Start your DIY journey today: www.sailrite.com

A DIY Rooftop Transformation

It all started with an idea. How many of us have been frustrated or disappointed by store-bought patio cushions and other mass-produced furniture? Your store-bought cushions last a season or two on your patio, and then the fabric begins to fade. Or stains from birds and food spills don’t come out no matter how hard you scrub. 

Javier Guerrero Garcia felt the same way. He and his family have a lovely private rooftop terrace above their apartment in La Cala de Mijas, an Andalusian province in southern Spain. He purchased IKEA cushions for the terrace benches and was disappointed in their performance. They were smaller than what he wanted and kept slipping off the benches.

Custom-size cushions were available — but at astronomical prices. While searching on the internet one day, Javier found the Sailrite 30-Minute Box Cushion video tutorial. Then he watched another Sailrite cushion video. And another. Soon enough he thought to himself, “Well it doesn’t look that hard, right?” And so his DIY journey began. 

With video tutorials and materials from Sailrite, Javier transformed his rooftop terrace into a cozy oasis with custom-fit cushions and a fabric enclosure so his family could enjoy the view year-round. Keep reading to learn more about this industrious DIYer and how he went from someone who had never touched a sewing machine to the go-to DIY guy his neighbors and family turn to for their sewing needs.

diy box cushions
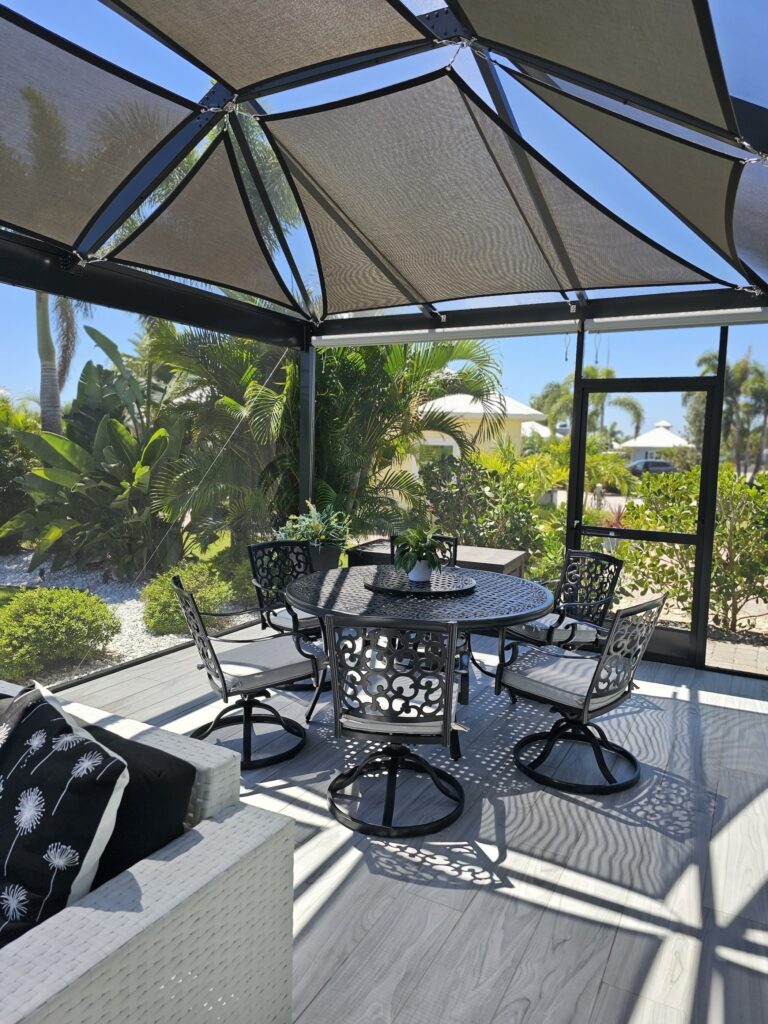
Here’s a look ahead at the box cushions and enclosure Javier made using Sailrite resources.

Learning to Sew

The cushions project was fairly straightforward for Javier and a great way to learn how to sew. He had never sewn before, but he was determined to make cushions that fit his patio benches perfectly. In addition to the 30-Minute Box Cushion video, Javier also used the Sailrite Fabric Calculator to help him determine how much fabric and other materials he would need for his cushion covers.

Because he had never sewn before, Javier relied on Sailrite how-to videos to tackle his rooftop projects. We asked him — as a sewing newbie — what he thought of the Sailrite videos and if they were easy to follow. Here’s what he told us:

Absolutely! The shots were clear (not easy when you watch many other “sewing” videos where you only see hands moving), explanations on the whys and hows were completely reasonable and understandable, and they covered every aspect and foreseeable problem (like the fabric shrink when sewing). [The Sailrite videos] were the one and only reason for me to think that I could learn to sew by myself and tackle the first cushion project. … Even my mother-in-law is still surprised about how it all finally came along.”

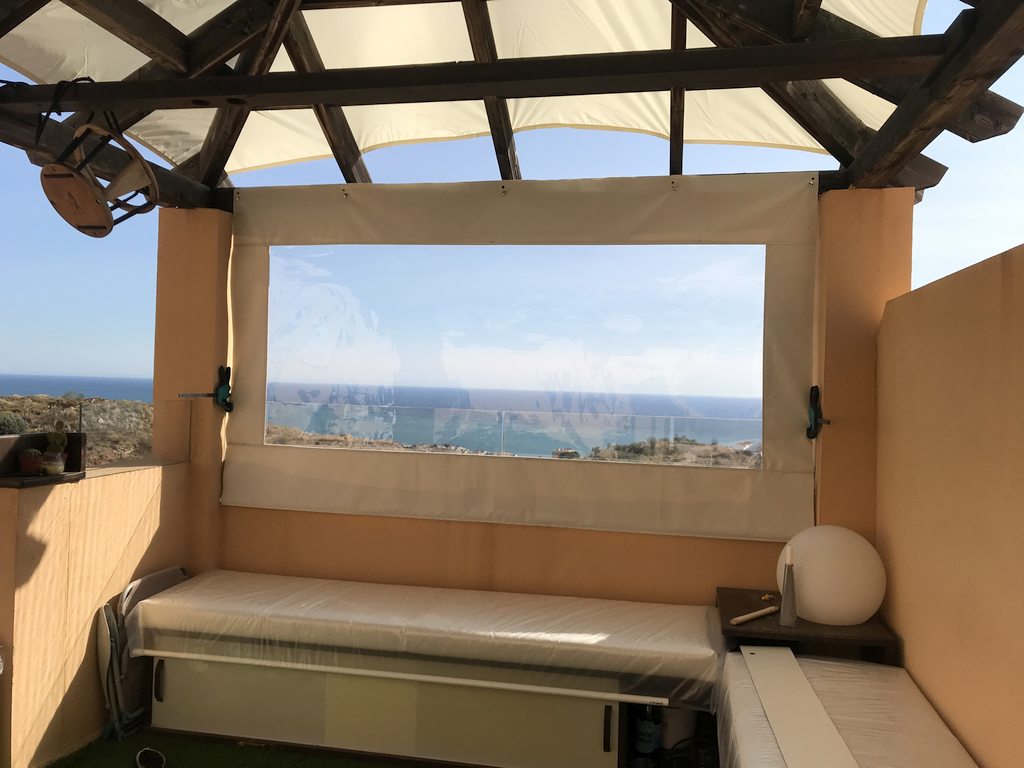
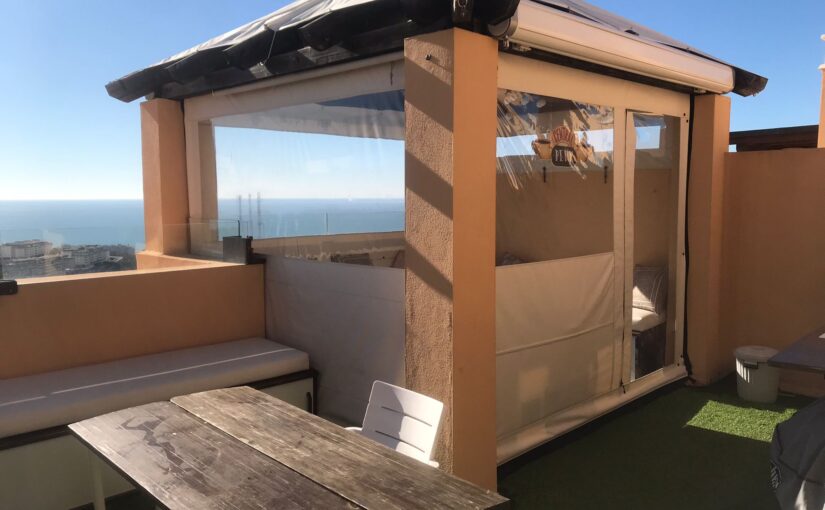
rooftop enclosure
Who wouldn’t want to enjoy this gorgeous seaside view year-round?

The cushions turned out great, and Javier was excited to tackle his next sewing project. This one would be much bigger and more involved: a four-sided enclosure with a zippered opening for his rooftop pergola. 

DIY Pergola Enclosure

The pergola enclosure consisted of four large squares of material — no curves or shaping. Javier first mocked up a sketch to figure out window placement, sizing and overall construction. Once he had the design figured out, he cleared out his living room to create enough flat space for measuring and patterning. 

“I cut the sides long so they could be trimmed later, assembled almost everything (including windows) using just your semi-flat felled seam tutorial, installed the LOXX® hardware, hung them for final trimming, added the Stayput™ fastener cords for windproofing, added the bottom Stayput tensioners to both the fabric and the wall, and that’s it!”

Two years later the enclosure still works great. And though the project was sometimes grueling and difficult, Javier learned a lot from the experience. He’s still very happy and proud of his accomplishment. “The vinyl windows stuck on every surface while pulling. I had bad luck with thread breaking and the process was time-consuming. … I sweated each and every one of the three-meter-long (approximately 10 feet) seams — and there are a few of them! Anyway, it was really fun and kind of a challenge to myself. I had a really good time and the results were fabulous and, most importantly, still are two years later.”

This slideshow requires JavaScript.

After installing the four-sided enclosure and getting everything zipped and snapped in place, he added a final finishing touch: a small gas heater. That way, the rooftop could be enjoyed year-round. Javier finished the project in time for Christmas dinner, and the windproof enclosure kept everyone warm and comfortable all night. In fact, Javier’s daughters — 5 and 7 years old at the time — named the enclosure “Villa Calorcito,” which loosely translates to “Cozyville.”

Neighbors keep asking me where I bought the rooftop enclosure, and they can’t believe me when I tell them I did it myself (They think I don’t want to give them the name of the contractor!). I just point them to your website and videos.”

And speaking of neighbors, Javier has received several requests for pergola enclosures from friends and neighbors. He’s not against the idea. In fact, he’s already thinking of ways he could improve his original design. He’s considering using sewable keder rail awning track instead of fasteners as that would more evenly distribute tension and minimize wrinkles in the fabric panels. “The Loxx fasteners make the panels easy to remove with a few pulls when the weather is hot. I still have the desire to try to sew a rail awning someday. Maybe for version 2.0 for some of the neighbors!”

New DIY Adventures

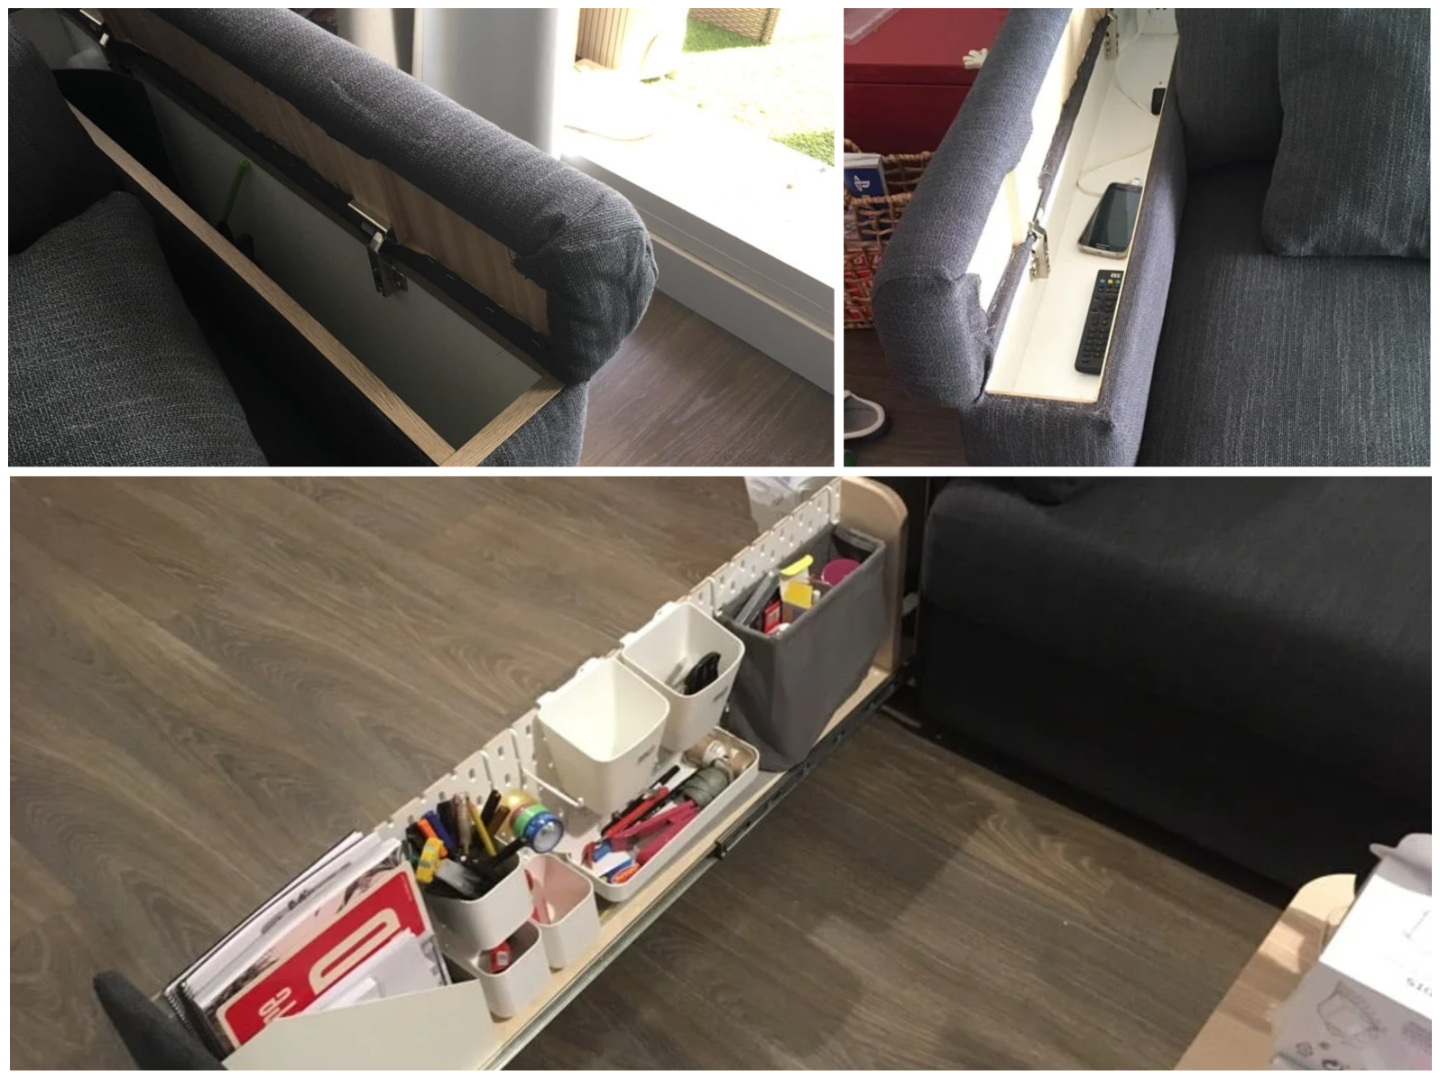
With the success of his rooftop enclosure projects behind him, Javier is enjoying his new skill set and is sewing up a storm. “Once you start, you can’t stop! I made a few box cushions for several different spaces, a gigantic sunshade for the adjacent rooftop space, and I hacked an IKEA sofa to gain lots of storage space. When you just add your first zipper or button or any other fabric hardware to anything, providing some functionality to an otherwise static and boring piece of fabric, you can’t stop thinking about adding zippers to everything else!”

sofa storage hack
Javier’s IKEA sofa storage modification was named “Best Hack of the Year” by the website IKEA Hackers.

We asked Javier if he has advice for anyone thinking about learning to sew and tackling their first project. Here’s what he said:

Go for it! The basic techniques are quite easy to learn (mastering them is a totally different story). But even as a first-timer, the results will absolutely blow your mind! … Start small, make a few mistakes early in the project, analyze and understand what worked for you and what didn’t, and learn something every day. Just try, make some errors and adjust. But even with the ugliest seams (me!), the results look awesome and you will be the only one looking at how bad your seams are. No one else will notice a twisted seam, even if you point at it with your finger.”

“Just try” — what simple yet great advice. Isn’t trying at the heart of the DIY process? Make mistakes, learn from them and never give up. And don’t forget to be patient with yourself and let go of those small mishaps. As Javier said — no one will notice them but you. 

Thank you for sharing your story with us, Javier. We’re thrilled that Sailrite could be your introduction to the fun and exciting world of sewing. Good luck with all your future DIYs.

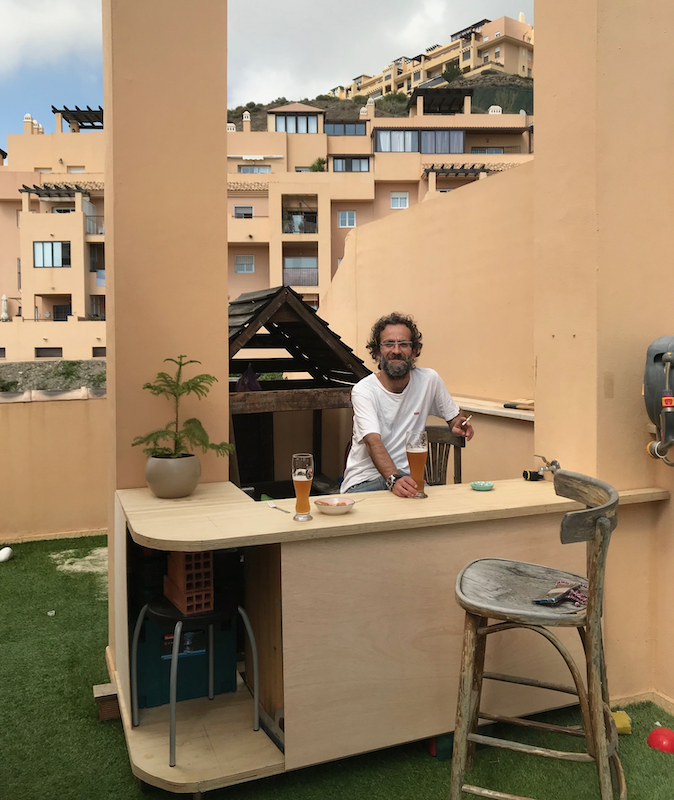
rooftop bar diy
What’s next for Javier? Updating the terrace’s bar area. This DIYer never slows down!


Who We Are

Sailrite is your one-stop DIY shop! We are a passionate crew of do-it-yourselfers who strive to equip you with the supplies and how-to knowledge you need to tackle your next project. Do you want to learn upholstery, leatherwork, canvaswork, hobby sewing, bag making or more? We have the fabric, tools, hardware, sewing machines and notions you need to master any DIY. And even if you’ve never sewn before, our tutorials and how-to videos are designed for beginners and experienced crafters alike.

Start your DIY journey today: www.sailrite.com
Recipe for DIY Success: Determination & a Sailrite® Sewing Machine

“Nothing is impossible.”

That’s the motto of Linda Butters-Freund, a dedicated sewer and co-owner of Florida-based small business Offshore & More Custom Canvas LLC. Given her impressive 63 years of sewing experience, it’s safe to say that there’s no project she can’t tackle.

“There has never been a project too big for me,” Linda said when we asked her about the largest project she’s ever done. That project? A huge shade panel for the U.S. Open Pickleball Stadium’s championship arena, completed in early 2021.

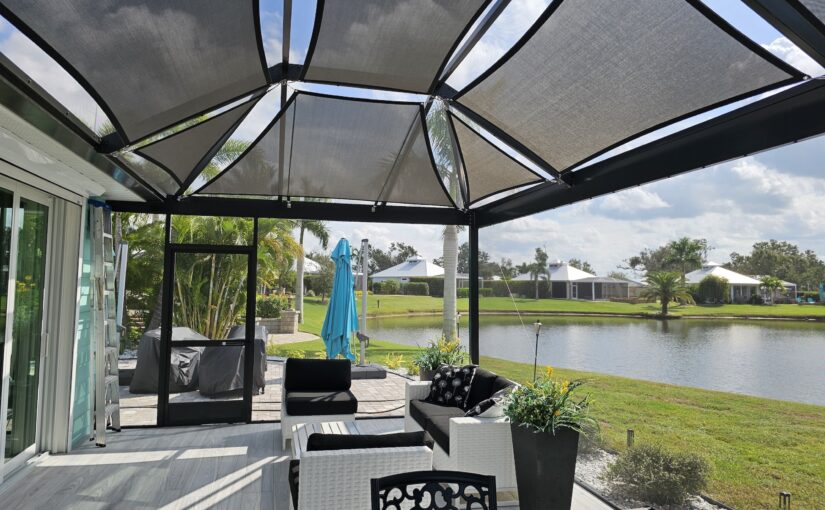
The shade panel covers the open front of the championship stadium, which is in Naples, Florida. During pickleball tournaments, it provides players and spectators alike with much-needed relief from high heat and constant sun exposure. It’s a new and improved version of the original shade panel, which was made in 2017.

As a longtime Sailrite fan, Linda knew just where to turn for her project materials. She purchased enough spur grommets and webbing from Sailrite to complete the hanging shade panel — with some to spare.

The panel’s massive scale made a large sewing machine a necessity. Luckily, Linda already owned a Sailrite® Professional Long Arm Sewing Machine when this project came around. With its extra-large throat, the Professional was the natural choice to sew the shade panel. “I honestly don’t think it would have been possible to use any other machine!” Linda said.

Introduction to Pickleball

Linda was already well acquainted with pickleball when she started working with the Naples stadium. She discovered the sport in 2012 while living on Florida’s Marco Island.

“I played tennis at the YMCA three times a week,” she explained. “I saw a flyer on the check-in counter announcing a clinic for pickleball. I signed up, started playing and realized that it was a much friendlier game … When I moved to Naples, I was fortunate to find a location nearby with lots of players.”

If you guessed that this “location nearby” was the U.S. Open Pickleball Stadium complex, you’re right on the money.

The stadium, which hosted the inaugural U.S. Open Pickleball Championships in 2016, consists of several open-air pickleball courts. Additionally, the championship court is covered by a large metal structure with fabric shade panels on the top and front. Linda started playing there before the original shade structure was built in 2017.

The Florida heat kept spectator numbers very low at the 2016 championships. Some shade, the stadium managers reasoned, would encourage more people to watch the tournament live in the future. They had the shade structure built soon after.

This slideshow requires JavaScript.

Although it greatly boosted attendance at the 2017 tournament, the structure had a major flaw. “[The] sunshades [were] made from a material that did not hold up to the elements,” Linda said. “[They] were fraying and the grommets were ripping out.”

The complex’s management needed someone to repair the shade panels — and they didn’t have far to look. Jim, the man in charge of the courts, soon learned about Linda’s sewing skills.

“[Jim] had seen some of my work from a player … I made personalized pickleball paddle covers. He asked [the player] for my name and contacted me,” Linda said. “I met with him, looked at the panels and said I would figure out a way to make repairs.”

Linda had never worked on such a large project before. But it’s never been in her nature to back down from a challenge. This tenacity and resourcefulness have served her well — starting when she learned to sew at 8 years old.

A Lifetime of Sewing Success

“I always watched my mother sewing clothes for my siblings and myself,” Linda said of her childhood. “I decided I would like to try my hand at it … I had some dolls that needed clothes! At that point everything I made was stitched by hand.”

It wasn’t long before Linda graduated from hand sewing to using a machine — after her search for just the right fabric for a project got a little out of hand.

“I decided to make a wedding dress for my Barbie® doll … I used my Easter dress slip/petticoat for the fabric. The ‘gown’ was beautiful! My mother was really impressed with my creativity until she realized what I had used to make it with!” Linda laughed.

Although upset that the dress slip was ruined, Linda’s mother saw that her daughter was serious about sewing. “[My mother] showed me the basics for using a sewing machine, gave me a box with extra fabrics and thread, and told me to have fun,” Linda remembered. “My world opened up and I knew sewing would always be a part of my life.”

In fact, sewing was Linda’s job long before she co-founded Offshore & More, and before she moved to Florida from the New England region.

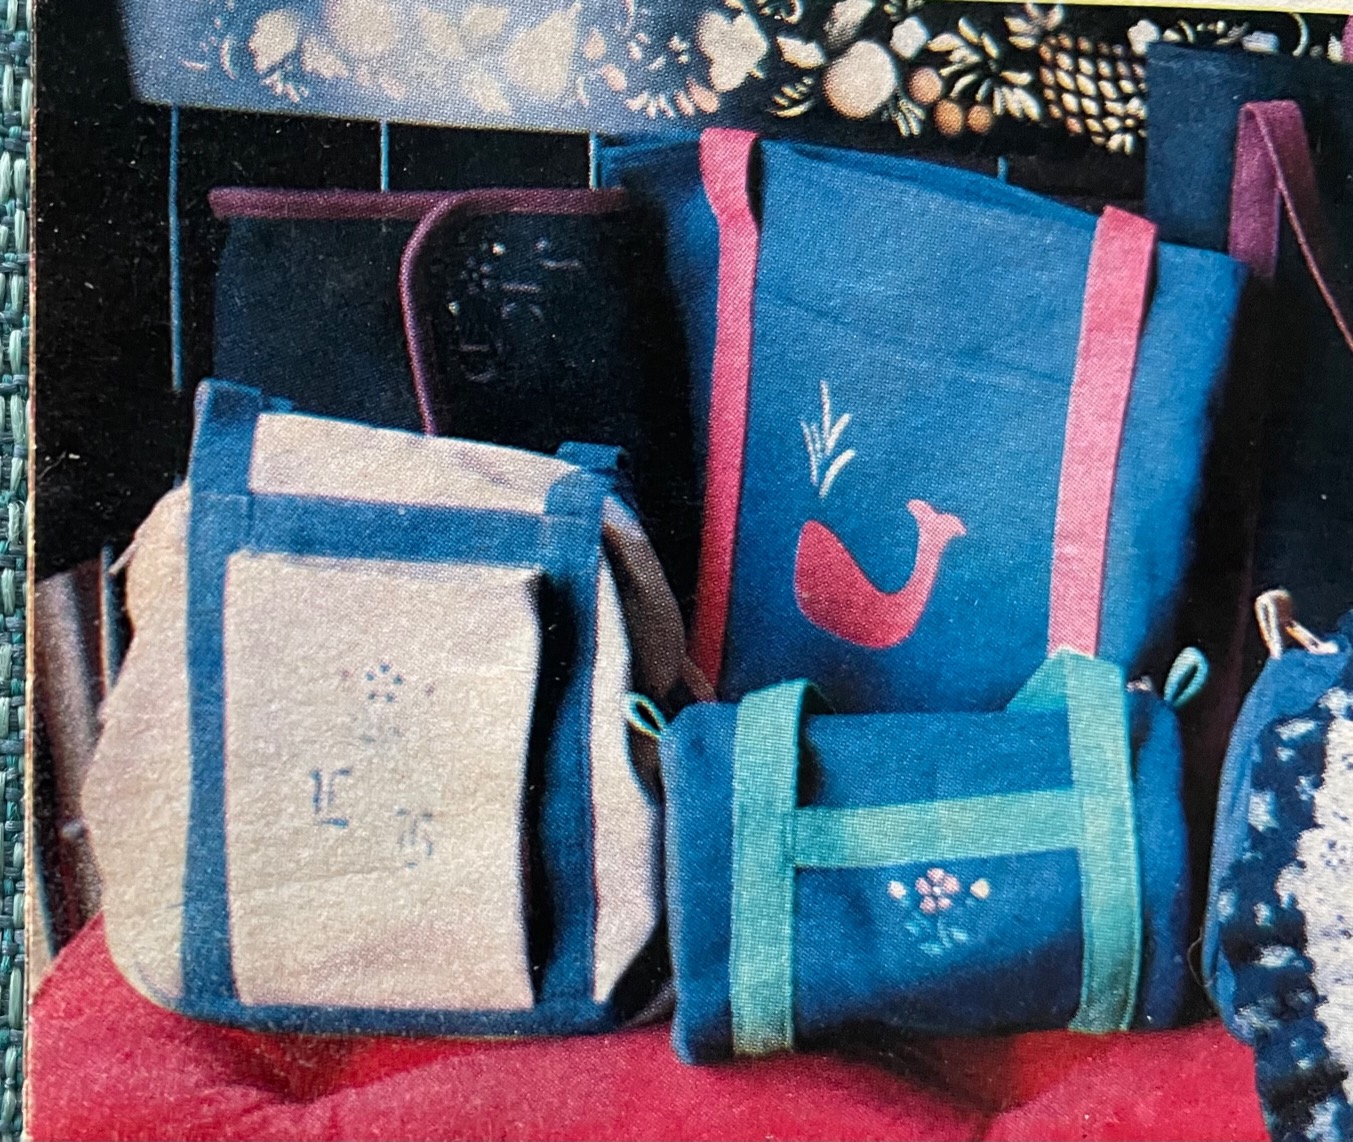
In addition to teaching sewing classes, Linda has owned a dressmaking business (and in a humorous callback to her introduction to sewing, she made numerous wedding gowns). She also designed and sold canvas handbags at home showings similar to Tupperware® parties. The Massachusetts native had such success with her handbags that Yankee Magazine featured her in its small business section!

Linda was featured in Yankee Magazine.
Linda’s canvas handbags, as seen in Yankee Magazine.

Later, Linda started her own marine canvas business after overhauling her family’s 40-foot yawl (a two-masted sailboat) with new upholstery and custom covers. Other than a short stint sewing for interior designers, she’s been entrenched in the marine sewing world ever since.

As an unstoppable entrepreneur, Linda has learned a lot about running a small business. When we asked what she would tell other aspiring business owners, she said this: “The most important advice I would give to someone who wants to start their own sewing business: LOVE what you’re doing! Every time I open the door from the house to my workshop, I look forward to working on projects.”

Sunshine, Shade Panels & Sailrite

Linda spent most of her life in the northern part of the East Coast — but by 2010, she was ready for a change of scenery. She decided to trade in bitter New England winters for the sandy beaches and ample boating opportunities of South Florida.

Around that time, she turned to Sailrite to bolster her marine sewing career. “I needed a company that would be able to supply all the tools and products required for my numerous projects. After hours of research, I came to the conclusion that Sailrite was my No. 1 choice!”

Linda’s familiarity with Sailrite was a big help when it came time to repair the pickleball stadium shade panels in Naples. She already owned an Ultrafeed® LS, but the large panels were often too bulky to fit through the compact machine’s throat. “I decided I needed a machine with a longer arm when I did repairs on the old shade panels,” she told us.

For this dedicated Sailrite fan, the perfect machine wasn’t hard to find. “Whenever a new project comes my way, I always do my research for supplies on the Sailrite website,” she said. “[It] is my go-to place to shop!”

That’s how Linda discovered the Professional Long Arm (now discontinued) and decided it was the upgrade she needed to repair the shade panel. “The added room under the arm made the ease of pushing 110-inch-wide material a breeze,” she said. “And being able to zigzag the rips really made the job easy!”

This slideshow requires JavaScript.

Thanks to this upgrade, Linda became the pickleball stadium’s go-to project person. She kept up with repairs on the original shade structure until 2020, when something happened that was too big to fix.

“A windstorm came through Naples and shredded the original stadium,” Linda said. “[It] had to be replaced due to hurricane-force winds.” There was no denying it — the shade panels on top of the original stadium were done for.

The 2017 stadium after a bad windstorm.
The windstorm did a lot of damage to the original shade structure.

Somehow, the branded shade panel on the front of the stadium survived the storm. But its reign didn’t last much longer.

A new metal structure and shade panels were in place by the end of 2020. That’s when “[the stadium’s management] decided that the old shade panels [for the front] … needed to be replaced. They contacted the stadium company to inquire about purchasing material to match the [new] structure.”

This slideshow requires JavaScript.

Jim, the stadium’s manager, turned to Linda for help making the raw fabric into a single shade panel to cover the stadium’s front. It would be Linda’s largest project ever, but she was determined to face the challenge head-on.

The Making of a Shade Panel

Armed with the new shade fabric, her Professional Long Arm and the materials she purchased from Sailrite, Linda got to work on the front panel in January 2021. She didn’t have much time — that year’s Pickleball Championship tournament was scheduled for April. Fortunately, she also wasn’t alone.

You see, Linda’s son Michael and his family also live in Florida. Linda had taught him how to sew when he was growing up in Massachusetts, and he’d helped with some of her previous projects. Just like his mom, he’d caught the sewing fever.

“[Michael] wanted to get back into the canvas business,” Linda told us. “He asked me if I would like to make my boat canvas official. He wanted to have something to do when he wasn’t working his ‘real’ job.” Linda liked the idea, and Offshore & More Custom Canvas was born.

This slideshow requires JavaScript.

When Michael isn’t at his full-time job, he pitches in on Offshore & More’s projects, including the shade panel. Good thing, too — the shade panel called for large-scale measurements that would be difficult for one person to manage. Linda gave us the details:

“The shade panel was made up of seven individual panels [and] measured 125 feet across the lower edge and 19 feet [tall] in the center.” The oversized panels required more space than Linda’s garage workshop could provide.

“Fortunately, we have a very large driveway,” she said. “I was able to place the three [center] panels on my driveway, line up the sides and mark for grommet placement. Since the top of the shade panel was arched, I had to roll part of the painted [center] panels to the side to mark and measure for the other four panels needed to complete the project.”

Linda used her driveway as a worktable.
One panel screen-printed and ready for sewing!

After measuring and cutting the panels, Linda turned to her trusty Professional Long Arm to sew them together. Then, it was time to install the grommets — which was when having a helper became indispensable.

Due to a hand injury, Linda couldn’t use a hammer to install the incredible 650 spur grommets that the project called for. Instead, “Michael was enlisted to mark and install the grommets,” she told us. “He saved the day.”

Besides the 650 grommets, the mother-son team went through 110 yards of shade cloth and nearly 800 feet of webbing. Including a three-week screen-printing process — which required Linda to ship the giant panels to a printer on a pallet — the whole project took two months of hard work. Linda and Michael finished the shade panel in March 2021, just in time for the U.S. Open tournament the following month.

The Creativity Continues

Although the shade panel has been done for over a year, Linda still checks in on it now and again — and she feels as proud of it today as she was the day it was completed. “I love opening up a pickleball magazine and seeing the finished project in full color,” she told us.

This slideshow requires JavaScript.

In fact, that sense of accomplishment is one of the things Linda loves most about her DIY lifestyle. “I can take a simple piece of material and create something unique,” she said. “Once the project is completed, I’m left with the feeling, ‘Yes, I made that!’”

Sewing is her first love, but it isn’t Linda’s only DIY hobby. She told us she also enjoys watercolor painting and gardening. “The weather in Florida has proven to be a challenge though,” she said of gardening. “If you forget to water one day, the plants are toast!”

But remember, Linda isn’t the type to give up when things get tough. Whether it’s gardening in the Florida weather, digging up repair manuals to fix an old lawnmower or using Sailrite’s free how-to videos to learn a new sewing project, Linda embodies the go-getter spirit of a true DIYer. “I’m happy as long as I’m doing something creative,” she said.

We certainly understand that, Linda! Thank you for sharing your story — we know that your creativity and tenacity will inspire your fellow DIYers to make great things. Best of luck on all your future projects!


Who We Are

Sailrite is your one-stop DIY shop! We are a passionate crew of do-it-yourselfers who strive to equip you with the supplies and how-to knowledge you need to tackle your next project. Do you want to learn upholstery, leatherwork, canvaswork, hobby sewing, bag making or more? We have the fabric, tools, hardware, sewing machines and notions you need to master any DIY. And even if you’ve never sewn before, our tutorials and how-to videos are designed for beginners and experienced crafters alike.

Start your DIY journey today: www.sailrite.com
Shock & Awning: Re-Covering After a Hurricane

How many yards of fabric does it take to sew an awning for a commercial building? It depends on the size of the building, of course. But for Sailrite® customer Rick Smith, the answer is nearly 90 yards. Put another way, that’s over 1,000 square feet of fabric!

How did he get the opportunity to sew such a massive project? Ironically, by taking his couch to an upholstery shop.

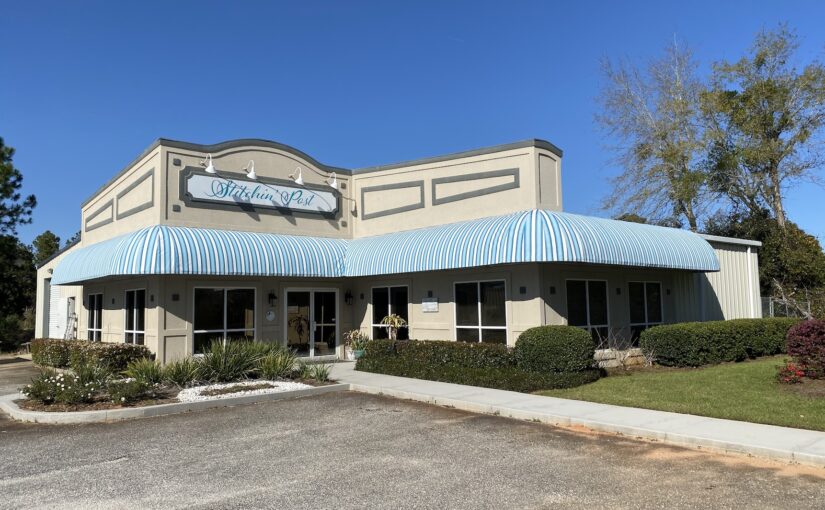
Rick and his wife live in a coastal Alabama town that is often hit by hurricanes. It can take years to remedy all the damage in the town after a serious storm. When Rick visited the town’s most popular upholstery shop in early 2022, he got a firsthand look at some of the lingering damage from a 2020 hurricane.

“Their awning had been destroyed by Hurricane Sally,” Rick said of the shop. “I asked them about replacing it, and they hired me on the spot.”

This popular upholstery shop had been so busy with orders for customers that no one who worked there had the time to repair the 136-foot by 8-foot awning. The project promised to be a huge undertaking, but it wasn’t the first awning Rick had ever sewn. It wasn’t even his first time sewing professionally.

Rick already had a strategy for sewing awnings before he started working on the upholstery shop's project.
One of Rick’s prior awning projects.

Now retired from a career in marketing and communications — including running his own advertising agency for 18 years — Rick does projects for his small sewing business.

He learned how to sew growing up, and was fortunate to have not just one, but five teachers. “I grew up in a big family of sewers. I’m the youngest of nine kids, and my mom and four sisters sewed professionally,” he told us. “[They sewed] everything from wedding dresses to industrial upholstery and factory garment jobs.”

Despite his early start in the hobby, Rick didn’t do much sewing for nearly 40 years. Instead, he sailed competitively in his spare time — a pastime that began during his college days. Rick has owned more than 11 sailboats in his life, including a Beneteau 423 sailboat he and his wife purchased in 2012.

Unlike the other sailboats, the Beneteau was not for racing. Instead, the couple dreamed of becoming liveaboards. This sailboat would be their new home.

Preparing for Life on the Water

For a successful liveaboard life, however, Rick would need to dust off his sewing skills and get a sewing machine that could handle marine environments. Enter the Sailrite® Ultrafeed® LSZ Sewing Machine.

Rick often admired the marine-friendly machine in the pages of boating magazines. “I liked that the LSZ was ruggedized for such an environment, was a serious heavy industrial machine, had a walking foot, was portable and capable of using without power,” he said.

It was the perfect machine for the nautical life that the couple envisioned. But looking at something in a magazine isn’t the same as seeing it in person, and Rick was hesitant to make a purchase without seeing the LSZ firsthand.

Luckily, two of his friends decided to go to the United States Sailboat Show in Annapolis, Maryland. Sailrite sets up a booth at the show every year to meet fellow boating enthusiasts, answer questions and demonstrate Sailrite products.

Rick’s friends brought him sewing machine brochures from the show and told him their impressions of the LSZ. Convinced that the machine was quality, Rick bought an LSZ of his own in 2014.

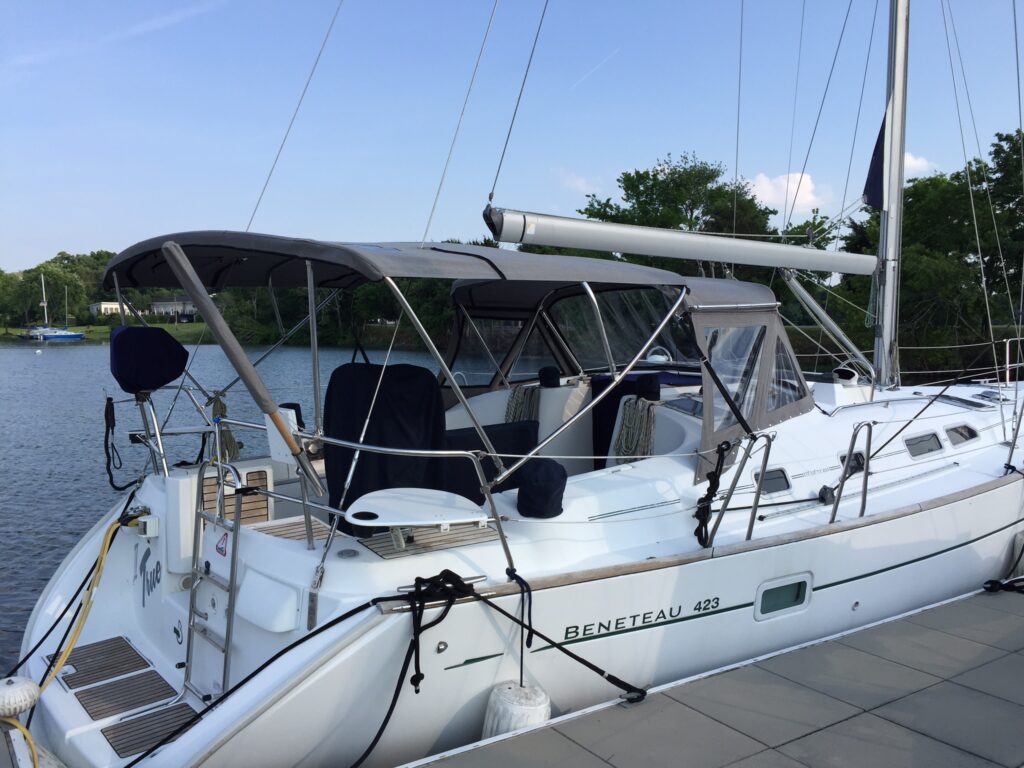
With his new machine, Rick made a few updates to the Beneteau sailboat. “The bimini was the first replacement, and I added the dodger and side curtains.” After those projects were done, Rick and his wife planned to get their life on the water underway.

Rick made a custom bimini and dodger for his Beneteau 423 sailboat.
The Beneteau 423 sporting its custom canvaswork.

“At the time I first purchased the LSZ, I fully expected to pack the machine in the lazarette of my 43-foot sailboat and live a life in the Caribbean, doing needed repairs and projects for myself plus picking up occasional repair jobs along the way,” Rick told us.

But the best-laid plans don’t always pan out. Unfortunately, health issues forced the couple to rethink their arrangements. They sold the Beneteau in 2018 and instead decided to make a favorite vacation spot in coastal Alabama their home.

Although they sold their sailboat, the couple kept their Ultrafeed. That turned out to be the right call. They quickly discovered that there was no shortage of paid sewing work up for grabs in their new hometown.

“I live on the Gulf Coast near the Florida panhandle. Storms and extreme sun cause lots of damage, so there’s lots of demand for repairs and overstitching. Many fabricators don’t want to do repairs, so I seem to stay fairly busy,” Rick said.

In addition to these small repair jobs, Rick has also made biminis, dodgers and covers for others’ boats, as well as repairing sails. And he’s no stranger to creating custom cushions and enclosures for outdoor spaces.

This slideshow requires JavaScript.

Thanks to the easy availability of sewing work in his area, Rick can create a totally custom schedule. In fact, that’s what he likes most about his small DIY business. “I get to pick the jobs. … If the job isn’t a good fit for me, I can turn it down. Without having a storefront or a formal business, I can do jobs at a price that leaves [me and my customers] both happy.”

Tackling the Awning Project

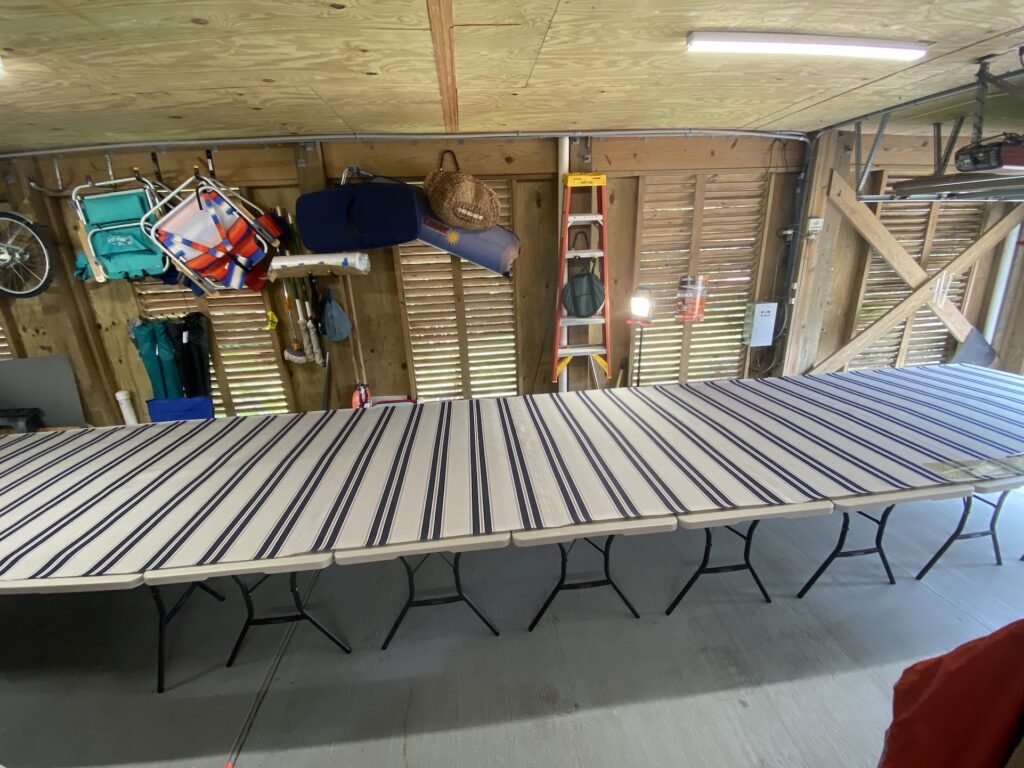
It was this freedom and flexibility that led Rick to the awning project at the upholstery shop in early 2022. Although it was a huge project that required dozens of yards of Sunbrella® awning fabric, he was prepared. The couple’s garage pulls double duty as a spacious sewing studio, which Rick has optimized for large projects.

“I have 12 30-inch by 72-inch poly folding tables, plus my machine and two smaller tables, that allow me to set up a sewing surface that runs 32 feet from one end of my garage to the other. I can move out my truck and assemble the tables in 10 to 15 minutes. My sewing table is on wheels, so I can roll it to the tables at whatever point I need it.

“When finished, I can remove and fold [the tables] and repark my truck in the garage in less than another half hour. I have 12 4-foot LED shop lights in that section of my garage, so it gets lit like a science lab when I sew.”

This slideshow requires JavaScript.

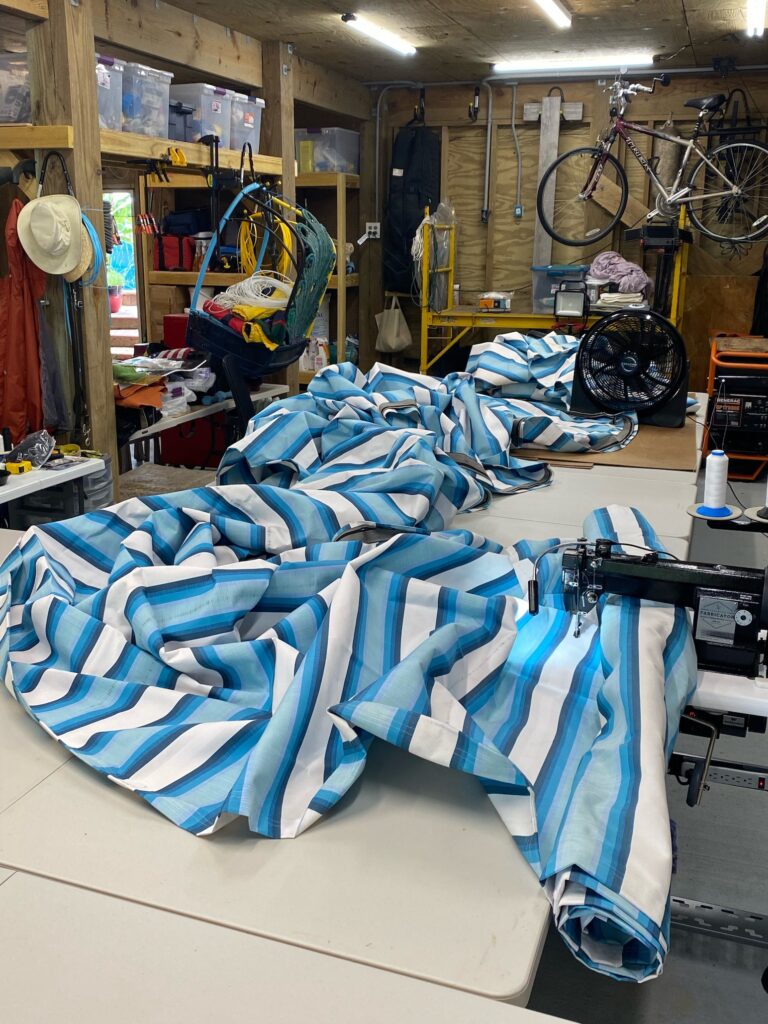
Having a great workshop like Rick’s certainly helps. But every sewing project has its challenges — and this awning was no different. Rick had to fit multiple yards of heavy awning fabric through the throat of his LSZ every time he needed to sew a seam. “I was very careful and methodical on how I staged the assembly,” he said. “I had the smaller panels of every seam to the inside of the machine.”

This slideshow requires JavaScript.

Before starting work, Rick estimated that the whole project would take about 48 hours. “Actual hours were more like 50 hours to complete through assembly and took four people a total of six hours to install,” Rick said. “The total time in days and weeks was one week in prep, two weeks in cutting and assembly, and a day for installation.”

Although Rick did all the patterning, cutting and sewing by himself, installation wasn’t a one-person job. He had to call in some help. “Luckily, my helpers to install were all friends who were happy to work for lunch and beer,” he laughed.

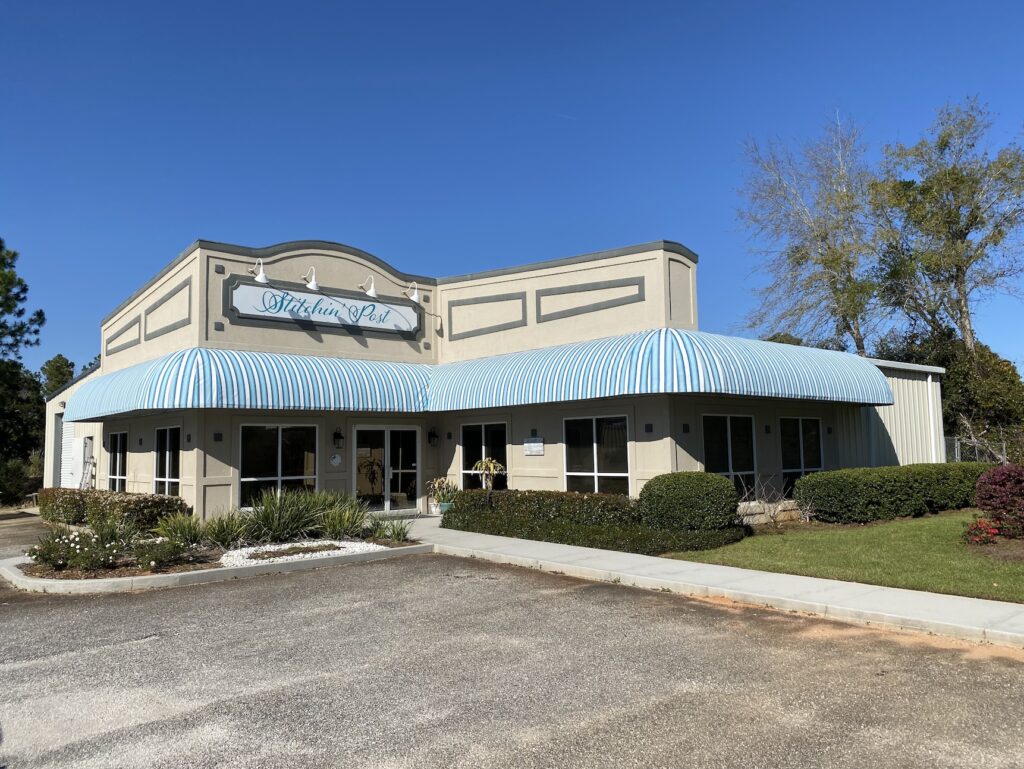
The blue-and-white striped awning matches the shop's sign perfectly.
The awning temporarily installed on the upholstery shop.

Once the awning was installed, though, the friends discovered a problem with the E-Z Lace that held the awning to its frame.

Rick gave us some background on the issue. “This is the fourth awning I’ve done using E-Z Lace. Each one was one I could pattern myself and had no issues using just the lace without adding fabric for a lace pocket. This one was different. … The [frame] tubing was 1-1/2-inch square aluminum. With just 2-1/2 inches of fabric on the E-Z Lace, measurement proved to be too critical for a good fit.”

Unfortunately, that meant the awning needed to come down for repairs. But Rick was more than up to the challenge of adding a fabric pocket and moving the lace up by 2 inches. And since he had the awning back in his garage studio, he decided to make it even better by adding topstitching.

Upgrading the Sewing Studio

But topstitching would call for a sewing machine size upgrade. “I simply did not have room in the LSZ throat to do topstitches on that many rolled panels,” Rick explained. That conundrum turned out to be the reason he’d been looking for to splurge on a Sailrite® Fabricator® Sewing Machine.

Rick also put his Fabricator sewing table on wheels.
Topstitching is a breeze with the Fabricator!

Rick ordered his Fabricator only a few days before we reached out to interview him for this blog. Since then, he’s been hard at work with his new machine. “Now that I have the freedom and room in the machine, I’m adding topstitching over all 38 panels to sleep well at night when the eventual hurricane blows through,” he told us. “My customer didn’t ask me to do this, but they have been so good to me, and I feel blessed to give them a project they are proud to brag about.”

From what Rick has told us about his hard work on the project, we’re not surprised that the folks at the upholstery shop love the new awning! And they’re paying their gratitude forward: “The upholstery shop is weekly sending me business for jobs in canvas they choose not to do,” Rick said.

Between these paid projects and his personal to-do list — which he said includes “two smaller awnings, a long list of re-covering jobs my wife has been patiently waiting for me to start, then some patio enclosures to be finished by year-end” — Rick will never be without a job for long. Now that his workshop is outfitted with an Ultrafeed and a Fabricator, he’s prepared for every project that comes his way.

Thanks for sharing your story, Rick! We’re excited to see what you make next, and we wish you all the best for your future projects.


Who We Are

Sailrite is your one-stop DIY shop! We are a passionate crew of do-it-yourselfers who strive to equip you with the supplies and how-to knowledge you need to tackle your next project. Do you want to learn upholstery, leatherwork, canvaswork, hobby sewing, bag making or more? We have the fabric, tools, hardware, sewing machines and notions you need to master any DIY. And even if you’ve never sewn before, our tutorials and how-to videos are designed for beginners and experienced crafters alike.

Start your DIY journey today: www.sailrite.com
Creative Quarantine DIYs With the Ultrafeed®

David Thiesmeyer isn’t new to the DIY world. He tackled his first big sewing project — a mainsail cover for his sailboat — well over 10 years ago. He considers himself a “DIY type of person” and takes pride in sewing great projects. His most unique creation was not sailing-related and happened during the first year of the pandemic. 

With Sailrite® fabric, supplies and his Ultrafeed® LSZ, David designed, sewed and installed a patio enclosure that connected to the underside of his daughter’s elevated deck. With a well-made enclosure, she was able to use her patio into the fall and winter and have friends over for ventilated, socially distanced hangouts. Let’s learn more about David’s DIY background and how he transformed his daughter’s patio into a year-round entertaining hot spot.

Sewing, Sailing & Sailrite

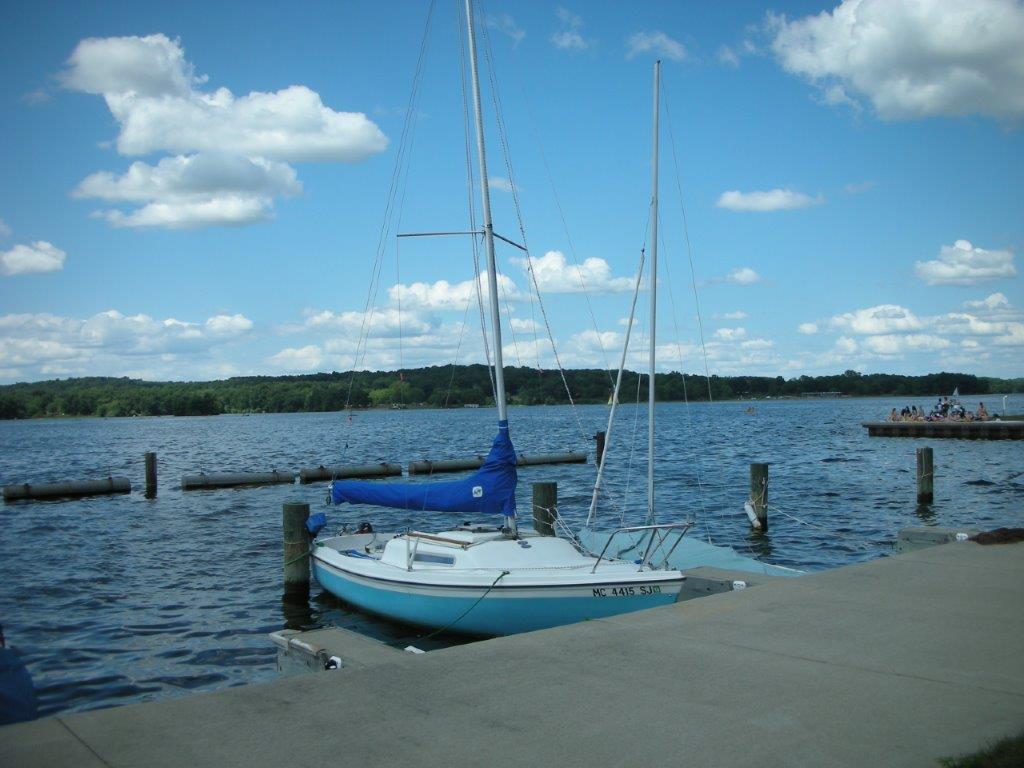
In 2008, David bought his first sailboat. The MacGregor Venture 21 was over 30 years old and in major need of sail repair and new sail covers. David has always been the DIY type, so he decided to tackle the sail cover repairs himself. “I bought a mainsail cover kit from Sailrite. I reviewed the very well-done video instructions and sewed it on my wife’s home machine.”

David's sailboat with mainsail kit from Sailrite
Here’s David’s sailboat featuring the Sailrite mainsail cover he sewed himself.

It’s after that mainsail cover project that David realized he needed a heavy-duty machine. “I had overloaded my wife’s sewing machine and thought I’d ruined it. Luckily, I had just knocked it out of adjustment and was able to fix it. That is when I decided to get a real sewing machine and bought the Ultrafeed LSZ.”

Over the years, David has sewn many projects for his sailboat. He’s made a new mainsail from a Sailrite Sail Kit, a genoa sail bag, cushion covers, lifeline covers, winch covers, sail bags and more. He credits his Ultrafeed with his productivity and quality results: “I like the Ultrafeed because I have never found a job that it could not complete. I added the Workhorse® Servo Motor and Ultrafeed Industrial Table and have never been happier. This upgrade really added to my sewing enjoyment and quality of my finished projects.”

The COVID “Quaran-Tiki” Project

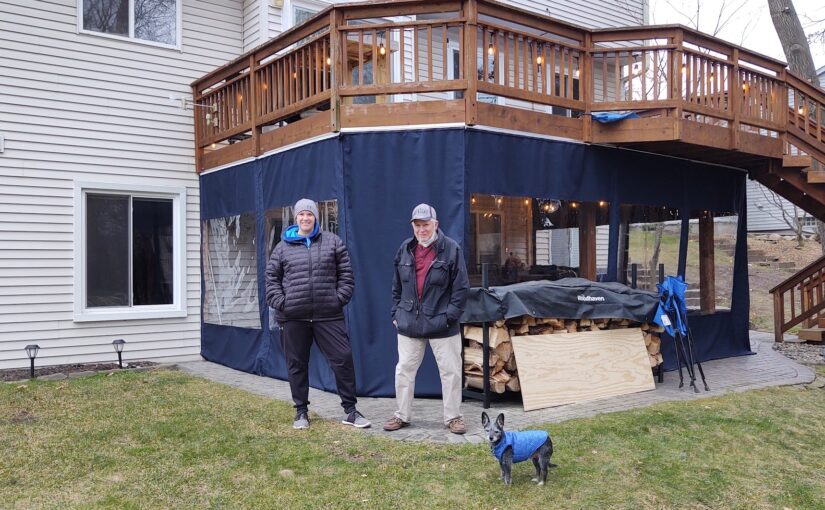
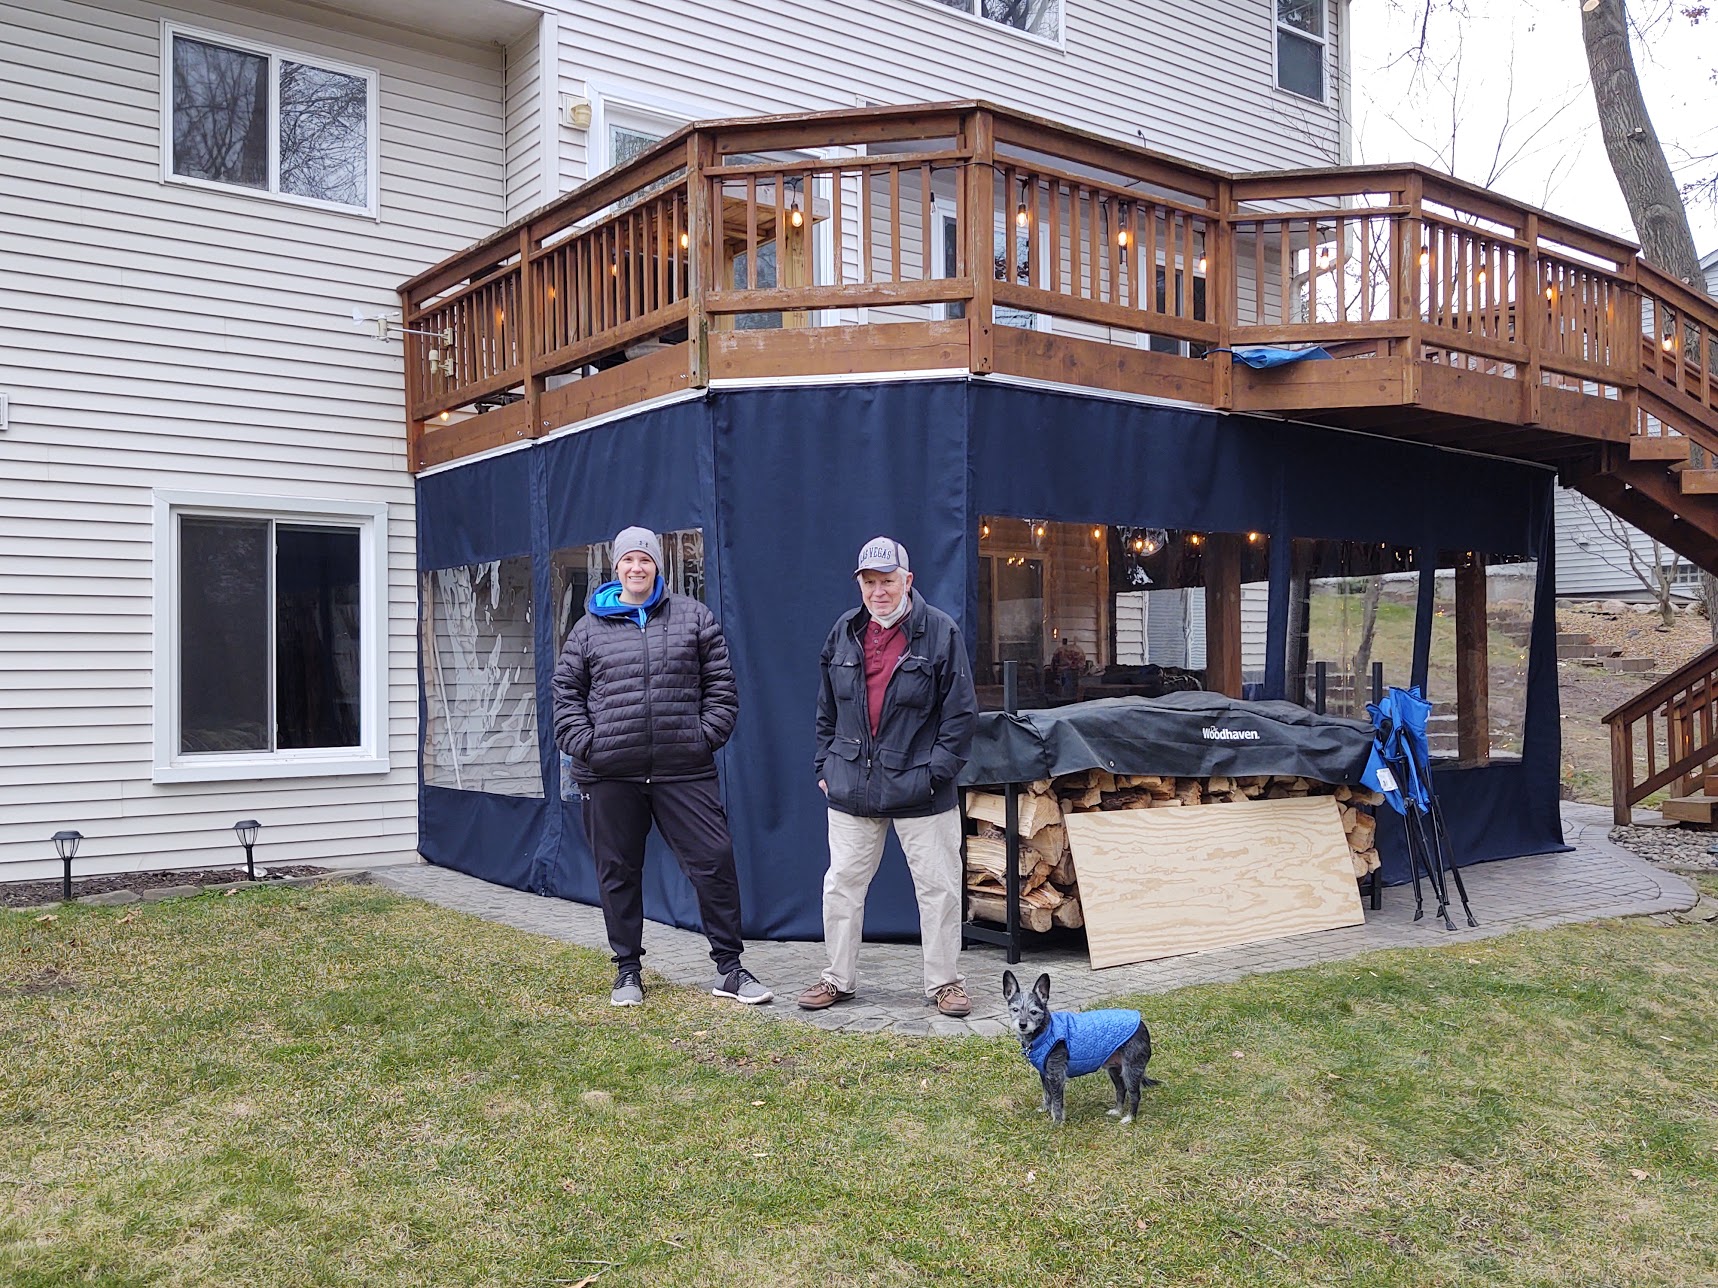
At the height of social distancing, when year-round outdoor entertaining spiked in 2020, David’s daughter asked him to make an enclosure with ventilation that would attach to the underside of her elevated deck. She had built a tiki bar from pallet wood and wanted to extend the use of her patio during the fall and winter seasons. David eagerly accepted the project request. “I was excited to do a new sewing project as sailing season had just ended. I decided that it should be removable and made use of the Sailrite awning track around the bottom of the upper deck and along the walls of the house.”

The enclosure project David made for his daughter's deck using Sailrite supplies.
A job well done!

To sew the enclosure, he ordered Sunbrella® Marine Grade fabric, 30 gauge Plastipane window material, aluminum awning track and awning rope, YKK zippers and Shelter-Rite fabric — all from Sailrite. The Quaran-Tiki was David’s second enclosure project. He used the skills he learned while designing and sewing his first enclosure — an attachment for a travel trailer to keep mosquitoes at bay while enjoying the attached deck — to help make the enclosure.

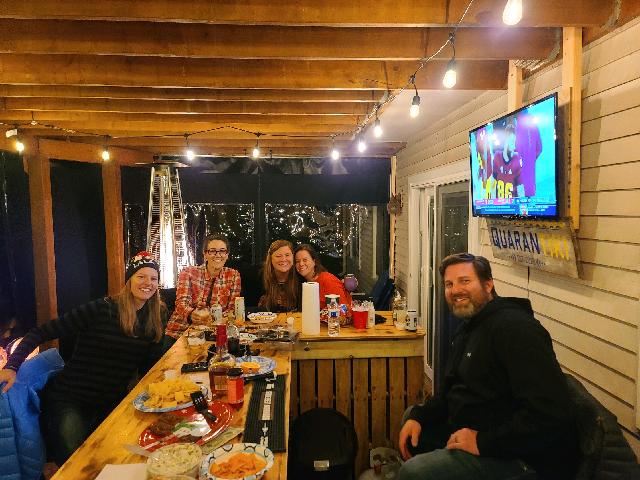
And what did David’s daughter think of the Quaran-Tiki? “Sara was elated with how the project turned out, as were all her friends and neighbors who are always coming over to enjoy Quaran-Tiki. I am very satisfied with how it turned out.” The side panels roll up to let a breeze through in the summer, and Sara equipped the patio with two propane heaters for the colder months. 


David's daughter and friends enjoying the enclosure he made form Sailrite supplies.
Sara’s friends are all smiles enjoying the Quaran-Tiki!

After well over a year, the enclosure is still in great shape and getting plenty of use. As for David, he’s still enjoying his Ultrafeed as much as the first day he purchased it. “Most of my sewing projects have been boat-related, although I have been known to repair anything made of canvas or in need of a heavy-duty sewing machine.” 

We’re thrilled David has enjoyed his Ultrafeed for over 10 years now and that Sailrite could be part of his creative journey. Good luck with all of your future projects, David. Here’s to more sewing, sailing and DIY adventures.


Who We Are

Sailrite is your one-stop DIY shop! We are a passionate crew of do-it-yourselfers who strive to equip you with the supplies and how-to knowledge you need to tackle your next project. Do you want to learn upholstery, leatherwork, canvaswork, hobby sewing, bag making or more? We have the fabric, tools, hardware, sewing machines and notions you need to master any DIY. And even if you’ve never sewn before, our tutorials and how-to videos are designed for beginners and experienced crafters alike.

Start your DIY journey today: www.sailrite.com
DIY & EDC: A Match Made in Self-Reliance

What is EDC? It stands for “everyday carry” and it represents a lifestyle of utility and preparedness. EDC items consist of pouches, bags or backpacks containing everyday essentials. A person’s EDC kit is very personal, containing items they think are essential to their daily life. Typical EDC items include things like keys, wallet and phone, but also a small flashlight, pen and notebook, lighter, pocket knife or multitool — things that all serve a purpose and have a useful function. Having these essentials with you every day means that you’re ready for anything and prepared for the unexpected — should the need arise.

What do EDC and DIY have in common? More than you’d think. At its core, EDC embodies a belief in always being prepared but also being able to take control of a situation and handle it on your own. That kind of self-reliance and self-accountability is echoed in the heart of every DIYer. Having the right tools to handle any situation has a common thread in the DIY lifestyle.

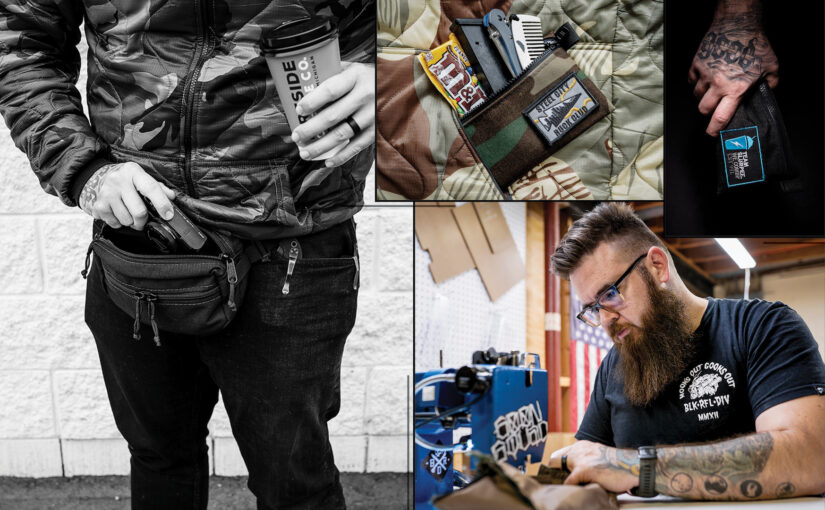
Tim Galloway is a newcomer to both the DIY and EDC communities. He’s a professional photographer who has worked in news and done some commercial work for the past 10 years. But when the COVID-19 pandemic hit, it put an indefinite hold on his photography business. With time on his hands and a desire to stay busy and productive, he turned his attention to something that has always piqued his interest: sewing EDC items.

ultrafeed sewing
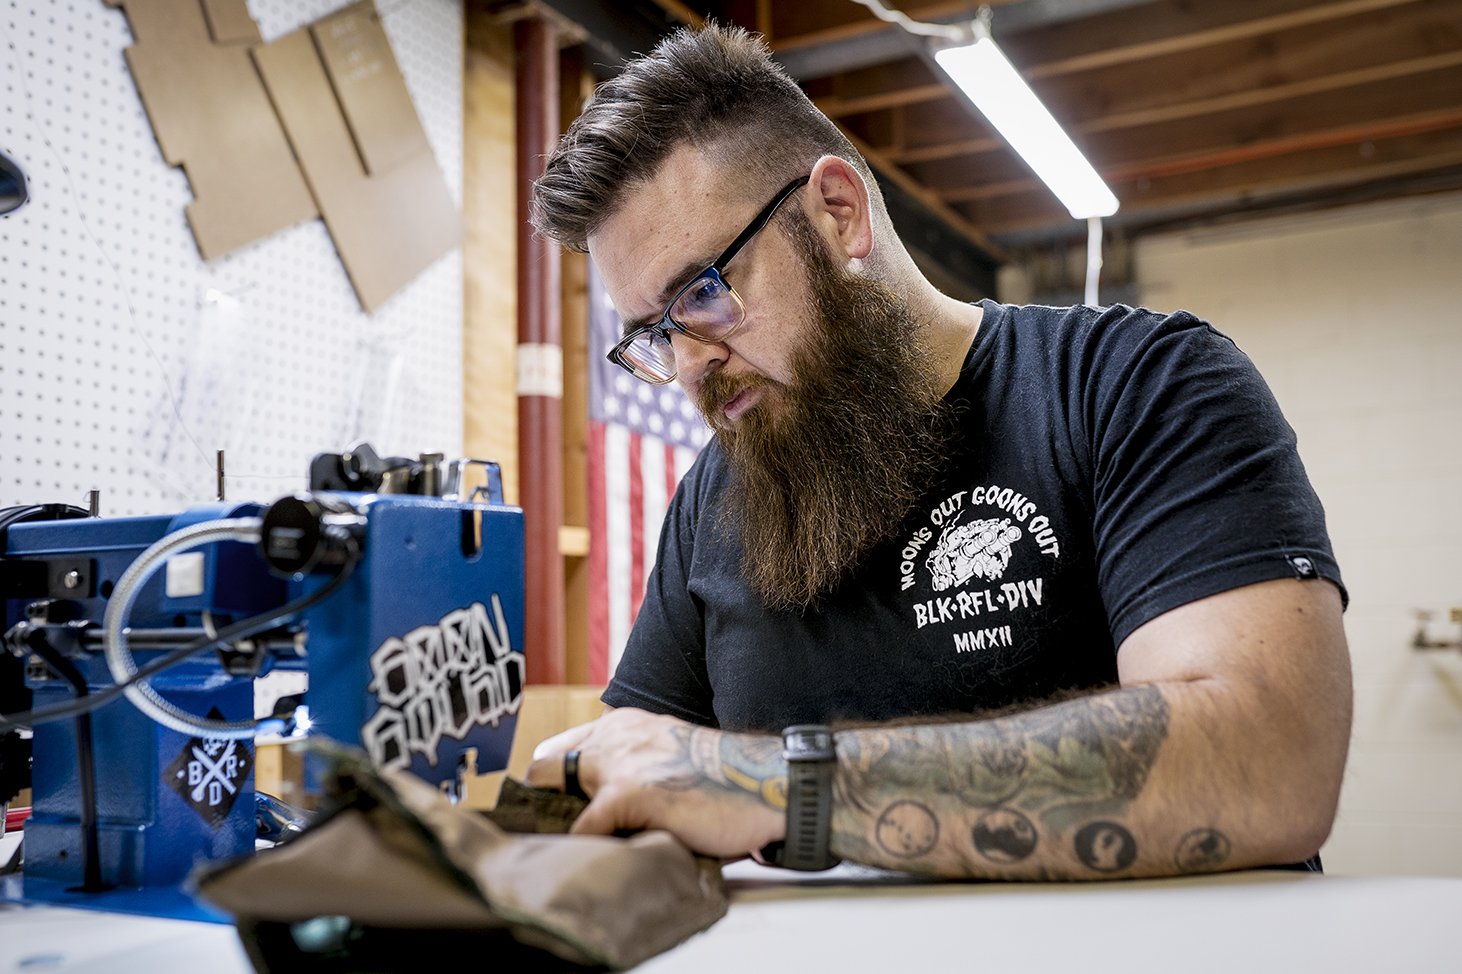
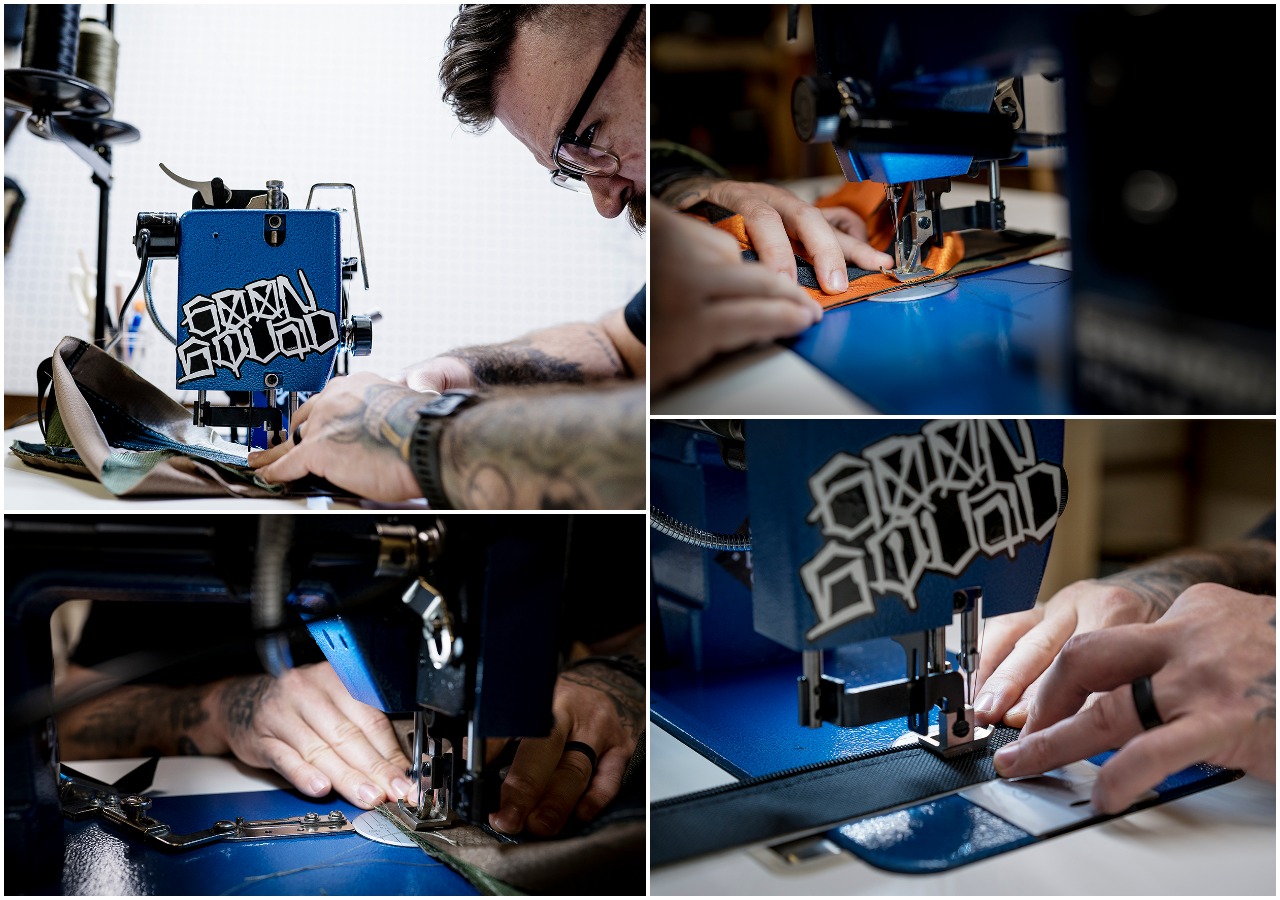
Tim sews an EDC bag using his Ultrafeed LSZ Sewing Machine.

The EDC community is popular and growing, and Tim is carving out his own space with his small business, goodwerks. Right now, it’s a one-man operation. Tim cuts the patterns for his bags and EDC accessories and sews everything himself. At first, he was using a home sewing machine. But he quickly realized it wasn’t powerful enough to sew through the heavy-duty layers of his bags and straps. He discovered the Sailrite® website and ordered the Ultrafeed® LSZ Sewing Machine. With the Ultrafeed, he’s been able to sew with professional results and deliver the quality that the EDC industry demands.

Join us as we get to know this small-business owner, his DIY philosophy, and how Sailrite could be part of his sewing journey.

Sewing & Sailrite

Tim had never sewn before he decided to give his EDC hobby a real shot at success. But he didn’t let that small hiccup stop him. “I learned to sew in May of 2020 mainly through YouTube tutorials and trial and error. My mom helped me search for a domestic machine that would be able to handle heavier materials as I sew primarily Cordura and webbing. I grew out of that machine very quickly as I realized that it wouldn’t be able to handle the layers as smoothly as I had hoped and certainly not the volume. Especially if I’m sewing daily or close to it.”

In need of a heavy-duty machine that could handle materials like Cordura, ripstop and webbing, Tim started his search. “I did a bunch of research. I looked at a lot of other machines, peeking at Juki, Consew, etc. Frankly, the price point was a bit out of reach for me for a Juki setup, and I really wanted a new machine. I watched a ton of videos and read a bunch of articles. The thing that drew me to the LSZ was the walking foot, ease that it dealt with heavier materials (like, you know, sails), the optional Workhorse® Servo Motor (which I use with the full table setup) and the fabled legendary customer service.”

He received his Ultrafeed LSZ in July of 2020 and has been sewing with it regularly. Even though Tim is a new sewer, he still had a lot to say about the machine. “The machine works really well for flat work. I think with the correct thread and needle setup, it is pretty smooth sailing (see what I did there?). I really enjoy having the servo motor so I can sew at night when my wife is sleeping. With this being the only industrial-type machine I’ve used, there are a lot of things I don’t know about how they operate. So there was a bit of a learning curve. I refer to the manual somewhat often and have had to learn to have a few extra parts on hand in the event of a maligned needle strike, etc.”

tim sewing

The EDC Community

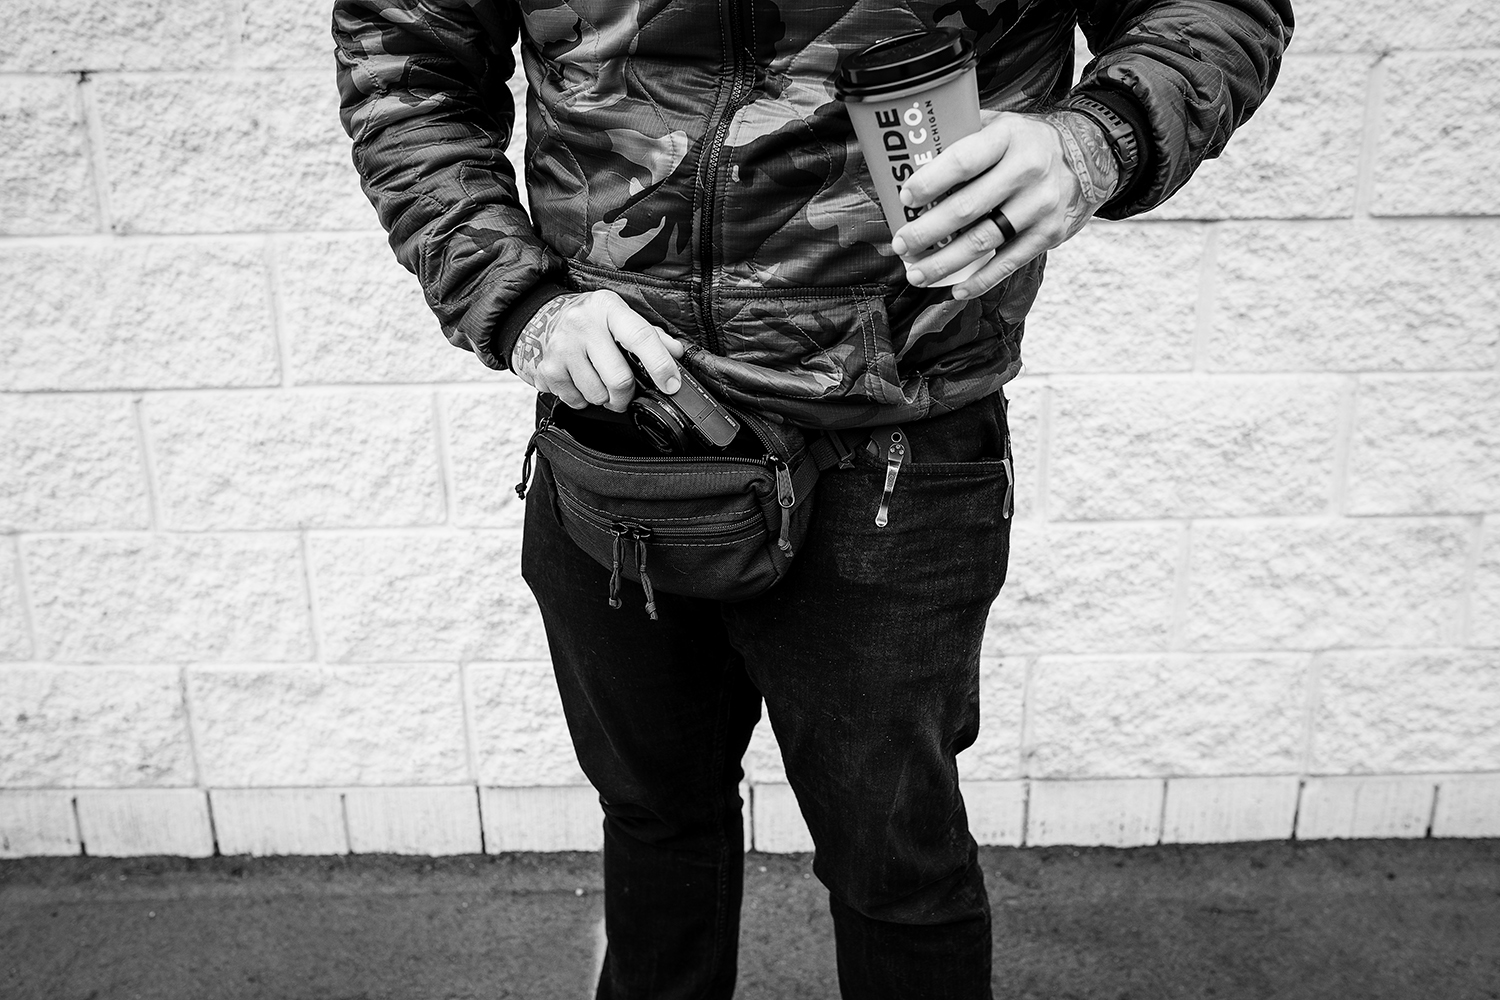
Tim’s bags and pouches are simple in design and are made with high-quality fabrics and hardware pieces. He uses 1000D Cordura fabric with a ripstop liner for a professional look and to help with water resistance. Cordura is well-known in the hiking, camping and rucking communities for its incredible durability and water resistance. Tim’s most popular design is the Boogie Bag, which is a fanny pack with zippered compartments to keep everything organized. “I based it off of other, similar bags but addressed a few things I did or didn’t like on others. I want my products to ooze quality and durability. My company slogan, if you’d call it that, is ‘Simple. Durable. Handmade.’ I’m not really looking to reinvent the wheel but just bring quality into small soft goods.”

Tim’s current demographic is people in the rucking community. Rucking is a form of endurance training that involves marching at a fast pace carrying a weighted pack. Anyone can ruck as a form of exercise, but those who participate in GORUCK events are serious endurance athletes who expect a lot from their gear. And they have started turning to goodwerks for their rucking needs. “I’ve been very fortunate to have made fantastic friends in that community who have supported my small business and buy from me every time I drop goods. I mainly sell out of my stuff but am slowly building stock. Ideally, I want to transition more to the EDC community. I want my products to be accessible for all folks that are interested in quality gear for their everyday organization and needs.”

“I hold high the value of handmade goods and small businesses. From personal experience, I know how challenging it is to run your own business. How you have to wear a lot of different hats to make things come together. The late nights, early mornings, weekends you sacrifice, and so on. I think that when people can find something that they care about enough to devote to that, it deserves praise. When I make my products I know that they’re not going to be perfect every time, but I do the best I can to make them look like they were produced on a mass scale. I take a lot of pride in my gear, and it’s incredibly rewarding getting positive feedback.”

This slideshow requires JavaScript.

Doing Good Works

Part of Tim’s mission with goodwerks is to become a contributing member of his local community and to, in essence, put good into the world. Where did the name “goodwerks” come from? We’ll let Tim explain: “goodwerks came about with the help of a friend. I initially was going to call it ‘threadwerks’ or something similar. But my friend Dan told me to take a look at the back of my right hand, which is tattooed with the word “good” and an ax through the letters. It’s a reminder to ‘sharpen my axe’ daily and to make the best of all situations.”

Good isn’t just part of his business’s name. It’s also fundamental to Tim’s personal philosophy and a guiding principle for the way he lives his life each and every day. “A large part of my business is to give back and to create good in the world. Each month, people that follow my Instagram account nominate others to receive some free gear from me. It’s a simple gesture to show others appreciation. I also am working on having regular raffles that benefit nonprofit organizations, mainly organizations that are veteran-oriented. In November 2020, with the help of my favorite local coffee shop donating some coffee, and a slap/patch maker, we raised $1,250 for One More Wave, a foundation that helps wounded veterans get surf therapy.”

tim with EDC bag

Tim recently held his second nonprofit raffle and raised $1,700. Proceeds went to The Enduring Campaign, a Michigan-based nonprofit that offers job placement and other support to the homeless veteran community. Good works and gratitude keep Tim humble through the growing success of his sewing business. “There’s no way I’d still be running with this little business without the community that’s helped support me. The people that have spent their hard-earned money with me have helped me stay afloat during the shutdowns. It’s incredibly humbling every time I get an email with an order. goodwerks doesn’t exist without the community surrounding it.”

Tim’s positive outlook on life and his desire to pay it forward is something we can all appreciate and strive toward. It’s a nice reminder that anyone can give back and put some goodness into the world, whether that’s through DIY or by other means. The world could use a few more people like Tim. Putting good into the world, even in a small way, has a ripple effect that grows and expands beyond our sight. Let’s all go do some good.

tim sewing

If you’d like to follow Tim’s EDC sewing adventures you can follow him on Instagram @goodwerks.


Who We Are

Sailrite is your one-stop DIY shop! We are a passionate crew of do-it-yourselfers who strive to equip you with the supplies and how-to knowledge you need to tackle your next project. Do you want to learn upholstery, leatherwork, canvaswork, hobby sewing, bag making or more? We have the fabric, tools, hardware, sewing machines and notions you need to master any DIY. And even if you’ve never sewn before, our tutorials and how-to videos are designed for beginners and experienced crafters alike.

Start your DIY journey today: www.sailrite.com
Jan West: A Seasoned Sewist

With a little help from Sailrite® and the Ultrafeed® Sewing Machine, Jan West felt like she could tackle just about any project. As an experienced sewist, she was no stranger to the world of DIY projects, and she was kind enough to share with us her most recent sewing successes. She is proof that there’s always a plethora of creative projects to create if you have just a little time, patience and determination.

Q: What’s your story? How’d you start sewing?

A: I started sewing when I was a young girl, probably 8 or 9 years old. Both of my grandmothers had a big impact on my love for sewing and crafting. I spent a lot of time with both of them, and they taught me to hand sew and allowed me to sew on their machines or work on crafts. As I grew older, my career and family didn’t allow me much time to sew, but recently, I’ve had free time again and gained inspiration to sew and work on different craft projects.

Q: What’s your most recent sewing accomplishment?

A: A few weeks ago, I decided to order fabric to re-cover my patio chair cushions. I had re-covered some a few years earlier and knew that I could tackle the job, but I wanted to refresh my memory by watching some YouTube videos. While watching these, I ran across the Sailrite video instructions on how to reupholster golf cart seats. The video was so easy to follow and understand and, knowing that I had sons that needed their seats reupholstered, I was convinced that I could do this. 

I immediately started to search Sailrite’s website for the vinyl fabric that I would need. I was concerned that I didn’t have a walking foot upholstery sewing machine like Sailrite showed in their videos, but I did have an older metal machine with a walking foot. With the Sailrite video at my disposal, I was able to sew the vinyl on my old machine and the golf cart seats turned out very well. 

At the same time, I knew that my stitching was not as perfect as it could have been due to having to coax the fabric through at times. Soon I realized that if I was going to continue these kinds of projects, I would need a Sailrite machine. It would take my next projects from looking good to looking great! Plus it would make the project so much easier to sew. By this time, I had already watched almost all of Sailrite’s videos and had convinced myself that I could re-cover an armchair, a bimini and much more.

I actually looked at different machines online, but after reading reviews, I always came back to the Sailrite website. I purchased the Ultrafeed LSZ and am currently sewing new covers for some wicker patio furniture. If you’re accustomed to a regular home sewing machine, it might take a little getting used to the walking foot on the Ultrafeed, but I have been very pleased with it so far. No more coaxing the fabric through the machine and no more inconsistent stitches! I can’t wait to reupholster the next golf cart seat. I have my Morbern® vinyl from Sailrite ready and waiting!

Jan West

Q: Can you tell me a little bit more about your golf cart project?

A: My golf cart seat project went right along with your how-to video series. Luckily, the seats on my golf cart were exactly like the ones that you upholstered in your video. I started by removing the seat backs. I measured the lengths, widths and edges of them and also marked where I wanted the coordinating fabric to be centered on the backs. I used these measurements, along with the seat cushion measurements, to diagram out on paper how I would lay the pattern pieces out on 54-inch wide vinyl fabric. Then I decided how much fabric I would need to order from Sailrite.

I added a 1/2-inch seam allowance to all the measurements except the boxing pieces, marking the end boxing pieces as described in the video. Then I removed the staples holding the existing vinyl on and cut out the end boxing piece to be used as my pattern. With measurements from the plywood backing, I cut out the vinyl pieces for the front of the back cushion, including the coordinating fabric and allowed about 3 inches in length on each piece to wrap around and staple to the plywood back. I sewed the fabric strips together with a 1/2-inch seam and top stitched a flat-felled seam. I then stitched the boxing to each end and top stitched again, by watching your exceptional video. 

This slideshow requires JavaScript.

My husband helped me by replacing the rusted tee nuts in the plywood and I used contact cement to reattach the foam to the plywood. I had purchased a pneumatic staple gun and my husband helped me to staple the vinyl to the plywood seat backs. I’m not very strong in my hands, so having someone to help you staple and stretch the vinyl is great. We attached the newly covered back cushions to the golf cart and transferred where I wanted the coordinating fabric to match up on the seat bottom and marked the old vinyl with a sharpie marker. I basically did the same process with the seat cushion as with the backs. 

Overall, I enjoyed my experience with this project. It was much easier than I expected because of your instructional video tutorials that I kept referring to. The biggest setback was having to cut off the old screws and replace the tee nuts without damaging the plywood. Even though I used fabric from Sailrite, at this time I didn’t have my Ultrafeed and I really wish I did. It would’ve turned out much better.

Q: In your opinion, what’s the most rewarding part about sewing your own DIY projects?

A: I think that the most rewarding part of sewing my own projects is the self-satisfaction of knowing that you can accomplish something that you’ve never done before, along with saving the money that you would have paid someone else to do it for you. And I can use my talent to help save my family money too!

Now that I have the Sailrite machine, I am already using it to sew some new patio cushions. I am thrilled with it, and I can’t wait to finish this project and use the machine on the next golf cart seat waiting in the wings. I even have plans to re-cover an armchair when I decide on the fabric I want. I’ve been so inspired by your video tutorials and I truly believe: “I can do that!”  

Please keep the videos coming!

IMG_7622


Who We Are

Sailrite is your one-stop DIY shop! We are a passionate crew of do-it-yourselfers who strive to equip you with the supplies and how-to knowledge you need to tackle your next project. Do you want to learn upholstery, leatherwork, canvaswork, hobby sewing, bag making or more? We have the fabric, tools, hardware, sewing machines and notions you need to master any DIY. And even if you’ve never sewn before, our tutorials and how-to videos are designed for beginners and experienced crafters alike.

Start your DIY journey today: www.sailrite.com
Taking DIY to New Heights

The possibilities of things you can make with a sewing machine are limitless! Sailrite® customer Gregory Palmquist had a fleeting idea to sew his own kites after he was underwhelmed by the selection of mass-produced kite kits. This seed of an idea has grown into a bigger hobby that has led to more sewing projects, including patio furniture, beach bags, totes and more. With tools, supplies and how-tos from Sailrite, he’s been able to take his sewing skills to incredible heights!

It all started when Gregory was young. Like many kids, he grew up watching his mom sew on an old Singer sewing machine, and he would tinker around with it occasionally. Fast forward to junior high school and a woodshop class that was at full capacity. “Some of the boys, including myself, went to home economics class instead. We made stuffed dolphins for a project. Mine came out pretty good for a 12-year-old boy.” This early experience with sewing would pay off in a big way later in life.

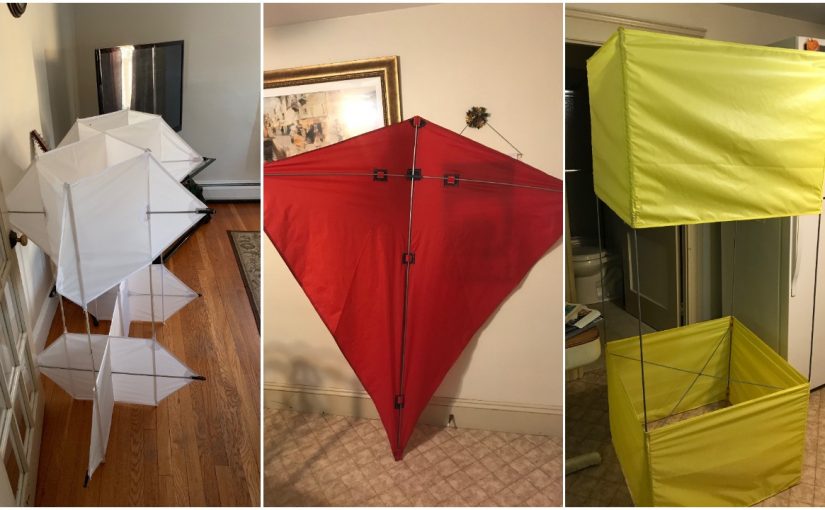
Gregory has always been fascinated with aviation. As a boy, he made his own kites out of newspaper and sticks. A few years ago, he was given a used Kenmore machine and, on somewhat of a whim, he decided to try his hand at sewing kites. “I was at one of the big box home stores getting ideas on materials to put together a quickie box kite. I finally decided to go all in and do it right. I found plans online and just expanded the dimensions.”

This slideshow requires JavaScript.

He makes his kites out of ripstop sailcloth and webbing. After several attempts on the Kenmore, he quickly realized his second-hand machine wasn’t up to the challenge. “Some of the nylon webbing reinforced areas are thick and the Kenmore just couldn’t handle it.” Next, he tried sewing on a Pfaff, but it still didn’t hold up to his kite-making demands.

Not wanting to give up his budding hobby, Gregory began the search for a better sewing machine that would be able to handle his needs. “I researched many machines when I came across the Sailrite® Ultrafeed® LSZ Sewing Machine. Immediately I knew this was the machine for me. The portable size, the power and the price point were winners.”

After the Pfaff failed, he finally “drank the Kool-Aid®” as he put it and ordered an Ultrafeed LSZ. “How did I survive all these years without this machine?” He recently upgraded his Ultrafeed with the Workhorse™ Servo Motor in the Industrial Sewing Table. “For a 58-year-old guy who’s been in engineering, I appreciate the power and efficiency of the Workhorse Servo Motor coupled with the Ultrafeed and Industrial Table. Move over peanut butter and jelly because this is the perfect pairing ever!”

Gregory has sewn four large kites on his Ultrafeed. He started with a basic Eddy design and progressed to the complex Compound Cody, a modern double box design based on the original Cody War Kite designed and patented in 1901. His first kite, the Eddy, measured 6 feet tall x 6 feet wide. Gregory sews them during the wintertime, using the dining room table as a work station.

patio set

The new patio set Gregory sewed using his Ultrafeed LSZ.

Since his kite sewing was so successful, Gregory’s wife asked him if he could fix some things around the house. She put him to work replacing the tattered awning on their patio swing. “The 1″ Swing-Away Binder is a super tool! I used polyester thread throughout for UV resistance. Sailrite had everything I needed.” Next up was replacing the swing’s seating cushions and sewing a new barbecue grill cover for a matching and cohesive outdoor seating area.

“Having some leftover material, I threw together a bag for the missus. My wife is a nurse, and the girls at the hospital loved it! They were floored to hear that her husband made it.” This led Gregory to search for some of the Sailrite bag-making tutorials. He watched the “How to Make a Beach Bag” video and began making beach bags, totes and other bags. Gregory said watching Sailrite’s tote videos brought his sewing up to a professional level. “They’re a huge hit with the ladies. I couldn’t have come this far without Sailrite — thank you!”

tote bag collage
Gregory showing off some of the beach bags he’s made.

Although Gregory doesn’t get to fly his kites as much as he’d like, he can’t bear to part with them. “We’re in Rhode Island, and I never did have much time to take these big boys out to fly during the summer. I did consider selling them, but I don’t want to part with my labor of love. There will be time eventually.”

What does Gregory like best about sewing and the DIY experience? Not only is sewing a creative outlet for him, but it’s practical too. He’s been able to sew bags for his wife, spruce up their patio, sew his beloved kites — and who knows what other uses he’ll find for his Ultrafeed. “I’ve got so much inspiration and the creativity is just flowing out of me! This newfound medium has allowed me to express my artistic creativity. My creations are purposeful and give me satisfaction.”


Who We Are

Sailrite is your one-stop DIY shop! We are a passionate crew of do-it-yourselfers who strive to equip you with the supplies and how-to knowledge you need to tackle your next project. Do you want to learn upholstery, leatherwork, canvaswork, hobby sewing, bag making or more? We have the fabric, tools, hardware, sewing machines and notions you need to master any DIY. And even if you’ve never sewn before, our tutorials and how-to videos are designed for beginners and experienced crafters alike.

Start your DIY journey today: www.sailrite.com
Custom Cabins: Tales of an Outdoor DIYer

Imagine a quiet evening in the woods — you’re sitting by the campfire, and as the night draws to a close, you cozy up in your very own tent-cabin. For many people, spending time in the wilderness brings joy, tranquility and peace of mind. And while the casual camper might be content with a tent or pop-up camper, the more serious outdoorsman, like Scott Miller, seeks something bigger and better (and vastly more permanent). As both an inventive spirit and an outdoor aficionado based in Northeast Wisconsin, Scott was more than happy to share his journey into the wild with us and explain how Sailrite® could play a part in bringing his creative vision of totally unique cabins to life.

Scott has been in the design and wood fabrication business for over two decades, mostly focusing on heavy timber projects. No stranger to rugged terrain, he’s camped everywhere from upstate New York to Alaska. He even attended the Pat Wolfe School of Log Building in Ontario, Canada, and studied the craft of log and timber frame construction to truly hone in on this discipline and turn it into a viable career. 

The-Tent-Cabin-Maker-Use.jpg
Scott has long been immersed in the outdoors.

He’s always longed to get away and enjoy the wilderness in an effort to recapture the simplicity of Henry David Thoreau’s famous nonfiction novel, “Walden.” The popular true story was written in 1854 and describes Thoreau’s time spent living alone in a cabin at Walden Pond, near Concord, Massachusetts, — a simple life in the solitude of the forest. By the end of the Thoreau’s tale, he feels more at peace with himself and all living things around him, a peace that comes from being one with nature. 

This harmony between both nature and the human mind truly resonated with Scott and was the driving force behind his most popular DIY creation to date. “My appreciation for the outdoors and camping inspired me to design a tent-cabin that could be enjoyed year-round.” As a seasoned craftsman, Scott had already been designing and creating several styles of tent-cabins for himself and felt confident in his abilities. But he also realized that this new style of tent-cabin would require a more streamlined effort if he was to make a successful business out of creating and selling them. 

IMG_8339
Create your own solitude with a totally unique tent-cabin.

With a desire to comingle his ingenuity and craftsmanship, all that Scott needed to take his cabin-making venture to the next level was a dependable, heavy-duty sewing machine capable of tackling the thick canvas found on the tent-cabins. So, like any savvy businessman, he took to the internet to start researching his options. That’s where he stumbled upon Sailrite, took the plunge on his DIY journey, and began his foray into sewing.

“I started sewing in 2015 after purchasing an Ultrafeed® LSZ Sewing Machine. I really like the compact style of the LSZ and its robust power. I learned to sew after watching Sailrite how-to videos and from books I purchased. Then in 2018, I was excited to see the release of the industrial Fabricator® Sewing Machine and bought one immediately.”

Sewing-Canvas.jpg
Scott and his trusty Fabricator, ready for action!

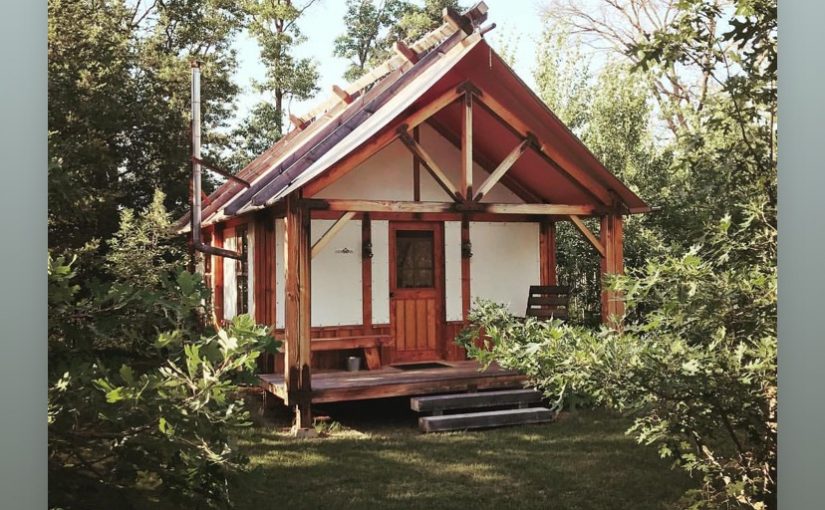
Built for the avid backwoodsman (or woman), Scott’s cabins are compact, comfortable lodgings not to be confused with a yurt, a tiny house or any other more livable dwellings. In his own words, these cabins are built for those looking for an authentic American camping experience with a style and amenities similar to those found in the cabins of the 1860s. Scott explained that “I’m mainly interested in the United States market, as the tent-cabin is part of our American history. They were lived in throughout mining camps in the West.” 

As an amalgamation of imagination and traditional techniques, Scott was kind enough to explain the painstaking process that goes into each and every one of his tent-cabins. 

“I design the tent-cabins on a sophisticated CAD (Computer-Aided Design) program used for wood design. I create a 3D model of the tent-cabin and produce shop drawings for fabrication. My son does help me when I need it, which I really appreciate. His review of my CAD drawings and help with the layout work is great. All my tent cabins come as a precut kit. Tent-cabin making is an ‘art form and craft’ and is gradually turning into a business of making tent-cabins for others. I’ve made eight tent-cabins so far and they usually take five to seven weeks to make, depending on the style.”

This slideshow requires JavaScript.

Although these tent-cabins come as kits that must be assembled by the customer, a great deal of thought and preparation goes into each one before they’re sent to their new home. And Sailrite is there to help every step of the way! Scott explained that, “I am extremely happy with all the products from Sailrite. I use the 1/2-inch basting tape for sewing the canvas and I also use hole punches, thread and grommets.”

And of course, the Ultrafeed LSZ and Fabricator help to sew the heavy canvas for all the canvas tents, as the roof and walls of the cabins are made of heavy-duty cotton army duck canvas pruchased from Sailrite. The tent-cabin is precut and marked for all screw locations and assembly drawings are included. The customer then erects the wooden tent-cabin frame based on the assembly drawings and, as the final step, attaches the canvas to the frame. 

pjimage (14)
Scott’s cabins can be transformed to suit any camper!

“These tent-cabins are not portable, but they’re not entirely permanent either. They’re popular with folks who own acreage or need a cabin for hunting or fishing. They might be set near a lake, along a river, or on a wooded lot. If someone needs a place to write, do art, a nice garden structure, or just to relax while enjoying nature, these tent-cabins are great.”

So what’s next for this environmental entrepreneur? Bolstered by his success in the DIY world, Scott explained to us that he enjoys sewing so much now that he’s even planned to tackle a number of non-cabin-related sewing projects in the future and is always open to new ideas. But for now, it’s fulfilling enough for Scott to connect with nature through his cabin creations. 

“The most rewarding part of my work is providing a product for others to enjoy.”


Who We Are

Sailrite is your one-stop DIY shop! We are a passionate crew of do-it-yourselfers who strive to equip you with the supplies and how-to knowledge you need to tackle your next project. Do you want to learn upholstery, leatherwork, canvaswork, hobby sewing, bag making or more? We have the fabric, tools, hardware, sewing machines and notions you need to master any DIY. And even if you’ve never sewn before, our tutorials and how-to videos are designed for beginners and experienced crafters alike.

Start your DIY journey today: www.sailrite.com
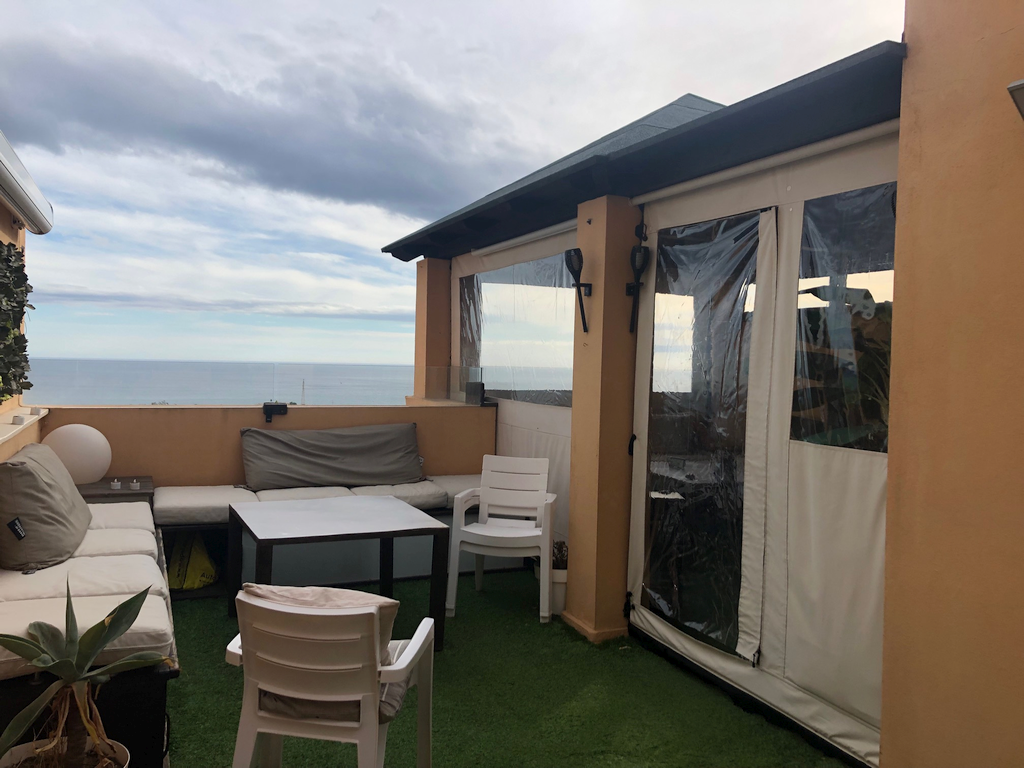
Outdoor Awnings: A Dream Home DIY

Debra Brown is well acquainted with the world of sewing, having started her first project as a teenager. But what began as a fun, sporadic hobby turned into necessity years later when Debra and her husband moved to Portland, Oregon, and purchased a beautiful Cape Cod home built in 1937. After moving in, they quickly noticed their dream home was not without flaws. “The back of the house faces west and the August sun in Portland can be brutal. The house came with seasonal awnings for each window to mitigate the heat, but unfortunately, they were old and tattered. The awning company wanted $4,000 to remake them — seven in all!” 

Bolstered by her “can do” attitude and sewing skill set, Debra set off to find a way to perfect her new home by creating her own awnings. This would prove to be her greatest sewing adventure yet, and would eventually lead her to Sailrite’s tools and supplies. We’re happy to have been a part of the journey, and Debra was kind enough to share her success story with us.


This slideshow requires JavaScript.

Q: What’s your history like with sewing? How long have you been doing it and how did you learn?

I learned to sew in middle school and still recall my very first projects as a 14-year-old — a simple gym bag and a dirndl skirt. Since then, over the years I’ve enjoyed sewing clothing and simple home décor items. When my husband and I moved to Portland, Oregon, and bought an 80-year-old house, my brother, Jesse, encouraged me to take on more ambitious sewing projects including draperies, duvet covers and Roman Shades. Jesse had been sewing custom home décor items for decades and taught me everything I know about sewing with heavier weight fabrics. He had also loaned me one of his industrial sewing machines to complete my projects in the past.

Q: What was the process like of creating your awnings? 

When I decided to try making new awnings for our house, I knew it would be challenging. I had no idea what types of fabric were available, or what tools and notions I’d need. I began by taking apart one of the old awnings and documenting each step so I’d know how to construct a new one. My brother suggested I visit the Sailrite website to learn about appropriate fabrics and thread. I was amazed by the selection available and settled on Sunbrella® Marine Grade Fabric, based on Sailrite’s recommendations for awning construction. 

I ordered just enough fabric to complete the first awning, as it would be a test as to whether or not I could really do this. Next, I needed the right tools. My best friends turned out to be the Sailrite® Edge Hotknife and Seamstick Basting Tape. I could never have managed the Sunbrella without these two lifesavers. Construction of the first awning was slow going. I borrowed two different sewing machines from Jesse just to get started. 

It took me two entire days to create the test awning. I made lots of mistakes but also learned a lot about working with large pieces of Sunbrella. Sailrite’s videos on sewing flat-felled seams were incredibly helpful and helped me gain confidence in my abilities. I knew that if I was going to proceed with constructing six more awnings, I’d need a lot more fabric. But most importantly, I knew I’d need a heavy duty walking foot sewing machine that could handle the project, and that I could easily set up and move around in my sewing area.

image1
The Sailrite Edge Hotknife was an invaluable tool for cutting Sunbrella.

Q: How did you decide on selecting a Sailrite Ultrafeed® Sewing Machine? What are your thoughts on the machine so far?

I spent a lot of time on Sailrite’s website researching machines and watching videos on working with Sunbrella Marine Grade Fabric. I decided on Sailrite’s Ultrafeed LS machine. I was not disappointed. The day my machine arrived, I spent time watching Sailrite’s assembly video and videos on winding bobbins, threading the machine, and sewing basic seams. Without these videos, I would not have felt comfortable setting up my machine and getting started sewing. They were incredibly helpful. 

After completing six more awnings — the last one in a record time of three hours — I can say with confidence that the Ultrafeed LS is an elegant workhorse that seems to have been made for my project. The machine easily handled multiple layers of Sunbrella fabric. I never experienced stuck fabric, the machine losing its timing, or any of the other issues that I had with the borrowed sewing machines I’d used in the past.

image3
Working with layers of thick Sunbrella required the Ultrafeed LS.

Q: Do you plan to sew other projects using the Ultrafeed? 

Now that I’ve finished the awnings, I’m excited to try other projects that utilize Sunbrella, such as patio cushions or maybe a heavy duty tent for my husband’s hunting trips. He’s already asked me to do some repairs on one of his canvas backpacks. Now that I have the experience, the tools and the Ultrafeed LS machine, I’m thinking the sky’s the limit! 

Q: What was the most rewarding, and most challenging, part of constructing this project?

One of the most rewarding parts of the project was simply the realization that I could recreate a large custom item from scratch if I invested in the right tools and materials. The other big rewards are the energy savings on the second floor of my house, which, in the absence of awnings, can be very hot in the summer, not to mention saving over $2,500 by making the awnings myself. That’s even after my investment in the LS, the fabric, and the tools and supplies needed. 

The greatest challenge was not having an existing pattern or sewing instructions for these custom awnings. Sailrite made the sewing easy. It was the cognitive piece — thinking through the steps involved — that was the most challenging.


Q: What was the reaction of your family and friends to the new project? 

My family was really impressed with the new awnings. They watched me sew them over a couple of weeks, and were amazed at how professional they look. At first, some of my friends didn’t believe that I actually made them myself. “No way!” was the most common response I received after revealing the beautiful new awnings on the back of my house. Thank you, Sailrite!


Who We Are

Sailrite is your one-stop DIY shop! We are a passionate crew of do-it-yourselfers who strive to equip you with the supplies and how-to knowledge you need to tackle your next project. Do you want to learn upholstery, leatherwork, canvaswork, hobby sewing, bag making or more? We have the fabric, tools, hardware, sewing machines and notions you need to master any DIY. And even if you’ve never sewn before, our tutorials and how-to videos are designed for beginners and experienced crafters alike.

Start your DIY journey today: www.sailrite.com