The Drive to Learn: One DIYer’s Roadmap to Sewing Mastery

Restoring well-worn or damaged items has become very popular in the last few years. Just look at the dozens of TV shows about home renovations, antiquing and swap meets as proof of this trend. Many people renovate to give historical items their shine back or to reduce waste — giving items with a story a new lease on life instead of letting them go to a landfill.

Sailrite® customer Jerry Bartlett is one such restorer. He’s interested in reducing waste and refreshing historical pieces too — but he’s not looking for retro clothing, antique furniture or old-school knickknacks.

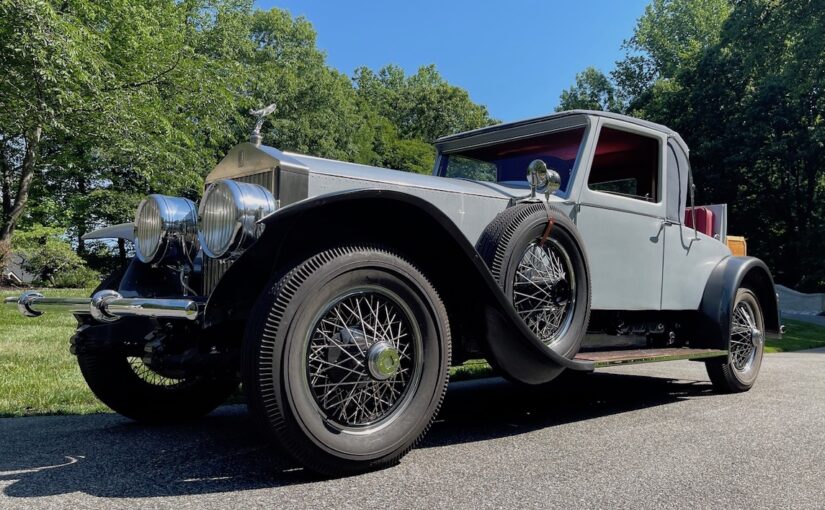
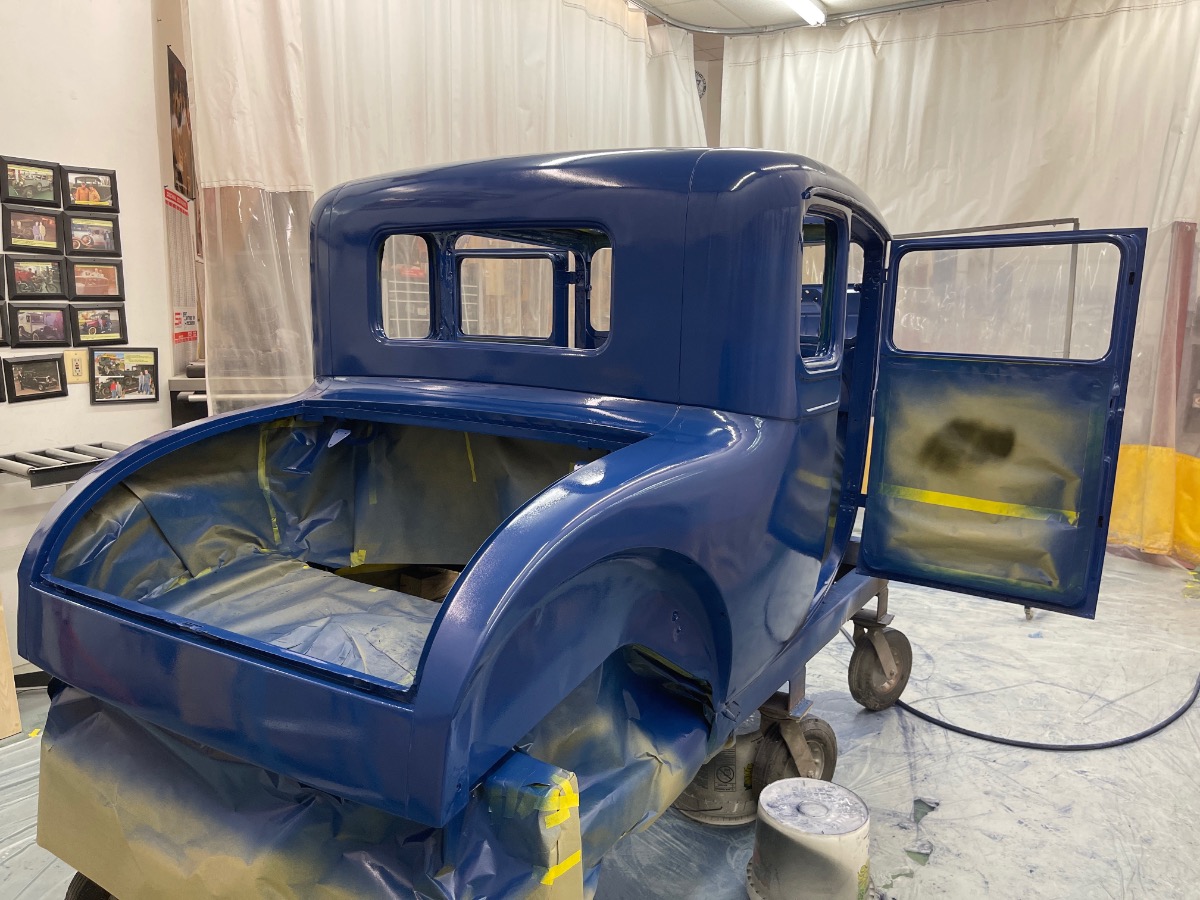
Instead, Jerry often brings home vintage automobiles. This self-sufficient DIYer loves nothing more than getting his hands dirty restoring classic cars, and he frequently turns to Sailrite for project materials.

How does a sewing company like Sailrite come into the picture of car restorations? Upholstery, of course! Restoring a car isn’t just about what’s under the hood or how it looks on the outside. From the seats and door panels to the headliner and more, there are plenty of places for fabric and foam inside a car.

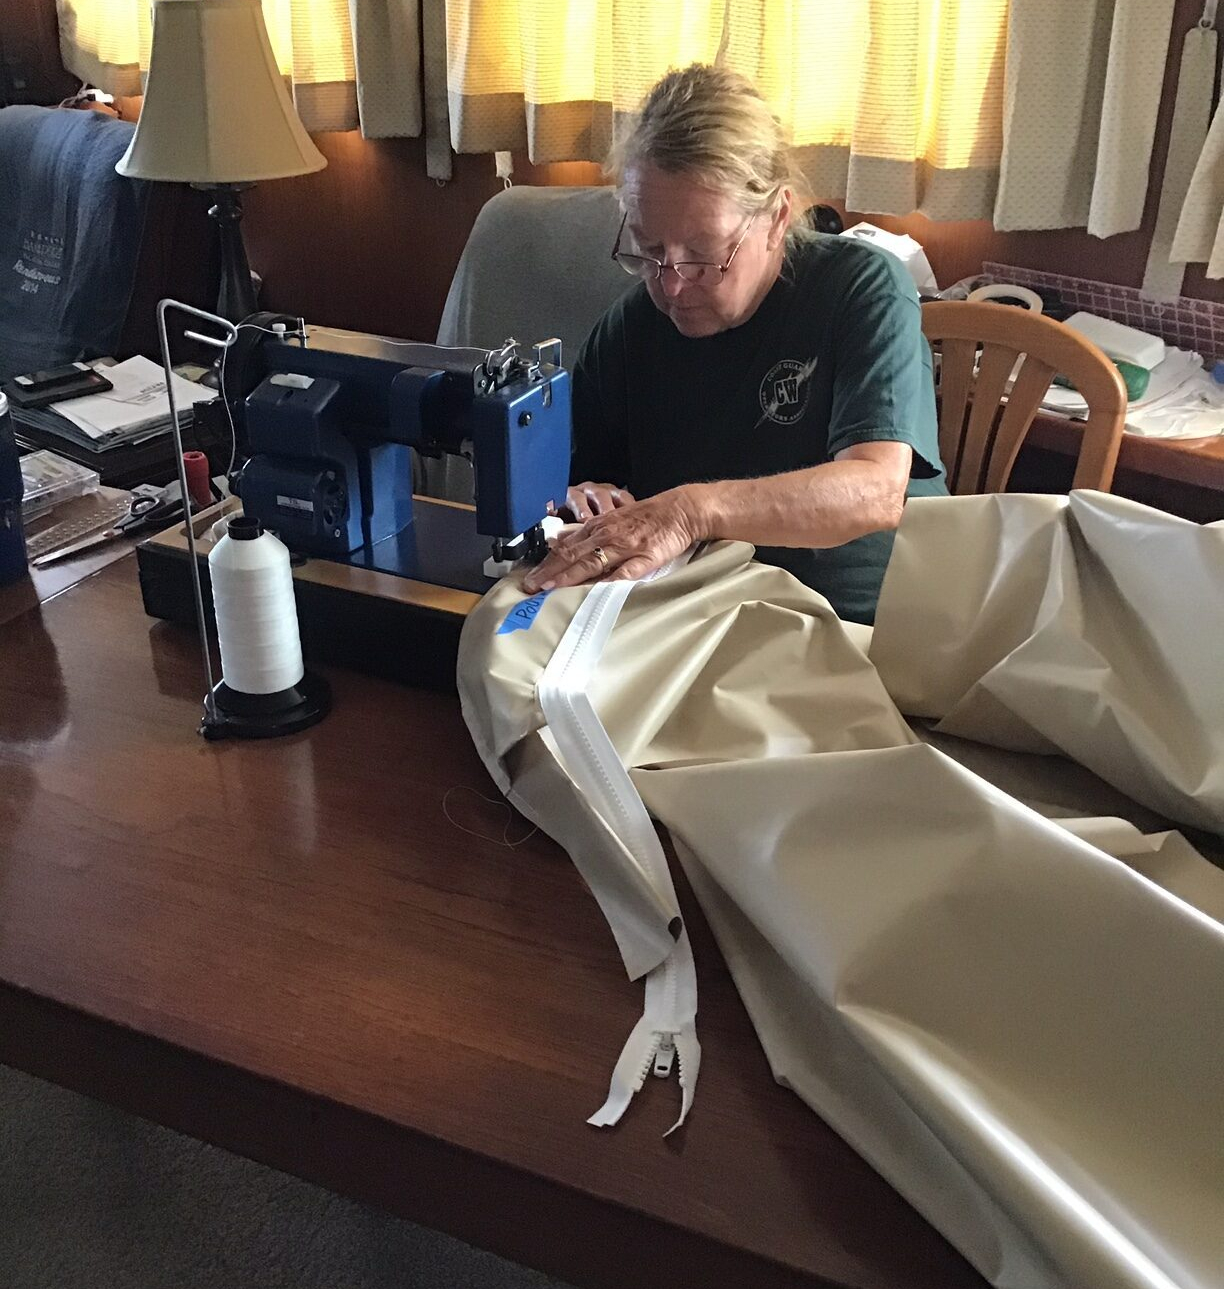
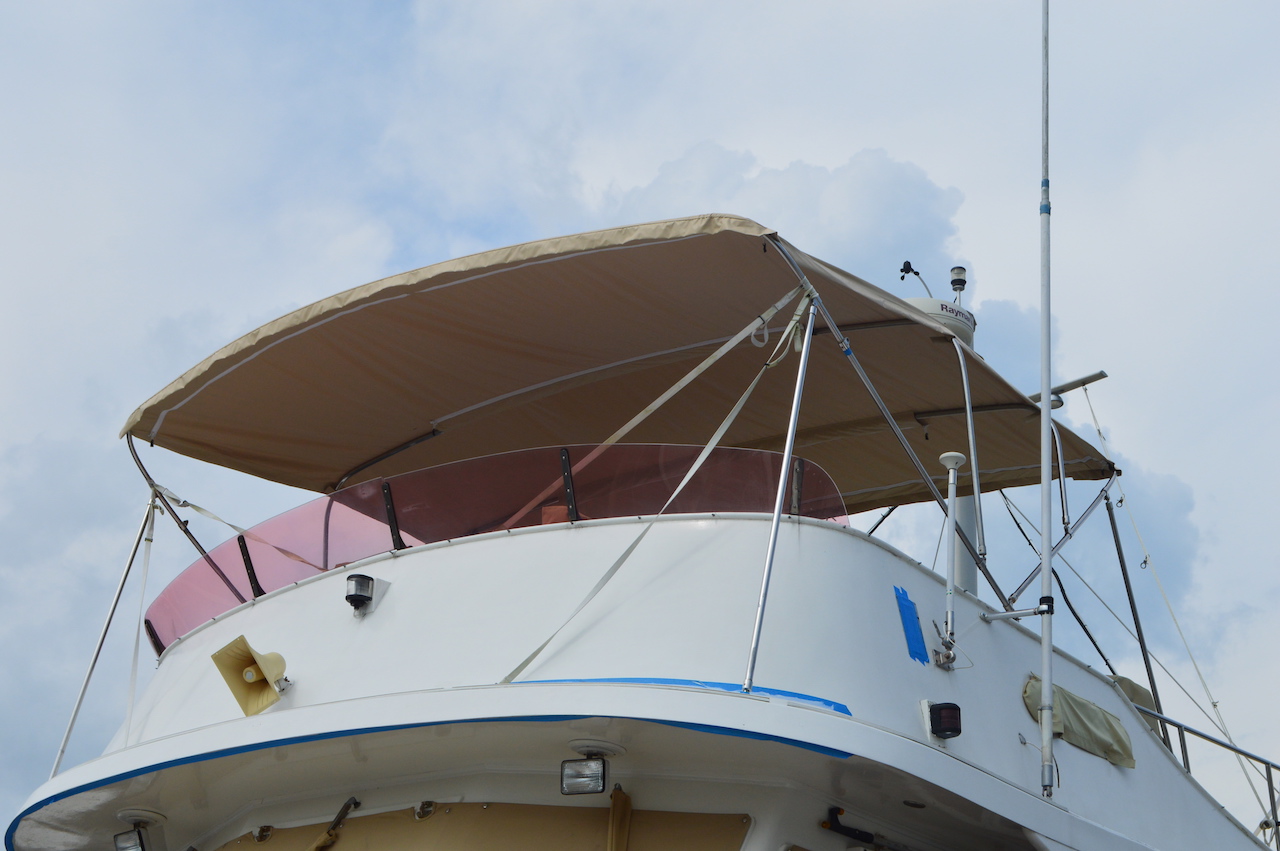
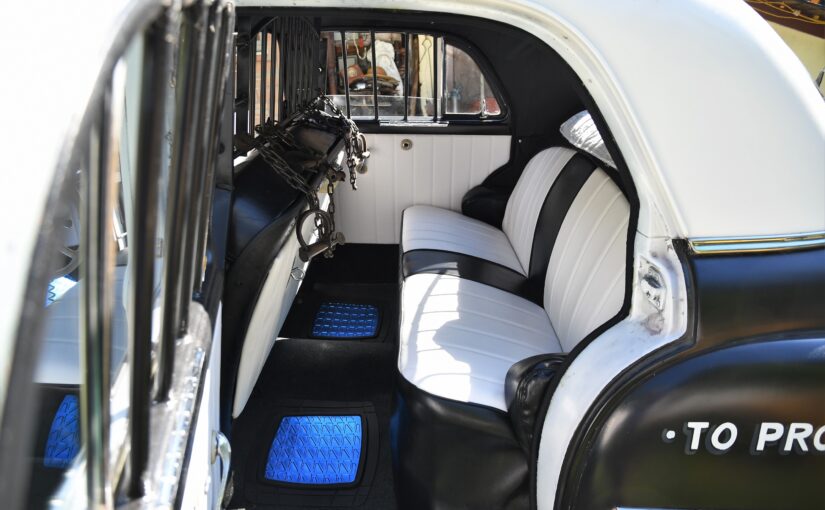
Jerry proved this by redoing the interior of a 1950 Plymouth Special Deluxe. He did all the upholstery work with a Sailrite® Fabricator® and other tools and materials from Sailrite.

A preview of the finished upholstery.

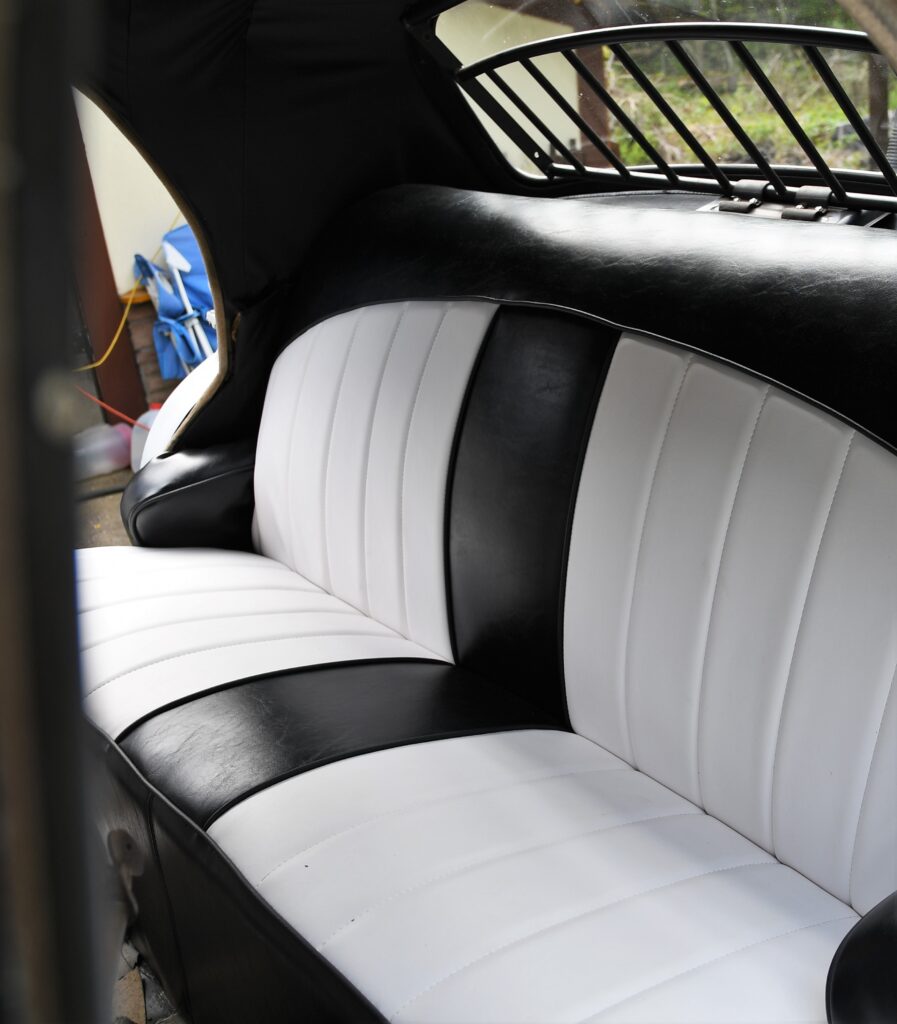
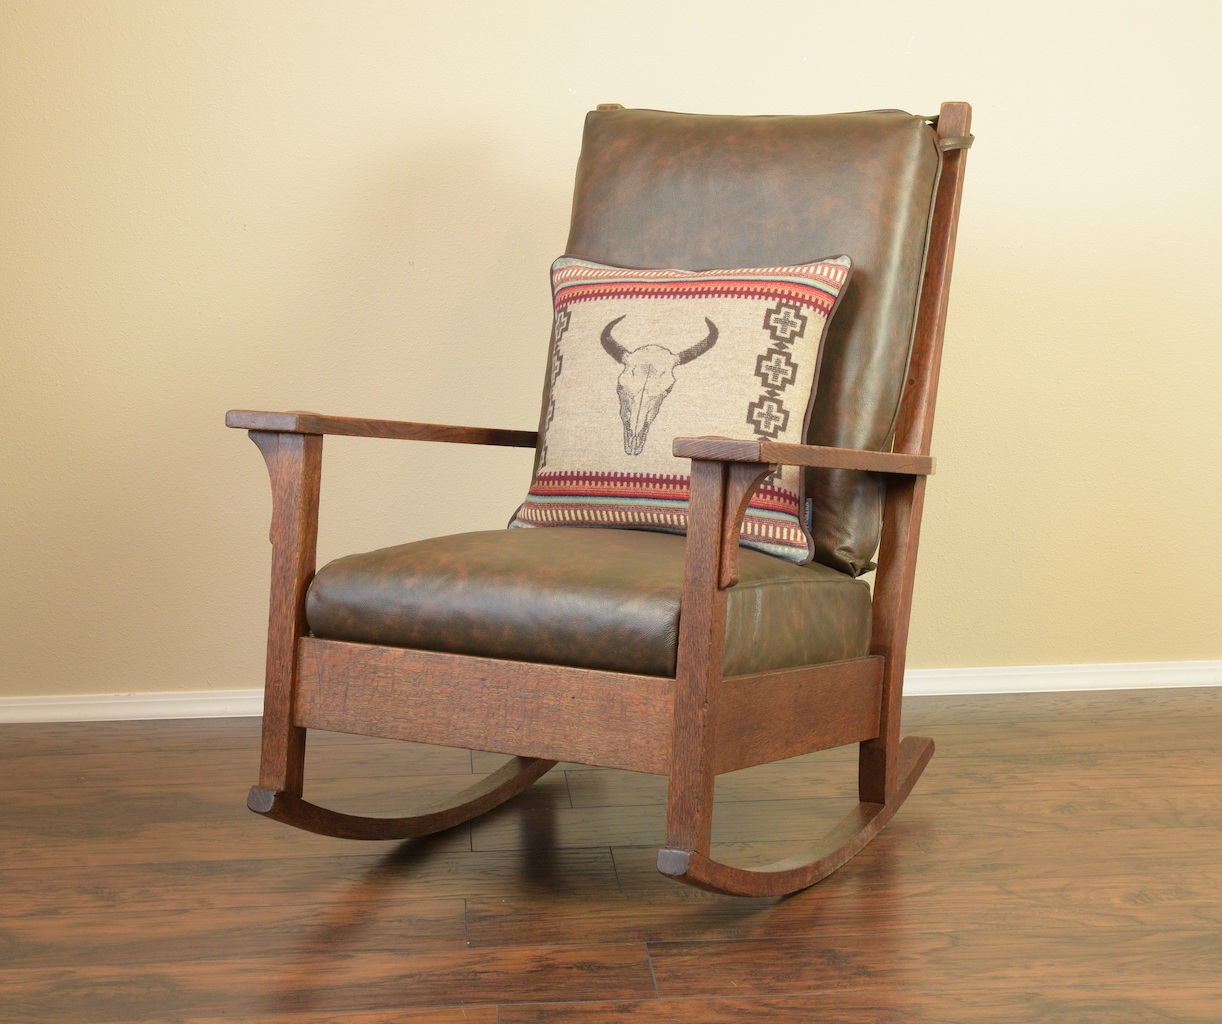
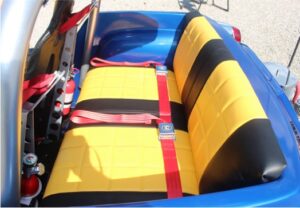
This seat looks professionally done, right? From the outstanding results, you’d never guess that this car’s upholstery was Jerry’s first sewing project ever. In fact, Jerry taught himself to sew (with help from Sailrite) specifically to reupholster this unique Special Deluxe.

The Need & the Potential

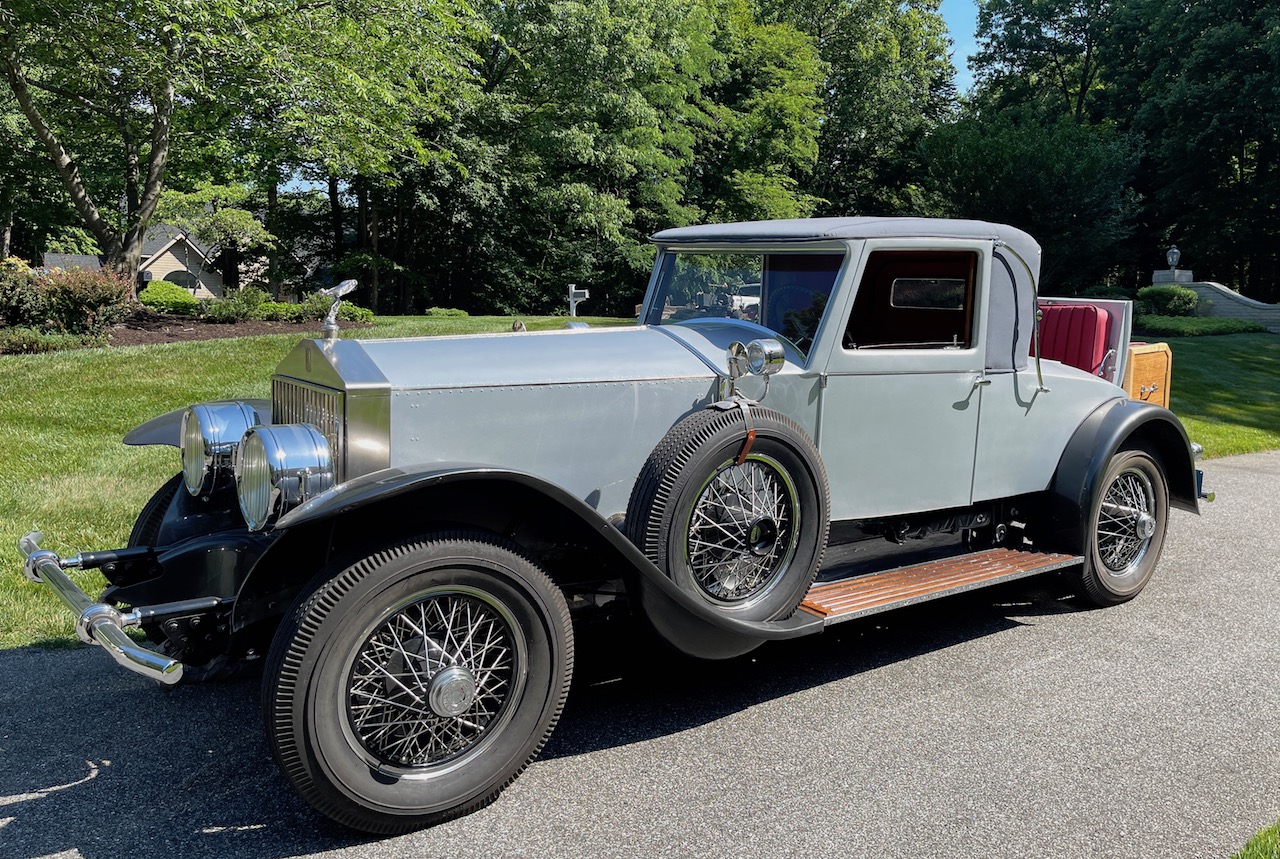
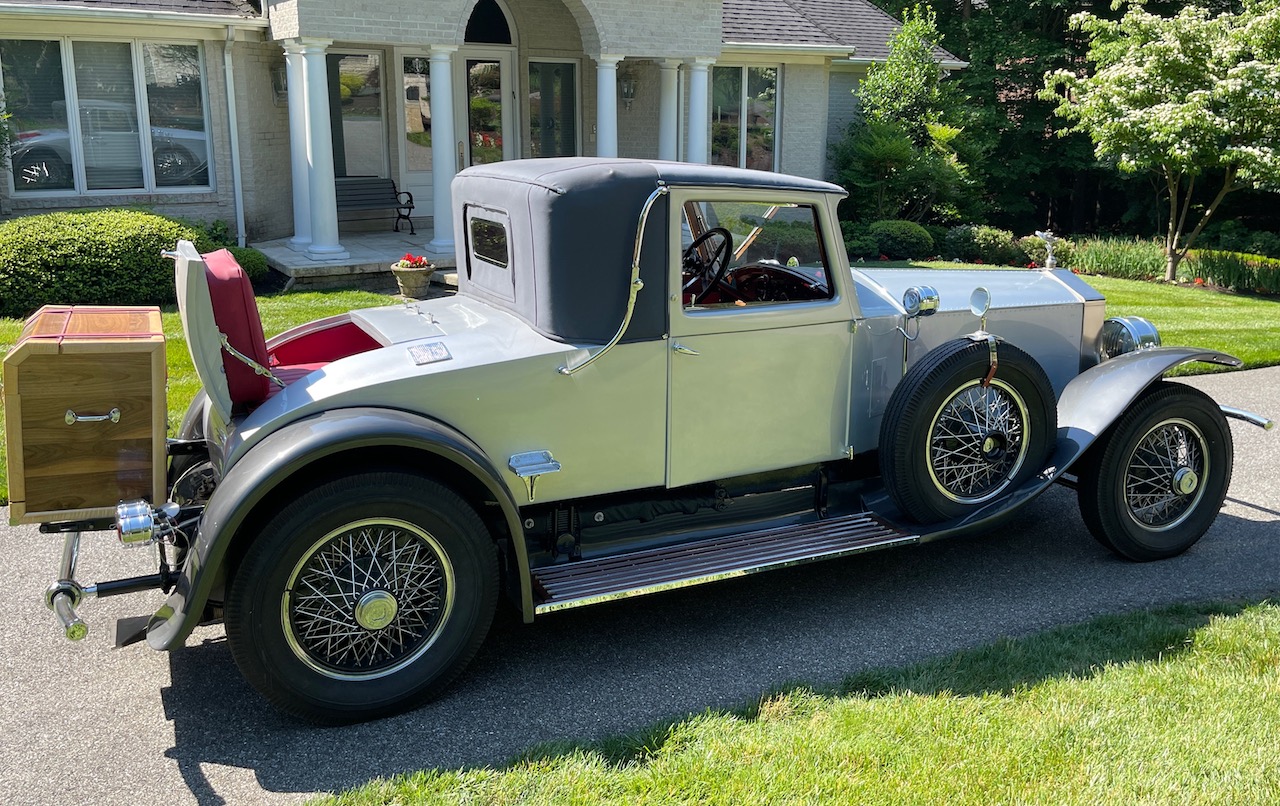
This particular car is reminiscent of a County Highway Patrol cruiser used in New York in the early 1950s. A fan of the explosive innovation in the automobile industry in the 1950s and ’60s, Jerry was immediately drawn by the overall aesthetic and history behind the vintage cruiser when he saw it at a car show. As luck would have it, the car was for sale — and Jerry bought it right away.

“It spoke to me,” he said of the cruiser. “This thing had lots of potential, and with some work and creativity, it could be a historical piece.”

Seeing the potential in the car was a major first step to transforming it into the showpiece it is today. The car needed some mechanical work and a few touch-ups to the already restored exterior. But its interior was, in Jerry’s words, “in dire need of help.”

“The seats, door panels and sun visors were beyond hope. There was no headliner or bows, no carpet, and all the window channel liners were mostly gone.”

This slideshow requires JavaScript.

He was already well acquainted with the mechanical portions of the refurbishment — an interest that began when he was a child. “I was the kid who always had the desire within my DNA to take things apart to find out what made them tick,” Jerry remembered.

During his high school years, Jerry took classes in auto body work at a local technical career center. After graduating high school, he spent four years as a mechanic in the U.S. Army. Then he spent 10 years working in auto body and fender repair before becoming a fleet mechanic.

Even while working on cars for a living, Jerry always had a “hobby” car that he restored on the side. It all started in 1990; that’s when he said he found “the car of [his] dreams: a 1959 Cadillac Coupe DeVille.”

Despite all his work experience, his first hobby project wasn’t easy. “[The DeVille] was a disaster. The only two good panels on it were the roof and trunk lid. It ran rather poorly, needed a windshield, interior and tons of TLC, but I was up to the challenge,” he said.

And since he didn’t go easy on himself for his first renovation project, you can bet that the many projects that followed weren’t cakewalks either. The long list of cars that Jerry has restored includes such notable models as a 1979 Pontiac Firebird, a 1961 Ford F-100 and a 1969 Pontiac Trans Am.

Learning to Sew With Sailrite

So, you can see that Jerry was more than equipped to take care of the patrol cruiser’s mechanical needs. But while he was eager to make the car look like new on the inside, he had some important research to do first.

“Reupholstering an auto interior [was] the last horizon in the automotive world for me,” Jerry said. Even sewing in general was completely new territory. While scouring the internet to learn about automotive upholstery, he found Sailrite’s classic car reupholstery project video series and decided to watch it.

“I was very impressed with Sailrite’s website from top to bottom. Everything was so well organized and easily accessible, I found myself actually wanting to return every time I had a question or idea,” he said.

Although first overwhelmed by how much he had to learn about sewing, Jerry soon found that Sailrite’s huge library of how-to videos told him everything he needed to know. “The learning process initially is a lot to digest since it’s not just operating a sewing machine,” he said.

“Once you’ve watched one or more of Sailrite’s well-produced, clear and concise videos, that [overwhelmed] feeling just kind of melts away, and it becomes quite easy to imagine yourself as the person in the video. This is what gave me confidence … to enter the exciting world of sewing!”

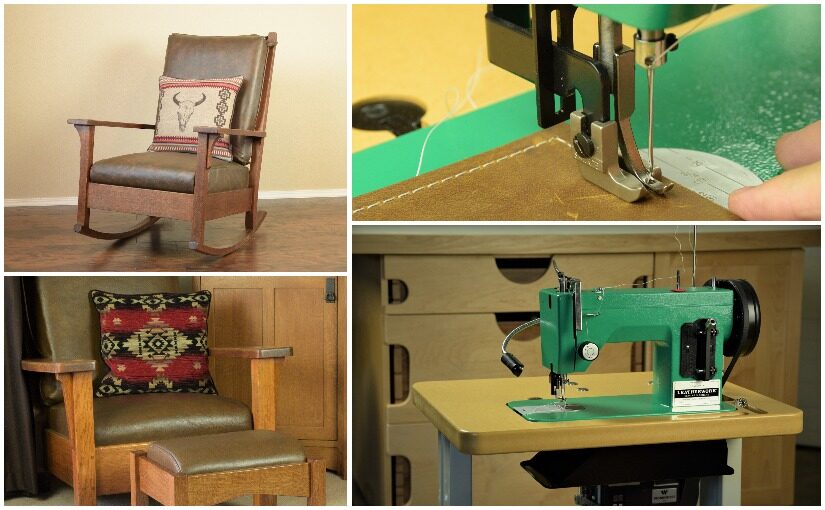
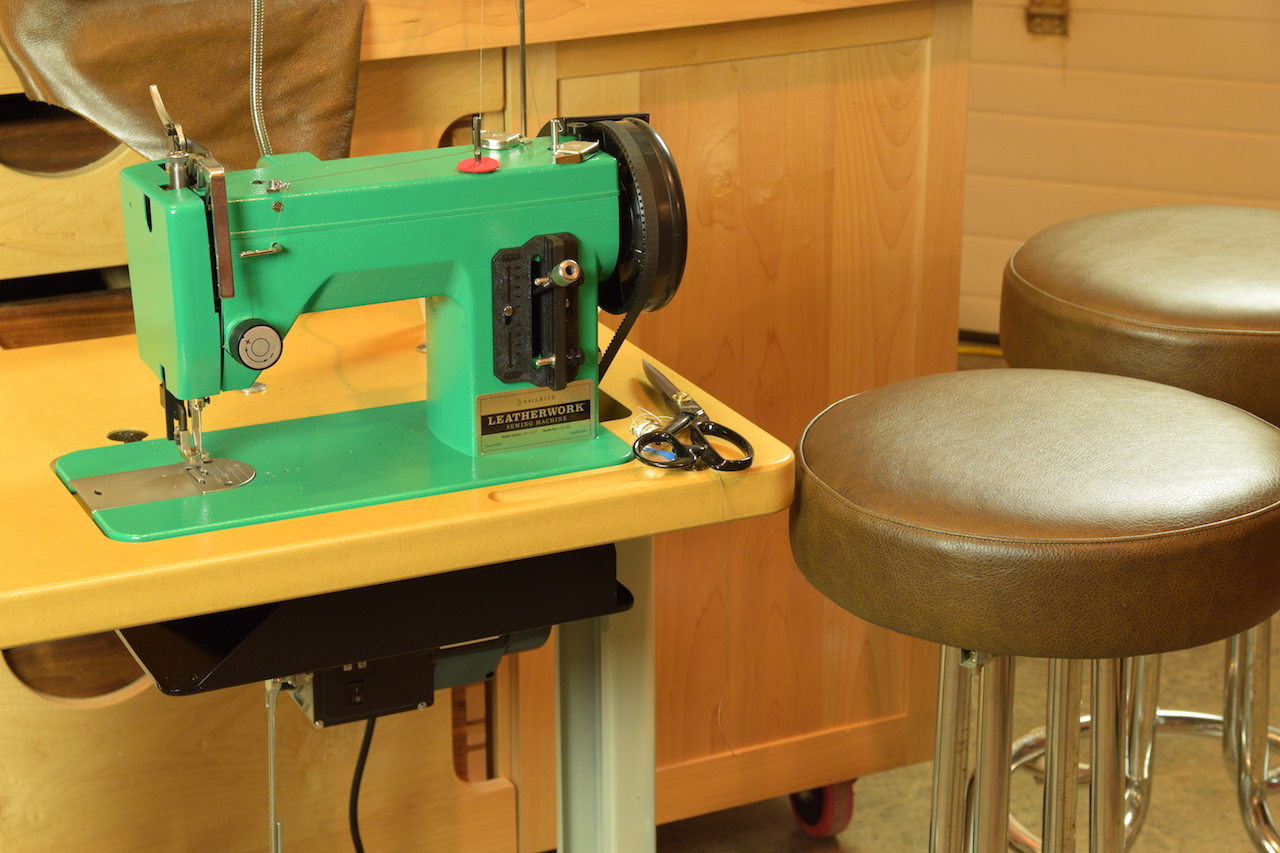
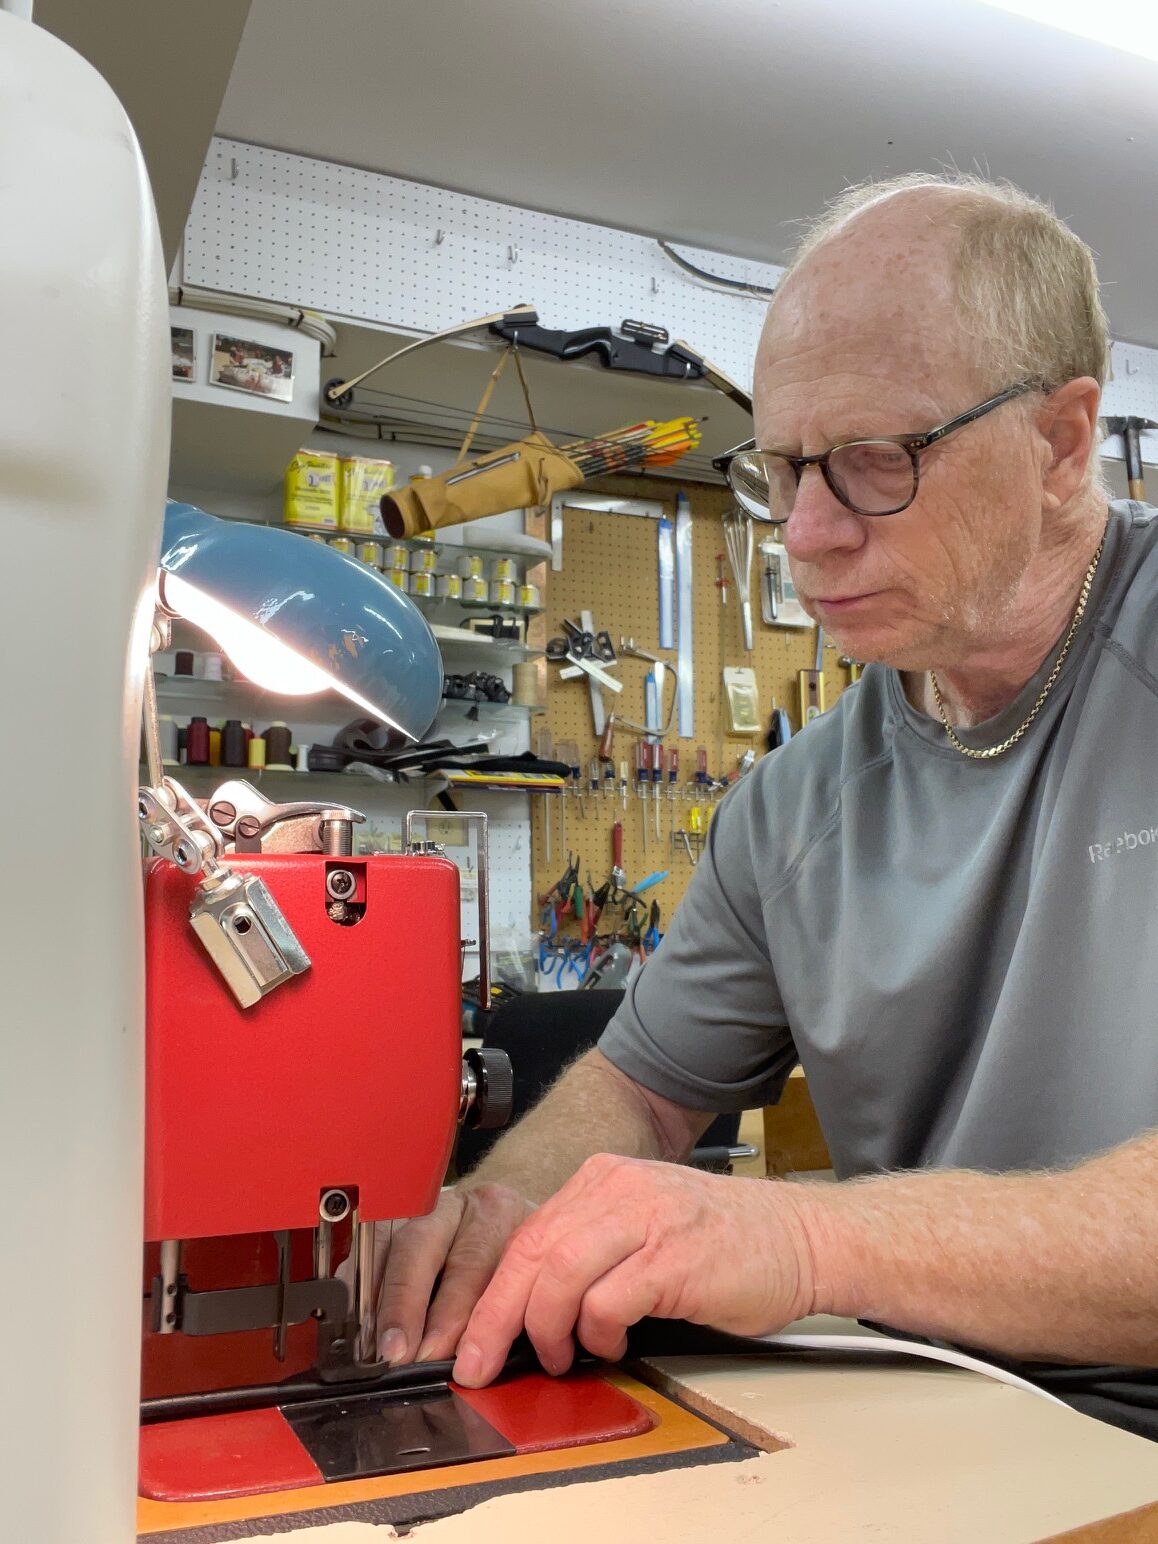
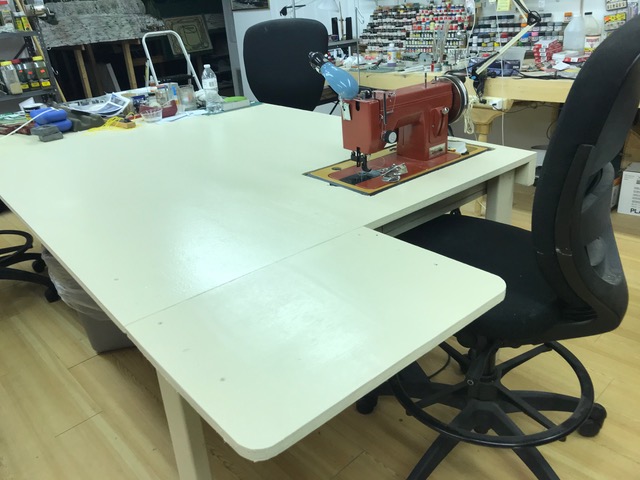
After nearly a year of thorough research and watching how-to videos, Jerry bought a Fabricator Sewing Machine for his project. It’s saying something that Sailrite’s largest machine won his vote. Space is at a premium in Jerry’s work area, and he couldn’t afford to give even an inch to a machine that wouldn’t make the cut.

He told us more about his workspace: “I’m working off the lid of a 36-inch by 28-inch chest-style refrigerator [and] a 60-inch by 30-inch section of kitchen floor, or plywood and sawhorses if the weather is good so a car in storage can go outside. The Fabricator occupies a small 6-foot by 8-foot area.”

Jerry sewing with his Fabricator machine.
The Fabricator helps Jerry make the most of his limited workspace.

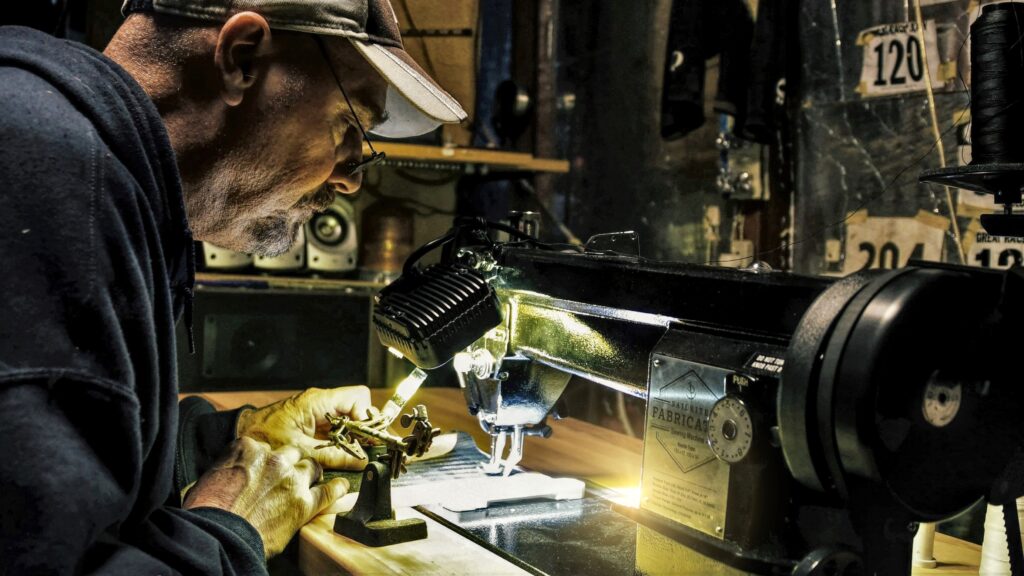
The industrial machine had to be everything Jerry needed to justify taking up so much of his already tight workspace. “Through my research, there were common things that a sewing machine should have and be able to do regarding automotive upholstery. [The] Fabricator repeatedly checked off all those boxes,” he said.

But that wasn’t the only hurdle the Fabricator had to clear to win its spot in Jerry’s workshop. This DIY enthusiast’s home isn’t connected to the local power grid, so he generates his own electricity with solar panels and wind turbines. “Power usage for anything added to the system is always a concern,” he shared. Luckily, the Fabricator fell well within the usage limits of his self-reliant electrical system.

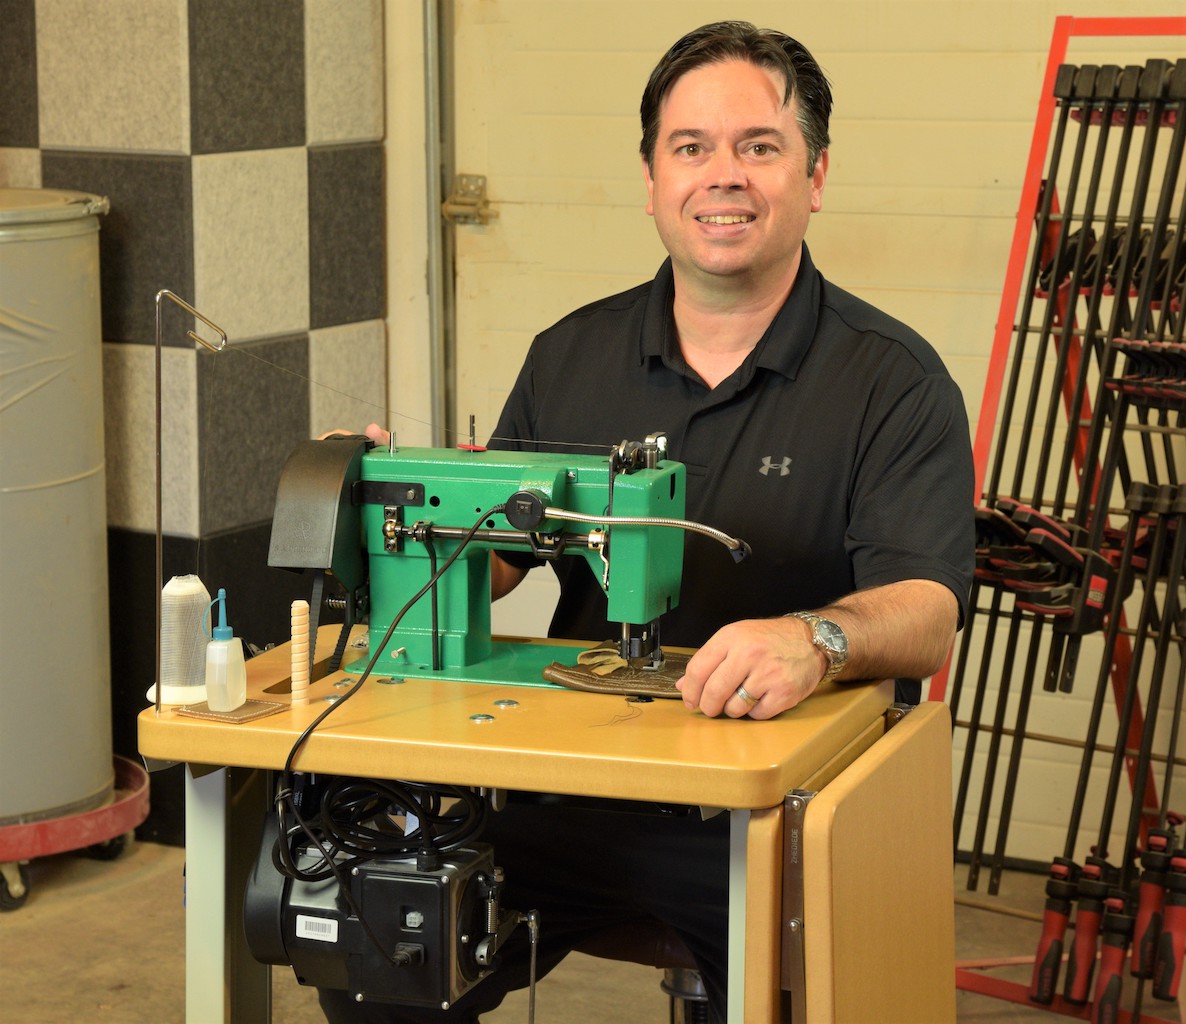
After getting all the tools and materials he needed for what he calls his “very first sewing adventure,” Jerry’s next step was to get some hands-on experience with the Fabricator. “I was a bit nervous having only seen [the Fabricator] on the web and reading user reviews about it,” he told us. “To my delight, setup wasn’t difficult, and it really helped for me to do this and learn about everything connected to the unit.”

Jerry’s favorite feature of the Fabricator is the programmable Workhorse® Servo Motor. While getting started, he found it helpful to lower the motor’s speed to sew one stitch at a time. “This feature is truly what allowed me the ability to learn as I went. … Regardless of speed, every stitch turned out as perfectly as the previous one. It’s a brute of a machine that can be as gentle as a kitten, so yes, you really can do this at a snail’s pace just like I did!”

Overcoming Project Roadblocks

Buoyed by his success setting up and testing the powerful machine, Jerry jumped right into the cruiser upholstery project. First, he had to disassemble and pattern the seats and door panels. That’s when things began to fall apart — literally.

“What was left of the original interior was mostly useless, as it fell apart on disassembly,” Jerry told us. The few useful-looking pieces he was able to salvage had unfortunately hosted rodents some time before he bought the car; he was forced to throw those pieces out for sanitary reasons and start completely from scratch.

This slideshow requires JavaScript.

But like the rest of his sewing adventure, the unusable cushion material presented a learning opportunity. From the experience, Jerry learned to make patterns exactly how he wanted them, measure multiple times and cut once, and look for guidance from more experienced DIYers instead of trying to “reinvent the wheel.”

Although he did triumph in the end, Jerry told us that patterning from the ground up was the most challenging part of restoring the car’s interior — especially since he had a very specific vision for how it should look.

“The goal was to make the new patterns work with the curves of the roof and cagework, so the top of both front and rear seats would need a matching arch,” he said. “I also wanted great big pleats — something not available in a 1950 Plymouth Special Deluxe. … Overcoming these challenges required several reviews of Sailrite’s video series, and attention to detail with measuring and markings.”

This slideshow requires JavaScript.

After hours of painstaking work creating patterns, cutting material pieces and sewing stitch by stitch on his Fabricator, Jerry finished the upholstery renovation with professional-looking results!

Driving Off Into the Sunset

Aside from the “feeling of self-satisfaction in taking on something [he’s] never done before,” Jerry’s favorite thing about the finished upholstery is getting to show it off. “The icing on the cake is when people, especially those who’ve been sewing for decades, say, ‘This is really nice. Where did you have this done?’” he said.

This slideshow requires JavaScript.

A perfect example is a recent project Jerry did for his mother, whom he said has high standards and calls things like she sees them. After he sewed cushions for her four-chair outdoor table set, she “scrutinized [them] even more thoroughly than a jeweler would with diamonds. The final verdict was, ‘These are perfect.’”

Jerry’s mom isn’t the only person impressed by his newfound sewing skills. Earlier this year, he entered the patrol cruiser in the 2022 Adirondack Nationals car show, held in Lake George, New York. The show’s attendees loved the cruiser!

“I cannot even tell you how many compliments there were about the interior,” Jerry shared. “It’s now my belief that with all the ‘eye candy’ the car has to offer, the upholstery is the real showcase that ties everything together!”

This slideshow requires JavaScript.

The show’s judges thought so too. The police cruiser won a big award at the show — appropriately, the Sheriff’s Pick award. Congratulations, Jerry!

More Projects Down the Road

We asked Jerry what he plans to do now that the cruiser restoration is done. “Are these ever really done?” he laughed. “So far this has been an off-and-on project for the last two and a half years. Out of all the extensive work completed, the interior revamp has been the biggest chunk and the most rewarding by a long shot.”

For now, Jerry is taking a break from the cruiser to do a couple of other upholstery projects. He’s partially completed one: “I have a 1953 Pontiac Chieftain that’s essentially the equivalent of a ‘shop truck’ that goes everywhere. The seats were terrible in that one too but are now reupholstered — again using everything obtained from Sailrite.”

This slideshow requires JavaScript.

Jerry plans to restore the Chieftain’s side panels, door pads and headliner, but he’s put those on the backburner for now to work on something even more exciting.

“The next project is an interior (mainly the four bucket seats) of a 1961 Chrysler 300G. These cars may have had the most incredible factory interior ever … I will need to really think this one through and make it as good as the original or better. These are high-profile cars, and the sharpest critics tend to seek them out. Challenge accepted — and armed with the Fabricator, it’s game on!”

If there’s anything we’ve learned about Jerry, it’s that he’s no stranger to a challenge. We’re sure that the restored Chrysler will draw nothing but praise from critics and car show judges alike.

Before we wrapped up our interview, we asked Jerry what he would say to someone else who has a big project in mind but needs to learn to sew first. He had a checklist of advice ready:

“Educate yourself on the topic. That may involve getting together with someone close to you that has experience in this field. … Think of things you would like to make for yourself or others. This will give a project some context that’s relevant to you. Once you’ve read, watched and learned as much as you want, imagine yourself actually creating and sewing that item. And lastly, be persistent! Like anything one wishes to become good at … a skill will come with time and experience.”

Jerry, you’ve certainly proved that patience and dedication can help a person accomplish just about any goal they set. Thank you for sharing your inspiring story to encourage your fellow DIYers. We can’t wait to see what you make next!


Who We Are

Sailrite is your one-stop DIY shop! We are a passionate crew of do-it-yourselfers who strive to equip you with the supplies and how-to knowledge you need to tackle your next project. Do you want to learn upholstery, leatherwork, canvaswork, hobby sewing, bag making or more? We have the fabric, tools, hardware, sewing machines and notions you need to master any DIY. And even if you’ve never sewn before, our tutorials and how-to videos are designed for beginners and experienced crafters alike.

Start your DIY journey today: www.sailrite.com

A Thoughtful Hobby: Leatherworking With Willie Sandry

When you find a way to combine your two favorite hobbies into one handcrafted piece of art, that’s the mark of a true craftsman. And that’s exactly what Willie Sandry did. Willie’s journey into leatherworking actually started with woodworking. Willie has been building wood furniture pieces for years. When his wife tasked him with building a set of eight dining room chairs complete with upholstery, he needed to tackle a new set of skills. Willie chose goat hide for his chair cushion covers, and it beautifully complemented the handcrafted white oak table that he had previously built.

dining table and chairs
Here’s the white oak dining table and chairs that Willie upholstered.

After the success of that initial upholstery project, Willie discovered a love for upholstery work — especially working with leather hides. He was soon ready to step up his upholstery skills and learn all he could about this new and exciting hobby. “I didn’t want to be limited to no-sew upholstery projects, so I took a leather upholstery class and started soaking up all the knowledge I could find.”

He’s been fortunate enough to turn his passions into a source of income. He is a freelance writer for woodworking magazines and a blogger for leather and woodworking websites. On his YouTube channel, The Thoughtful Woodworker/Upholsterer, he shares his knowledge of woodworking and upholstery with viewers. “I love sharing projects and posts with fellow crafters. I love teaching the craft, and I’m always learning.”

It’s through his upholstery projects that Willie discovered Sailrite and the Leatherwork Sewing Machine. We sat down to chat with Willie and find out more about his leather crafting journey. This talented DIYer had a lot to say about how his two passions — woodworking and leatherworking — have come together to produce some truly beautiful, handcrafted masterpieces.

magazine cover
This Ebon Oak Rocker that Willie built and upholstered graced the August 2021 cover of Popular Woodworking magazine.

Q. What sort of leather projects do you typically work on?

A. My main goal was to master leather seat cushions and backrest cushions so I could upholster Stickley Morris chairs and oversized Charles Limbert rockers. Whether they were genuine antiques, or reproductions from my woodshop, I was going to have a lot of chairs to upholster. Some have piping and some use single-felled topstitched seams, but all of the chairs highlight the natural materials front and center. They’re usually made with quarter-sawn white oak lumber and natural leather upholstery.

leather settle
Willie built a new seat frame for this L & JG Stickley antique settle and reupholstered it in a beautiful top grain cowhide.

Q. What’s your favorite type of leather to work with? And what’s your favorite kind of project to make?

A. Upholstery grade leather is almost always chrome tanned for a nice soft, workable feel. I like leathers in earth tones with very little sheen. If it looks like it belongs in a furniture catalog from 1906, then I’ll probably like it. Browns, greens and subtle red tones are my favorite. I try to source full hides that are 2-1/2 to 3 ounces thick. A 50 square foot hide will upholster a Morris chair with seat cushion, back cushion and a small ottoman.

Q. What do you love most about working with leather?

A. I pulled apart an antique chair cushion a couple years ago that had the original leather upholstery intact. That chair was over 110 years old. Sure, the leather showed its age, but it was still there. Still quietly doing its job, and somehow managing to look better with age. I love the smell of leather. I love getting “the big scissors” out and cutting leather on my large work surfaces in the shop. Rotary cutting strips, gluing layers for straps, sewing layers together stitch by stitch. Thinking and planning for each next step, carefully working with your head down until the final product is revealed. In this “throw away” world, it makes me smile inside to know that something I’ve had a hand in making might be around for someone to admire in 110 years or so.

rocking chair upholstery
Willie reupholstered this Stickley mission rocking chair for his YouTube channel.

Q. What made you interested in the Leatherwork Sewing Machine?

A. I like walking foot sewing machines, plain and simple. In fact, my second sewing machine was a walking foot, and I’ve been using one ever since. If you think about a standard sewing machine in terms of material feeding, they’re pretty basic. The feed dogs below are the only mechanism feeding the material into the machine. This unilateral feeding can lead to uneven top and bottom layers as you complete the seam. A walking foot adds two feet that move in unison to advance the material in a uniform way. When you’re working with leather, a walking foot is a necessity.

leatherwork with stools
On his YouTube channel, Willie teaches viewers how to reupholster these shop stools using his Leatherwork Sewing Machine.

Q. Having sewn on the Leatherwork, what are your impressions of the machine? We position the Leatherwork as an entry-level leather hobbyist machine. Would you agree with that assessment?

A. The difference between a basic portable and the Leatherwork is apparent right away. The Leatherwork comes loaded with a full-size variable speed servo motor, and Sailrite even found a way to shoehorn a speed reducer onto that compact table. The table is a little small, so I added a flip-up extension table to one side. That add-on helps me enjoy both the compact size and expandable work surface.

The Leatherwork is a unique package. The machine head may be entry level, but the added features of the table package probably put it in a mid-level category. I encourage crafters to “buy once and buy right.” Most people go shopping for a used sewing machine, and if it has the word “industrial” in the title, they assume it must be capable of sewing leather. Let me tell you, there are many full-sized industrial sewing machines that aren’t suited for leather projects. In fact, most industrial sewing machines don’t even have a walking foot. You have to research the models and determine what thickness of leather you intend to sew. Every sewing machine has limitations. Understanding and working within those limitations is the key to success.

willie with leatherwork
Here’s Willie with his Leatherwork Sewing Machine. You can see the extension table he built to give himself more room when sewing larger projects.

Q. Have there been leather “dos and don’ts” that you’ve experienced throughout your leather crafting journey? If so, could you share some of your wisdom with our readers?

A. Don’t run out of bobbin thread when sewing leather. Unlike that pillow cover you finished last week, leather is unforgiving. A machine with an empty bobbin will perforate your project like a sieve – and holes in leather are permanent. Keep your eyes open, and check your seam often as you work.

Q. What do you love about sewing and the DIY lifestyle?

A. Looking around my home, I get to say “I made that” a lot. But there is a deeper sense of satisfaction when you dry your own lumber, build your own furniture, and cap it off with your own custom leather upholstery. We are such specialists these days, but if you branch out just a little bit, you’ll be amazed what you can learn.

Q. Can you talk a bit about your YouTube channel — The Thoughtful Woodworker — and how that pertains to leather as well? What do you enjoy most about sharing your knowledge of woodworking and DIY with others?

A. The Thoughtful Woodworker YouTube channel is partly woodworking, but it also has a pseudonym – The Thoughtful Upholsterer. Small channels have to be careful not to spread themselves too thin, so I combined my passions into one platform. I started the upholstery content because there are so few sources to learn upholstery. Now, if you want to learn how to sew a pillow, there are plenty of videos out there. But if you want to learn leather upholstery, it’s a different story. You either know everything because you’ve been an upholstery pro for 30 years, or you know nothing. There didn’t seem to be any middle ground. That’s the goal of my channel: To give relative newcomers enough confidence to tackle one specific type of project. Maybe they won’t master all styles in the first year, but if they can do a really good job building or upholstering a classic rocker, then I have succeeded.

Here’s Willie’s barstool tutorial if you’d like to watch the Leatherwork Sewing Machine in action.


Who We Are

Sailrite is your one-stop DIY shop! We are a passionate crew of do-it-yourselfers who strive to equip you with the supplies and how-to knowledge you need to tackle your next project. Do you want to learn upholstery, leatherwork, canvaswork, hobby sewing, bag making or more? We have the fabric, tools, hardware, sewing machines and notions you need to master any DIY. And even if you’ve never sewn before, our tutorials and how-to videos are designed for beginners and experienced crafters alike.

Start your DIY journey today: www.sailrite.com

Jim Norman: Building a Houseboat of His Dreams

We’ve all heard the expression, “When life gives you lemons, make lemonade.” Well, that sentiment couldn’t be truer for New Jersey native and retired newspaperman Jim Norman. In 2009, Jim was unfortunately part of a round of layoffs at The New York Times, where he worked as an editor. He and his wife made the tough decision to sell their vacation home, and future retirement home, in Maine.

Jim vowed that he would somehow get a toehold in Maine again. Years later, his prediction would come true, just not in the way he originally thought. While researching the “tiny home” phenomenon in 2014, he stumbled upon the story of a man who, instead of building his dream tiny home, built a houseboat instead. Jim knew this was the path for him and a clever and inventive way to get back to Maine — or wherever he wanted to go. He knew wherever he and his wife vacationed it would be on the water. So why not live on the water? “The more I thought about it, the more it made sense. Wherever I decided to vacation with it, we would be on waterfront property. And no real estate taxes! What could be better than that?”

jim with boat
Jim and his wife, Ginger, are all smiles taking Jersey Girl out on the Hackensack River in New Jersey.

To Build a Boat

Jim contacted the designer of the “tiny houseboat” and bought a set of digital plans. In May 2015, he started building his future vacation home on the water. At first, Jim worked on the boat in his spare time, as he was still working in the newspaper industry. By the spring of 2016, he found himself looking for another editing or writing job. He came to the conclusion the next year that, at the age of 74, he was past due for a happy and well-deserved retirement. From 2017 on, Jim was able to focus on the boat with his full attention and made it his retirement project.

Jim built the houseboat without any assistance from professionals. But that didn’t worry him. Jersey Girl is actually the ninth boat Jim has built! “The obsession started in 1995 when I built an 11-foot sailing/rowing dinghy. … Next came two cedar-strip kayaks, followed by kid-sized plywood kayaks for three grandsons and a full-sized plywood touring kayak for me.” And just as with the dinghy, Jim modified the plans of the houseboat and made it partially his own design, adding 3 extra feet of length to the boat’s original schematics and a hinged hatch opening to make it easier to climb aboard, among other modifications.

roof hatch
Jim shows how the hinged roof hatch allows for easy exit and entry.

Occasionally, friends and neighborhood kids asked to help out with Jersey Girl, and Jim was always willing to let others get involved in the fun. “Several times, just for the fun of it, I held ‘work parties,’ opportunities for friends and neighbors to come and help out. On one occasion, I invited folks over for the experience of gluing and screwing a bottom panel onto the upside-down frame structure. When it was done, they all signed their names with a Sharpie pen, and those names are still there, although covered with layers of fiberglass, epoxy and paint. A couple of times, neighbors asked me if I would let their kids do something. So I outfitted them with disposable gloves and old work shirts and let them do a few swipes of paint with a roller.”

What exactly does it take to build a wooden houseboat from the hull up? Here’s a brief rundown with photos of the boat’s construction and assembly from start to finish.

This slideshow requires JavaScript.

In May of 2021, Jim launched Jersey Girl for the first time in the Hackensack River, near his home. He followed this up with outings in Lake Hopatcong, New Jersey’s largest lake, and in Maine’s Eggemoggin Reach and New Hampshire’s Squam Lake. In the six years it took to complete her, he learned a lot about building your own boat, perseverance and, most importantly, himself. We asked Jim some questions about his experience building a wooden houseboat, and all the ups and downs that come with such a daunting DIY project. He was happy to share more details about the build with us and offer his advice to anyone thinking of tackling a similar project.

Q. Is Jersey Girl for day trips or is she fit for liveaboard?

A. She’s not quite ready for overnighting, but I hope she will be by summer 2022. Plywood inserts fasten between the two settees on the port and starboard sides, and the seatback cushions are sized to exactly fill the gap to make a queen-sized bed. … Three projects planned for the spring are a slide-out shelf for a small refrigerator under the galley counter, a shower arrangement on the aft deck, and two solar panels on the roof to keep the batteries charged up when we’re not connected to shore power. So my hope is to make JG self-sufficient off-grid for a week or more at a time.

Q. How did you feel the first time you launched Jersey Girl?

A. I felt great! Because I had made so many modifications to the plan, and she wound up being almost three times her as-designed weight, I really did not know what to expect. Would I have a boat, or an interesting camper trailer? As it turned out, she not only floated, but she floated right side up, a major triumph right there. More than that, she floated exactly to where I estimated her waterline to be, with a draft of only about eight inches – meaning I can poke around in really shallow water without worry. Also, she’s incredibly well balanced, level in the water no matter where or how passengers like to sit or stand. She easily takes as many as 10 people at a time for day trips (only two for overnighters), and she’s beautifully behaved over the wakes of passing boats. I could not be more pleased.

Q. What was the inspiration behind the name?

A. Well, I’m a Jersey Boy! I grew up in New Jersey and, although I have lived and worked in many different places, I really appreciate all that New Jersey has to offer. So, the name is in honor of all the Jersey Girls, who seem to share a sassy, bossy, somewhat lovingly entitled attitude. … And by coincidence, I keep running into Jersey Girl references: There’s a diner near Lake Hopatcong called the Jersey Girl Café, and a popular local craft brewery that sells cans of Jersey Girl beer.

Two of Jim’s grandchildren visit during the winter of 2018 and give their approval.

Q. What was the hardest part of building her? Did you run into any unforeseen complications or problems? If so, how did you solve them?

A. That’s a good question! Boatbuilding is nothing BUT a serial exercise in problem-solving. And because I made so many modifications in the existing plan, and developed so many methods for doing what I wanted to do, I turned out to be an expert in creating more problems for myself. In fact, I seem to have derived what I call Jim’s First Law of boatbuilding: Every solution begets a new problem. And so on.

One of the most persistent problems during construction was how to keep rainwater from filling the unsheltered hull before fully enclosing it with the decks and cabin. No matter how tightly tarped and covered the hull was, it seemed that rain always managed to find a way in. Ultimately the answer was that water accumulation was simply unavoidable, and I just had to budget time for bailing and mopping in my construction schedule.

Because I was doing so many of the things that I did for the first time in my life, I encountered problems that I just had to sit for a while and think about – and consider the future consequences – before going on.

Q. What do you like most about the do-it-yourself lifestyle?

A. Not only is it very satisfying to do things oneself, but it makes it possible to get things just the way you like them, without having to settle for some manufacturer’s or retailer’s idea of what you need. I’ve never been frightened of DIY, no matter what the field. I’ve learned to do carpentry, boatbuilding, mechanical work, electrical work, plumbing, brazing, welding… People often ask me, “Is there anything you can’t do?” I tell them I’ve never tried my hand at brain surgery, and that’s probably a good thing.

diy fabric projects
Top: Jim made protective deck covers using Softouch® fabric. Bottom: Roll-up window shades using Top Gun® and Protect-It™ fabric.

Q. What advice would you offer to someone interested in building a boat or tackling a big project like this?

A. I guess I’d say if you have a dream for something big, don’t put it off for as long as I did. Get started on it when you’re young. And if you do put it off as long as I did, don’t listen to the naysayers, even if they are the people you love and respect. Just find a way to get started; you’ll quickly pass the point of no return and then you won’t have any choice but to finish it.

Sewing for Jersey Girl

One of the final steps of the boat’s creation was the interior finishing. This is where Sailrite came in. Jim had never sewn prior to the projects he made for Jersey Girl. But as we’ve learned so far, that wasn’t going to stop him. “I bought the least expensive consumer-grade heavy-duty sewing machine I could find, watched a couple of online videos on how to use it, bought a remnant of heavy fabric from a nearby fabric store, practiced sewing in a straight line for a half hour, and that was it! The rest, as they say, is history. It turns out I like sewing, and one of these days I’ll probably find a way to justify one of Sailrite’s machines!”

Jim purchased Sunbrella® Canvas upholstery fabric, high density foam and the Sailrite® Blade Foam Saw and made cushions for the seats and seat backs (15 in total) that will double up as the mattress for sleeping. He turned to Sailrite’s popular 30-Minute Box Corner Cushion tutorial to help him make the cushions.

foam cutting
Measuring, plotting and cutting foam for the cushions.

He also sewed interior roll-up window shades that also attach to the outside to protect the windows when trailering the boat. He used Top Gun for the window shades with an inner layer of a soft protective lining fabric to protect the windows during transportation on the highway. Finally, he patterned and created exterior deck covers to help prevent rainwater and spray from seeping in through the hinged hatch covers.

Watching the 30-Minute Box Corner Cushion video is what convinced Jim that he could tackle these sewing projects, even though he’d never sewn before. While using Sailrite’s Fabric Calculator to help lay out the fabric for patterning and cutting, he contacted Sailrite customer service wanting to know if Sailrite also offered a Foam Calculator. We didn’t at the time, but Sailrite has always listened to customer suggestions and ideas. We now offer a Foam Calculator that shows DIYers how to nest foam pieces to get the most usage out of their foam sheet and to help save money.

cabin interior
The finished cabin interior. We think Jim did a fantastic job on the box corner cushions!

What’s Next for Jim & Jersey Girl?

Now that Jersey Girl is finished (mostly!), Jim is ready to get her on the water and enjoy his six years of hard work and determination. But that doesn’t mean he’s ready to slow down. Even though the bulk of his work on Jersey Girl is done, he’s not planning on slipping into a life of inactivity in front of the TV. “Now that I am retired, with all of my other interests, I often wonder where I ever found the time to work for a living. If you ever see Jersey Girl on a waterway near you, be sure to stop me to say hello!”

Jim will turn 80 in May 2022, and he says he’s probably through with big building projects. Instead, he’s putting his hands to work on a new venture — writing a book. The book will chronicle his adventure building Jersey Girl and all that came with the experience. “Now that most of the work is done, the chronicle will also be about the places we travel together, the things we see, and the people we meet along the way.” Jim plans on taking Jersey Girl up the Hudson River and possibly to Canada for a rendezvous with other boatbuilders, painting and photographing what he sees along the way, two other passions of his.

And even though Jersey Girl’s sewing projects are complete, Jim isn’t putting his sewing machine away anytime soon. He has plans to redo his patio furniture cushions that have seen better days. He also has an idea for a line of educational plush toys for children.

If you’d like to learn more about Jersey Girl and follow Jim’s adventures on the water, you can follow his Facebook page: Jersey Girl the Houseboat.

jersey girl on the water


Who We Are

Sailrite is your one-stop DIY shop! We are a passionate crew of do-it-yourselfers who strive to equip you with the supplies and how-to knowledge you need to tackle your next project. Do you want to learn upholstery, leatherwork, canvaswork, hobby sewing, bag making or more? We have the fabric, tools, hardware, sewing machines and notions you need to master any DIY. And even if you’ve never sewn before, our tutorials and how-to videos are designed for beginners and experienced crafters alike.

Start your DIY journey today: www.sailrite.com

Cat Claws Have Nothing on This DIYer

Patty Poncer Marks is no stranger to sewing. Whether making her own clothing or sewing custom slipcovers for her family, Patty has been honing her craft since she was 12 years old. Patty has applied her skills to everything from quilts, to bags, to banners and decorative pieces for her home. When her cat, Abby, took a liking to Patty’s favorite chair, a reupholstery job was next on Patty’s DIY docket. She turned to the experts at Sailrite® for guidance. With her sewing experience and Sailrite’s tools and know-how, Patty was able to tackle reupholstering her chair with confidence. Follow along to read what Patty has to say about her DIY and crafting lifestyle, plus how Sailrite played a key role in her reupholstery project.

Learning to Sew

My mother signed me up for sewing lessons with Mrs. Meyerose in Covington, Kentucky, when I was about 12 years old. She had taught my mom to sew years earlier, but I was the one who really took to the craft. Mrs. Meyerose had converted the first floor of her house to a sewing studio. The front room was filled with old Singer® treadle machines that had been converted to run on electricity. I still remember the sound and slow steady pace of those machines, just perfect for beginners. I was the only kid in the class, and Mrs. Meyerose seemed ancient at the time — probably about my age now. I continued my lessons for a couple of years, and by the time I took home economics in the seventh grade, I ended up teaching the sewing portion of my class.

Mrs. Meyerose insisted that her students take notes and somewhere I still have that little steno pad. There were rules about how to use our cutting shears properly, straighten the fabric, alter the patterns and operate the machines.  Before we ever made our first garment, we made samples of darts, gathers, sleeves, zippers, etc.  It wasn’t long before I was sewing most of my clothes. My first plaid projects included a fitted button-down blouse with a collar and a lined wool coat. I even made a tailored, lined sports jacket; a reversible vest; and ties for my dad. My dad said he knew when I was in my room sewing because the gauge on our electric meter was spinning wildly!

This slideshow requires JavaScript.

It was during that time my mother bought me my first Singer sewing machine with a zigzag stitch.  That function opened up a whole new opportunity to make appliqué banners.  The early ones were pretty simple, but the later ones are also art.

I graduated from college with a degree in engineering math, followed by an MBA. My first purchase when I was hired as an Engineering Manager was a new Bernina® 801. I was so excited to have a semi-automatic buttonhole feature and blind stitch hem. I thoroughly enjoyed those days of making Halloween costumes, bridesmaids’ dresses, prom dresses and more over the years. 

Giving With Sewing

There is no end to sewing opportunities. Recovering cushions, making curtains and drapes and small upholstery jobs eventually led to reupholstering couches and chairs for me and my family. I enjoyed matching the stripes on a sleeper sofa for my daughter using the absolute minimum amount of fabric. This was done as a fitted slipcover.  We reinvented that piece several times over the years.  

Another new oportunity opened when I joined the Art and Environment committee at my church. That’s when the banner work really took off. I enjoyed making seasonal banners but hanging them on the pillars was a time-intensive, cumbersome task.  I built mounting boards that could be strapped to the eight pillars surrounding our worship space. The boards use Velcro® to accommodate three layers of banners that can be attached and decorated on our workroom table. Hanging then only involved handing the board up to be buckled in place. 

This slideshow requires JavaScript.

I continued to do lots of appliqué but I began to see the opportunity for machine embroidery as well.  I upgraded to a Bernina® 750 QE with the embroidery unit and have finally passed my original Bernina on to my daughter. I love the variety of stitches and the ability to handle anything from thin, slippery fabric to thick rag rugs.

It’s hard to attend a craft show or see anything in fabric and not say, “I could do that!” A few of my creations include lightweight day packs, compression packing bags, grocery totes, laptop sleeves and aprons. I even made several braided rag rugs for my home. Last year for Christmas, I sorted through my silk scarves and made kimonos and tailored shirts for my family. When COVID-19 came along I happily made over 600 four-layer masks to give away to family, friends and institutions.  This year the Christmas sewing gift will be travel cosmetic bags and cell phone caddies.

This slideshow requires JavaScript.

If I see it, I can make it — usually out of my stash! I have inherited stash fabrics, unfinished projects and supplies from family members.  I cherish finishing the items their hands started. Speaking of stash, anyone who saves scraps is eventually going to make a quilt. It can’t be helped. So, I finished a couple of theirs, and made several of my own baby quilts for family members.  It’s especially pleasing to combine quilting, embroidery and appliqué work.

Enter Sailrite

This brings me to the project that introduced me to Sailrite products. Several years ago, I inherited my mother’s cat. Abby immediately took a liking to my favorite red chair and decided it made a handy scratching post. No amount of coaxing, chasing, covering or spraying could deter her from eventually shredding the chair. It was time to reupholster! I had just enough fabric from my stash, but I would have to lay out the pieces very carefully to match the horizontal and vertical stripes.

This slideshow requires JavaScript.

That’s when I discovered my new friend Cindy on YouTube and the How to Reupholster an Armchair video. I watched those Sailrite videos over and over, working in stages and making notes. I realized that with her expertise and her impressive tools, I could manage this project! That led me to Sailrite’s helpful website where I ordered the Sailrite® Long Nose Upholstery Staple Gun, tack strips and other supplies.

Just a few days into removing the old fabric, I had knee replacement surgery. This gave me lots more time to plan and consider my task. Cindy is right about the deconstruction taking much longer than the reconstruction. My husband put the chair on a table in the living room where I could eventually stand for short stints as my knee healed. He bought me a portable air compressor so that I could staple quickly when I was able to stand. When I eventually needed access to my sewing room to make the piping and cushion, I still couldn’t manage stairs; he used a golf cart to drive me up and down from the living room deck to the outside basement entry. 

This slideshow requires JavaScript.

One of Cindy’s best tips was to use the old fabric as a pattern and to mark where the pieces join. I roughly laid out all the pieces to ensure they would fit my limited fabric, but only cut out one piece at a time. Then I pinned the new piece in place next to an old piece to mark where the pattern had to match vertically and horizontally. I continued this method as I worked my way around the chair. Working in the proper order was imperative to achieve a match all the way around as well as up and down.

This slideshow requires JavaScript.

I am so pleased with the result and forever indebted to Cindy for sharing her expertise. Her calm and confident voice also helped me to be patient and enjoy the challenge. I even machine embroidered a “tag” to the fabric with my initials and date. Then I used the old red fabric from the chair to make a bed and recover a scratching post for the cat. Abby took to both with great enthusiasm which will hopefully prevent her from ruining my “new” chair.

cat bed
Abby loves her new bed!
cat tree
Recovering Abby’s cat tree was a clever way to reuse the old chair fabric.

Future DIYing

I still have a list of projects and plenty of fabric to explore. I’d like to try my hand at smocked pillows next. Having a well-stocked, sorted and labeled private workspace helps. I have the liberty to spend hours, make a mess and then close the door until I am refreshed and inspired to return — which these days is quite often. When I’m not sewing, I enjoy playing the piano, singing in the choir and writing Pysanky. Pysanky are Ukrainian Easter Eggs; decorating them is another seasonal hobby of mine. These are real, emptied eggs, dyed with a wax resist process and they last for years.  I’ve made hundreds and teach classes.

This slideshow requires JavaScript.

Wow! We think that chair looks great, and we’re so glad Sailrite was able to help! With everything that Patty DIYs, we’re excited to see what she creates next. Thanks for sharing your story with us!


Who We Are

Sailrite is your one-stop DIY shop! We are a passionate crew of do-it-yourselfers who strive to equip you with the supplies and how-to knowledge you need to tackle your next project. Do you want to learn upholstery, leatherwork, canvaswork, hobby sewing, bag making or more? We have the fabric, tools, hardware, sewing machines and notions you need to master any DIY. And even if you’ve never sewn before, our tutorials and how-to videos are designed for beginners and experienced crafters alike.

Start your DIY journey today: www.sailrite.com

Restoring Antique Cars & Learning to Sew

Ted Levitt lives according to two main principles: service and quality. He grew up watching his parents run a very successful diner, and he credits them for his success in business and his drive to succeed in everything he does. What does all this have to do with DIY? Keep reading to learn more about Ted, his fascinating life’s story, and his passion for car restoration and how it lead him to Sailrite® and the Ultrafeed® LS Sewing Machine.

Growing up in his parents’ diner — Chick and Ruth’s Delly in Annapolis, Maryland — instilled in Ted an appreciation for and belief in honesty and hard work. “I loved working with my parents starting at 8 years old. I worked every weekend and after school. I guess I thought it was fun being with them; I didn’t really think of it as work.” The lessons learned in his parents’ diner would prepare Ted for a life of success in the hospitality and food service industry.

Ted graduated high school a year early, and he intended to work at the diner full-time. His parents, however, had other plans. “They told me to get a college degree and that the business would be waiting for me after I graduated.” He graduated from the Culinary Institute of America with a degree in culinary arts. He then went on to receive a Bachelor of Science degree in hotel and restaurant management from Florida International University.

Ted sews piping for a car upholstery project.

He returned to Annapolis and took over his parents’ business at the age of 24. In addition to managing the family diner, Ted opened a 10-room bed-and-breakfast and started a very successful vending machine company. The diner was known for its hand-rolled fresh-baked soft pretzels. Ted was asked to sell his soft pretzels at Camden Yards, the Major League Baseball ballpark home to the Baltimore Orioles. His pretzels were so popular he eventually opened 33 other locations in the area.

For most of his life, Ted has had a passion for car restoration. It’s a pursuit that started when he was a teenager and has grown and flourished through the years. Work and raising a family stalled this incredibly detailed and time-consuming pastime. So when Ted retired in 2017, it finally gave him the time to dedicate to his car restorations.

More Than a Hobby

When did Ted’s love of antique car restoration begin? It’s a fascinating story. “When I was 17 years old and in high school, I found a 1933 Dodge Brothers car in the woods on the side of a road. I found the person who owned the property and asked to buy it for $75 — even with a tree growing up through the roof! Later, I found out that it was the same model of car my parents owned for five years back in 1947. I restored it over the next few years not really knowing what I was doing. But it turned out OK and I still own it today.”

Ted’s completed 1928 Rolls Royce Phantom. What a beauty!

What is it about car restoration that Ted enjoys so much? “I always liked working with my hands, and I’ve always loved learning new things. After I played with the 1933 Dodge Brothers as a teenager, I wanted to learn how to properly restore cars.” It’s not just car restoration where Ted applies his hands-on, do-it-yourself mentality. When he took over his parents’ diner, he did most of the electric, plumbing and repair work himself. “I took a heating and air conditioning class at a local community college and I took welding classes in the evenings. Most everything else I’ve learned by reading or asking people and learning on my own. I’m not afraid to try anything. My dad taught me I could do anything I put my mind to and I believed him.”

1928 rolls royce phantom
View of the upholstered rumble seat and trunk.

Like many DIYers, Ted is fascinated by the magic of experiencing something evolve from nothing. Where does Ted find all these vintage cars in need of restoration work? He finds them all over the country searching through magazines and online forums, or even through word of mouth. “I always drive to pick up the car myself so I can meet the owner and hear the car’s history firsthand.”

“As with everything else involved in restoring a car, I want to say I did it all. Over the years I’ve learned to work on engines, learned to weld, took English Wheel metal shaping classes to learn how to make fenders and body parts, and learned how to use a mill and lathe. Everything I’ve learned has been through classes, reading books, watching YouTube videos, and with a lot of help from knowledgeable friends. I guess I am a jack of all and master of none. My work is not the best but I think it turns out OK. But most importantly, I know I did it myself and learned something new every day.”

Ted put his Ultrafeed in a custom table so he’d have plenty of room to work on projects.

Learning to Sew

Being a deep-rooted DIY guy and wanting to be involved in every aspect of his car restorations, Ted wanted to do his own upholstery work. Never having sewn before, Ted didn’t know where to get started. Luckily, he had a friend who was well acquainted with Sailrite. “I had never sewn before I bought the Ultrafeed. My friend told me about Sailrite, and there was a location in Annapolis just a few minutes from my home.” Ted bought his Ultrafeed LS in 2009 at Sailrite’s Annapolis, Maryland, retail store location (we have since closed our retail stores).

Through his friend’s recommendation, Ted explored the Sailrite website and knew the Ultrafeed was the right machine for his antique car upholstery work. Before he jumped right in with upholstery sewing, he knew he needed to practice and familiarize him with the machine and basic sewing skills. Again, he turned to Sailrite for help. Ted used Sailrite’s free how-to videos, and other resources on the internet, to teach him how to sew. “The Sailrite videos are amazing. I have also called in a few times and spoken to your DIY guys. The service is amazing. It made it so easy for me to learn how to sew.”

This slideshow requires JavaScript.

One of his most impressive restoration projects was working on a 1928 Rolls Royce Phantom. He converted the car into a rumble seat body style and did the entire restoration himself. He used the sewing skills he learned over the years to sew the upholstery for the new rumble seat and car interior seating. After years of sewing car upholstery with his Ultrafeed, Ted is still happy with his machine. “It has worked amazingly. And if there were any problems, it was the lack of knowledge from me, the user. But when I called for assistance, your staff talked me through the problem or sent me videos to walk me through it.”

What’s Next

As if he wasn’t busy enough in his retirement, car restoration isn’t Ted’s only hobby. When Ted’s not bringing classic cars back to pristine condition, you can find him working on his impressive model train collection. “I’ve been building an HO scale train layout for many years. I build everything from scratch.” Ted also enjoys woodworking. He builds beautiful wood furniture and music boxes for friends and family.

This slideshow requires JavaScript.

Ted finished his full Phantom restoration project in January 2021 after countless hours of work. Never one to remain idle for too long, he’s already moved on to his next project. “Now I am working on a 1928 Dodge Brothers Victory Six 5 Window Coupe. I just painted the body and the chassis is done. I hope to have the body on in a couple of months and then I will start on the interior of that car.”

Ted now owns 11 antique cars originating from 1915 to 1933 and he has restored them all. “Some of them were in pretty good shape and some should have been stripped for parts. But I wanted to bring them back to life, and I enjoyed the restoration process on all of them.” With no plans to sell, he enjoys driving them around town and sharing the history of the cars with others.

1928 dodge brothers
Progress on Ted’s latest project, a 1928 Dodge Brothers Coupe.


Who We Are

Sailrite is your one-stop DIY shop! We are a passionate crew of do-it-yourselfers who strive to equip you with the supplies and how-to knowledge you need to tackle your next project. Do you want to learn upholstery, leatherwork, canvaswork, hobby sewing, bag making or more? We have the fabric, tools, hardware, sewing machines and notions you need to master any DIY. And even if you’ve never sewn before, our tutorials and how-to videos are designed for beginners and experienced crafters alike.

Start your DIY journey today: www.sailrite.com

A Total Powerboat Transformation

Sometimes the perfect project comes along that lets you put all your DIY skills to use. That’s what happened to Ronnie Miller. This talented DIYer found a powerboat for sale online that needed A LOT of work — a complete overhaul. He bought the boat in February 2019, for only $1,000 and worked hard to get it water-ready by June. Keep reading to learn more about this powerboat transformation and how Sailrite® supplies and project videos helped Ronnie tackle this massive DIY endeavor.

Like a lot of DIYers, Ronnie learned the ropes as a young boy. “My grandmother taught me to hand sew when I was 5 years old. My uncle was a tailor and he gave me swatches to work with.” From those humble beginnings, his talent grew and grew.

boat collage
Keep scrolling to see the “before” photos!

In addition to sewing, Ronnie enjoys a variety of other hands-on hobbies. “Projects are my hobby. I have always been good with my hands, fixing and rebuilding things.” Ronnie recently moved into a condominium, and he has been enjoying remodeling it himself and turning it into a proper home. “I’ve been working on carpentry and woodworking projects. I laid the vinyl floor, painted and fixed sheetrock. I have installed a mosquito mister at the house, a new metal fence to see the lake, a new wood fence, and I installed an entire sprinkler system for the front yard and back.”

Let’s learn more about the big powerboat project! “I always wanted a boat. This was the first one I ever owned, towed, worked on and completed in just three months.” What an accomplishment! So, exactly how much work went into the powerboat transformation? We’ll let Ronnie explain in his own words.

This slideshow requires JavaScript.

“I found the boat on a for-sale website and thought if I failed, I couldn’t lose too much considering I only paid $1,000 for it. I later put in an additional $6,000 including the engine, materials and tools, which I am always using now. I didn’t realize I had to replace the engine, floor or dashboard with all-new electronics until I started tearing it apart.”

After all the hard gutting and rebuilding work, Ronnie was ready to tackle the upholstery. That’s where Sailrite came in. “I needed vinyl to cover the seats and I found Sailrite online.” He chose a striking combination of white, silver and black Morbern® vinyl fabrics. He also ordered Medium Density Polyurethane Antimicrobial Foam from Sailrite — a great choice for powerboat upholstery.

boat in progress
In-progress photos.

The project went fairly smoothly, and Ronnie only hit a few minor snags along the way. “Once I got started, I wanted everything to look new. I had the trailer sandblasted and had to replace parts there. I needed a new gas tank float and a new dashboard with new Bluetooth® radio. I replaced the old carpet with gray-and-black striped flooring, and I installed lights on the front for boating at night.”

Before his recent move, he lived just five short minutes from Lake Houston, a reservoir on the San Jacinto River northeast of Houston, Texas. Ronnie took the boat out almost every week. After enjoying the water and the boat for a while, he decided to sell it and made a whopping $5,000 profit! He credits the eye-catching upholstery work for garnering such a big profit. True to his DIY nature and need to keep busy, Ronnie bought and restored a second boat and made $6,000 on that sale!

This slideshow requires JavaScript.

So, what’s he working on now? “Since completing the boat I have now started a wall covering of large fabric-covered squares behind my bed. It’s still a work in progress, but I should be finished soon.” Ronnie is using the Sailrite how-to video “How to Make Upholstered Wall Panels” to help complete the project.

“I find that working on a project is great for the mind; it gives you time to think alone. I also get great satisfaction by looking at it and saying, ‘Hey, I did that!’” Way to go, Ronnie! We love your positive attitude and can-do spirit. Good luck on all of your future DIYs. We’re sure they’re going to be huge successes.


Who We Are

Sailrite is your one-stop DIY shop! We are a passionate crew of do-it-yourselfers who strive to equip you with the supplies and how-to knowledge you need to tackle your next project. Do you want to learn upholstery, leatherwork, canvaswork, hobby sewing, bag making or more? We have the fabric, tools, hardware, sewing machines and notions you need to master any DIY. And even if you’ve never sewn before, our tutorials and how-to videos are designed for beginners and experienced crafters alike.

Start your DIY journey today: www.sailrite.com

Regina Fuller: A DIY Success Story

To DIY or not to DIY — is that even a question!? Not for enthusiastic sewer Regina Fuller. Though she’s new to sewing, she’s full of that can-do spirit that lives and thrives in all sewers and makers. Regina and her husband, Jacob, purchased a fixer-upper NorSea 27 sailboat. The boat needed major restoration, from helm to hull and everything in between. Regina knew it was going to be a big project, and while her husband did the brunt of the work, she wanted to contribute to the boat’s revamp in a tangible way. She decided to sew new cushions for the interior cabin and exterior cockpit, even though she’d never done upholstery work before. With the help of Sailrite’s supplies and how-to videos, she was able to successfully complete her cushion projects with great results.

Regina learned to sew at a young age, but she never really caught the sewing bug. “My mom taught me the basics of sewing when I was a kid, but I never really took to it. As an adult, I could mend clothes and made a bed skirt once, but that was about the extent of my sewing experience.” Even with such minimal practice, and not having touched a sewing machine in years, Regina was ready to take on her first upholstery project. First up were the cushions for the boat’s cabin. She used a home sewing machine for the project and followed Sailrite’s “How to Make V-Berth Cushions” how-to video. Though she had a couple of small struggles, she completed the cushions and was thrilled with the end product.

Jake and Regina on boat
Jacob and Regina Fuller enjoying some much-deserved time on the water.

For the cockpit cushions, she knew her home sewing machine wouldn’t be able to handle the thickness of the vinyl and piping. So Regina turned to Sailrite again. After thorough research and consideration, she invested in the Ultrafeed® LSZ. Her delight and excitement at how the cockpit cushions turned out speak volumes. The right tools and supplies make all the difference. What’s Regina’s favorite part about sewing and DIY? “The end product! There is a lot of satisfaction in knowing that you made something that you and your family get to enjoy for years.” 

Join us as we learn more about this determined DIYer, her family’s sailing lifestyle, and what she’s learned from her sewing experiences so far.

Q. When and how did you learn to sail?

A. My husband is a skilled sailor and has been sailing since he was a kid. He took me sailing on our second date and I fell in love with him and sailing! We live in Humboldt County, California, so we sail primarily in Humboldt Bay. When we have vacation time, we like to trailer our sailboat to the San Juan Islands in Washington or Clearlake, California.  

Q. What do you love about sailing? 

A. Everything! The wind, the fresh air and the wildlife you see in the bay. Our boat is a mini floating home and we often stay the weekend on it. I love being confined to the boat where you aren’t distracted by house chores and other worries of the world. The soft lull of the sea is so relaxing. We have two teenage boys ages 13 and 16. At this age, they just want to be with their friends or on electronics. We love stealing them away from all of that and getting them on the boat. There is nothing better than being hunkered down inside playing Yahtzee and drinking hot chocolate or sailing in 15+ knot winds using all their skills to have a successful sail. I have so many amazing moments and memories over the past 20 years on one of our sailboats. 

The Nor’Sea 27 fixer-upper. Just wait till you see the “after” photos!

Q. Can you tell us what all was involved in your big Nor’Sea restoration project?  

A. My husband has always wanted a Nor’Sea 27. We’ve had two other monohulls over the years, and some Hobie Cats and daysailers, but never a Nor’Sea. It’s a seaworthy classic sailboat that can be put on a trailer and taken to any sailing grounds you want. Over the years he has seen them for sale, but not at a price point we could afford and usually located states away. Five years ago, one came up for sale only 45 minutes away from our home. He took me to see it and I thought he was crazy. Yes, it was only $5,000, but the amount of work it needed was more than I had a vision for. We have renovated two homes and built a third, so I knew he had the skills and determination to see it through. But this time I didn’t see how it would be possible that I’d ever want to stay a night on this boat. Five years later he proved me wrong and all I want to do every weekend is go to the boat. We named the boat “Zephyr” and launched her for the first time in June 2020. 

This slideshow requires JavaScript.

Almost everything had to be done. He had a new gas tank made and he installed it. He put in a newer diesel engine and redid the plumbing and electrical. He renovated the hanging locker on the port side in order to install a propane heater. He gutted the galley and installed all new appliances and customized the galley to maximize the space and fit my dishes. He gutted the starboard side navigation station and turned it into shelving and settee — painted, sanded and restored woodwork. On the outside, he sanded and painted, built the bowsprit, and installed some new rigging and lifelines.  

Right now he is restoring the trailer and I’m planning to make a bimini. We plan to pull the boat back out in the winter for a few more improvements. Given all the blood, sweat and tears that he put into this renovation, I was determined to make a contribution by making the cushions. We thought about paying someone to do it, but I really wanted to be able to say that I put some time, energy and skill into our dream boat as well. The cushions were the sprinkles on the cake to make his beautiful restoration look complete.  

This slideshow requires JavaScript.

Q. What made you decide on an Ultrafeed Sewing Machine? What specific qualities were you looking for in a sewing machine?

A. I used a “heavy duty” inexpensive Singer sewing machine for the inside cabin cushions. I was afraid to invest in a quality upholstery machine when I didn’t know if I would even be able to successfully make the cushions. I broke several needles pushing through that project. After successfully making those cushions and realizing that I had enough skill to really do this, I knew I had to invest in a quality machine if I planned to make the cockpit cushions with piping and vinyl. There was no way my other machine would do it. I needed it to be able to easily go through several layers of heavy-duty canvas or vinyl. 

I looked at several heavy duty upholstery machines. Sailrite had a quality product for a very reasonable price. I ultimately decided to purchase the Ultrafeed because my experience to date with Sailrite has been exceptional. I love all the how-to videos and online tools to help me decide on the best materials for my projects. The Ultrafeed sewed the vinyl and piping like it was cutting through butter. I couldn’t be happier with it. I have really appreciated the short tutorials to help me understand how to thread the machine, wind the bobbin, and provide general care for the machine. All the Ultrafeed videos have been really thorough and helpful.

cockpit cushions
Cockpit cushions before and after.

Q. Now that you’ve been practicing and have sewn a few projects, have you learned any sewing tips along the way that you’d like to share?

A. I do have an important tip to share from my experience. When using the seam ripper on the zipper plate, use the plastic tip side down to rip after you get it started. I accidentally ripped my fabric when I continued to use the sharp side down — it’s a real bummer to rip it for so many reasons.

Here are all my take-aways from my vinyl cockpit cushion project: 

1) Definitely use the basting tape to help keep the vinyl from puckering when attaching it to the piping. It will make it SO much easier to line everything up nicely when sewing the plaque on. Your how-to video recommends it, but I tried the first panel without it and wished I had listened to your recommendations. I used the basting tape on everything after that. 

2) If using the YKK® AquaGuard® Water Repellent Zipper, don’t forget to sew it into the zipper plaque the opposite way you would for a regular zipper. I totally forgot about this and sewed it in wrong and threaded the pull on like you would a normal zipper. Of course it wouldn’t zip closed and didn’t work. I thought the zipper was a joke. I went back to the Sailrite website and found a video tutorial about this zipper, and that’s when I realized I did it all wrong. Once I got it sewed correctly it worked like a dream! 

3) I used closed cell foam for the cockpit cushions for its flotation. Closed cell foam is very different to work with than the interior foam I used for the cabin cushions. When cutting out the fabric and foam, I used the same allowance for my seams and compressing the foam that I did for the interior cushions. When I finished the first one and put the foam inside, I was so disappointed. It was extremely loose. The correct fix would have been to cut the foam out larger; however, I had already cut the foam for two of the cushions and there was really no way to easily add another 1/2 inch of foam to all sides. So I ended up tearing apart the cushion cover, cutting it down, and re-sewing.  Although it ended up being 1 inch shorter than my original pattern, you wouldn’t be able to tell. It still looks nice in the cockpit. I had a few other cushions to make that I hadn’t cut the foam for yet, so those turned out nice and exactly to pattern.

boat restoration
The beautiful Zephyr fully restored and ready for launch.

Q. What advice would you give to a brand-new sewer or someone thinking about getting into sewing? 

A. You can do it. The Sailrite videos teach you everything you need to be successful. If you know you want to complete upholstery projects, then invest in a quality machine from the start. By having a quality machine, your very first project will be easier, which will help build your confidence.  

Q. Is there anything else you’d like our readers to know about your sewing, sailing lifestyle or yourself in general?

A. My motivation in entering to be a featured customer was to hopefully inspire others. I had only basic/limited sewing skills and I’m so proud of what I have accomplished with my first few projects. I hope others see this story and take the plunge in trying something new. My success was truly due to the excellent tutorials, materials and equipment offered by Sailrite. 

Now that Regina has conquered the boat cushions, she’s ready to put her new skills and her new machine to work again. Next up, she plans on sewing a bimini for their newly restored boat. She also wants to learn how to do sail repair (perfect for the Ultrafeed LSZ) and wants to sew duffle bags from used sailcloth — a great way to reuse and upcycle used sails! With an ever-growing project list, we’re thrilled that we could be a part of Regina’s sewing and DIY journey. Good luck with all your future sewing projects, Regina! We know you’ll do great!

Regina and family
The whole family (from left: Ethan, Regina, Buster, Hunter, Jacob and Joshua) playing Yahtzee aboard Zephyr.


Who We Are

Sailrite is your one-stop DIY shop! We are a passionate crew of do-it-yourselfers who strive to equip you with the supplies and how-to knowledge you need to tackle your next project. Do you want to learn upholstery, leatherwork, canvaswork, hobby sewing, bag making or more? We have the fabric, tools, hardware, sewing machines and notions you need to master any DIY. And even if you’ve never sewn before, our tutorials and how-to videos are designed for beginners and experienced crafters alike.

Start your DIY journey today: www.sailrite.com

Planning for the Unexpected: A DIY Journey

A self-proclaimed jack-of-all-trades, master of none, Joe McFarland has a well-rounded DIY skill set. From sewing canvas and upholstery, welding, woodworking and electrical skills to motorcycle repair, machining and mechanical engineering — the list goes on and on. Joe is a true thrill seeker and big kid at heart; he loves boating, motocross, RC cars, drones and planes. An engineer by trade, he spends his free time volunteering, sailing, writing, canning, beekeeping and has recently gotten into vinyl lettering.

One of his most enduring and favorite activities is sewing. Having learned from his mother, he uses his sewing skills to outfit his four boats and recently completed a Meyers Manx dune buggy overhaul. He completely refurbished the buggy and sewed the backseat upholstery using his well-invested Ultrafeed® LSZ. Keep reading to learn more about this energetic go-getter and his long list of DIY triumphs.

Joe (#82) and his friends mountain bike racing.

Learning to Sew

Joe and his brother learned to sew, both by hand and machine, when they were kids. They were raised by their mother, who is just as self-dependent as her sons, and she instilled them with important life skills at an early age. “I remember clearly being in summer camp and one of our group projects was to hand-sew torn clothing. The counselor asked me if he had the final lock stitch correct, and I showed him how I was taught — and that I still use to this day when hand sewing.” This upbringing made Joe the self-reliant and motivated person he is today. 

And just like his mom, Joe shares his skills and knowledge and enjoys helping others to grow and learn how to do things for themselves. “Knowledge can save a person’s life, especially on a sailboat, in a storm, on a lee shore, or with a failed motor due to water contamination in the fuel system (as I’ve experienced firsthand on my boat). Being able to fix things is important.” All of Joe’s boats have been fixer-uppers, and he takes as much joy from refurbishing and getting them seaworthy as he does from sailing and cruising.

Joe with Ultrafeed
Joe with his Ultrafeed LSZ, ready to tackle his next project!

What does Joe love about sewing? “I really enjoy sewing. It’s relaxing and slows me down. Not so much as a hobby, but as a means to get things done and to save significant dollars.” He also enjoys the independence that sewing brings. Being able to make or fix something yourself and have it turn out exactly the way you’re envisioning is a sentiment all sewers can relate to and appreciate.

Boats, Sewing & DIY

Joe bought his first sailboat, a semi-derelict 1972 30-foot C&C named Wild Irish, in 2003. It needed a lot of work. Joe purchased the boat in the spring, and he spent several months sanding, polishing and sprucing up the boat while it was in dry dock storage. A few years after the initial refit, it was time to upgrade all of the canvaswork. “To save time and money, DIY was the only way the work that was needed was going to get done. Providing my own canvaswork was one, if not the biggest, cost savings.”

He needed a sewing machine that could handle the many canvas projects he had planned. “I knew I needed an industrial machine. After researching the options I chose the Ultrafeed LSZ, which best fit my needs. It’s portable and robust, can be hand cranked, and the support offered by Sailrite is important. I will have my machine on my boat for long distance sailing for sure.”

“I was getting ready to undertake my first major boat canvas project — bimini, dodger, side and rear enclosures, and shades. So while I was at the Annapolis Boat Show that year, I went to the Sailrite booth and started asking questions. [Vice President and Owner] Matt Grant assisted me one-on-one and from that point on I was hooked on Sailrite. Working for a customer-driven corporation, I know that customer support is key.”

This slideshow requires JavaScript.

He has made numerous projects over the years, including canvas projects, covers, cushions, pillows and more. He relied on Sailrite’s how-to videos to help him through the hardest projects. “The only way I was able to tackle the canvas enclosure project was by living on YouTube and watching the Sailrite instructional videos over and over. I would test-sew small demo pieces of Strataglass™ to ensure I was doing it right before cutting into the large and costly rolls.”

For his dodger DIY, Joe took extensive photos of every step of the process. He did his patterning on the boat, and then took everything back to his sewing loft 127 miles away from the boatyard. Such diligent and careful planning paid off in the end. Joe’s dodger turned out beautifully and his hard work can be seen in the finished project. “The first fit was perfect and I was terribly thrilled. I plan on adding snaps in the summer when the canvas is hot, and then cut in the grab rails and running rigging holes.” Joe created a three-piece dodger, and all three panels can be removed or installed for weather conditions and comfort.

Joe now has four boats: the 30-foot Wild Irish, a 22-foot Catalina named Irish Rover, an 8-foot Zodiac Inflatable named Ulysses and a 20-foot Sea Ray called Irish Wake. He has sewn projects for all of his boats. “I have sailed my boats in all but one of the Great Lakes, the Gulf of Mexico, the Atlantic Coast and the Bimini Bahamas.” This small fleet of sailing vessels is sure to keep Joe busy in his sewing loft for the foreseeable future.

Joe's boats
Irish Rover and Wild Irish at the marina

A Year on the Sea (Almost)

Joe, like a lot of people, had big plans for 2020. But as the John Lennon lyric goes: “Life is what happens to you while you’re busy making other plans.” Flashing back to 2015, Joe announced to friends, family and coworkers that he planned on taking a yearlong sabbatical in 2020 to sail the Atlantic and Caribbean on his 30-foot sailboat, Wild Irish. “It was my 50th birthday gift to myself and was supposed to start in February 2020. I worked diligently over the past five years refitting the boat for ocean sailing, including the last bits of canvaswork and interior upholstery. In April 2020, one year’s worth of provisions were ready to be loaded and the boat was scheduled for launch.” 

Joe meticulously planned and prepared for his yearlong voyage. He arranged the time off with his employer. He organized, he packed, he cooked and canned a year’s worth of meat and other provisions. He even made his own soap from the rendered beef fat! He installed solar panels on his bimini and added a new barrier coat and bottom paint to the hull specifically for saltwater. He was excited and ready to finally begin his sea voyage. And then … the COVID-19 pandemic hit.

“Wild Irish will not launch this year. It pains me to see her alone on the hard. I was almost there and was ready to load the last bit of stores, which are all now in storage.” Ever the optimist, Joe didn’t let a year off work go to waste. “No worries on the postponed boat trip; everything is a blessing in disguise. I finished my buggy!”

Plan B: Project Dune Buggy

With a year off from work and no hopes for his sea voyage, Joe, was unwilling to while away a whole year. So he turned to another project to occupy his time. “The buggy is an original 1970 Meyers Manx and the project has a long history – 31 years to be exact.” Joe grew up in Southern California, and Pismo Beach was considered the dune buggy mecca. “At the time, my stepfather had several buggies, one of which was a one-piece fiberglass body dune buggy.”

At age 19, Joe was living in Ohio, and he traded in his motorcycle for a buggy. It was kept behind an old barn buried in weeds and heavily damaged from the elements. “That summer, I had completely stripped it down to pieces and readied it for the rebuild. After re-fiberglassing the many holes and damage from years past, a friend’s father owned an auto body shop where my buddy worked. I was able to barter the 1989 I-Roc Z metallic blue paint job for a car audio system, which I installed in his classic car. While the body was being painted, I continued work on the chassis. Then life got in the way. Between working several jobs and putting myself through college, the buggy sat in storage.” The project was started and stopped several times over the years. Until, finally, the 2020 pandemic offered the perfect opportunity to complete the rebuild. A serendipitous consolation prize for his canceled sailboat trip.

This slideshow requires JavaScript.

In February 2019, Joe flew to California to meet Bruce Meyers, the creator of the Manx, for a group breakfast organized by the Manx Group. The Meyers Manx dune buggy was produced from 1964 to 1971 in California and was initially designed for desert racing. The recreational vehicle has the shortened chassis of a Volkswagen® Beetle and became the first-known street-legal fiberglass dune buggy. Meeting Bruce Meyers gave Joe the motivation he needed to restart his dune buggy project, and the pandemic gave him the opportunity.

And so, in early 2020, Joe began working on his buggy restoration project. He washed 30 years of dust off his buggy and got to work. “The restoration went as expected with few surprises. Fortunately, I had rebuilt the motor and transmission in 2019. I had restored the chassis pan in 1989. There was considerable time for disassembly, washing, cleaning, sandblasting, priming, painting and reassembly of all the subcomponents. There were also components that needed to be manufactured, including the rear engine cage frame, front seat frames, rear seats and more.”

Sailrite’s vinyl was a perfect match!

Joe’s dune buggy project was coming along nicely, but there was one more thing he needed. The yellow vinyl for the backseat needed to perfectly match the prefabricated front seats. Luckily, with time on his hands and Sailrite headquarters a short road trip away, the solution was clear. “I went to the Sailrite website and found several shades of yellow. I knew there was no way I was going to match the color online since the yellow I needed was a very off shade.” He contacted Sailrite and asked if he could bring a sample of the vinyl to the Sailrite office so they could find a vinyl in stock to match. One of Sailrite’s customer service reps worked with Joe personally to find an exact match to his yellow front seats. He returned home with the vinyl he needed and had the backseat upholstered the next day. After a few finishing touches, the buggy was complete and Joe took it out for its first drive in over 30 years — a happy ending to what could have been a wasted year.

buggy complete
What a masterpiece!

What’s next for this adventurous DIYer? Well, he’s still on sabbatical for the rest of the year. He’s currently working on refurbishing a 1958 chopper that he purchased in 1998. Joe plans on relaunching his Wild Irish trip in 2021. Until then, we’re confident this hardworking sewer will find plenty of projects to occupy his time. We wish you all the best, Joe, and hope that when you do finally launch your yearlong sailing voyage that it’s truly the trip of a lifetime. You’ve earned it!


Who We Are

Sailrite is your one-stop DIY shop! We are a passionate crew of do-it-yourselfers who strive to equip you with the supplies and how-to knowledge you need to tackle your next project. Do you want to learn upholstery, leatherwork, canvaswork, hobby sewing, bag making or more? We have the fabric, tools, hardware, sewing machines and notions you need to master any DIY. And even if you’ve never sewn before, our tutorials and how-to videos are designed for beginners and experienced crafters alike.

Start your DIY journey today: www.sailrite.com

Captain’s Log: A Lifetime on the Water

Captain Helen Deitrick-Kovach is an accomplished boater and sewist. She grew up in a boating family and has been cruising the waters for 62 years. In 2004, she and her husband sold their house and moved aboard their 50-foot Marine Trader trawler powerboat. These liveaboards have logged thousands of miles and explored countless waters. In late 2018, they left the boat in heated winter storage for the first time in 16 years! Captain Deitrick took that time on land to complete an assortment of sewing projects for the trawler. She used her Ultrafeed® LSZ to help her accomplish this huge sewing endeavor. Keep reading to learn more about this intrepid boater, her DIY philosophy, and what she loves about the boating lifestyle.

Captain Helen Deitrick-Kovach

A Love of the Water

Boating and sailing have been a big part of Captain Deitrick’s life since early childhood. “I learned to sail at the age of 8 at a day camp on Rogers Lake in Old Lyme, Connecticut. We sailed Blue Jay dinghies. I acquired a 12-foot johnboat at the age of 10 and worked the inlets of the Connecticut River with my three lobster pots and pitchfork collecting longneck clams.” She spent high school summers sailing One Design boats at a local yacht club.

After college, she and her husband sailed their 28-foot S2 Performance Cruiser on Lake Hartwell in South Carolina, at Western Carolina Sailing Club. “We used the boat as our weekend lake house and raced competitively in the PHRF (Performance Handicap Racing Fleet). We did this for 18 years until we purchased our Marine Trader trawler.”

When the family moved to Charleston, South Carolina, her husband went to work for Tow Boat US, and he needed a Coast Guard license. Their son knew he wanted to attend a maritime school, so they both attended Sea School in Charleston, considered to be the premier maritime training school in the United States. Upon completion, they received their 100 ton license with sail and towing endorsements.

Adventures on the Horizon

In 2004, when their son went off to college, the couple decided to sell their house and move to the coast. They lived aboard the trawler while their son attended Maine Maritime Academy in Castine, Maine, a four-year academy that graduates officers and engineers for the United States Merchant Marine and marine-related industries.

The 50-foot trawler came with a bit of a learning curve. “We used that time to get acclimated to the systems on the trawler.” The couple graduated from a sailboat with a single 9 horsepower Yanmar engine to twin 150 horsepower diesel Lehman engines, 12 batteries, 760 gallons of fuel, 360 gallons of water, a 50-gallon holding tank and five air conditioners — all packed into a 50-foot boat.

allez boat interior
A look inside ALLEZ! That’s a lot of boat to sew for.

They knew they wanted to be full-time cruisers, and so Captain Deitrick decided it would be prudent for her to get a captain’s license as well. “I did not need to have it to drive the boat, but the education was valuable. I knew how to drive, but docking and undocking required some learning. We took a shakedown cruise (in which the performance of a vessel is tested) in the spring of 2010 with our son on board to help me get the hang of it.”

They named the trawler “ALLEZ!,” which is French for “Let’s Go!” — a very fitting name given the couple’s wanderlust spirit. They have logged thousands of miles since purchasing the trawler in 2004. “She is a 1992 model wide-body and we are the second owners. We have lived on board for 17 years full time. We do not own a house and, until February 2020, we didn’t own a car either.”

In 2010, the intrepid travelers began cruising full time. They cruised all up and down the East Coast to the Florida Keys. In 2013, they started the Great Loop. “We took almost four years to complete the 6,100 mile trip.” The Great Loop is a system of interconnected waterways on the eastern portion of the United States and part of Canada. The Great Lakes, the Mississippi River, the Atlantic and Gulf Intracoastal Waterways and the Rideau Canal are just some of the natural and manmade waterways that form the Great Loop. “We have been all the way up the Potomac to Washington, D.C., and have spent entire summers just cruising the Chesapeake Bay — 1,300 plus miles each summer exploring the rivers and small towns on the Bay. Because we live on the boat full time, we are pretty much always moving around.”

sewing bimini
Captain Deitrick works on a new bimini top using her Ultrafeed LSZ Sewing Machine.

Sewing & DIY

Captain Deitrick taught herself to sew at the age of 10. She started out simple, making throw pillows, but soon moved on to garments including jumpers and skirts. “I graduated to more complex sewing projects like Vogue Patterns® and formal gowns. When I was at Furman University in Greenville, South Carolina, I became the lead student costumer for the theater department. After college, I made all my own clothes for my working career. When we purchased our S2 sailboat, I made sail covers, winch covers, and several boom tents and bow triangles for shade. I was called upon to make similar products for members of the sail club, for which I was paid. I like the independence that being able to do my own work affords me, as well as the ability to customize my projects.”

Over the last 18 years aboard ALLEZ!, Captain Deitrick has tackled numerous sewing projects for the boat. In her words: “If it is made of fabric — Sunbrella®, Phifertex®, Stamoid™, Naugahyde® or upholstery/curtain material — I have made it for ALLEZ!” Just a handful of the bounty of projects she’s made for the trawler include curtain panels, door panels, roll-up screens, handrail, grill and winch covers, and so many cushions. A 50-foot boat is a lot of space, and there’s a DIY project everywhere you look.

This slideshow requires JavaScript.

“Being able to sew and having the machine on board at all times has been invaluable. I have also been able to take on projects for other boaters who need repairs or replacements and do not have the skill or inclination to undertake the project themselves.” Her most recent DIY was a new bimini for the upper deck. She chose Stamoid for the 12-foot x 15-foot bimini and used her Ultrafeed to tackle the project. “Every bit of material I have used on the boat has come from Sailrite®. Additionally, the supplies I have purchased for my projects for hire have all come from Sailrite as well.”

Captain Deitrick says the new upper deck bimini was her toughest project to date. “It was big and I had never used patterning material before. I had always just used the old bimini, but since it was a new design with adjusted rails it was different. Add to the fact that while we removed the fifth rail and adjusted the heights on the two intermediate bows, I did not have the luxury of walking all around the frame.” The mid-summer heat in South Carolina didn’t make it any easier either. Captain Deitrick had limited time to pattern the frame before the temperatures rose and the wind kicked up every afternoon. But the satisfaction and happiness of completing a big project just can’t be beat!

bimini
Captain Deitrick’s completed bimini. We think she did a great job!

A New Beginning

After almost two decades on the water, Captain Deitrick and her husband are bidding farewell to the liveaboard lifestyle. They’ve decided to sell the trawler and relocate closer to family. “We have two young grandchildren and want to be full-time grandparents, and that is hard to do when you are 1,200 miles away.” The couple have traveled and boated to all the places they wanted to visit, and they’re looking forward to this next chapter of their lives. They plan to continue traveling — this time by land. A bittersweet ending perhaps, but the memories they made aboard ALLEZ! are sure to bring smiles to their faces whenever they are missing life on the water.

allez marine trader trawler


Who We Are

Sailrite is your one-stop DIY shop! We are a passionate crew of do-it-yourselfers who strive to equip you with the supplies and how-to knowledge you need to tackle your next project. Do you want to learn upholstery, leatherwork, canvaswork, hobby sewing, bag making or more? We have the fabric, tools, hardware, sewing machines and notions you need to master any DIY. And even if you’ve never sewn before, our tutorials and how-to videos are designed for beginners and experienced crafters alike.

Start your DIY journey today: www.sailrite.com

Sewing for Entrepreneurs

Imagine getting to do what you love and getting to be your own boss. Does this sound like a dream come true? It’s not too far fetched of a concept when you have a creative vision and a can-do attitude. Theresa Harmon is a prime example of what talent and hard work can amount to. She was kind enough to share with us her sewing history and how she came to run her own small business using her Sailrite® Fabricator® Sewing Machine. 

Screen Shot 2020-07-29 at 1.47.34 PM
Together with her machine named Oz, Theresa is unstoppable!

For Theresa, sewing and crafting have been a passion since she could use crayons and paper. But sewing started in a 7th grade home economics class, and 48 years later, her creative drive has opened up more doors for her than she could have ever imagined. “In 2006, I bought my first embroidery machine. Upon returning to the store for new owner classes, I was solicited about a sewing job. There was a local woman restoring a historic carriage house in a bed and breakfast. She needed a seamstress and I needed to pay for my expensive machine! After successfully sewing window treatments, cushions, pillows and slipcovers for her, I decided to start my own shop called All the Trimmings. This was the first incarnation of my business, and so far I’ve sewn for interior designers, decorators and, of course, my own customers. The second incarnation of my shop started in 2018 and is still going strong today. ”

“My goal with sewing is to satisfy my creative, social and entrepreneurial needs while fabricating one-of-a-kind soft furnishings for a niche retail market. I’m a one-woman workroom! I make custom furnishings like pillows, seat cushions, curtains, drapes and more that aren’t available in the mass-retail market.”

Throw Pillows Molly Snow copy
Custom pillows made for a happy customer.

Now you might be wondering where the Sailrite Fabricator comes into play in all this. Well, a small sewing business would be nothing without a trustworthy machine to build the business on. Theresa was more than willing to share how her journey intersected with the Sailrite mission to empower DIYers. “My reason for choosing Sailrite and the Fabricator was the customer service, hands down. At the time, I was shopping for machines and working as a sales associate for another sewing machine dealer who taught new owners how to use their machines. I quickly understood how important it was for customers to learn how to use their new sewing machines in order for them to feel satisfied with their purchase and be confident sewers.”

Banquette Cushions & Pillow Goodspeed copy
Theresa crafted cushions for the adorable nook.

“The Fabricator had all the built-in features I wanted, like a built-in walking foot and the ability to go slow while still using full power. These features are critical for achieving meticulous upholstery detailing. Another plus is the access to all the free Sailrite videos and the promise of tech support via email and phone. Having my Fabricator (which I’ve named Oz) gives me a lot of confidence in my ability to turn out professional work!”

Theresa has made tons of incredible projects for clients with her industrial sewing machine, and both the results and the customers can attest to her talent. You might’ve even seen some of Theresa’s work featured on our Sailrite website or our Instagram page! So far she’s made things like vinyl banquette cushions, window seat cushions, pillows, breakfast nook seating and more! Theresa recalled one of her more daunting DIY projects, and one that she is most proud of —  a revamp of a mid-century papasan chair. A local interior designer reached out to her about the chair and she was able to tackle the project with a little ingenuity and elbow grease from the Fabricator.

IMG_2557
The real challenge —  a vintage papasan chair.

After speaking with Theresa, we had a few more questions about her DIY successes. Luckily, she had answers!

Q: What is it about the DIY sewing lifestyle that you enjoy the most?

A: I find the process of creating something that’s never existed before to be fascinating. To be able to get paid to do something I love and decide when I will work is an irresistible combination.

Q: Do you have any words of wisdom for someone thinking of starting to sew their own projects?

A: Don’t be afraid of failure. I believe all of us learn best through our mistakes. Perfectionism and comparison both squelch our creativity. Every person’s journey is unique; therefore, there are no absolutes to success other than trying your best while continuing to practice and try new things.

Q: What projects do you see yourself sewing in the future?

A: I’ve made a lot of purses in the past but never one from leather. Since I have some scraps and I know Oz (my Fabricator) will have no problem sewing through it, maybe a leather tote bag is in my future!

This slideshow requires JavaScript.

Does the DIY lifestyle still sound like a pipe dream to you? Theresa’s story is proof that you can learn the tools of the trade and, with the right sewing machine and support, you, too, can sew projects for every area of your life. Who knows, you might even get good enough to be your own boss! Anything is possible when you embrace your inner creativity and put in the work. And Sailrite is here to help you every step of the way.


Who We Are

Sailrite is your one-stop DIY shop! We are a passionate crew of do-it-yourselfers who strive to equip you with the supplies and how-to knowledge you need to tackle your next project. Do you want to learn upholstery, leatherwork, canvaswork, hobby sewing, bag making or more? We have the fabric, tools, hardware, sewing machines and notions you need to master any DIY. And even if you’ve never sewn before, our tutorials and how-to videos are designed for beginners and experienced crafters alike.

Start your DIY journey today: www.sailrite.com