Sailing Wife, Sewing Life

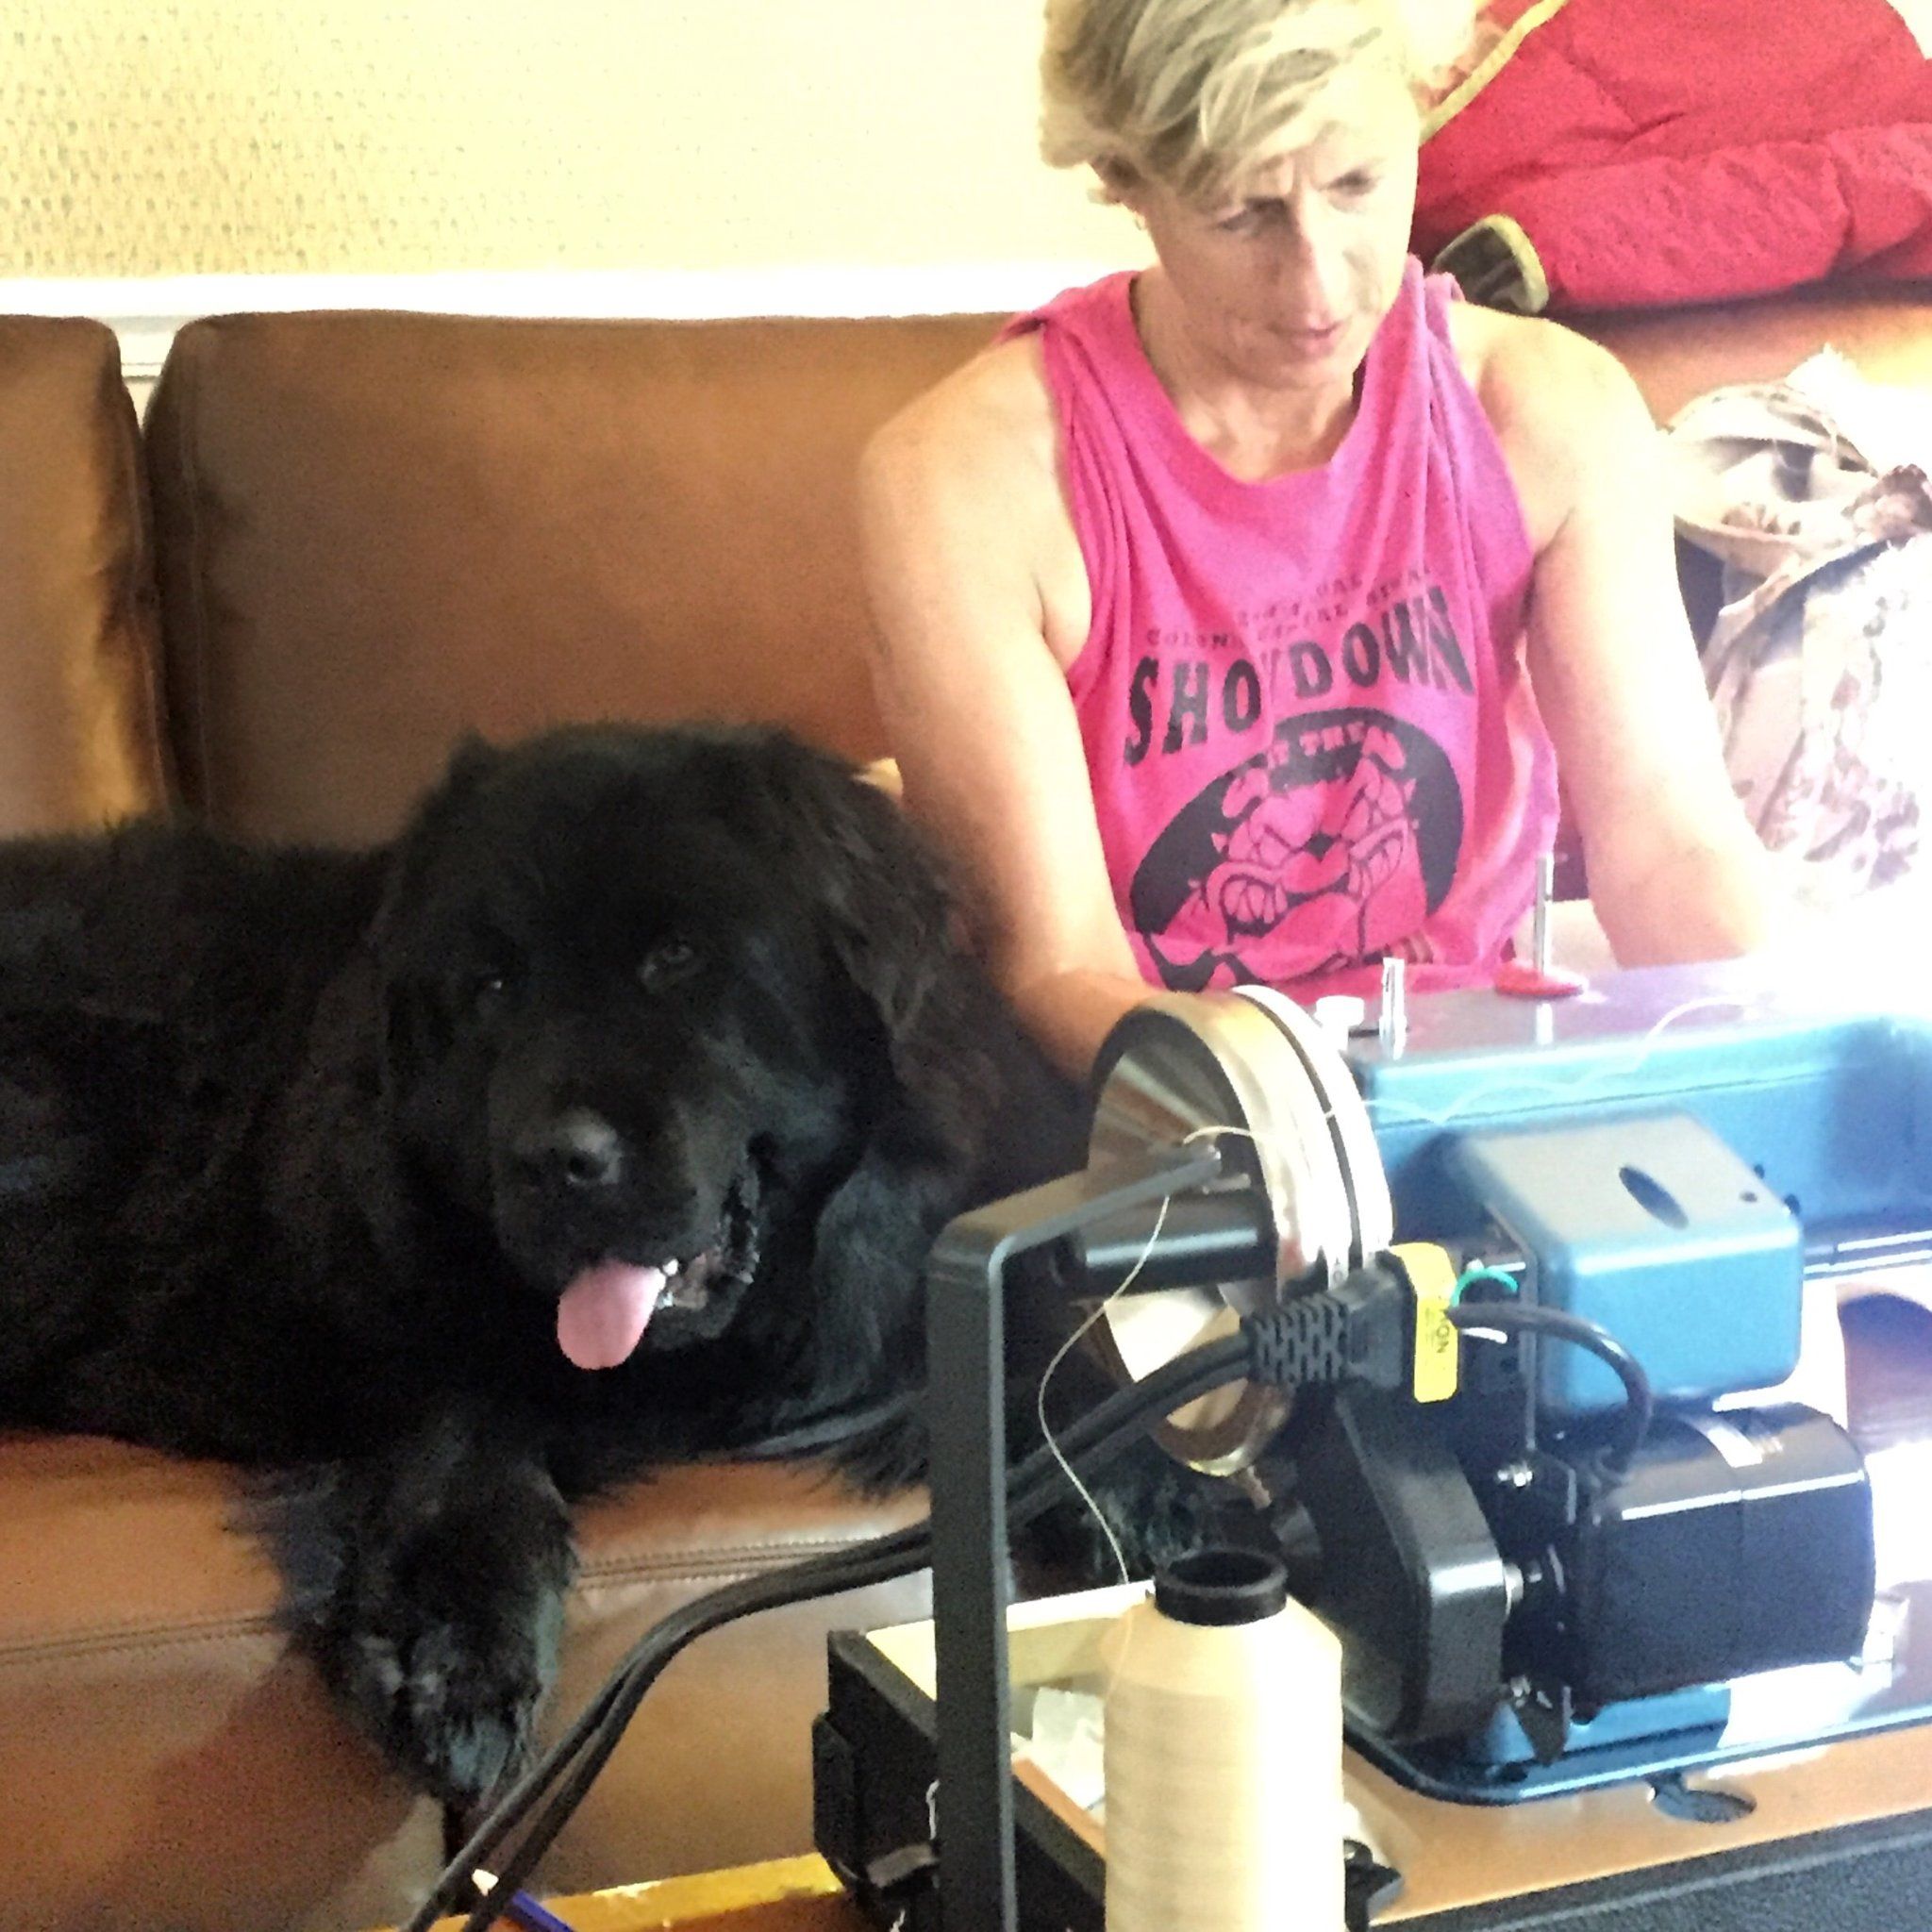
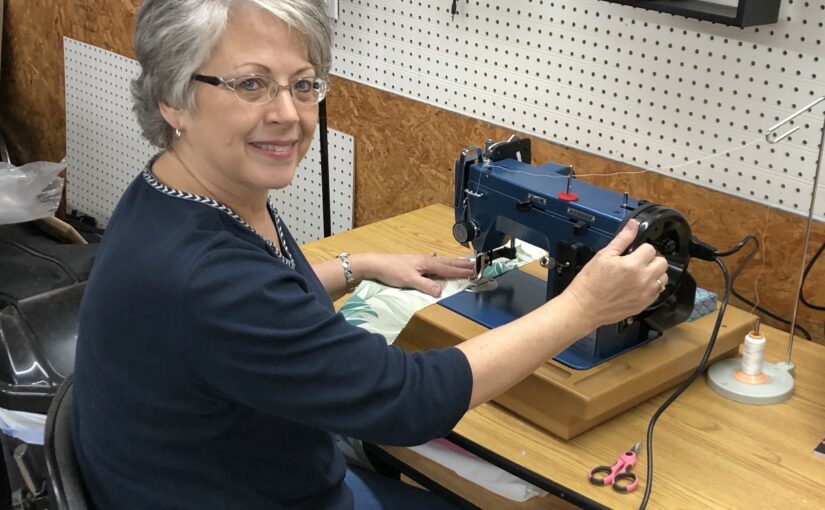
At the age of 10, Bailey Heyman received her first sewing machine as a gift from her grandparents. What she didn’t know was that this small gift would spark a lifelong passion that would change her life. Bailey is truly a Jill-of-all-trades, sewing everything she can get her hands on, such as apparel, marine projects, pet projects — you name it. Along the way she discovered sailing and then the Sailrite® website, which only bolstered her love of all things DIY. Not to mention it brought her face to face with a world-class sewing machine, the Sailrite® Ultrafeed® LSZ.

“I remained interested in the idea of sewing through middle school, high school and college. It wasn’t until after college that I had a well-paying job and could finally spend the money to pick up sewing again. I first bought a computerized machine even though it had been 14 years since the last time I’d had a sewing machine. My return to sewing started with making dog bandanas that I would give out to a local dog rescue I volunteer for. Sewing dog bandanas then turned into sewing dog vests and then it all escalated quickly!”

image2
Bailey, photographed here among her newly sewn boat cabin cushions.

While always the avid sewist, Bailey wasn’t always entwined with the sailing lifestyle or Sailrite. That she learned from her husband, who is from a long line of sailors and began to teach her the way of the water. This fact, combined with her infatuation with aerodynamics, led her to explore the world of sailmaking. It was here that things really began to gain momentum! Eventually, Bailey discovered the Ultrafeed LSZ Sewing Machine and her ability to DIY grew tenfold.

“When looking into industrial sewing machines for sewing sails, Sailrite is the first thing that comes up. It did not take me long to look at the company and know that it was a brand with a community that I wanted to be part of. I received my Sailrite Ultrafeed LSZ and immediately began to dress it up with stickers. Out of all the things I’ve done with my Sailrite, turning it into an angler fish has gotten the most likes on social media. That’s fine with me because it makes me smile every time I finish a project, turn off the lights, and see it glowing.”

This slideshow requires JavaScript.

You might’ve seen Bailey’s customized Ultrafeed LSZ on our Sailrite Instagram page, complete with a smiling sticker that glows in the dark. This gives the machine the appearance of an angler fish, even with the lights off. And if you thought that was ingenious, you should see the great number of other projects Bailey has finished recently using her portable powerhouse of a machine.

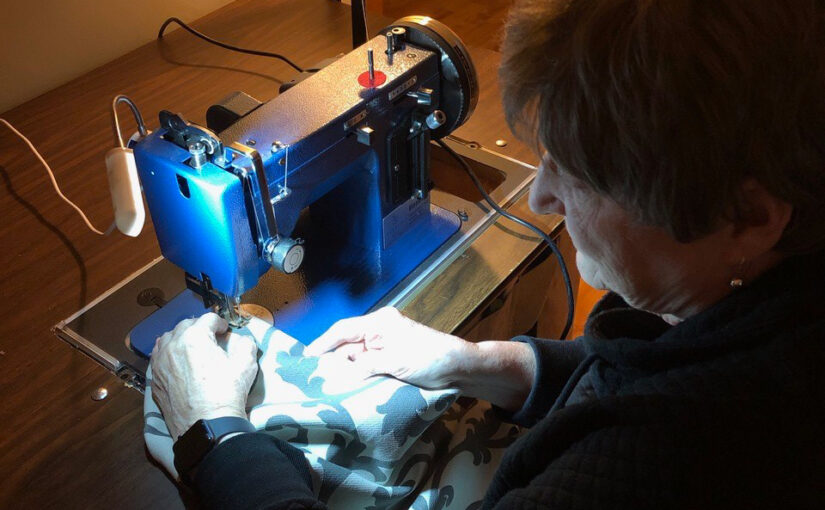
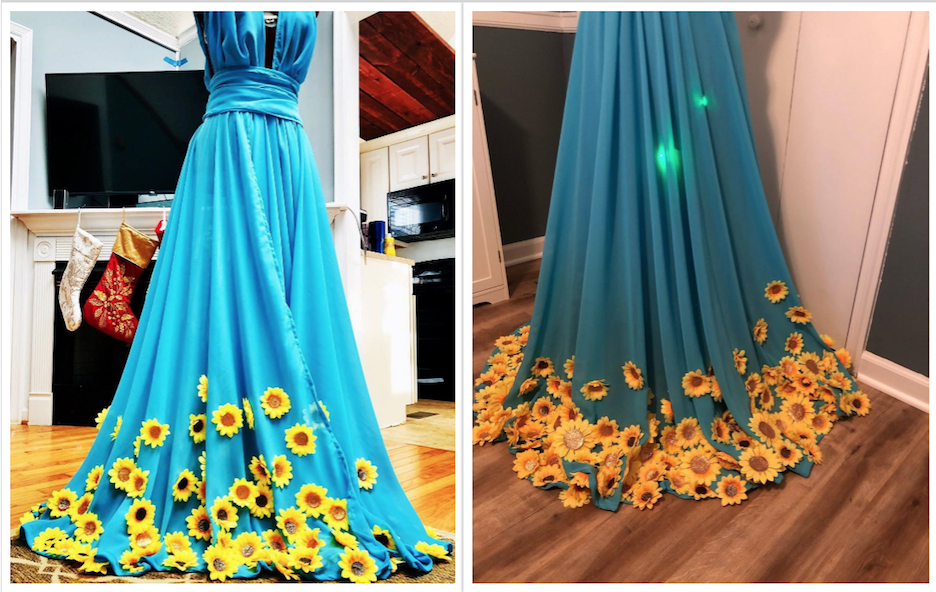
The project that Bailey is most proud of? Her lightning bug sunflower dress of course. She was kind enough to share the entire process with us.

“I wanted to make a dress to wear to an engineering banquet that I had coming up. I knew I wanted a dress with sunflowers because those are my favorite flowers. I loved the blue and yellow color combination. After I made the dress, I started to think about what I wanted to add to it next. I love building circuits and wanted to work them into my sewing projects. One day I had the idea to add lightning bugs to the sunflower dress. But I had to figure out how to sew the conductive wire to get them to light up inside the dress. Most DIYers will sew wire into dresses like that by hand, but because of the shape of the dress, I knew that would take a long time. I tried to use my computerized sewing machine first but the thread was too thick for it. I thought perhaps my Sailrite Ultrafeed would not work with it because the dress material was chiffon, but I decided to try anyway. It took a few minutes to get the settings right for the material but once I did, I was able to sew the conductive wire perfectly into the dress!”

Screen Shot 2020-07-08 at 9.53.55 AM

Following the creation of her prized sunflower dress, Bailey has been busy making even more wearable works of art. Her many successes include flowy skirts and gowns with a variety of leaves and creatures on them, each one perfectly showcasing her boundless creativity. She explained, “My inspiration for making them all comes from self-inspiration. It only takes about an hour to an hour and a half to make the base of a dress or skirt and then it usually takes a few hours to days to add appliques such as flowers or iron-on designs.”

This slideshow requires JavaScript.

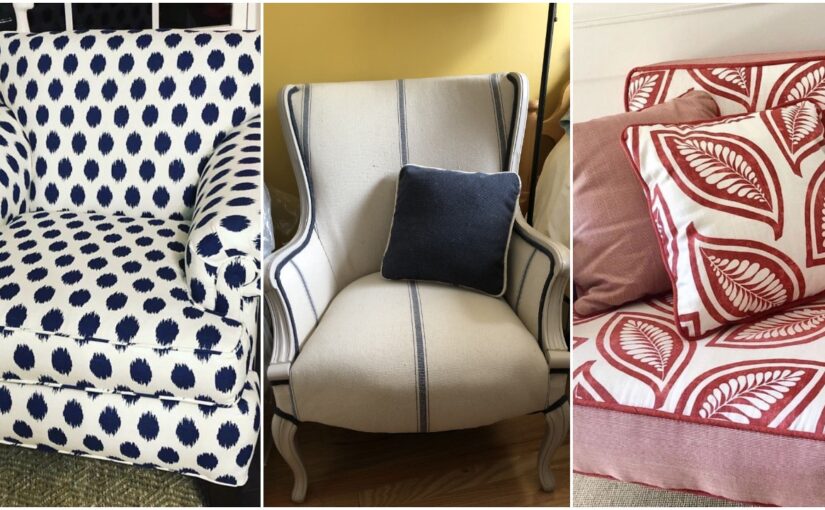
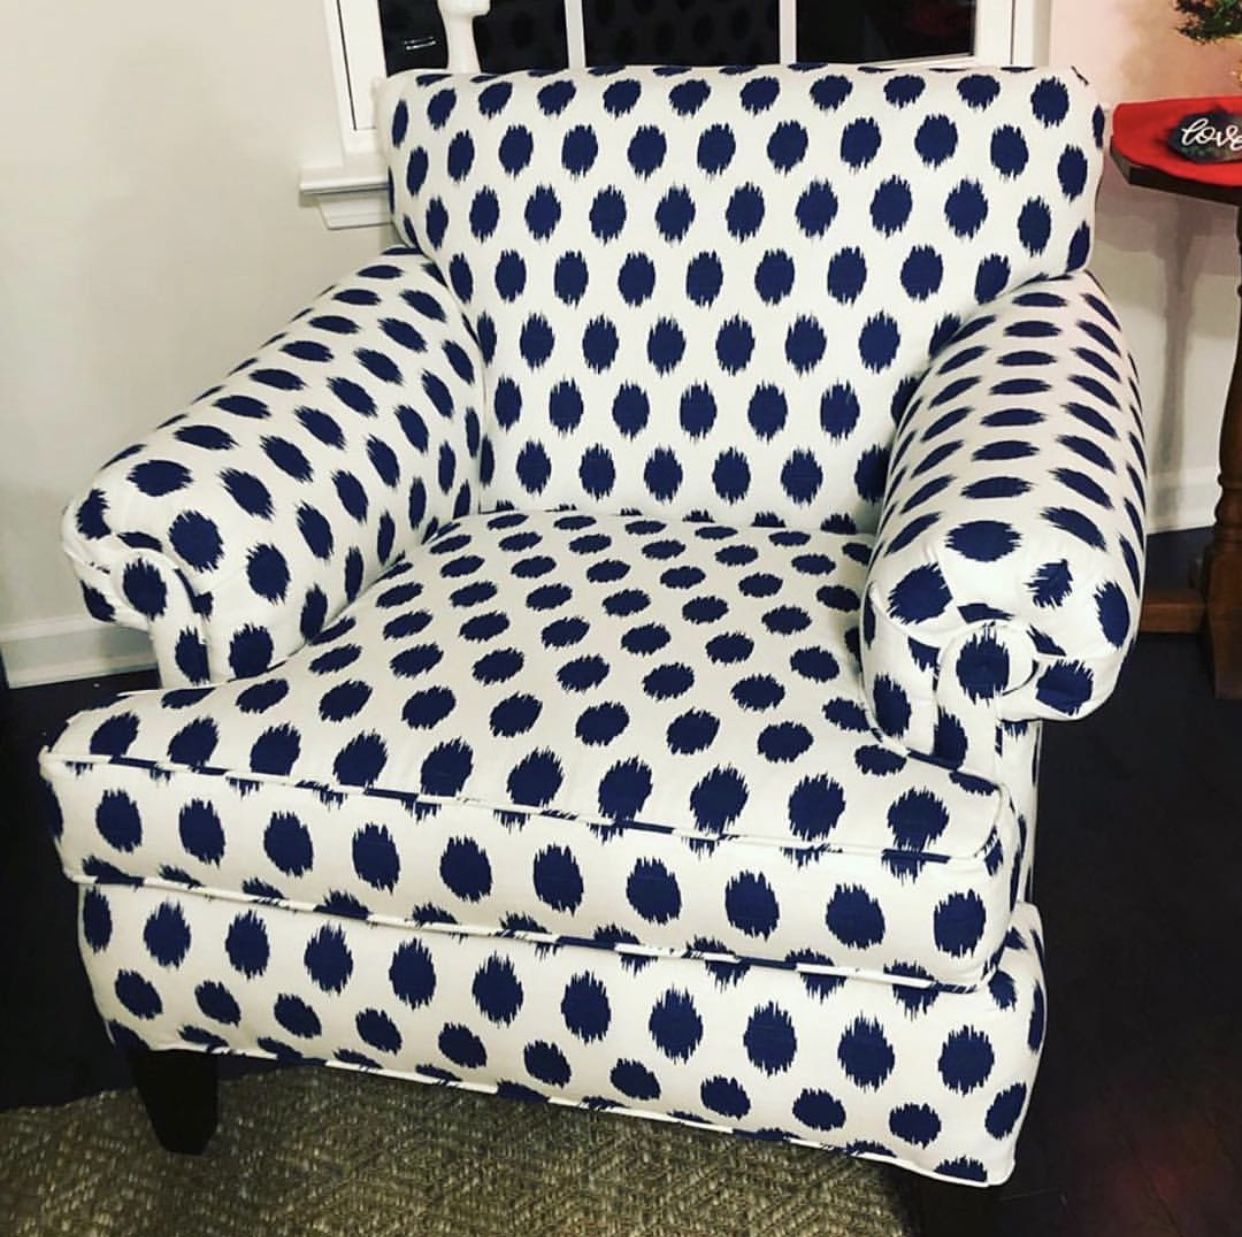
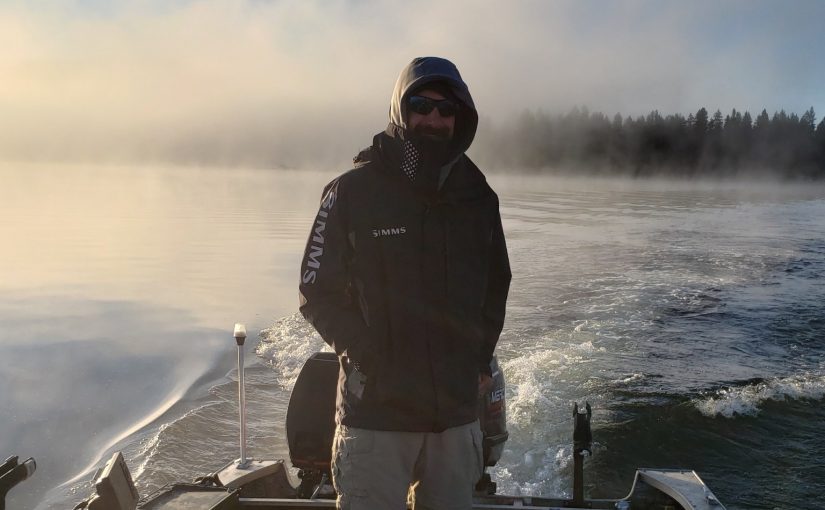
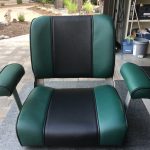
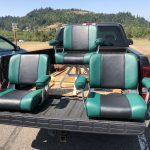
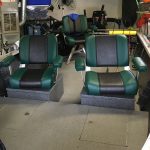
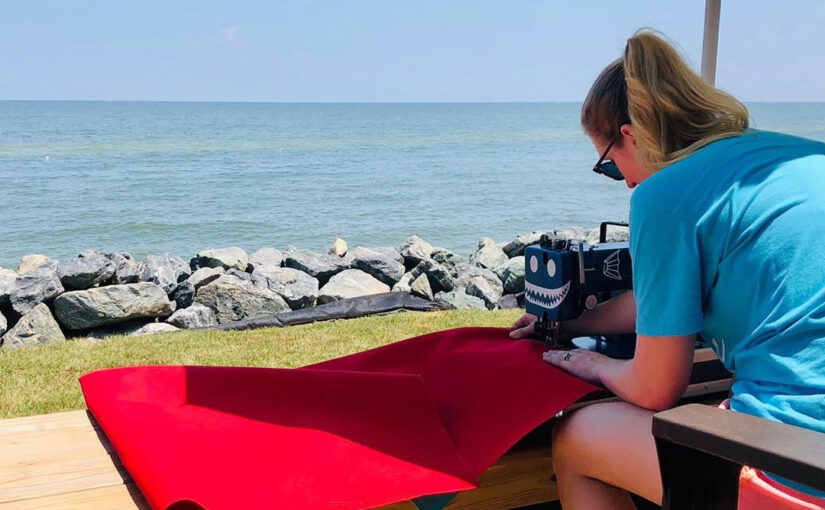
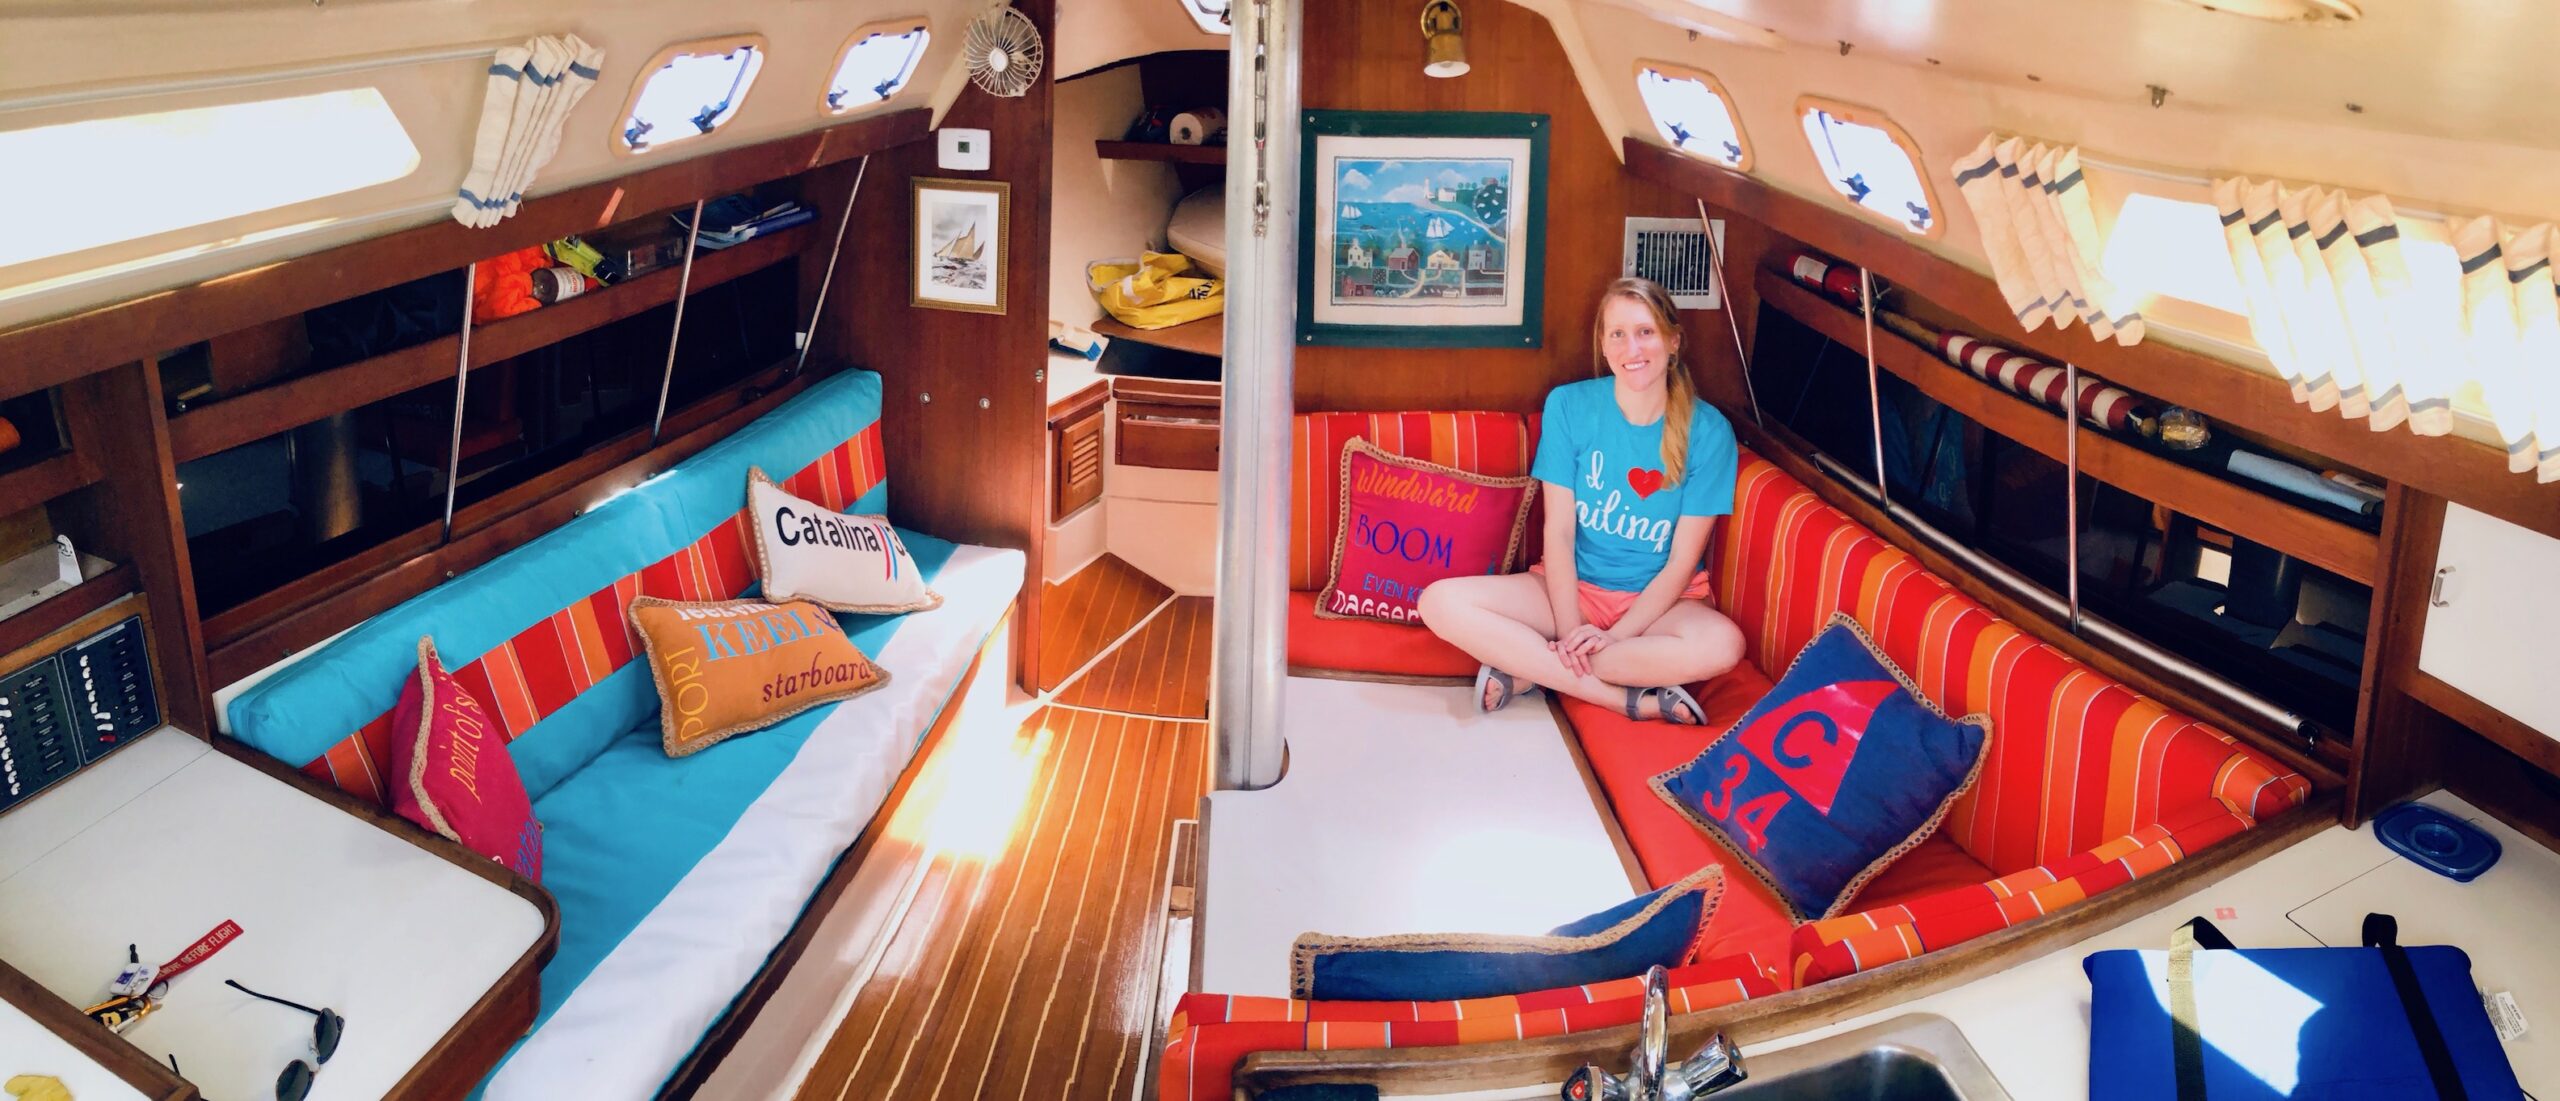
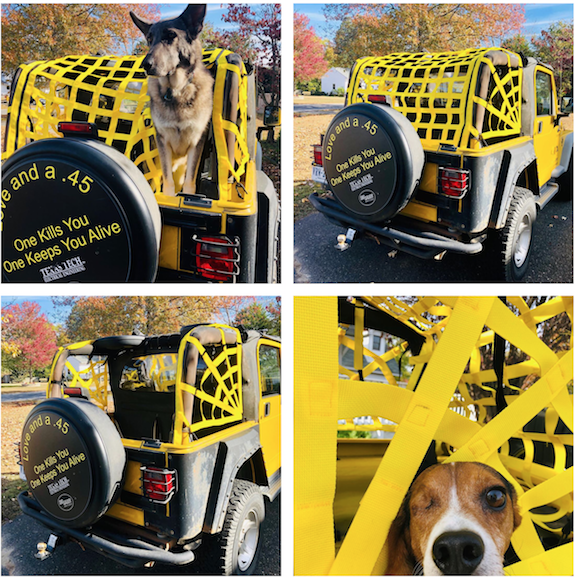
Within her eclectic portfolio of DIY projects, you’ll also find a slew of marine cushions she’s created to revamp her and her husband’s boat. She’s also crafted numerous additions to her Jeep as well as pet projects for her beloved dogs. And not only do these creative endeavors showcase the versatility of the Ultrafeed Sewing Machine, but more importantly, they showcase Bailey’s versatility and expertise as an enterprising young sewist.

We asked Bailey if she had any advice for DIYers who have dreams of following in her footsteps, and she was kind enough to share her thoughts with us. “My biggest pointer is to be self aware. If you do not know yourself and how your mind operates then you risk becoming your own worst enemy when creating things. A personal example of this is that I know I often get carried away with cutting fabric. When this happens I end up over-cutting or finding out the pattern I was cutting was a little off and so now I have a pile of cut fabric that will not work. This means that I have to either throw away the cut fabric, spend time to fix the cuts (if they are fixable), or set them aside (which ends up haunting me until I eventually throw them away). Because I am self aware of this, I always make sure to remind myself to not get carried away when I cut. If I was not self aware of how I operate, then I would continually get carried away with cutting and then kick myself for all the money I throw away.”

Screen Shot 2020-07-08 at 10.14.38 AM
Bailey recently crafted a new netted top for her Jeep. It’s even pup approved!

Bailey also has the support team of her family to thank for her ability to create. She remembers her grandpa having a big smile one his face while watching her sew and when she showed him the Sailrite he was certainly impressed. She likes to remember him fondly as a champion of her creativity.

With a can-do attitude, a great sewing machine and some DIY guidance, you too can create incredible DIY projects. We’re eagerly waiting to see what you sew next, Bailey!


Who We Are

Sailrite is your one-stop DIY shop! We are a passionate crew of do-it-yourselfers who strive to equip you with the supplies and how-to knowledge you need to tackle your next project. Do you want to learn upholstery, leatherwork, canvaswork, hobby sewing, bag making or more? We have the fabric, tools, hardware, sewing machines and notions you need to master any DIY. And even if you’ve never sewn before, our tutorials and how-to videos are designed for beginners and experienced crafters alike.

Start your DIY journey today: www.sailrite.com

Sewing Upholstery With the Ultrafeed®

All DIYers, whether they’re a sewer, woodworker, crafter or other, have the same thing in common. They love the satisfaction they get from accomplishing a project on their own. Cory Springer is no different. She owns a small upholstery business in Virginia, and one of her favorite things about sewing is that she is always learning and improving. With the help of Sailrite® project videos and her Ultrafeed LSZ Sewing Machine, she’s conquering the upholstery game and creating beautiful and unique furniture pieces.

Cory grew up watching her mother sew. “She was always sewing something — mostly curtains, but sometimes clothes too. As an adult, I started sewing when I wanted to make some clothes for my daughter’s American Girl dolls.” Her sister gave her an old, unused Janome sewing machine and she bought patterns and taught herself to sew.

This slideshow requires JavaScript.

“I’ve gone from one end of the spectrum, making doll clothes, to the other, sewing upholstery!” Cory learns from what other people have made. She doesn’t consider herself to have creative vision. Therefore, she relies on pattern instructions and online videos to help her with her upholstery work, and that’s how she found Sailrite’s YouTube channel.

The first Sailrite video Cory watched and used for her upholstery work was the “How to Reupholster an Armchair” video. She used the techniques she learned in the video to upholster an armchair in an eye-catching white and navy polka dot fabric. “Ever since that time, I’ve looked to Sailrite first for tutorial videos and I direct anyone who asks to the Sailrite YouTube page!”

armchair upholstery
Cory reupholstered this armchair with help from Sailrite’s free video tutorial. The results speak for themselves!

To get her small business off the ground, Cory needed a heavy-duty sewing machine that could handle her upholstery needs. Since Cory was already familiar with the Sailrite project videos, she saw how well the Ultrafeed Sewing Machine handled upholstery work and other materials. Choosing an Ultrafeed for her budding upholstery business was an easy decision. “Everything I could possibly want to ask about this sewing machine was answered on the Sailrite website. You guys have the best resources — clear, concise and easy to use. I felt absolutely comfortable and confident making this purchase.”

“If I want to learn to sew something, I always check Sailrite’s video library first. I fully trust your videos over anyone else’s because they are just so thorough!” Cory named her upholstery business Black Dog Furniture because of her love of Newfoundland dogs. She and her husband have two adorable Newfies: Cubby, an 8-year-old who is always close by “helping” while Cory sews, and Apple, a newly acquired puppy thanks to the recent quarantine.

sewing with ultrafeed
Cubby supervises as Cory works on a project using her Ultrafeed LSZ Sewing Machine.

After four years of sewing with the Ultrafeed, Cory is still happy with the machine. “I love its durability and ease of use. I’m a newbie when it comes to sewing, and I’m probably really hard on the machine — but it can take it! I also love that Sailrite tells me exactly how I can perform routine maintenance on my machine.”

Cory doesn’t stop at upholstery work. She’s put her Ultrafeed to use over the years making everything from upholstery and cushions to pillow covers and window treatments. She recently used the Sailrite face mask tutorial to sew protective masks for herself and her family. What’s next on her list of new projects to tackle? “I’m sewing a new patio umbrella (my Newfoundland puppy chewed a hole in mine) and I’m making some outdoor sun shades for my daughter’s porch.”

In addition to sewing, Cory is also a skilled woodworker. She incorporates her woodworking talents into her upholstery work, but she also makes standalone wood pieces as well. Her first big woodworking project was a farmhouse trestle table she built for her daughter’s new house. “Also, I recently started learning to hand letter in a modern calligraphy style. That has been fun and also a very therapeutic activity.”

woodworking farmhouse table
Cory built this stunning farmhouse trestle table for her daughter.

Creativity runs in the family. “I have three older sisters. Two of them are also avid sewers and the other is a big redecorator. We all look forward to the arrival of the Sailrite catalog when it comes out each year. It’s like getting the old Sears Christmas catalog when we were kids. We’d scour every page of the toy section just like how we now scour every page of the Sailrite home catalog!”

We’re thrilled Cory is loving her Ultrafeed Sewing Machine. With patience, practice and the right resources, your sewing potential is limited only by your imagination! Good luck on your next project, Cory! Sailrite will be here to help with anything you need!


Who We Are

Sailrite is your one-stop DIY shop! We are a passionate crew of do-it-yourselfers who strive to equip you with the supplies and how-to knowledge you need to tackle your next project. Do you want to learn upholstery, leatherwork, canvaswork, hobby sewing, bag making or more? We have the fabric, tools, hardware, sewing machines and notions you need to master any DIY. And even if you’ve never sewn before, our tutorials and how-to videos are designed for beginners and experienced crafters alike.

Start your DIY journey today: www.sailrite.com

Jan West: A Seasoned Sewist

With a little help from Sailrite® and the Ultrafeed® Sewing Machine, Jan West felt like she could tackle just about any project. As an experienced sewist, she was no stranger to the world of DIY projects, and she was kind enough to share with us her most recent sewing successes. She is proof that there’s always a plethora of creative projects to create if you have just a little time, patience and determination.

Q: What’s your story? How’d you start sewing?

A: I started sewing when I was a young girl, probably 8 or 9 years old. Both of my grandmothers had a big impact on my love for sewing and crafting. I spent a lot of time with both of them, and they taught me to hand sew and allowed me to sew on their machines or work on crafts. As I grew older, my career and family didn’t allow me much time to sew, but recently, I’ve had free time again and gained inspiration to sew and work on different craft projects.

Q: What’s your most recent sewing accomplishment?

A: A few weeks ago, I decided to order fabric to re-cover my patio chair cushions. I had re-covered some a few years earlier and knew that I could tackle the job, but I wanted to refresh my memory by watching some YouTube videos. While watching these, I ran across the Sailrite video instructions on how to reupholster golf cart seats. The video was so easy to follow and understand and, knowing that I had sons that needed their seats reupholstered, I was convinced that I could do this. 

I immediately started to search Sailrite’s website for the vinyl fabric that I would need. I was concerned that I didn’t have a walking foot upholstery sewing machine like Sailrite showed in their videos, but I did have an older metal machine with a walking foot. With the Sailrite video at my disposal, I was able to sew the vinyl on my old machine and the golf cart seats turned out very well. 

At the same time, I knew that my stitching was not as perfect as it could have been due to having to coax the fabric through at times. Soon I realized that if I was going to continue these kinds of projects, I would need a Sailrite machine. It would take my next projects from looking good to looking great! Plus it would make the project so much easier to sew. By this time, I had already watched almost all of Sailrite’s videos and had convinced myself that I could re-cover an armchair, a bimini and much more.

I actually looked at different machines online, but after reading reviews, I always came back to the Sailrite website. I purchased the Ultrafeed LSZ and am currently sewing new covers for some wicker patio furniture. If you’re accustomed to a regular home sewing machine, it might take a little getting used to the walking foot on the Ultrafeed, but I have been very pleased with it so far. No more coaxing the fabric through the machine and no more inconsistent stitches! I can’t wait to reupholster the next golf cart seat. I have my Morbern® vinyl from Sailrite ready and waiting!

Jan West

Q: Can you tell me a little bit more about your golf cart project?

A: My golf cart seat project went right along with your how-to video series. Luckily, the seats on my golf cart were exactly like the ones that you upholstered in your video. I started by removing the seat backs. I measured the lengths, widths and edges of them and also marked where I wanted the coordinating fabric to be centered on the backs. I used these measurements, along with the seat cushion measurements, to diagram out on paper how I would lay the pattern pieces out on 54-inch wide vinyl fabric. Then I decided how much fabric I would need to order from Sailrite.

I added a 1/2-inch seam allowance to all the measurements except the boxing pieces, marking the end boxing pieces as described in the video. Then I removed the staples holding the existing vinyl on and cut out the end boxing piece to be used as my pattern. With measurements from the plywood backing, I cut out the vinyl pieces for the front of the back cushion, including the coordinating fabric and allowed about 3 inches in length on each piece to wrap around and staple to the plywood back. I sewed the fabric strips together with a 1/2-inch seam and top stitched a flat-felled seam. I then stitched the boxing to each end and top stitched again, by watching your exceptional video. 

This slideshow requires JavaScript.

My husband helped me by replacing the rusted tee nuts in the plywood and I used contact cement to reattach the foam to the plywood. I had purchased a pneumatic staple gun and my husband helped me to staple the vinyl to the plywood seat backs. I’m not very strong in my hands, so having someone to help you staple and stretch the vinyl is great. We attached the newly covered back cushions to the golf cart and transferred where I wanted the coordinating fabric to match up on the seat bottom and marked the old vinyl with a sharpie marker. I basically did the same process with the seat cushion as with the backs. 

Overall, I enjoyed my experience with this project. It was much easier than I expected because of your instructional video tutorials that I kept referring to. The biggest setback was having to cut off the old screws and replace the tee nuts without damaging the plywood. Even though I used fabric from Sailrite, at this time I didn’t have my Ultrafeed and I really wish I did. It would’ve turned out much better.

Q: In your opinion, what’s the most rewarding part about sewing your own DIY projects?

A: I think that the most rewarding part of sewing my own projects is the self-satisfaction of knowing that you can accomplish something that you’ve never done before, along with saving the money that you would have paid someone else to do it for you. And I can use my talent to help save my family money too!

Now that I have the Sailrite machine, I am already using it to sew some new patio cushions. I am thrilled with it, and I can’t wait to finish this project and use the machine on the next golf cart seat waiting in the wings. I even have plans to re-cover an armchair when I decide on the fabric I want. I’ve been so inspired by your video tutorials and I truly believe: “I can do that!”  

Please keep the videos coming!

IMG_7622


Who We Are

Sailrite is your one-stop DIY shop! We are a passionate crew of do-it-yourselfers who strive to equip you with the supplies and how-to knowledge you need to tackle your next project. Do you want to learn upholstery, leatherwork, canvaswork, hobby sewing, bag making or more? We have the fabric, tools, hardware, sewing machines and notions you need to master any DIY. And even if you’ve never sewn before, our tutorials and how-to videos are designed for beginners and experienced crafters alike.

Start your DIY journey today: www.sailrite.com

Sewing a Labor of Love

Kathy Roberson is no stranger to the sewing world. She’s been sewing as a labor of love for members of her family for years. But when her granddaughter wanted a complete revamp of her bedroom, she knew she would need a well-equipped sewing machine to get the job done. After some research and coaxing from her husband, Kathy embarked on her DIY journey with a little help from Sailrite®. And she’s here to share her heartwarming story with us!

Q. What’s your history like with sewing?

For years I dreamt of having an industrial sewing machine. In my young adult life, I worked at three different sewing factories and knew what they were capable of. When I was 40, my husband and I refurbished a 1978 Toyota Corolla for our then 16-year-old daughter’s first car. We borrowed a portable industrial machine from a friend to sew the covers for the seats. 

From that time on I searched for a machine that would compare to it. (Wish we had the internet then!) I found a few cast-off factory machines, but there was always something to keep me from buying one. I’ve had a couple of well-known machines that worked on regular home materials fairly well. But they struggled to sew pillows, curtains and light upholstery projects. They would also break multiple needles with each project. 

My very expensive computer machine quit a couple of years ago and for a few months, I didn’t have a machine for the first time in my life. I finally bought a $100.00 machine to do simple mending jobs with. I have two sergers also that I enjoy and thought I would be fine with them. 

Xakm0+cjTASyXgCze9+mtA
Some of Kathy’s sewing work.

Q. What led you to choose Sailrite?

Our granddaughter wanted her room updated because it was a little girl room and she is now a college student. We could have hired someone else to make the Roman Shades, but she wanted Gran to make them. So here I sat with yards of material and a sewing machine. I wondered whether the machine would make it through the simplest seams that the curtains would require. 

Imagine my surprise when I stumbled upon the Sailrite website. I was so mesmerized with the videos and products I found! I read tons of testimonies from people who were so happy with their machines. My dilemma was this: I will be 75 years old soon and my husband is 79, and I am wanting a new sewing machine! When I approached the subject of the machine, his response was, “YOU WANT WHAT?” I said, “It is a wonderful machine but if you are not on board with me getting it, I understand.” I didn’t cry and beg him to understand, but I wanted to!

I could not quit watching the videos on the Sailrite website. Like I said before, the videos just mesmerized me! I guess he caught me watching the videos one too many times because one day all of a sudden he came into my computer room and said, “Kathy if you want that machine, just order it!” I excitedly asked, “Are you sure?” You see, in our 55 years of marriage, we never buy anything that costs over a couple of hundred dollars without being in agreement. He answered, “Yes, you have wanted a machine like that for a long time.”  Happy is a calm word for the excitement I was feeling when I ordered my Sailrite® Ultrafeed® LSZ!

IMG_3127
Kathy’s custom Ultrafeed table sewing space!

That very day I ordered the machine and two days later it was here. When the delivery truck pulled into the drive, I hurried out to meet the driver, which happened to be a lady. She opened the back doors of the vehicle and pulled out the first box and then the second and as she was helping us get them out, she said, “You are going to love this machine! I have one just like it and I love mine.” I asked her what type of things she sewed on hers and she replied, “Everything!  After a week of working, when the weekends come, I am sewing. I love it! It will sew anything. I sew for myself and my grandchildren! I just love it! I am here to tell you that you will not be sorry for buying this machine!” She sure eased any qualms that I could have had in buying the machine!

Q. What was your experience like using the Ultrafeed for your project?

We had no problem putting the machine together. I put the Monster® II Balance Wheel on it but thought that the handle was supposed to stay on the balance wheel. When I began using the machine, it shook more than I thought it should. I had watched the videos and thought I knew everything! My husband told me that the handle might be causing the machine to shake, but I wouldn’t listen to him. I contacted the website and they wanted me to film a video while sewing to see the shaking. I did that and then they told me that the handle was not supposed to be left on the balance wheel while sewing. It was only for sewing when you were sewing manually! Uh-oh! But how nice to have my problem solved so quickly. The Sailrite customer service could not have been any nicer to me. I took the handle off and have not had any problem with it shaking. Just injured my pride a little!

Sewing the Roman Shades and pillows on my Sailrite Ultrafeed LSZ was like cutting soft butter with a sharp knife. I never broke one single needle! It went over the thickest parts with no effort at all and made the project so much fun to sew. I have made curtains with welting the bottom before, but I’ve never ever enjoyed it like I did when I made these curtains. I watched the Sailrite videos for making welting and it was so easy with the LSZ. I didn’t have any issues or broken needles like I’ve had with the other machines in the past. I love it!

The way the Ultrafeed LSZ feeds the material to keep both top and bottom even is wonderful. The larger window shade had to have a seam in it. I had cut the material so that the pattern would match when seamed. My experience in the past is, no matter how close you cut to get the pattern right, the real test comes with how the machine feeds the material. 

fullsizeoutput_2afb

In the picture where I am pointing to the seam, you can see that the Ultrafeed LSZ fed the material really well. I was so pleased after I got the seam finished and opened it up and the pattern was perfect! Unless you are close to the shade, as I am in the picture, you cannot tell where the seam is!  That seam was only sewn once. I was amazed because in the past I have had to rework things multiple times until I got it right. 

Q. What’s next for you in the sewing world?

My husband took a folding table we had and cut a hole in it and made a box so that the Ultrafeed LSZ would set down in it. That way I have a larger table area and if I need the machine to be portable it will just lift out. I made the skirt at the end of the table and the pockets at the front so that my notions would be handy as I need them. Under the table, I can store other sewing notions, thread, material, etc. Now when I need to sew, all my “stuff” is in one place! I LOVE IT!

fullsizeoutput_2a91
Kathy’s granddaughter loved her new and improved room.

I haven’t decided what project I will try next, but I am confident that whatever it is, I have the machine that will sew it! I love my Sailrite LSZ machine.


Who We Are

Sailrite is your one-stop DIY shop! We are a passionate crew of do-it-yourselfers who strive to equip you with the supplies and how-to knowledge you need to tackle your next project. Do you want to learn upholstery, leatherwork, canvaswork, hobby sewing, bag making or more? We have the fabric, tools, hardware, sewing machines and notions you need to master any DIY. And even if you’ve never sewn before, our tutorials and how-to videos are designed for beginners and experienced crafters alike.

Start your DIY journey today: www.sailrite.com

Five-Star Sewing With Steve Bugg

While the term “do-it-yourself” is often associated with creativity, there’s another important aspect to the DIY culture: the ability to be both resourceful and self-sufficient. When Steve Bugg was laid off from his job in 2016, he decided to take matters into his own hands and embark on a career journey that involved learning new tricks and the Ultrafeed® LS. This is a story of ingenuity and hard work — one that proves that it’s never too late to learn a new trade and explore the world outside of your comfort zone.

The beginning of Steve’s story starts with the end. “I was a land manager for a small oil and gas exploration company. I’d been with the company for 20 years. In 2016, the company went under and everyone was let go. … It was then that I realized if I could bust my butt for someone else’s company, I certainly could work even harder for myself. I found a franchise that repaired and restored leather, plastic and vinyl.”

Fibrenew-2Chop-GS.jpg
Steve’s diverse customer base can be found almost anywhere — land, air and sea.

While this type of business was an entirely new realm of his career experience, Steve realized that the business was unique in that it fulfilled a common need but had little competition. The market for repair was everywhere, as leather, plastic and vinyl are found in nearly every industry. You’ll find these materials in automobiles, boats, furniture, restaurants, medical offices, hospitals, planes and more. The job involved redying, cleaning, conditioning and repairing various types of leather, plastic and vinyl.

After purchasing the franchise, Steve found he was often renovating restaurant seating, but kept running into the same problems again and again. “I was doing a lot of restaurant work but was spending a lot of money hiring other people to sew for me so I could go out and re-cover the restaurant booths. These guys were making a lot of money off me. … That’s when I decided that I needed to learn how to sew. I was missing out on way too much money.”

After doing extensive research on a number of different sewing machine brands, there were a few contenders in mind. But once Steve stumbled upon the Sailrite website, that all changed. “I was taken in by all the videos, all the support products that just fit right into what I was doing, what I wanted to learn how to do, and other supplies I didn’t know I needed until I saw them on the website.” While Steve initially was fond of the Fabricator®, the need for portability was at the forefront of his budding business, as some sewing jobs would have to be done on-site. That led him to the Ultrafeed LS. With its straight stitch capability, the LS is portable and powerful enough to tackle the heavy materials encountered on the job.

Slide2.jpg
Steve getting the hang of his new Ultrafeed LS.

After purchasing his new machine, the next step was for Steve to learn how to sew. While the Ultrafeed glided through the heavy vinyl material he was sewing, it was a more difficult material for a novice sewist to learn the tools of the trade. He’d never sewn before and the challenge seemed daunting at first. In situations like this, Steve’s perseverance and “can-do” attitude made all the difference, and Sailrite’s instructional videos helped too.

“I was struggling with the whole concept, but I kept moving forward and watched a ton of videos. Then I saw a video on how to sew piping. I knew I could do that. Plus, the standard foot on the Ultrafeed has a groove that guides piping. After I learned how to make the piping, it hit me that I was going to get better.” Steve continued to watch videos and began trying out his new skills on a few restaurant booths. After making adjustment after adjustment to his sewing technique, he finally managed to become proficient in the trade. Now he can visit the job site in need of repairs, take measurements and patterns, and have the repairs sewn by the next day. And the best part is he can save money that he had previously spent outsourcing his sewing jobs.

This slideshow requires JavaScript.

Steve continued to work arduously sewing and repairing materials for numerous clientele. But one day he noticed the machine wasn’t feeding the vinyl like it normally did. Being in the middle of a huge project for a restaurant, he frantically contacted Matt Borden from Sailrite customer support. Living in Texas, Steve couldn’t make it to the Sailrite facility in Indiana, but that wasn’t an issue — a simple phone call cleared everything up.

“Matt was cool, calm and collected while I was in a panic. He was extremely patient with me and guided me through the process of finding the problem and the solution. He couldn’t have been nicer and more helpful. … Before too long I was back up and sewing. I got the job done and the restaurant was thrilled. Matt Borden is my hero!”

245A7928.JPG
Matt Borden works closely with Sailrite customers for stress-free machine repairs.

From amateur to accomplished professional, Steve Bugg has been through life’s ups and downs and made it out on top. With his Ultrafeed LS and determination, anything is possible. On top of the numerous restaurant booths, he’s sewn a few boat cushions, medical examination tables and cushions for mobility scooters. While Steve’s future may not always be certain, it is always bright, and he looks forward to helping his next customer.

“I’m not great, but I’m getting better all the time. It’s rewarding to hear my customers say how wonderful everything turns out. I have 100% five-star reviews to date and I don’t want that to change. I love learning. And the more I learn, the more new tools and supplies I need, and Sailrite has almost everything!”


Who We Are

Sailrite is your one-stop DIY shop! We are a passionate crew of do-it-yourselfers who strive to equip you with the supplies and how-to knowledge you need to tackle your next project. Do you want to learn upholstery, leatherwork, canvaswork, hobby sewing, bag making or more? We have the fabric, tools, hardware, sewing machines and notions you need to master any DIY. And even if you’ve never sewn before, our tutorials and how-to videos are designed for beginners and experienced crafters alike.

Start your DIY journey today: www.sailrite.com

Taking DIY to New Heights

The possibilities of things you can make with a sewing machine are limitless! Sailrite® customer Gregory Palmquist had a fleeting idea to sew his own kites after he was underwhelmed by the selection of mass-produced kite kits. This seed of an idea has grown into a bigger hobby that has led to more sewing projects, including patio furniture, beach bags, totes and more. With tools, supplies and how-tos from Sailrite, he’s been able to take his sewing skills to incredible heights!

It all started when Gregory was young. Like many kids, he grew up watching his mom sew on an old Singer sewing machine, and he would tinker around with it occasionally. Fast forward to junior high school and a woodshop class that was at full capacity. “Some of the boys, including myself, went to home economics class instead. We made stuffed dolphins for a project. Mine came out pretty good for a 12-year-old boy.” This early experience with sewing would pay off in a big way later in life.

Gregory has always been fascinated with aviation. As a boy, he made his own kites out of newspaper and sticks. A few years ago, he was given a used Kenmore machine and, on somewhat of a whim, he decided to try his hand at sewing kites. “I was at one of the big box home stores getting ideas on materials to put together a quickie box kite. I finally decided to go all in and do it right. I found plans online and just expanded the dimensions.”

This slideshow requires JavaScript.

He makes his kites out of ripstop sailcloth and webbing. After several attempts on the Kenmore, he quickly realized his second-hand machine wasn’t up to the challenge. “Some of the nylon webbing reinforced areas are thick and the Kenmore just couldn’t handle it.” Next, he tried sewing on a Pfaff, but it still didn’t hold up to his kite-making demands.

Not wanting to give up his budding hobby, Gregory began the search for a better sewing machine that would be able to handle his needs. “I researched many machines when I came across the Sailrite® Ultrafeed® LSZ Sewing Machine. Immediately I knew this was the machine for me. The portable size, the power and the price point were winners.”

After the Pfaff failed, he finally “drank the Kool-Aid®” as he put it and ordered an Ultrafeed LSZ. “How did I survive all these years without this machine?” He recently upgraded his Ultrafeed with the Workhorse™ Servo Motor in the Industrial Sewing Table. “For a 58-year-old guy who’s been in engineering, I appreciate the power and efficiency of the Workhorse Servo Motor coupled with the Ultrafeed and Industrial Table. Move over peanut butter and jelly because this is the perfect pairing ever!”

Gregory has sewn four large kites on his Ultrafeed. He started with a basic Eddy design and progressed to the complex Compound Cody, a modern double box design based on the original Cody War Kite designed and patented in 1901. His first kite, the Eddy, measured 6 feet tall x 6 feet wide. Gregory sews them during the wintertime, using the dining room table as a work station.

patio set

The new patio set Gregory sewed using his Ultrafeed LSZ.

Since his kite sewing was so successful, Gregory’s wife asked him if he could fix some things around the house. She put him to work replacing the tattered awning on their patio swing. “The 1″ Swing-Away Binder is a super tool! I used polyester thread throughout for UV resistance. Sailrite had everything I needed.” Next up was replacing the swing’s seating cushions and sewing a new barbecue grill cover for a matching and cohesive outdoor seating area.

“Having some leftover material, I threw together a bag for the missus. My wife is a nurse, and the girls at the hospital loved it! They were floored to hear that her husband made it.” This led Gregory to search for some of the Sailrite bag-making tutorials. He watched the “How to Make a Beach Bag” video and began making beach bags, totes and other bags. Gregory said watching Sailrite’s tote videos brought his sewing up to a professional level. “They’re a huge hit with the ladies. I couldn’t have come this far without Sailrite — thank you!”

tote bag collage
Gregory showing off some of the beach bags he’s made.

Although Gregory doesn’t get to fly his kites as much as he’d like, he can’t bear to part with them. “We’re in Rhode Island, and I never did have much time to take these big boys out to fly during the summer. I did consider selling them, but I don’t want to part with my labor of love. There will be time eventually.”

What does Gregory like best about sewing and the DIY experience? Not only is sewing a creative outlet for him, but it’s practical too. He’s been able to sew bags for his wife, spruce up their patio, sew his beloved kites — and who knows what other uses he’ll find for his Ultrafeed. “I’ve got so much inspiration and the creativity is just flowing out of me! This newfound medium has allowed me to express my artistic creativity. My creations are purposeful and give me satisfaction.”


Who We Are

Sailrite is your one-stop DIY shop! We are a passionate crew of do-it-yourselfers who strive to equip you with the supplies and how-to knowledge you need to tackle your next project. Do you want to learn upholstery, leatherwork, canvaswork, hobby sewing, bag making or more? We have the fabric, tools, hardware, sewing machines and notions you need to master any DIY. And even if you’ve never sewn before, our tutorials and how-to videos are designed for beginners and experienced crafters alike.

Start your DIY journey today: www.sailrite.com

Sewing for Salmon Season: A Marine DIY

Sewing for yourself is rewarding enough, but sewing for others opens up a whole new realm of DIY possibilities. When Debbie Stitz saw that her son’s boat was in dire need of new seats before salmon season in their hometown, she knew just the person to reupholster them — herself! Backed by her extensive sewing knowledge and a few key tools and supplies from Sailrite®, she set out to completely transform her son’s boat. She was generous enough to share the story of her many ups and downs on the road to do-it-yourself success with us.

Q. Have you always loved to sew? When did you learn?

I learned to sew at a young age. I remember it well. My mother was never a sewer, but my Aunt Susie was. My first project was a skirt with shoulder straps that crossed in the back and buttoned in the front. I remember making it at my cousin’s house in Upstate New York with my aunt’s help. I was so proud when I finished the skirt. I wore it the next day and told everyone I made it myself. 

From that day forward, I was hooked on sewing and determined to teach myself. I got a job working at a fabric store in my hometown of Corning, New York, and made most of my own clothes in high school. I taught myself to read and follow patterns, put in sleeves and sew in zippers. I just loved the creativity of being able to design and make my own clothes.

Q. How did you come across Sailrite? What made you choose the Ultrafeed® LSZ?

I started on a Kenmore machine, but tension problems and motor speeds convinced me to invest in a Bernina as I started to venture into curtains, home décor and quilting. There is nothing more frustrating than sewing with a machine that cannot do the job and give you professional-looking results.

02_Sewing on my Ultra Feed LSZ-1
Debbie and her trusty Ultrafeed LSZ.

I then started doing small upholstery projects and cushions, but my Bernina machine was having a tough time with the heavier fabrics and achieving a professional-looking stitch with heavier threads. I needed a commercial machine but could never justify the high cost for one. I was surfing the web one day and found the Sailrite® site. When I read about the features of the Ultrafeed LSZ and the price point, I was ecstatic and ordered one. I chose the LSZ model because I wanted the zigzag feature. 

Q. So you used the Ultrafeed to remodel boat seats? How did that happen?

At that time, my oldest son had asked me if I could make new vinyl berth cushions for his boat. Not only did I discover the Ultrafeed LSZ machine at Sailrite, but all the choices of marine vinyl, V-69 threads, needles, zippers, foam, cushion wrap silk film, cording, 1/4-inch basting tape — everything I needed to make his new V-berth cushions. I had made cushions before with fabrics, but sewing with vinyl was a new challenge for me. Sailrite offered wonderful videos that guided me in purchasing the right vinyl for my project and how to make my own cording and cushions.

IMG_3849
The final V-berth cushions looked immaculate.

Together, my son and I chose Morbern® Seabrook Sea White vinyl. I also purchased the Flex20 LED light, Deluxe 5 ½ Magnetic Sewing Guide. And for my new LSZ Machine, I chose the Right Roping Zipper Foot, Cording Foot Set and 1” Swing-Away Binder. The tutorials for learning the LSZ machine were extremely well done and very helpful to get started. I was convinced that this machine was a powerhouse and sewed anything I asked it to!

My confidence was soaring when my youngest son asked if I could re-cover his torn and tattered boat seats in his newly purchased used fishing boat. Of course, I said yes. After removing the tattered vinyl from the seats to try and get some sense of a pattern, I soon realized that all three of the seats needed to be totally rebuilt. The wood and foam were so rotten, and the screws so rusted, that it took my husband and I a full day to get the seats apart! We thought about just buying him new seats, but these were Bentley seats at $400 each that were just not taken care of. We decided these seats were worth restoring and took on the challenge together, as a team. 

This slideshow requires JavaScript.

My husband ordered the marine plywood, stainless steel machine screws, 4-prong hex nuts and supplies to build the seat structures. I went directly to the Sailrite site, where I found all the fabric and supplies needed to construct the new seat covers. I basically followed the original pattern of how the old covers were made, and my son’s choice was two colors of Naugahyde® vinyl that I got from Sailrite.

Q. Can you explain your DIY process a bit more?

Making and marking the pattern pieces were the most important. I took the least tattered pieces of the old covers and trimmed them where the original stitching holes were. I drew them out on poster board and added 1/2-inch seam allowances on all sewing sides. I marked the center points on the corners, and all other areas, to ensure a good match when sewing together. I then transferred and traced the pattern and markings to the Naugahyde fabric back, being sure to flip the pattern and mark for left and right sides, top and bottom, etc. I made all the contrasting cording first and machine basted to the seat pieces and then sewed the pieces together. I absolutely love my Ultrafeed LSZ machine! It sewed through the layers of Naugahyde with ease and the topstitching looked so professional. The Cording Foot Set also helps to make your own cording a breeze and is actually my favorite step. 

The next step was to remove the bad foam and replace with new foam after my husband had finished the wood seats and arms. Even though we used marine plywood, I still put 3 coats of Varathane® on the wood to keep it moisture and water-repellent. I used an electric kitchen knife to form and shape the foam and then used contact cement to glue the foam to the newly made wood seats. I lightly sprayed foam adhesive to the foam and covered the foam with Cushion Wrap Silk Film. The small amounts of adhesive spray kept the silk wrap from shifting as I was putting the new covers over the foam.

Using an electric staple gun and stainless steel staples (no rust), I attached the covers over the foam for the final fit. It was a two-person effort with my husband pulling and me stapling! I then attached the Hidem Gimp purchased from Sailrite to the bottom of the seatbacks to hide the staples. There were some hiccups along the way, but nothing too serious. It took a lot of “thinking and planning” before “cutting and sewing.

Q. Sounds like quite the project. What was the reaction of your family/friends to the finished product? 

The end result was three new boat seats that looked so professionally made. My husband and I were so proud to have accomplished something that we had never done before. It was a team effort. He was the carpenter and I did the sewing. Family and friends were amazed by the professional look of our final project, and our son was so thrilled to have new boat seats for the start of salmon season here in Oregon! I am hooked more now than ever, not on catching salmon, but hooked on sewing and starting my next project with my Sailrite Ultrafeed LSZ! New patio cushions and pillows are next.

Screen Shot 2019-09-27 at 9.54.20 AM

Thank you, Sailrite, for the machine, the accessories, the fabrics and all the inspirational videos you so thoughtfully put together on your website to inspire us all!


Who We Are

Sailrite is your one-stop DIY shop! We are a passionate crew of do-it-yourselfers who strive to equip you with the supplies and how-to knowledge you need to tackle your next project. Do you want to learn upholstery, leatherwork, canvaswork, hobby sewing, bag making or more? We have the fabric, tools, hardware, sewing machines and notions you need to master any DIY. And even if you’ve never sewn before, our tutorials and how-to videos are designed for beginners and experienced crafters alike.

Start your DIY journey today: www.sailrite.com

Full Speed Ahead: Sewing for the USCGC Mackinaw

Joe and Barb Traub aren’t your typical museum volunteers. They volunteer their time and sewing talents for the United States Coast Guard Cutter Mackinaw WAGB-83. This decommissioned Icebreaker ship was built during World War II as part of the war effort. While touring the ship, the couple couldn’t help noticing that some canvas covers were torn up and damaged due to the harsh winters on Lake Huron. One project led to another, and they have been sewing covers and other pieces for the ship ever since. Read about Joe and Barb, their sewing background, and a little bit of the Icebreaker’s history and the role it played in the war.

A Piece of History

The USCGC Mackinaw was built in response to the increased need to transport war materials — specifically ore — during the winter months of World War II. Icebreaker ships are designed with a strengthened hull engineered to plow through heavy ice and create a path for smaller boats to travel. Dubbed the “Queen of the Great Lakes” and “The Largest Icebreaker on the Great Lakes,” Congress authorized construction of Mackinaw on December 17, 1941, just 10 days after the bombing of Pearl Harbor.

ship1948
A photo of the USCGC Mackinaw breaking ice on Lake Huron in 1948.

The ship was built in Toledo, Ohio, and cost $10 million. The Toledo Shipbuilding Company won the contract. However, several delays and penalties forced the company to declare bankruptcy, and the construction was completed by the American Shipbuilding Company. The keel was laid on March 20, 1943. The ship is 290 feet long and the design is based on the Wind class of Coast Guard Icebreakers. However, Mackinaw was built wider and longer than other ships in this class so that the draft would be shallower. The hull was launched on March 4, 1944, and the ship was commissioned on December 30 of that year. Cheboygan, Michigan, remained the ship’s home port its entire life during active service.

The ship served many roles over its esteemed 62-year career. Not only was the Icebreaker a vital part of the war effort, but it also rescued stranded ships, assisted with shipwrecks, and even delivered Christmas trees to underprivileged children in Chicago. Mackinaw is a beacon of hope, a symbol of determination and goodwill not only for the Great Lakes region, but America at large.

This slideshow requires JavaScript.

Decommissioned in 2006, the Icebreaker now resides in its namesake port, Mackinaw City, Michigan, and serves as a floating maritime museum. The museum’s educational programming and exhibits teach visitors about maritime history and the economy and ecology of Michigan and the Great Lakes. The ship is open to the public from mid-May to mid-October every year. Aboard the ship, workers offer public tours, educational tours, overnight encampments and group events.

Sailing, Sewing & Sailrite

Barb learned to sew during her youth. Her mother was a high school home economics teacher and taught her daughter everything she knew. When they were married, Barb then taught Joe how to sew. The couple enjoys working on sewing projects together — both projects for their home life and sailing hobby, as well as the projects for the Mackinaw. “We do the projects together for the ship,” Joe said. “Barb is the guiding hand that directs the process. She is the brain, and I work at her direction as I learn.”

The Traubs are longtime Sailrite customers with a unique connection to the company. Their first sewing project as a couple was a tiller cover for their Ranger 26 sailboat. Working in Columbia City in 1989 and needing supplies, Joe happened upon a local business called Sailrite. “I purchased the materials from [founder] Jim Grant himself and have been a customer ever since.” The couple even raced with Jim Grant when they were living in Indianapolis and members of the same sailing club.

joe-and-barb-traub.jpg
Joe and Barb Traub show off the docking pedestal covers they made for the USCGC Mackinaw using their Ultrafeed LSZ.

Besides sailing, they enjoy travel and home improvement projects. “We have made a variety of projects over the years,” recounted Joe. “We’ve sewn Sunbrella® window covers for our cottage and diaper bags and tote bags from old sails.” The couple have also completed a hard top dodger and bimini for their Catalina 30 sailboat, a fire pit cover and numerous sail repairs for their friends in Florida, where they’ve wintered for the past 10 years.

Sewing for the Mackinaw

Joe and Barb Traub have been involved with the Mackinaw since 2015. “Our neighbor is the director of the museum and another friend works in the office,” Joe explained. “During a visit on the ship, we noticed that some of the canvas covers were in bad shape from the continued exposure to the weather. We asked if we could make a cover for the fuel storage area. One project led to another, to another, and on and on.”

fuel storage cover
The first sewing project the Traubs completed for the ship was a fuel storage cover.

The Mackinaw received a grant in 2018 to spruce up the historic ship, including resurfacing and repainting all exterior surfaces. The project’s goal was to preserve this important piece of American history and prevent further deterioration. Joe and Barb have been busy helping with this effort by sewing covers to keep certain parts of the exterior protected and well maintained. “We are volunteers just trying to maintain the appearance of the ship,” Joe stated.

The couple has completed three projects for the ship. Their first project was the cover for a fuel storage area made from Sunbrella Marine Grade fabric. Next, they completed eight docking pedestal covers made from vinyl and eight letter bags that hang above the lifeboats. “For the letter bags, one side required stitching through four layers of 20-ounce vinyl. No problem for the Ultrafeed®! “We’re currently working on a tow line winch cover that is 60 inches wide by 12 feet in diameter. The Sunbrella, thread, fasteners and HH-66 Vinyl Cement were all ordered from Sailrite.”

Joe and Barb are proud that their covers protect exterior parts of the ship and enhance the look and appeal of the vessel. They feel honored to donate their time and talents toward volunteering for such an important and noble piece of American history. Mackinaw WAGB-83 is a continuous reminder of American ingenuity, hard work and determination. The ship serves as a goodwill ambassador throughout the Great Lakes region, educating and inspiring both the young and young at heart.

deck of mackinaw

To learn more about the ship’s history and museum information, please visit www.themackinaw.org.


Who We Are

Sailrite is your one-stop DIY shop! We are a passionate crew of do-it-yourselfers who strive to equip you with the supplies and how-to knowledge you need to tackle your next project. Do you want to learn upholstery, leatherwork, canvaswork, hobby sewing, bag making or more? We have the fabric, tools, hardware, sewing machines and notions you need to master any DIY. And even if you’ve never sewn before, our tutorials and how-to videos are designed for beginners and experienced crafters alike.

Start your DIY journey today: www.sailrite.com

The DIY Life: One Man’s Creative Story

When amateur woodworker and DIY enthusiast Bruce Steinert realized his La-Z-Boy® recliners were looking a bit worse for wear, he set out to have them reupholstered. To his shock and disbelief, the lowest quote from an upholstery shop cost almost as much as the original purchase price of the recliners. Being a handyman with a “can do” spirit, he began researching ways he could reupholster the recliners himself. Along the way, he learned a lot about sewing, the upholstery process, and what it takes to tackle a new hobby. He’s shared his story with us.

Over the years, Bruce had completed many woodworking projects, both big and small. He built a workbench and router stand for his workshop as well as smaller home projects and repairs. Two of his most complex and impressive woodworking jobs were for a local church. He built a 12- by 16-foot, 4-foot-high stage that disassembled into 4- by 8-foot sections for storage. He also constructed a 5-foot-diameter oak pulley wheel to restore function to the church’s bell. Other projects, including electrical work, plumbing and window sash replacements, added to his skill set.

Bruce credits his woodworking and other crafting experience for his seamless transition into sewing and upholstery work. Having previous DIY projects under his belt also gave him the confidence to tackle a new hobby. “For most DIY projects, I find there is a stage in the project when you can’t go back and your only choice is to forge ahead to completion. It’s a great confidence builder. Online videos are a great learning tool.”

Prior to his La-Z-Boy upholstery project, Bruce had done some basic sewing. He sewed curtains, baby clothes, and had made clothing repairs. At an estate auction, Bruce and his wife purchased a Morris chair (an early 20th-century version of a recliner) at a great price because it had no cushions. They tried to make do with a purchased cushion, but it wasn’t ideal. The chair was such a great find that they didn’t want to settle for a mediocre store-bought cushion.

morris chair upholstery
The store-bought lounge chair cushion (left) is no comparison to Bruce’s well-fitting, custom-made cushions (right).

So, Bruce set out to sew a custom-made cushion for the Morris chair. While researching how to sew a cushion, he came across Sailrite’s inventory of how-to videos. By watching the Sailrite marine cushion video and applying his pragmatic approach to learning new skills, he was able to create a great looking chair cushion. It was this successful project that convinced Bruce he could handle the recliners. “Making new cushions let me practice with a larger project that needed the fabric pattern to match, new foam and zipper plaques. That gave me the confidence to tackle the recliners.”

In preparation for reupholstering the recliners, Bruce knew he’d need a better sewing machine. His old machine couldn’t handle more than two or three layers of fabric. He needed a sewing machine with more power and slow speed control that could handle thick fabric assemblies. When working on his Morris chair cushion, Bruce had watched many of Sailrite’s free project videos featuring the Ultrafeed®. Watching the Ultrafeed handle the various sewing applications in the videos is what sold Bruce on the machine.

With his new Ultrafeed LSZ at the ready, he again turned to Sailrite’s project videos. He watched the “How to Reupholster a Recliner Chair” video and followed it step by step. “The patterning techniques were all applicable. My process mirrored Cindy’s process in the video.” He made sure to take careful notes during the recliner disassembly process as he knew this would help him smoothly reassemble all the pieces. “When you are about to start removing the fabric, think through how the pieces were probably assembled at the factory since you will want to remove them in reverse order. There were 47 pieces for each of our chairs. Start to finish I completed both chairs in about four weeks but did not work nonstop.”

Not only did Bruce follow Sailrite’s recliner upholstery video, but he also watched the accompanying “How to Make an Upholstery Work Table” video so that he’d have a nice, elevated workstation on which to reupholster his recliners. With his woodworking know-how in his back pocket, Bruce took the Sailrite work table design and improved it by making his table collapsible for convenient storage in his workroom.

collapsible work stand
Bruce’s collapsible work table. He stores the legs, fabric and hardware pieces inside the table so everything stays together.

“I highly recommend building the stand if you don’t have a suitable work surface,” Bruce advised. “My workshop is fairly small and storing the stand was going to take up a lot of space. It needed it to be compact, yet easily reassembled.” Bruce modified his work table to make the legs detachable. The legs, trunk liner fabric and a bag of various hardware pieces are stored inside the collapsed table. The top and bottom of the table latch together for a secure hold. “From the original 9 square feet of floor space occupied, it’s now less than 3 feet.”

Now that Bruce has successfully reupholstered his recliners with his new Ultrafeed, he’s also used the machine to repair a tear in his computer bag. He used Sailrite’s video on how to repair a tear in a sail and adapted the technique. On the same bag, he replaced the worn out faux leather handle with real leather, also using his Ultrafeed. “It is a very well made product and simple to operate. It makes sewing truly a joy.”

One thing he learned along the way during his sewing DIY was to take it one step at a time. “Don’t let the scale of a project dissuade you from giving it a try. Reupholstering a chair is just a lot of little projects done in a sequence. Tackling these projects not only gives a great sense of accomplishment but is also a wonderful stress reliever. Put down the phone, turn off the TV and get started.”

completed recliner upholstery
Bruce enjoying the results of his hard work!

What’s next for Bruce? He doesn’t have any future sewing projects planned, but as he put it, “one never knows what might happen along. Long term, I have a desire to restore classic cars in my retirement. I’m sure there will be opportunities to upholster and make door panels for those. Who can say, maybe there is a second career out there for me.”


Who We Are

Sailrite is your one-stop DIY shop! We are a passionate crew of do-it-yourselfers who strive to equip you with the supplies and how-to knowledge you need to tackle your next project. Do you want to learn upholstery, leatherwork, canvaswork, hobby sewing, bag making or more? We have the fabric, tools, hardware, sewing machines and notions you need to master any DIY. And even if you’ve never sewn before, our tutorials and how-to videos are designed for beginners and experienced crafters alike.

Start your DIY journey today: www.sailrite.com

A Stitch in Time: Sewing for the USS Slater

Out with the old and in with the new is a phrase we’ve all heard. In fact, the DIY spirit is often centered around transforming something old into something new. But what happens when that old thing isn’t just a secondhand knickknack, but rather a part of American history? Fred Antico, a volunteer aboard the USS Slater, had to consider this carefully. Along with his trusty sewing companion, the Sailrite® Ultrafeed®, Fred has been revamping numerous upholstery projects for this national treasure with great results.

Looking Back

As one of 563 similar ships built between 1943 and 1945, the USS Slater DE766 is a CANNON class destroyer escort that served in the United States Navy during World War II. The ship was named after Frank O. Slater, an Alabama-born sailor who lost his life during the Battle of Guadalcanal in 1942. Destroyer escorts, like the USS Slater, were built to remedy a serious shortage in anti-submarine vessels in the Atlantic Ocean during the war. These ships combined heavy anti-submarine and anti-aircraft weapons alongside cutting edge technology to help them secure a victory for the Allied forces in the Atlantic.

The USS Slater had an illustrious history during World War II in both the Atlantic and Pacific, where it escorted 176 merchant ships across the Atlantic without any losses. Following the end of the war, Slater was deactivated and transferred to the Hellenic Navy in Greece and renamed AETOS, where it remained until 1951. Forty years later, under the care of the Destroyer Historical Foundation, the ship was transferred back to the United States.

USS SLATER Pre Restoration 1993
Upon its return to the United States, the USS Slater was found to be in rough shape.

After arriving in New York City in 1993, Slater has since undergone tremendous restorations and is one of less than a dozen surviving destroyer escorts. Entire crews worked tirelessly to restore her back to her prime 1945 condition. The painstaking process included removing Greek modifications, chipping and repainting the hull, decks and bulkhead, and reinstalling tons of authentic WWII naval equipment. Two decades of renovations later, the USS Slater is now a floating memorial to both destroyer escorts of the time and those who served aboard them.

Today, civilians have the unique opportunity to visit and tour the USS Slater in Albany, the capital of New York. It seems fitting, as more destroyer escorts were named for New York naval heroes than any other state, numbering 44 in total. The Destroyer Escort Historical Museum is open to guests of all ages, offering an up-close and personal look at the USS Slater as well as other ships. The USS Slater is even listed on the National Register of Historic Places; in fact, it’s the only ship of its type to have maintained its original WWII configuration.

Unknown
The freshly renovated USS Slater, ready for tours.

Preserving a Legacy

It was a during his time as a professor teaching television and radio production that Fred Antico became connected with the USS Slater. When the ship was first brought to Albany, it was undergoing extensive refurbishing projects — a perfect subject for students practicing video production. Fred asked those in charge of Slater if his students could come aboard and document the ship’s rehabilitation for a more hands-on teaching experience. The ship’s superintendent, Tim Rizzuto, welcomed Fred and his budding videographers and photographers. As a great supporter of Fred’s educational efforts, Tim even set up interviews with volunteers working on the ship and those who had previously served on ships like the USS Slater.

Fred explained that he and Tim are currently editing a video of the ship’s recent hull restoration with hopes to turn the multitude of photos and video footage into a documentary about the project. “When Tim and I were discussing the video project, I noticed the condition of some of the upholstered seats and mentioned that I would be willing to volunteer my upholstery skills. That lead to what I expect will be many upholstery projects. Our first was to create new cushions for the sofa and an armchair in the officer’s wardroom.”

Something Old, Something New

Fred decided to take up upholstery as a hobby following his retirement. He was no stranger to the DIY world, as his father and two uncles ran an upholstery shop in Albany, New York between the 1950s and 1970s — a place where Fred spent a lot of time as a child. But how did the Ultrafeed become part of the mix? Most of Fred’s sewing experience came from books, articles and the internet. During one of those sewing-related internet searches, he managed to stumble upon the Sailrite Ultrafeed LSZ Sewing Machine.

Fred Antico Sailrite LZ-1 1
Fred and his trusty Ultrafeed LSZ.

“This being my first serious go at upholstery, I was cautious about investing in an expensive machine. I found the Ultrafeed to be affordable and certainly capable of what I needed. But just as important were the support materials — the guides and supporting videos.”

For the USS Slater projects, the goal was to make the updated pieces look as close to the original as possible to match the rest of the historically-accurate renovations. Fred explained that in order to accomplish this, he researched manufacturer pictures of what the item originally looked like in order to perfectly replicate them. There aren’t any deadlines, so Fred takes great care to experiment until the desired result is achieved. He then creates templates to expedite the reupholstery process for future items with the same design.

Screen Shot 2019-06-10 at 3.45.24 PM

Ultrafeed in tow, Fred successfully revamped a 1940s era Art Deco sofa and multiple chairs aboard the ship, ensuring they look as close to the original as possible. For the couch, the Naugahyde Universal fabric, zippers, upholstery foam, Dacron batting and spray adhesive used to complete the project were all acquired from Sailrite. Fred was thankful to have gleaned techniques from the Sailrite videos to baste parts before sewing by using staples and hiding the zipper under the underlining fabric on the back panel of the cushion.

USS Slater
The 1940s era sofa (top) revamped with Naugahyde vinyl (bottom).

The Ultrafeed machine has been a huge help in this endeavor as well, with Fred explaining, “The Ultrafeed is an excellent machine to use right out of the box, which is how I used mine for about a year. Later, I upgraded by adding the Industrial Sewing Table and Workhorse™ Servo Motor. When producing multiple items like the seat cushions, I needed to make them as uniform as possible…I’ve seen highly experienced upholsterers sew seams at high speeds without a problem, but for a novice like me, being able to sew slowly enables me to stay on the stitch line whether it’s on a straight line or going around a corner. The Workhorse Servo Motor does that.”

Fred also explained that the most rewarding aspect of the work he does for the USS Slater is the company between Tim Rizzuto and the many volunteers that work on the ship and for the Naval Historical Museum. “They are dedicated to educating future generations about WWII vessels and the people who worked aboard them. And I’m happy to be able to make a small contribution towards that effort.”

Modern Day Slater

Today, the USS Slater serves as a constant reminder of those who served in WWII, and its extensive renovations have helped maintain its status as a historical landmark to educate young and old alike. Walking aboard the ship is like taking a step back in time, and Fred’s authentic upholstery projects have helped guarantee this. And here at Sailrite, we’re proud to have assisted in this noble venture. If you’d like to learn more about the USS Slater or plan your own visit, follow this link: https://www.ussslater.org/.

USS SLATER Group Tour 4 Port
Great dedication and teamwork allow the USS Slater to be an education beacon for guests.


Who We Are

Sailrite is your one-stop DIY shop! We are a passionate crew of do-it-yourselfers who strive to equip you with the supplies and how-to knowledge you need to tackle your next project. Do you want to learn upholstery, leatherwork, canvaswork, hobby sewing, bag making or more? We have the fabric, tools, hardware, sewing machines and notions you need to master any DIY. And even if you’ve never sewn before, our tutorials and how-to videos are designed for beginners and experienced crafters alike.

Start your DIY journey today: www.sailrite.com