A 20-Year Odyssey: Sailing Dreams, Woodworking & Self-Reliance

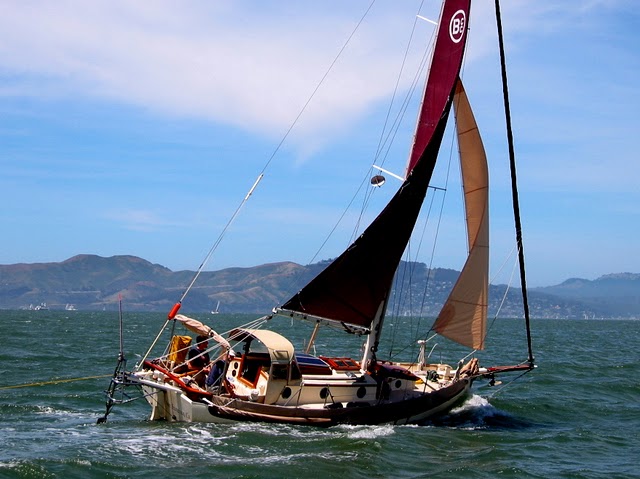
Wayne Edney is no stranger to hard work, patience and the spirit of self-reliance that defines every DIYer. In 1994, he completed the build of a Bristol Channel Cutter 28 from a bare hull. He spent eight years building the boat on a teacher’s salary, devoting his weekends and summers to the project.

“This was the culmination of a dream that had first come to light 20 years earlier after reading a cruising book by Erik Hiscock,” Wayne shared with us. “It had been a 20-year odyssey to finally launch my own cruising boat, so the boat was christened ‘Odyssey’ by my wife, Karen, and our two children, Annalise (11 years) and Erik (7 years).”
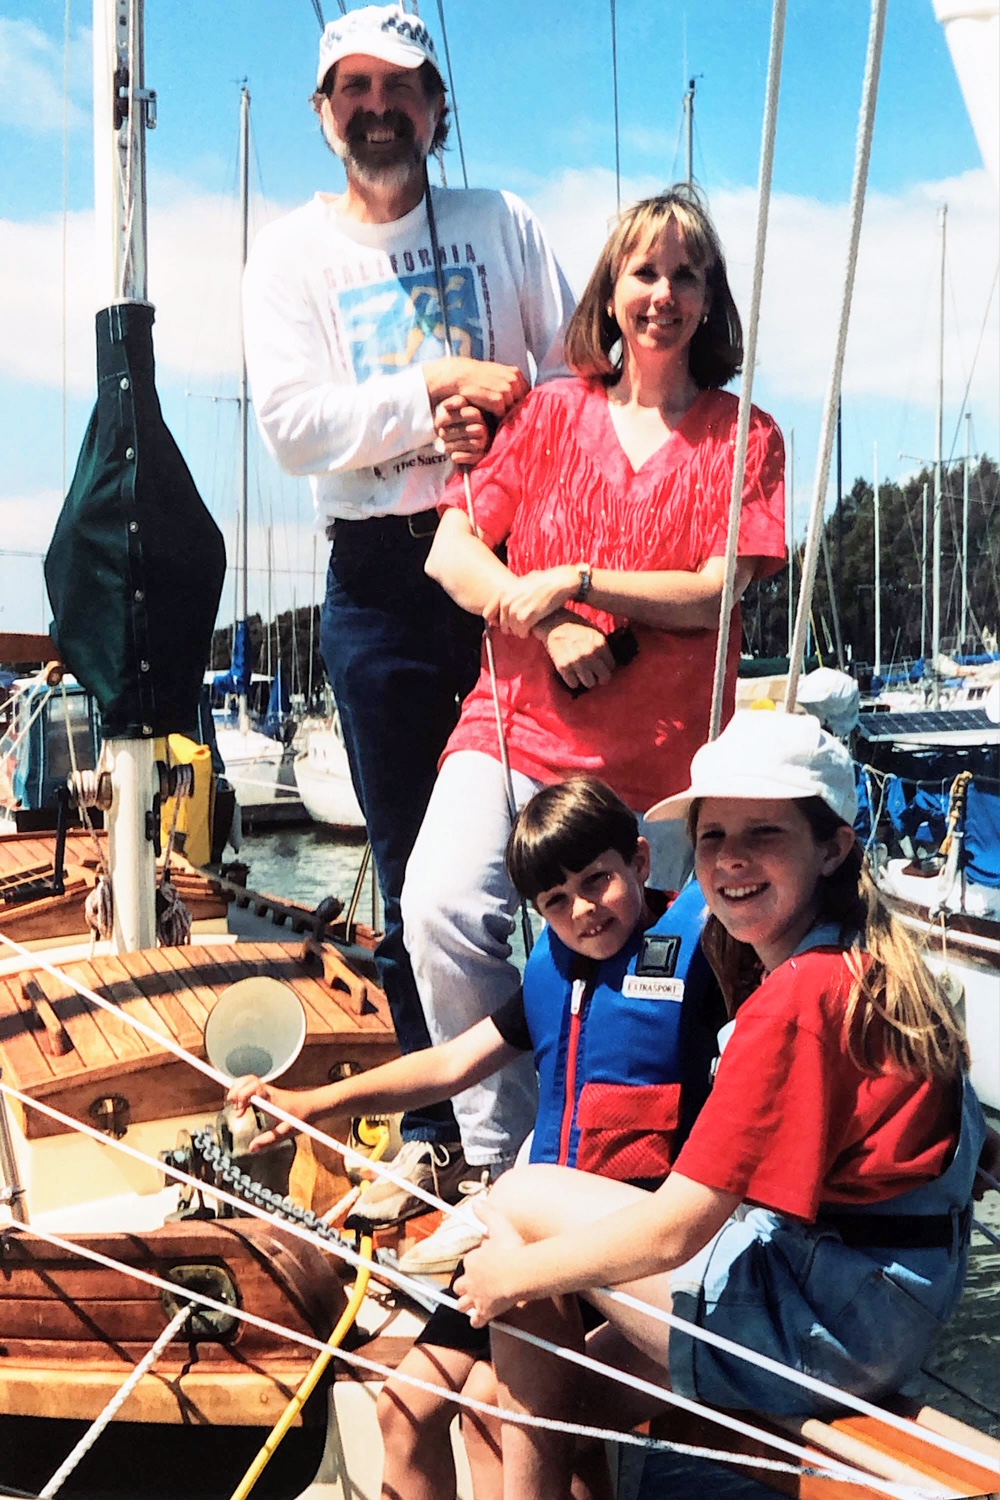
The Edney family on launch day of “Odyssey.”

The yearslong build marked the start of an incredible adventure for the teacher and his family. Keep reading to find out how Sailrite could help this intrepid DIYer fulfill his lifelong dream of building and launching a sailboat.

The Hull Truth

The Bristol Channel Cutter Wayne ordered from the Sam L. Morse Company in 1986 was delivered to his house as a bare hull. Wayne eagerly got to work. “They say that you can learn a lot by reading and I read every boatbuilding book I could find. However, there is no substitute for experience. In 1981, I took a one year leave of absence from teaching to attend a yearlong apprentice program at the Landing Boat Shop in Kennebunkport, Maine. I helped build a Swampscott dory and a Buzzards Bay daysailor. The woodworking skills I learned there were invaluable for completing my boat.”

Throughout the eight-year build of “Odyssey,” Wayne learned many valuable lessons about patience and resourcefulness. “Obstacles can sometimes be blessings in disguise,” he told us. “Building a cruising boat on a teacher’s salary meant limited cash flow, so patience and making the most out of each piece of wood were valuable lessons learned. Looking at the interior of my finished boat, a friend once said, ‘I can’t believe that you built all of this!’ I can’t  either, but as I look at each individual piece of wood, I can remember  the care that went into forming it.”

Overcoming money challenges, every piece of wood became a part of the boat’s story — a story crafted with care and dedication.

Wayne stands proudly with the boat he built.

Setting Sail

Once Wayne put the finishing touches on the “Odyssey,” he was more than eager to enjoy the fruits of his labor. In 2002, he took another leave of absence from teaching. The family set sail on a six-month cruise to Mexico. “We traveled from San Francisco to Cabo San Lucas to the mainland of Mexico and up into the Sea of Cortez.” Today, San Francisco Bay is their sailing playground, with week-long trips to the delta regions of Stockton and Sacramento.

Wayne learned to sail at the University of California, Davis. He enrolled in a sailing course for his physical education credit. “The course was taught on Sunfish boats. They were really small. When you made a mistake, you ended up in the cold water and were not likely to repeat that mistake.”

What began as a college course evolved into a lifelong love of sailing and the open sea. “Being close to nature and self-sufficiency are two of the greatest things about sailing and being on the water. Most people can remember the first time they came close to the sea and smelled the ocean even before they saw it. Sailing along beautiful shorelines, you are at home with the birds and animals living there.

“Being on a cruising boat in this environment requires a certain level of self-sufficiency. I know how our boat was built. In addition, I know how to maintain it. Our Bristol Channel Cutter has beautiful bulwarks and I am often asked what I use to keep them looking so good. The secret is the Sunbrella® that covers them when the boat is not in use. My Sailrite® Ultrafeed® LSZ has been and continues to be an important tool for maintenance and self-sufficiency.”
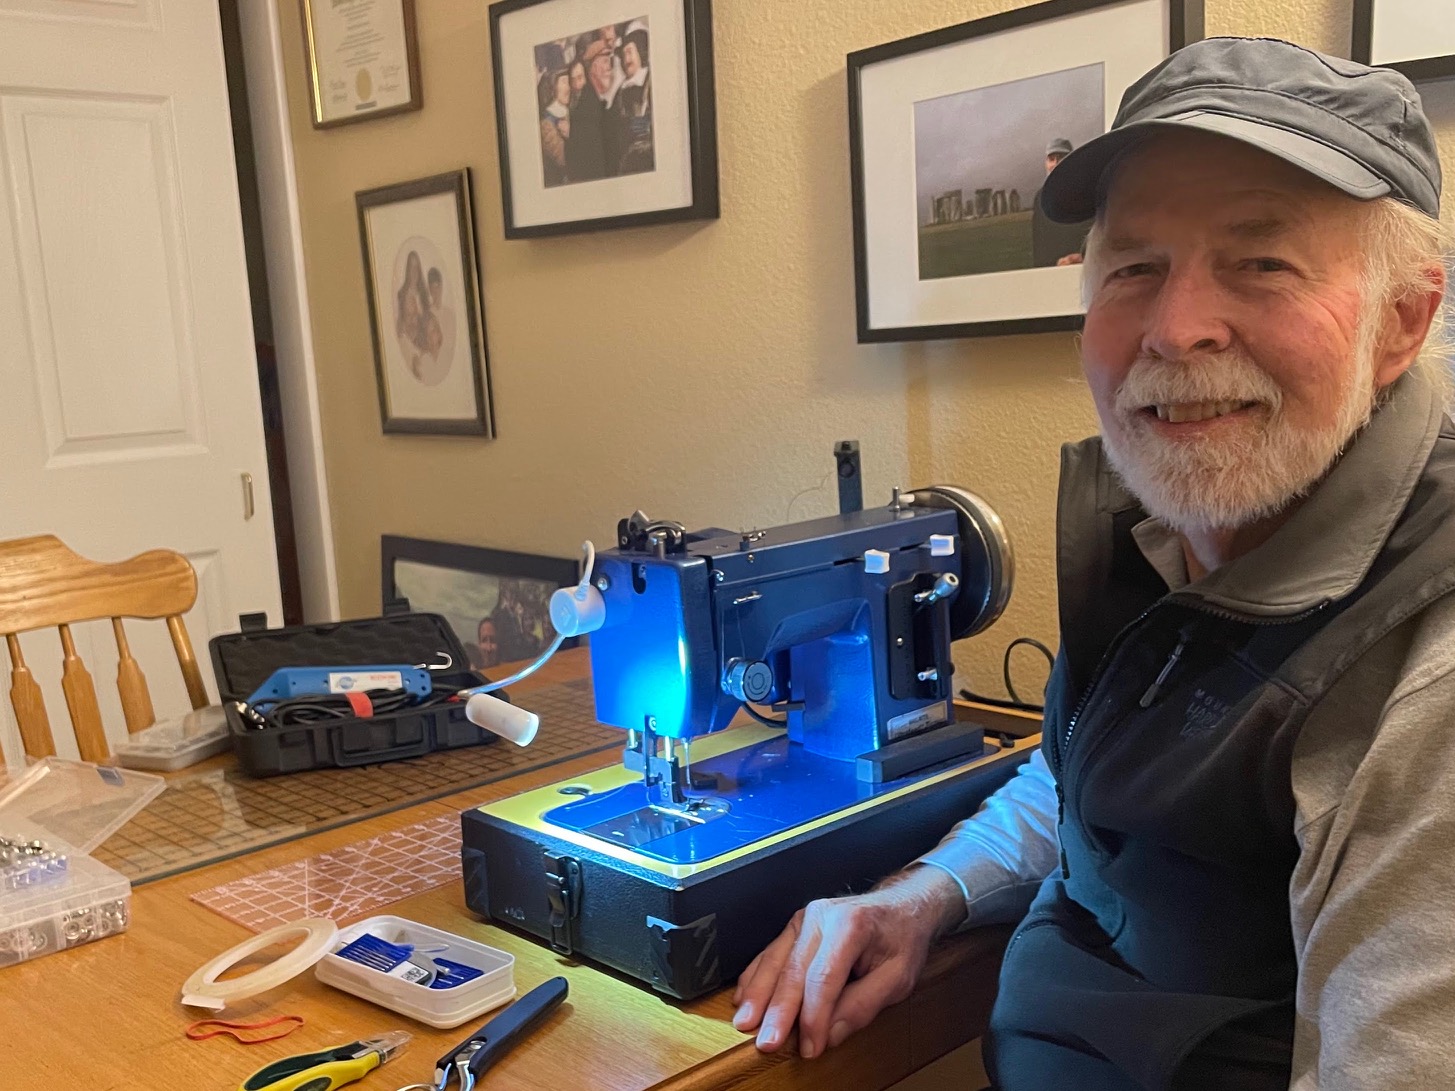
Here’s Wayne with his Version 1 Ultrafeed LSZ.

The DIY of It All

Before the Mexico trip, Wayne had a dodger professionally installed on the boat. But after years in the sun and elements, the canvaswork and window vinyl were showing wear. Luckily, Wayne got a tip about a great DIY resource. “I first heard of Sailrite from other cruising sailors on our trip to Mexico. As the years went by, the dodger we had professionally made began to show signs of wear. With encouragement from Sailrite videos, I decided that I could remake the worn dodger panels. That was the beginning of lots of sewing projects.”

Wayne didn’t let his sewing inexperience stop him from tackling his own canvaswork projects. His desire to do things himself extends beyond boatbuilding. “I have learned to sew by trial and error. Most of my projects are on our boat. However, I find myself watching all kinds of Sailrite do-it-yourself videos that have nothing to do with my projects, but contain techniques that I can use.”

As a skilled builder, he knew he’d need the right tools to successfully sew the planned enclosure and other projects for his boat. That’s when Wayne knew the right tool for the job was the Ultrafeed LSZ. “When I married my wife, an old Kenmore sewing machine came with her. It did okay on simple projects but was not up to the challenge of sewing multiple layers of canvas or leather reinforcements. My Ultrafeed LSZ has been a game changer, allowing me to build my sewing skills with each project. I have made mistakes along the way, but each mistake has been a chance to learn techniques and more about the machine.”

This slideshow requires JavaScript.

Referencing Sailrite how-to videos, especially on dinghy chaps and dodger builds, expanded the teacher’s knowledge. Valuable skills like using basting tape, different seams, and Sailrite tools became crucial for successful projects.

Over the years Wayne has made dodger panels, mosquito screens, sail covers, cushions, curtains, a deck awning and more. Referencing Sailrite’s “How to Make Dinghy Chaps” video was a great help when a friend asked him to make the protective covers for his inflatable dinghy. “Valuable skills like using basting tape, the most common seams for canvaswork, and the advantage of tools like the acrylic patterning ruler, Edge hotknife and patterning material, all were crucial to the successful construction of the dinghy chaps,” Wayne shared.

Advice for Others

To those considering sewing their own canvaswork, Wayne’s advice is simple: “Go for it and don’t be afraid to make mistakes. Follow the Sailrite videos for completing smaller projects. Make sure that your machine and thread are set up properly. Every project is a lesson and an opportunity to learn and build confidence.”

After all, learning new skills keeps you young — a sentiment echoed by a teacher whose journey brought a dream to life, one stitch at a time.

Watch the video below of Wayne’s build from hull to launch!

Who We Are

Sailrite is your one-stop DIY shop! We are a passionate crew of do-it-yourselfers who strive to equip you with the supplies and how-to knowledge you need to tackle your next project. Do you want to learn upholstery, leatherwork, canvaswork, hobby sewing, bag making or more? We have the fabric, tools, hardware, sewing machines and notions you need to master any DIY. And even if you’ve never sewn before, our tutorials and how-to videos are designed for beginners and experienced crafters alike.

Start your DIY journey today: www.sailrite.com

Jim Norman: Building a Houseboat of His Dreams

We’ve all heard the expression, “When life gives you lemons, make lemonade.” Well, that sentiment couldn’t be truer for New Jersey native and retired newspaperman Jim Norman. In 2009, Jim was unfortunately part of a round of layoffs at The New York Times, where he worked as an editor. He and his wife made the tough decision to sell their vacation home, and future retirement home, in Maine.

Jim vowed that he would somehow get a toehold in Maine again. Years later, his prediction would come true, just not in the way he originally thought. While researching the “tiny home” phenomenon in 2014, he stumbled upon the story of a man who, instead of building his dream tiny home, built a houseboat instead. Jim knew this was the path for him and a clever and inventive way to get back to Maine — or wherever he wanted to go. He knew wherever he and his wife vacationed it would be on the water. So why not live on the water? “The more I thought about it, the more it made sense. Wherever I decided to vacation with it, we would be on waterfront property. And no real estate taxes! What could be better than that?”

jim with boat
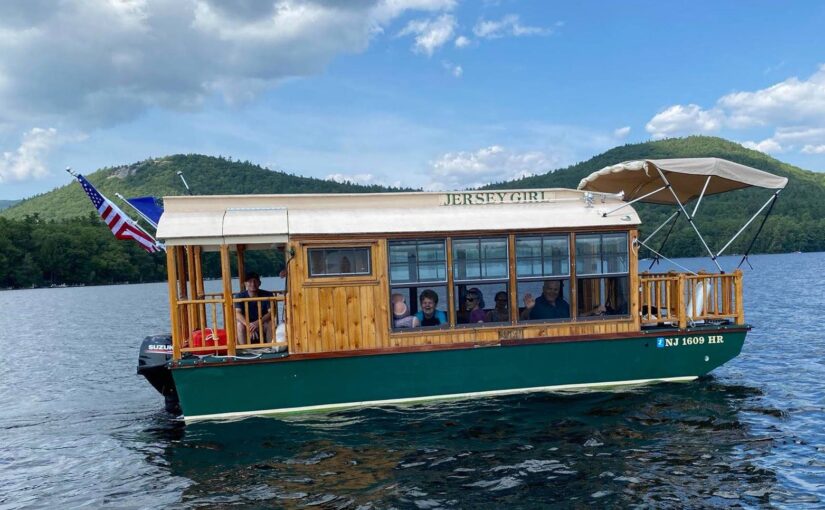
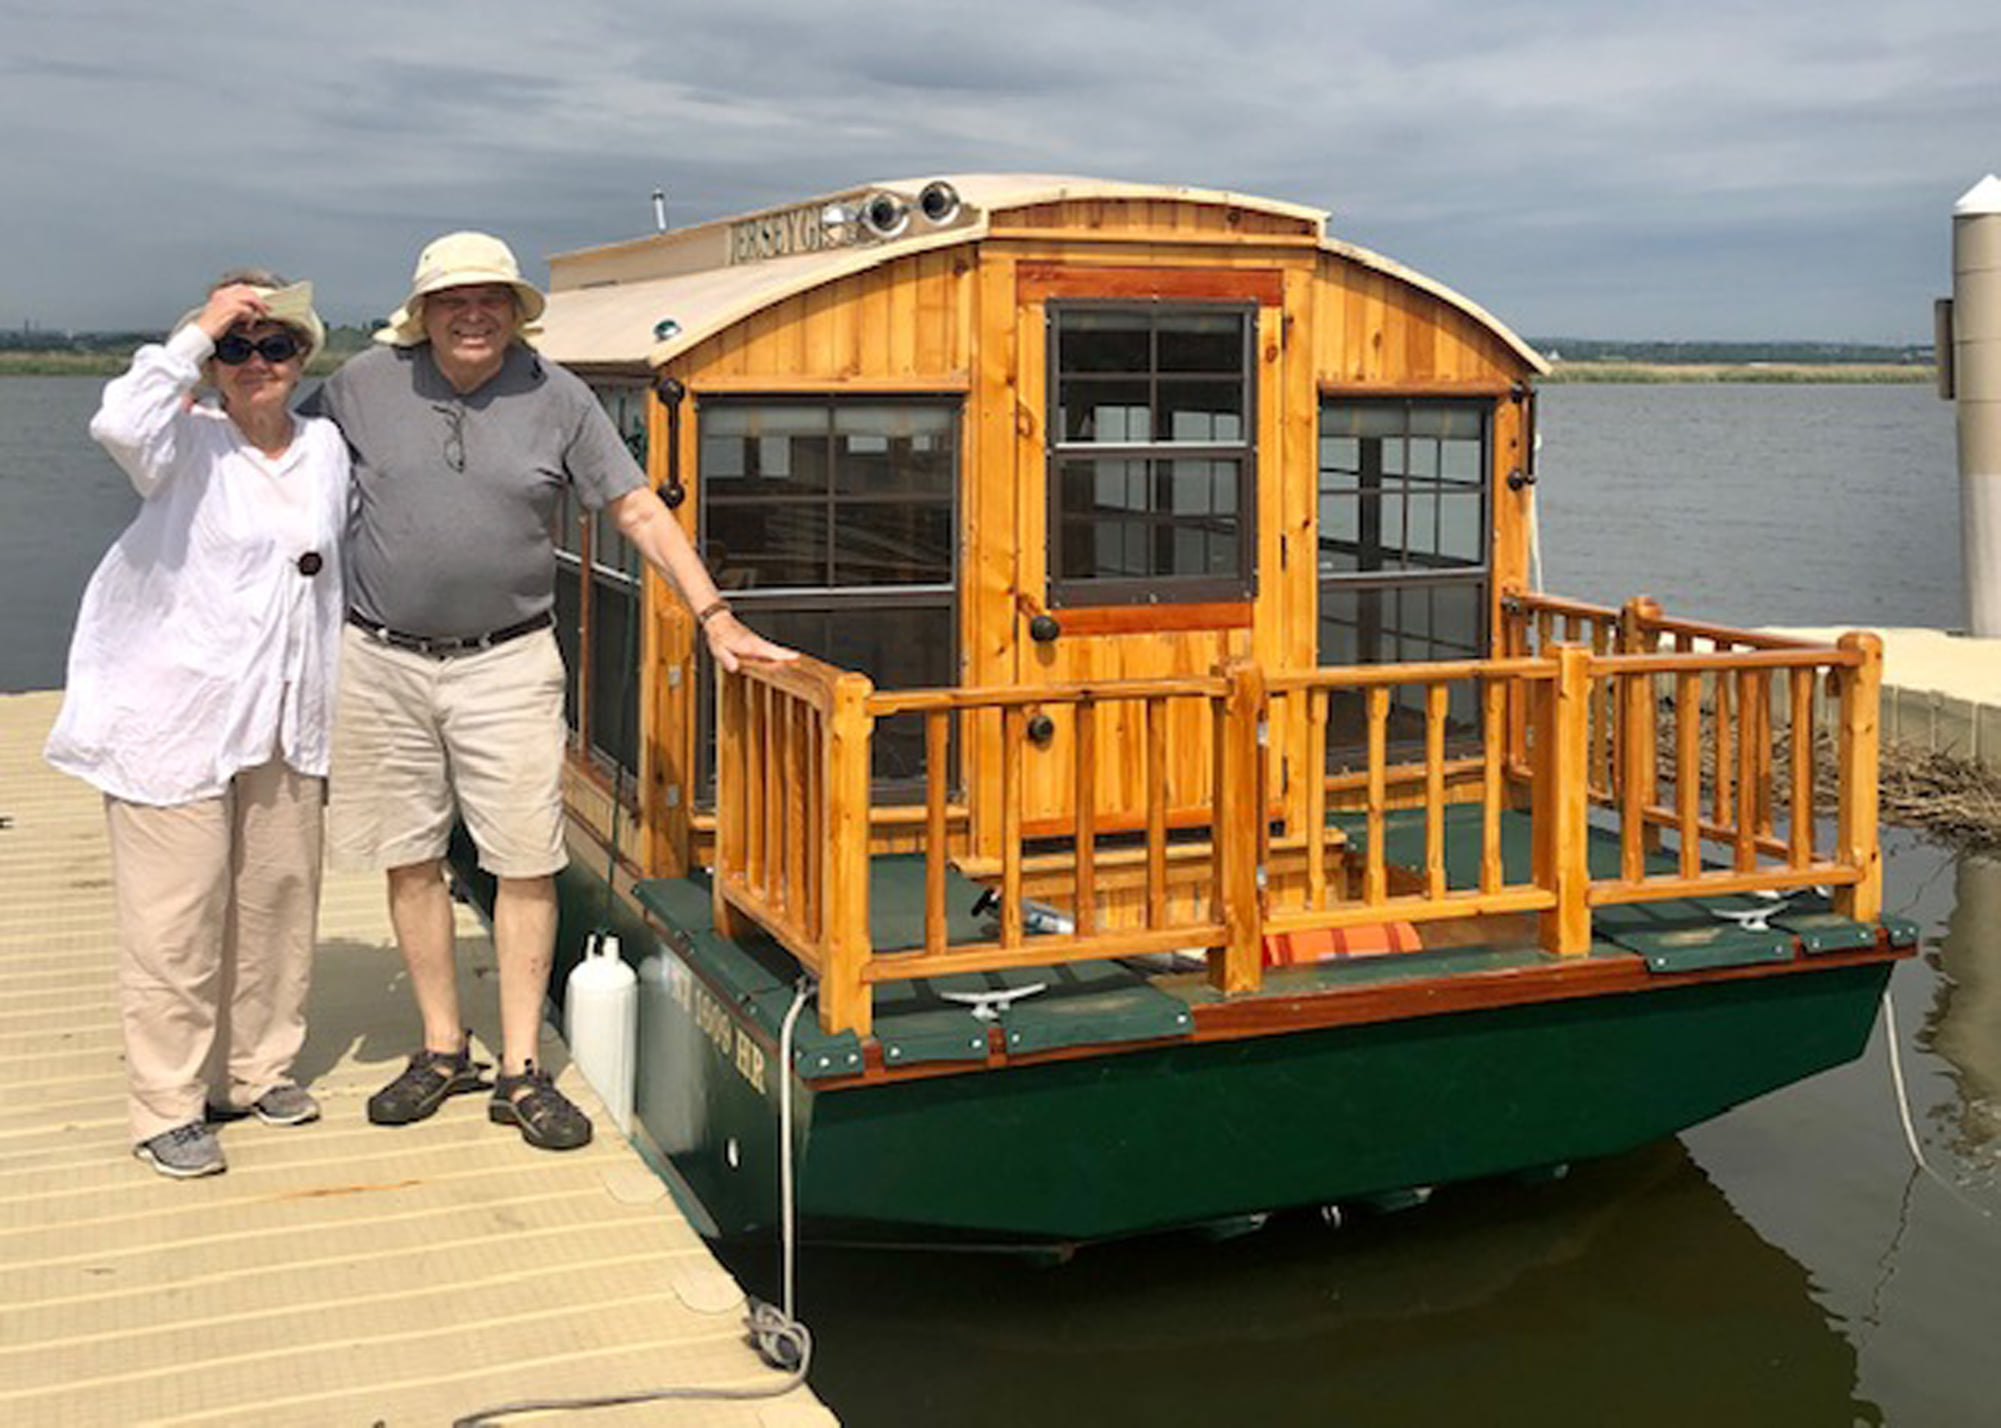
Jim and his wife, Ginger, are all smiles taking Jersey Girl out on the Hackensack River in New Jersey.

To Build a Boat

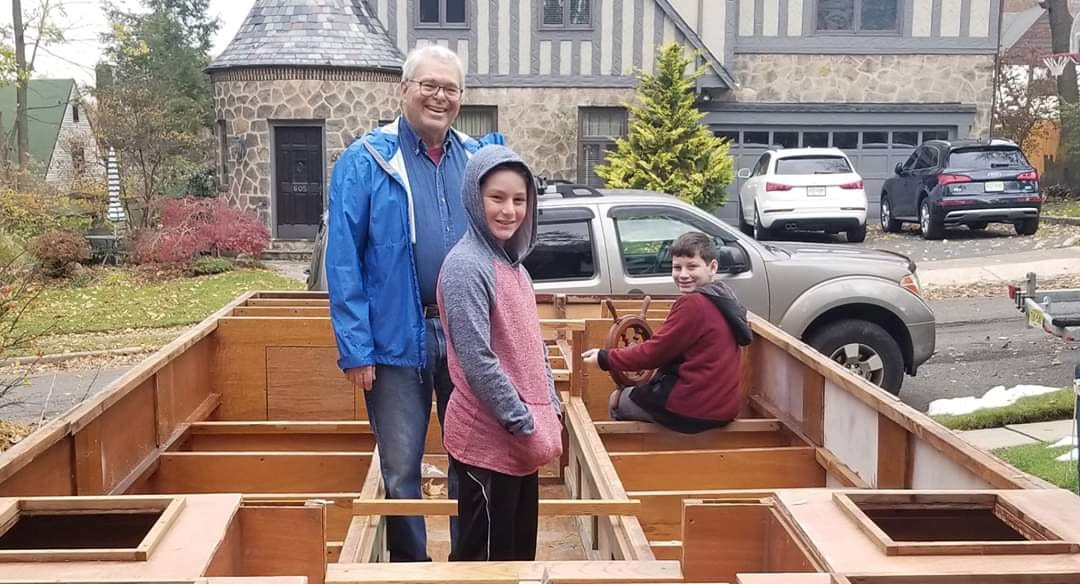
Jim contacted the designer of the “tiny houseboat” and bought a set of digital plans. In May 2015, he started building his future vacation home on the water. At first, Jim worked on the boat in his spare time, as he was still working in the newspaper industry. By the spring of 2016, he found himself looking for another editing or writing job. He came to the conclusion the next year that, at the age of 74, he was past due for a happy and well-deserved retirement. From 2017 on, Jim was able to focus on the boat with his full attention and made it his retirement project.

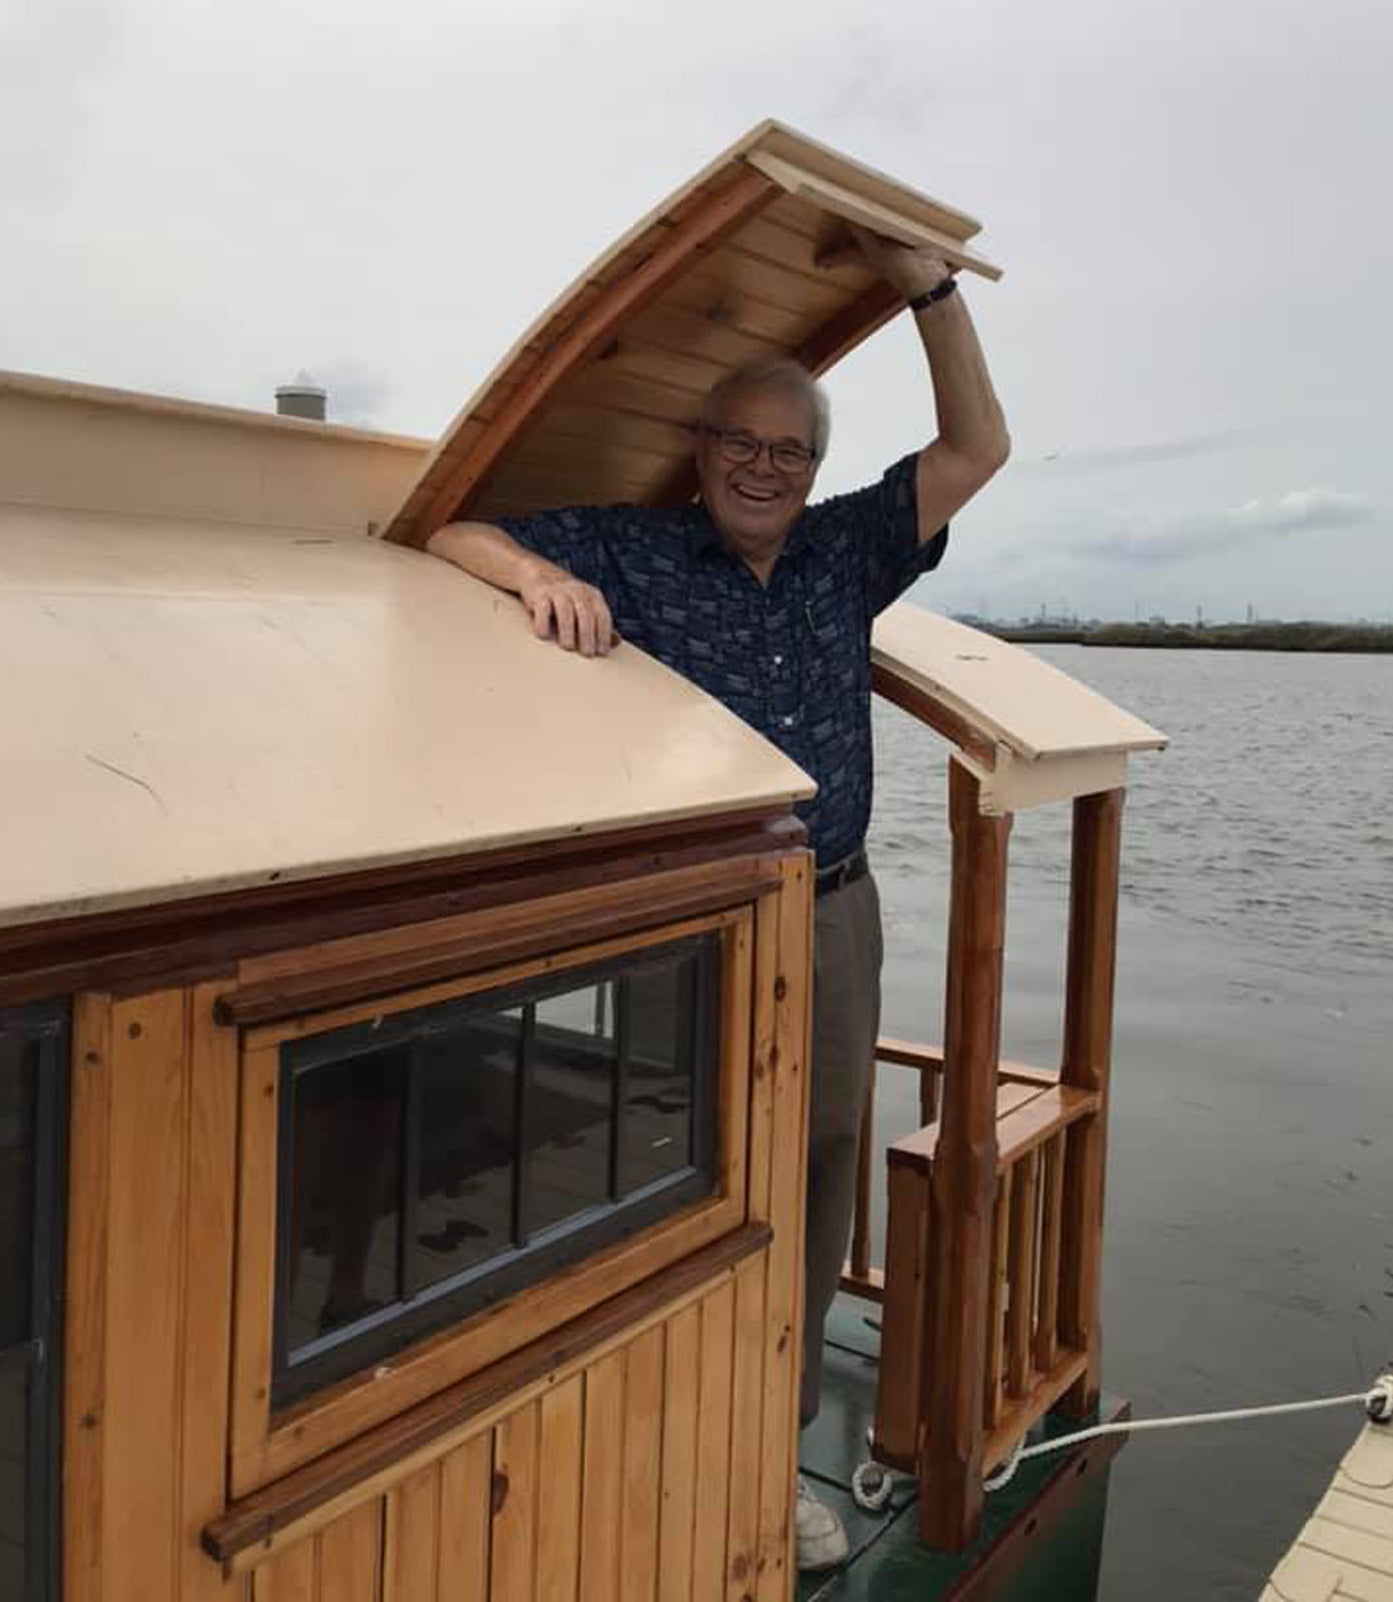
Jim built the houseboat without any assistance from professionals. But that didn’t worry him. Jersey Girl is actually the ninth boat Jim has built! “The obsession started in 1995 when I built an 11-foot sailing/rowing dinghy. … Next came two cedar-strip kayaks, followed by kid-sized plywood kayaks for three grandsons and a full-sized plywood touring kayak for me.” And just as with the dinghy, Jim modified the plans of the houseboat and made it partially his own design, adding 3 extra feet of length to the boat’s original schematics and a hinged hatch opening to make it easier to climb aboard, among other modifications.

roof hatch
Jim shows how the hinged roof hatch allows for easy exit and entry.

Occasionally, friends and neighborhood kids asked to help out with Jersey Girl, and Jim was always willing to let others get involved in the fun. “Several times, just for the fun of it, I held ‘work parties,’ opportunities for friends and neighbors to come and help out. On one occasion, I invited folks over for the experience of gluing and screwing a bottom panel onto the upside-down frame structure. When it was done, they all signed their names with a Sharpie pen, and those names are still there, although covered with layers of fiberglass, epoxy and paint. A couple of times, neighbors asked me if I would let their kids do something. So I outfitted them with disposable gloves and old work shirts and let them do a few swipes of paint with a roller.”

What exactly does it take to build a wooden houseboat from the hull up? Here’s a brief rundown with photos of the boat’s construction and assembly from start to finish.

This slideshow requires JavaScript.

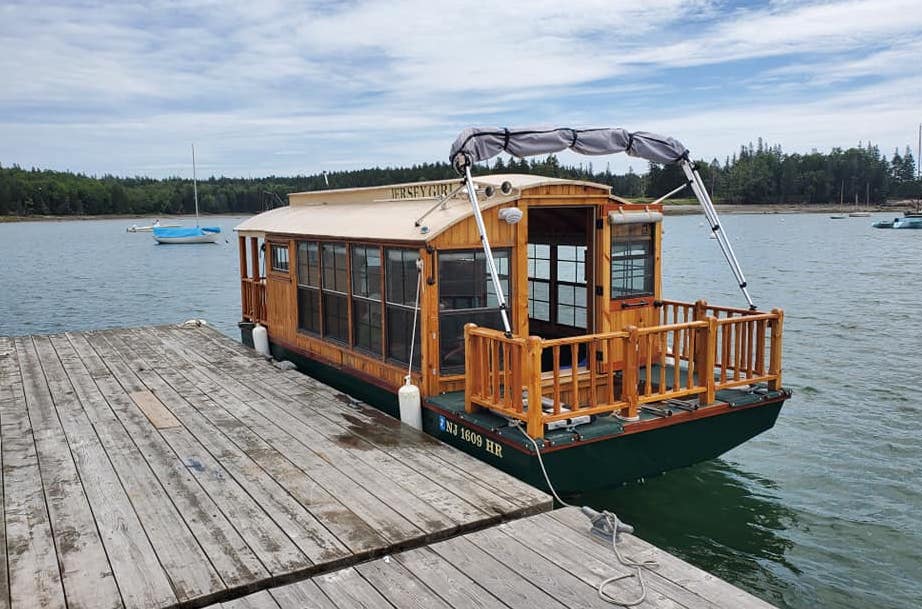
In May of 2021, Jim launched Jersey Girl for the first time in the Hackensack River, near his home. He followed this up with outings in Lake Hopatcong, New Jersey’s largest lake, and in Maine’s Eggemoggin Reach and New Hampshire’s Squam Lake. In the six years it took to complete her, he learned a lot about building your own boat, perseverance and, most importantly, himself. We asked Jim some questions about his experience building a wooden houseboat, and all the ups and downs that come with such a daunting DIY project. He was happy to share more details about the build with us and offer his advice to anyone thinking of tackling a similar project.

Q. Is Jersey Girl for day trips or is she fit for liveaboard?

A. She’s not quite ready for overnighting, but I hope she will be by summer 2022. Plywood inserts fasten between the two settees on the port and starboard sides, and the seatback cushions are sized to exactly fill the gap to make a queen-sized bed. … Three projects planned for the spring are a slide-out shelf for a small refrigerator under the galley counter, a shower arrangement on the aft deck, and two solar panels on the roof to keep the batteries charged up when we’re not connected to shore power. So my hope is to make JG self-sufficient off-grid for a week or more at a time.

Q. How did you feel the first time you launched Jersey Girl?

A. I felt great! Because I had made so many modifications to the plan, and she wound up being almost three times her as-designed weight, I really did not know what to expect. Would I have a boat, or an interesting camper trailer? As it turned out, she not only floated, but she floated right side up, a major triumph right there. More than that, she floated exactly to where I estimated her waterline to be, with a draft of only about eight inches – meaning I can poke around in really shallow water without worry. Also, she’s incredibly well balanced, level in the water no matter where or how passengers like to sit or stand. She easily takes as many as 10 people at a time for day trips (only two for overnighters), and she’s beautifully behaved over the wakes of passing boats. I could not be more pleased.

Q. What was the inspiration behind the name?

A. Well, I’m a Jersey Boy! I grew up in New Jersey and, although I have lived and worked in many different places, I really appreciate all that New Jersey has to offer. So, the name is in honor of all the Jersey Girls, who seem to share a sassy, bossy, somewhat lovingly entitled attitude. … And by coincidence, I keep running into Jersey Girl references: There’s a diner near Lake Hopatcong called the Jersey Girl Café, and a popular local craft brewery that sells cans of Jersey Girl beer.

Two of Jim’s grandchildren visit during the winter of 2018 and give their approval.

Q. What was the hardest part of building her? Did you run into any unforeseen complications or problems? If so, how did you solve them?

A. That’s a good question! Boatbuilding is nothing BUT a serial exercise in problem-solving. And because I made so many modifications in the existing plan, and developed so many methods for doing what I wanted to do, I turned out to be an expert in creating more problems for myself. In fact, I seem to have derived what I call Jim’s First Law of boatbuilding: Every solution begets a new problem. And so on.

One of the most persistent problems during construction was how to keep rainwater from filling the unsheltered hull before fully enclosing it with the decks and cabin. No matter how tightly tarped and covered the hull was, it seemed that rain always managed to find a way in. Ultimately the answer was that water accumulation was simply unavoidable, and I just had to budget time for bailing and mopping in my construction schedule.

Because I was doing so many of the things that I did for the first time in my life, I encountered problems that I just had to sit for a while and think about – and consider the future consequences – before going on.

Q. What do you like most about the do-it-yourself lifestyle?

A. Not only is it very satisfying to do things oneself, but it makes it possible to get things just the way you like them, without having to settle for some manufacturer’s or retailer’s idea of what you need. I’ve never been frightened of DIY, no matter what the field. I’ve learned to do carpentry, boatbuilding, mechanical work, electrical work, plumbing, brazing, welding… People often ask me, “Is there anything you can’t do?” I tell them I’ve never tried my hand at brain surgery, and that’s probably a good thing.

diy fabric projects
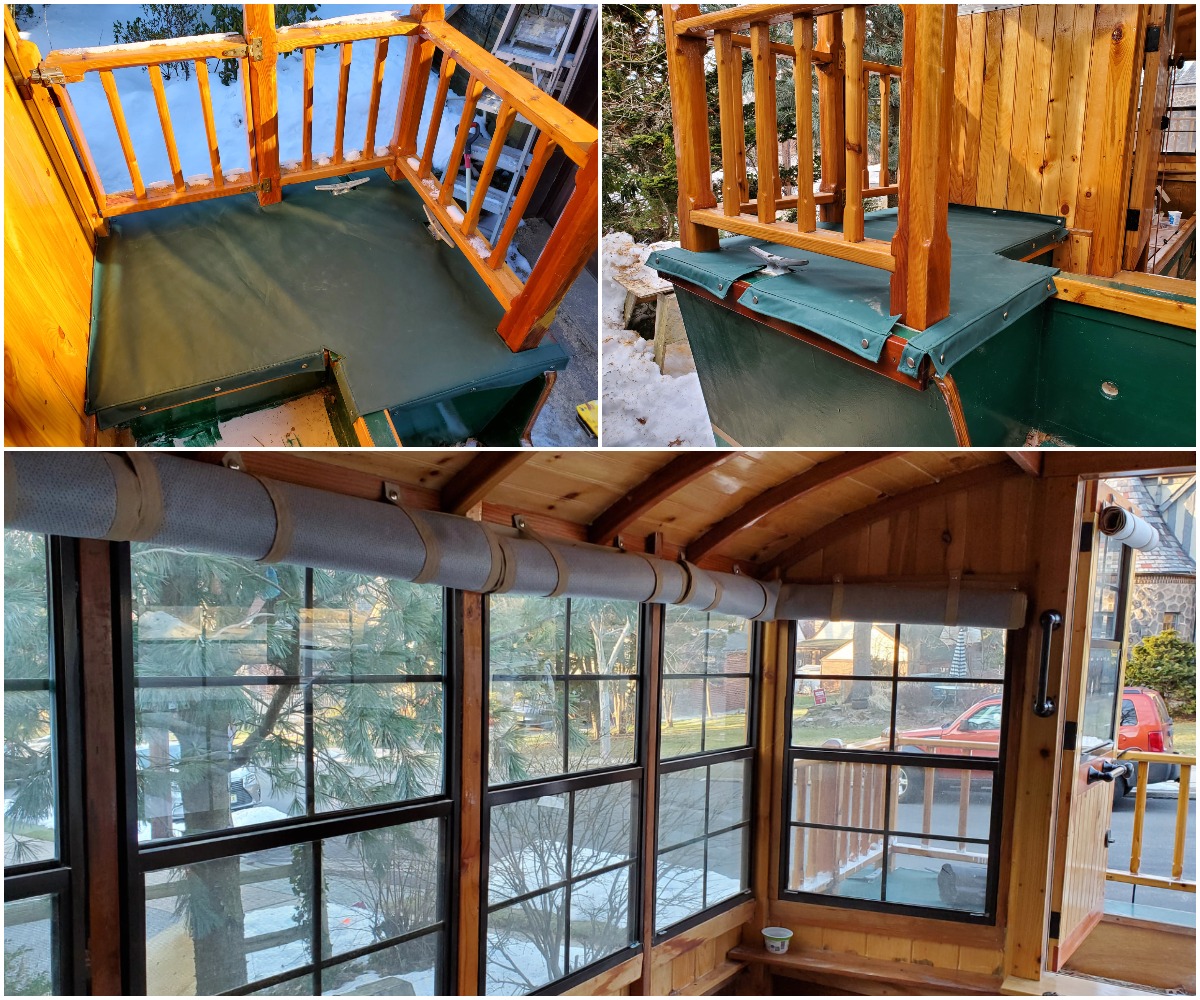
Top: Jim made protective deck covers using Softouch® fabric. Bottom: Roll-up window shades using Top Gun® and Protect-It™ fabric.

Q. What advice would you offer to someone interested in building a boat or tackling a big project like this?

A. I guess I’d say if you have a dream for something big, don’t put it off for as long as I did. Get started on it when you’re young. And if you do put it off as long as I did, don’t listen to the naysayers, even if they are the people you love and respect. Just find a way to get started; you’ll quickly pass the point of no return and then you won’t have any choice but to finish it.

Sewing for Jersey Girl

One of the final steps of the boat’s creation was the interior finishing. This is where Sailrite came in. Jim had never sewn prior to the projects he made for Jersey Girl. But as we’ve learned so far, that wasn’t going to stop him. “I bought the least expensive consumer-grade heavy-duty sewing machine I could find, watched a couple of online videos on how to use it, bought a remnant of heavy fabric from a nearby fabric store, practiced sewing in a straight line for a half hour, and that was it! The rest, as they say, is history. It turns out I like sewing, and one of these days I’ll probably find a way to justify one of Sailrite’s machines!”

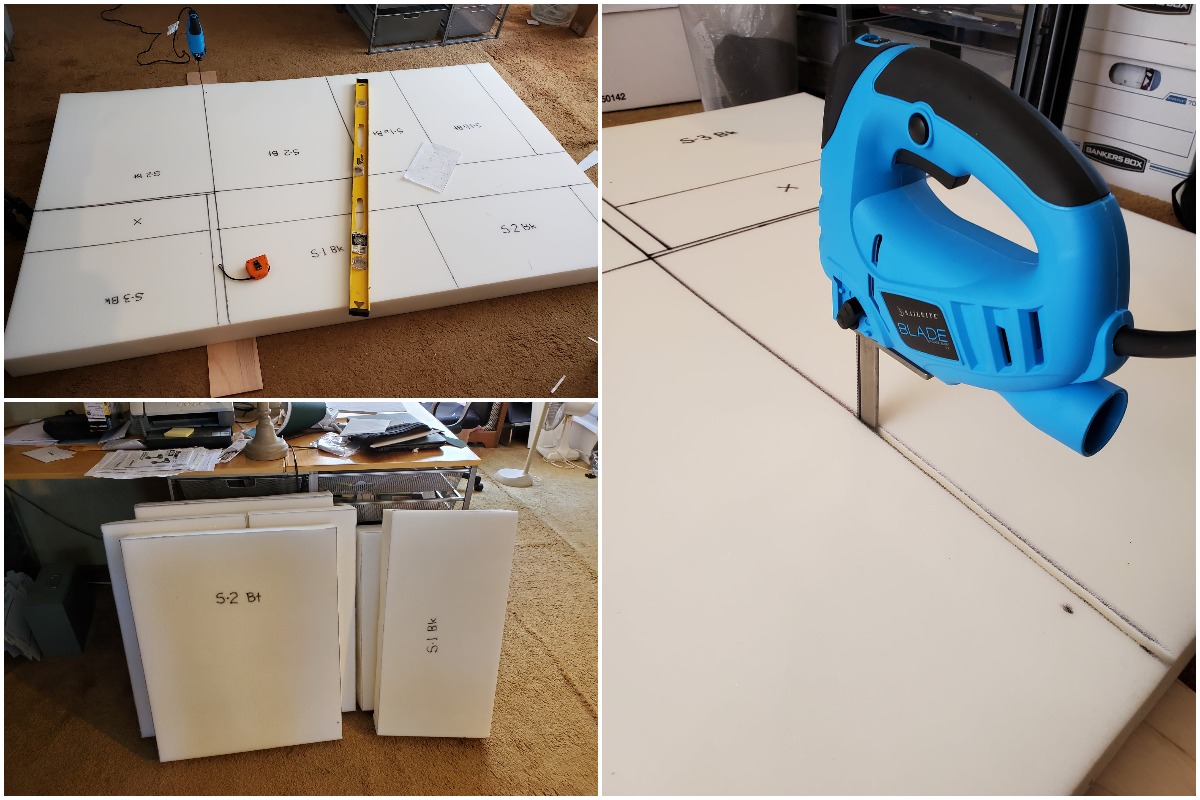
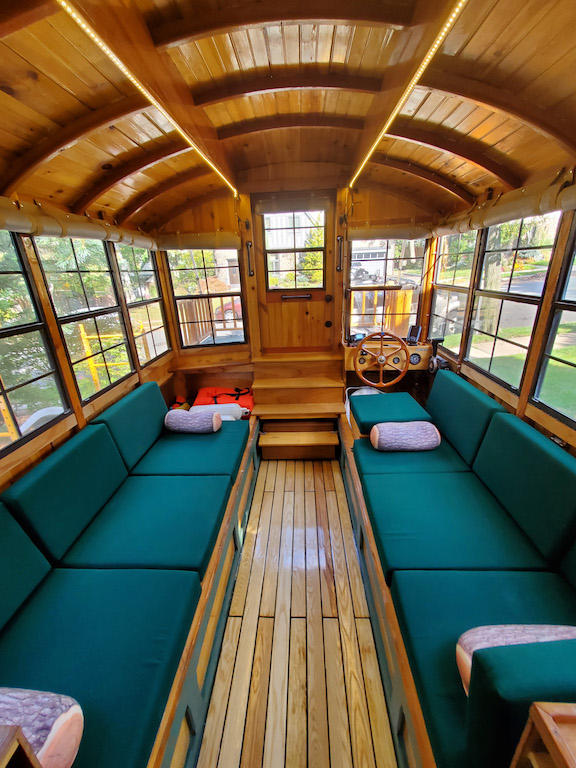
Jim purchased Sunbrella® Canvas upholstery fabric, high density foam and the Sailrite® Blade Foam Saw and made cushions for the seats and seat backs (15 in total) that will double up as the mattress for sleeping. He turned to Sailrite’s popular 30-Minute Box Corner Cushion tutorial to help him make the cushions.

foam cutting
Measuring, plotting and cutting foam for the cushions.

He also sewed interior roll-up window shades that also attach to the outside to protect the windows when trailering the boat. He used Top Gun for the window shades with an inner layer of a soft protective lining fabric to protect the windows during transportation on the highway. Finally, he patterned and created exterior deck covers to help prevent rainwater and spray from seeping in through the hinged hatch covers.

Watching the 30-Minute Box Corner Cushion video is what convinced Jim that he could tackle these sewing projects, even though he’d never sewn before. While using Sailrite’s Fabric Calculator to help lay out the fabric for patterning and cutting, he contacted Sailrite customer service wanting to know if Sailrite also offered a Foam Calculator. We didn’t at the time, but Sailrite has always listened to customer suggestions and ideas. We now offer a Foam Calculator that shows DIYers how to nest foam pieces to get the most usage out of their foam sheet and to help save money.

cabin interior
The finished cabin interior. We think Jim did a fantastic job on the box corner cushions!

What’s Next for Jim & Jersey Girl?

Now that Jersey Girl is finished (mostly!), Jim is ready to get her on the water and enjoy his six years of hard work and determination. But that doesn’t mean he’s ready to slow down. Even though the bulk of his work on Jersey Girl is done, he’s not planning on slipping into a life of inactivity in front of the TV. “Now that I am retired, with all of my other interests, I often wonder where I ever found the time to work for a living. If you ever see Jersey Girl on a waterway near you, be sure to stop me to say hello!”

Jim will turn 80 in May 2022, and he says he’s probably through with big building projects. Instead, he’s putting his hands to work on a new venture — writing a book. The book will chronicle his adventure building Jersey Girl and all that came with the experience. “Now that most of the work is done, the chronicle will also be about the places we travel together, the things we see, and the people we meet along the way.” Jim plans on taking Jersey Girl up the Hudson River and possibly to Canada for a rendezvous with other boatbuilders, painting and photographing what he sees along the way, two other passions of his.

And even though Jersey Girl’s sewing projects are complete, Jim isn’t putting his sewing machine away anytime soon. He has plans to redo his patio furniture cushions that have seen better days. He also has an idea for a line of educational plush toys for children.

If you’d like to learn more about Jersey Girl and follow Jim’s adventures on the water, you can follow his Facebook page: Jersey Girl the Houseboat.

jersey girl on the water


Who We Are

Sailrite is your one-stop DIY shop! We are a passionate crew of do-it-yourselfers who strive to equip you with the supplies and how-to knowledge you need to tackle your next project. Do you want to learn upholstery, leatherwork, canvaswork, hobby sewing, bag making or more? We have the fabric, tools, hardware, sewing machines and notions you need to master any DIY. And even if you’ve never sewn before, our tutorials and how-to videos are designed for beginners and experienced crafters alike.

Start your DIY journey today: www.sailrite.com
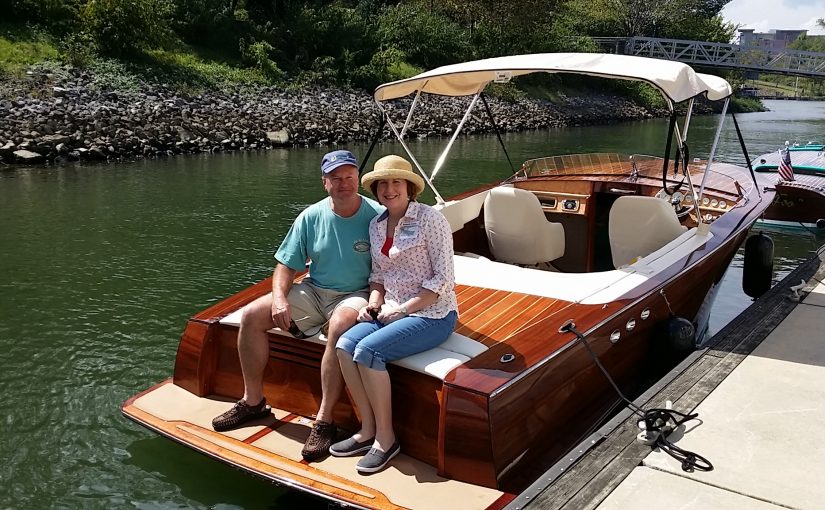
Building a Custom Wooden Boat

Somehow in the spring of 2007, Jeff Cobb ended up on Glen-L Marine’s email marketing list. Glen-L Marine sells wooden boat plans. “Week after week as the email appeared in my inbox, I’d have feelings of eagerness and disgust at the same time,” Jeff recalled. “Eager to see all the pictures of new wooden boats people around the world were building from Glen-L plans, and disgusted knowing that if I opened this email, I could kiss my productive workday goodbye because for the next two hours I’d be consumed by daydreams of the wooden boat I might build.” Jeff was particularly enamored with building a small sporty two-seat runabout model called the Glen-L Squirt.

While woodworking had never been his main hobby, Jeff had had the good fortune of growing up across the street from a cabinet builder and general jack-of-all-trades, Mr. Deedee, who built cabinets in his backyard shop. Mr. Deedee and Ms. Joy’s house is where all the kids hung out, playing basketball, ping pong and backyard football. While Jeff never did much work with Mr. Deedee, just from being around the shop as a kid he had gained a lot of woodworking knowledge. Enough so that he was confident he could build a good wooden boat, but he wasn’t sure if he wanted to make the commitment. But by the end of the summer he finally caved, ordered the Squirt plans, and began building.

squirt 1
“I just had to build this boat. I bought the plans, and built my first boat — a Glen-L Squirt.”

We’re Gonna Need a Bigger Boat

After completing the Glen-L Squirt in May 2009, Jeff and his wife, Melanie, began to assimilate into the wooden boat community in southern Louisiana and beyond. “We enjoyed the Squirt, but its use is very limited being that the boat is only 11 feet long. We were enjoying the people in the wooden boat community and the boating experiences,” Jeff stated, “but we wanted a bigger boat so that we could bring friends along. We also needed to go faster and handle rough chop in order to run with the big dogs.”

So, in 2012, Jeff started designing and building his second boat, the Pretty Girl Too. It’s a 22-foot runabout that comfortably seats six adults. Jeff had very specific features and design qualities in mind for this second boat. Essentially, he wanted the boat to be like a modern luxury runabout in every way but built out of wood with the general appearance of a classic wooden boat. He built the hull from a set of Clarkcraft Mariner plans that he modified substantially. He also incorporated design aspects and borrowed inspiration from several different boats, including the Riva Aquariva, Pegiva Convertible, and numerous Chris Craft models and Glen-L builds.

Building a Masterpiece

“It took me five years of nights and weekends to build the Pretty Girl Too,” Jeff recalled. “I’d say at least a year or so of that time was spent not so much in building the boat, but in thinking through the design. I don’t draw well nor do I know how to use CAD software, so the method of design consisted of building lots of mock-ups, which is quite time-consuming.”

constructing the hull
Clockwise from top left: Various stages of constructing the hull.

After building and modifying the hull frame to the shape Jeff was looking for, he double planked the boat with a 1/4-inch inner plywood layer and 1/4-inch outer Sapele veneer layer. Next came lots and lots of sanding and fairing. Fairing is the process of creating a pleasant fair curve as you look down the side of the boat. Too little sanding and fairing result in a profile that resembles a wrecked car that was poorly repaired at a subpar body shop.

He painted the boat bottom green and applied clear gloss above the waterline using numerous coats of SystemThree marine polyurethane for both. The finish was sanded to 5000 grit and polished to a high glossy shine. Finally, the hull was complete. Several friends and neighbors pitched in to help gently roll the boat onto some old mattresses and then lift it onto its trailer. A very happy celebration with beer and pizza followed.

flipping boat
Flipping the boat so it could be loaded onto a trailer to work on the interior.

Upholstering the Rear Seating Area

Designing the finished interior presented several challenges, but none bigger than the U-shaped seating area. Several mock-ups were built before finally settling on the final design. In the end, all that hard work and planning were worth it; the rear seating area emerged as a part of the boat that Jeff was most pleased with.

Once Jeff completed the woodwork, he thought his portion of the work was finished. He was excited to see the finished project and ready to write a check to an upholsterer and get it done. But his excitement was soon quelled when he discovered that very few upholstery shops do marine upholstery, and none of them had an appetite for all the custom work needed for his boat.

before upholstery
The rear U-shaped seating area before upholstery.

He first tried hiring an upholsterer in December 2016. Yet, by June of 2017, the boat was still not upholstered. He’d been strung along for months by a couple different shops telling him they’d get to it in two to three weeks, but never actually committing to the job. Frustrated by the runaround, he decided he would do the upholstery himself. He’d watched numerous Sailrite® how-to videos and borrowed an old Thompson Mini Walker — the precursor to the Sailrite Ultrafeed® — from his brother, Carl.

While Jeff was determined to get started on the upholstery work, there was a lot of apprehension. This was a major project for someone who’d never really sewn anything, and the upholstery is so prominent in an open-air runabout that there’s no place to hide mistakes. It really needed to be done right and professionally, and Jeff had grave concerns whether he was capable of sewing the upholstery to his high standards.

Then suddenly, a hero appeared! Jill, a friend of Jeff and Melanie’s, offered to do the sewing if he did all the foam fitting. This was a fantastic break! Not only did Jill have upholstery sewing experience, but she also had an Ultrafeed LSZ Sewing Machine. Much to her husband, David’s, dismay, she even put their sailboat dodger project on hold while she worked on Jeff’s upholstery. She professionally patterned the curved and irregular surfaces with Dura-Skrim® Patterning Material so everything fit tightly and sewed with Profilen® Lifetime Thread. The results were spectacular: “All too often I’m asked by people looking at the boat, ‘Who did your upholstery?’ They are always shocked to learn that it was done by a couple of enthusiastic amateurs. Jill really came to the rescue and did a fantastic job.”

pjimage
The completed upholstery work on the Pretty Girl Too.

A Snapless Cockpit Cover

With the upholstery completed, Jeff’s attention turned to another issue. He knew that in showing and using the boat it would spend many nights tied up to dock, and so he needed a cockpit cover to keep the interior clean, dry and protected during these overnight stays. While he appreciated Jill’s help on the upholstery, he was determined to do this project all on his own. This would be the project where he’d put all the hours spent watching Sailrite videos and his brother’s old Thompson Mini Walker to use. He ordered Top Notch® 9 fabric, grommets, Boat Blanket material and patterning fabric — all from Sailrite — and was ready to get to work.

However, there was one concern in making a cockpit cover that kept gnawing at Jeff. After hours and hours spent sanding and polishing the decking to a high-gloss mirror shine, he couldn’t bear the thought of marring his beautiful woodwork with snaps for attaching the cover to the boat. He came up with a clever alternative. Instead of using the traditional snaps to attach the cover, he tethered it to each of the four docking cleats. Then he added pockets to the cover that hold collapsible fiberglass tent poles to keep the cover taut. Jeff admitted, “It’s certainly a little different looking, but it’s a breeze to put on and works wonderfully, even in fairly high winds.”

snapless cover 1
The cockpit cover Jeff designed that cleverly uses tent poles so he didn’t have to add snap fasteners to his woodwork.

After completing the cockpit cover, Jeff put his newfound sewing skill into action by making fender covers with help from Sailrite’s project video. He also sewed some tote bags and did some canvas mending for a local sailing club. While finding satisfaction in the items he was producing, the actual act of sewing on the old Thompson was more often than not tedious and frustrating. The machine lacked the power to go through multiple layers of fabric and the stitch length adjustment would not hold in place. The final straw came when the tensioner broke. You can no longer find replacement parts for the machine, so Jeff rigged a homemade tensioner, but it didn’t work so well.

He then found a local sewing machine repair mechanic who installed a tensioner from a different model machine. “It worked OK, but not great,” Jeff explained. “I’d entertained the thought of getting a Sailrite machine early in the process while watching the videos but questioned whether it would be worthwhile just for doing the few projects I was working on. But once I realized how much I enjoyed sewing and began to envision all of the neat custom items I’d be able to make, I vowed that the next time Sailrite offered a 10 percent discount on the machine I was buying one — and I did.”

What made Jeff decide on an Ultrafeed? Following many other boatbuilders on the Glen-L forum who did their own upholstery, he noticed that most used the Sailrite machines and all of them spoke highly of their machines. Jill also loved her Ultrafeed and recommended it. “I’ve yet to read anything negative about Sailrite or their machines; it’s all glowing reviews. So, for me, buying the Sailrite machine was a no-brainer.”

pretty girl too
Jeff worked nights and weekends for five years building the Pretty Girl Too.

Smooth Sewing Ahead

Although Jeff hasn’t owned his Ultrafeed for very long, he’s enthusiastic about all the projects he’ll make with it. Having a heavy-duty sewing machine opens up a realm of new project possibilities. Jeff admits that he has more ideas than he’ll ever have time to sew, but he’s excited about the ones he will get to. He has plans to re-cover his outdoor patio cushions in LSU purple and gold for their game-day watch parties and has a desire to build curved wood mahogany captain’s chairs with custom upholstery for the Pretty Girl Too.

Another thing Jeff is looking forward to is loaning his Ultrafeed out to his brother. “Carl doesn’t sew too often, but the next time he does, I know he’ll enjoy the power and smoothness of the Utlrafeed over his old Thompson. When taking on any complex DIY project such as a boat, it’s always nice to have an “ace in the hole.” Carl’s my ace. He’s an extremely experienced craftsman in many areas and always available to provide advice and a helping hand. He’s also one of those guys who has every tool imaginable and has generously let me borrow them. It’s not often I have the opportunity to lend him any tool because he has them all, and so I’m excited about him benefitting from my Ultrafeed in the sewing projects he pursues.”

Oh, and how did Jeff come up with the name Pretty Girl Too for his second boat? “‘Pretty Girl’ is my wife, Melanie’s, pet name. She’s been so supportive of my boatbuilding hobby. The amount of support and encouragement she’s provided are immeasurable, and so I proudly named the boat after her. Thus the name, ‘Pretty Girl Too.’”

PG and Me at Madisonville
Jeff and Melanie are all smiles aboard the Pretty Girl Too.


Who We Are

Sailrite is your one-stop DIY shop! We are a passionate crew of do-it-yourselfers who strive to equip you with the supplies and how-to knowledge you need to tackle your next project. Do you want to learn upholstery, leatherwork, canvaswork, hobby sewing, bag making or more? We have the fabric, tools, hardware, sewing machines and notions you need to master any DIY. And even if you’ve never sewn before, our tutorials and how-to videos are designed for beginners and experienced crafters alike.

Start your DIY journey today: www.sailrite.com