A DIY Rooftop Transformation

It all started with an idea. How many of us have been frustrated or disappointed by store-bought patio cushions and other mass-produced furniture? Your store-bought cushions last a season or two on your patio, and then the fabric begins to fade. Or stains from birds and food spills don’t come out no matter how hard you scrub. 

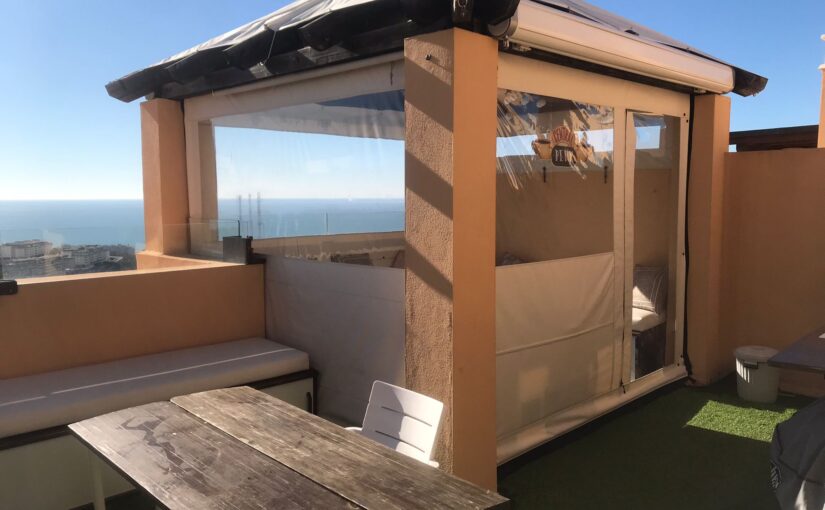
Javier Guerrero Garcia felt the same way. He and his family have a lovely private rooftop terrace above their apartment in La Cala de Mijas, an Andalusian province in southern Spain. He purchased IKEA cushions for the terrace benches and was disappointed in their performance. They were smaller than what he wanted and kept slipping off the benches.

Custom-size cushions were available — but at astronomical prices. While searching on the internet one day, Javier found the Sailrite 30-Minute Box Cushion video tutorial. Then he watched another Sailrite cushion video. And another. Soon enough he thought to himself, “Well it doesn’t look that hard, right?” And so his DIY journey began. 

With video tutorials and materials from Sailrite, Javier transformed his rooftop terrace into a cozy oasis with custom-fit cushions and a fabric enclosure so his family could enjoy the view year-round. Keep reading to learn more about this industrious DIYer and how he went from someone who had never touched a sewing machine to the go-to DIY guy his neighbors and family turn to for their sewing needs.
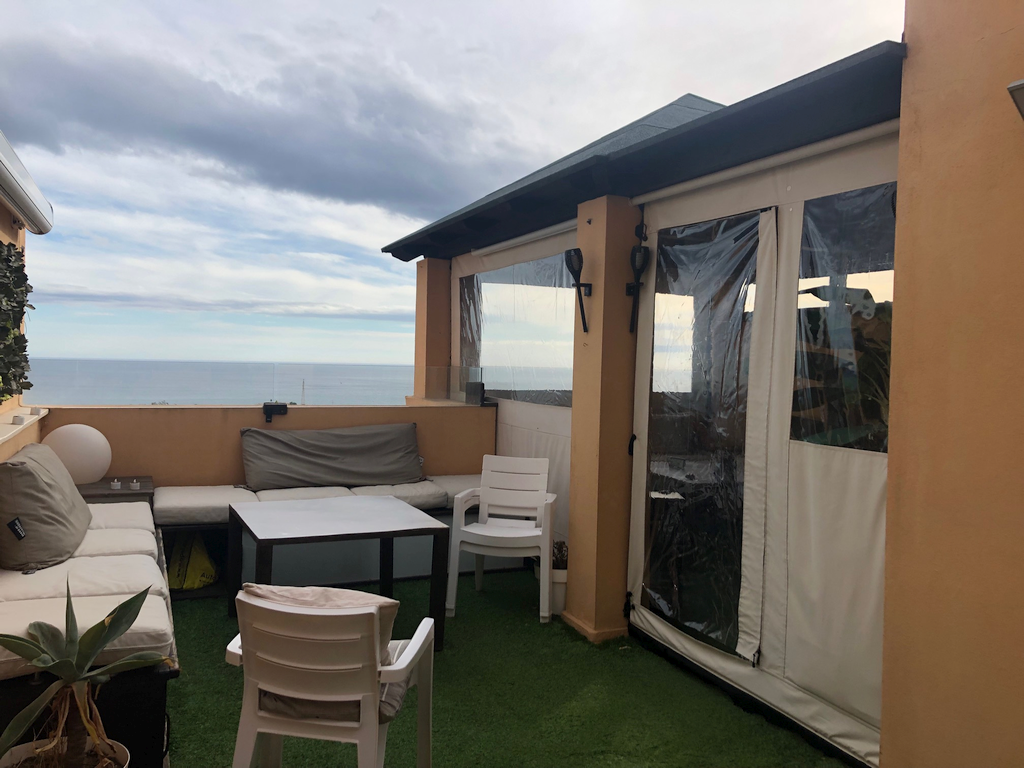
diy box cushions
Here’s a look ahead at the box cushions and enclosure Javier made using Sailrite resources.

Learning to Sew

The cushions project was fairly straightforward for Javier and a great way to learn how to sew. He had never sewn before, but he was determined to make cushions that fit his patio benches perfectly. In addition to the 30-Minute Box Cushion video, Javier also used the Sailrite Fabric Calculator to help him determine how much fabric and other materials he would need for his cushion covers.

Because he had never sewn before, Javier relied on Sailrite how-to videos to tackle his rooftop projects. We asked him — as a sewing newbie — what he thought of the Sailrite videos and if they were easy to follow. Here’s what he told us:

Absolutely! The shots were clear (not easy when you watch many other “sewing” videos where you only see hands moving), explanations on the whys and hows were completely reasonable and understandable, and they covered every aspect and foreseeable problem (like the fabric shrink when sewing). [The Sailrite videos] were the one and only reason for me to think that I could learn to sew by myself and tackle the first cushion project. … Even my mother-in-law is still surprised about how it all finally came along.”
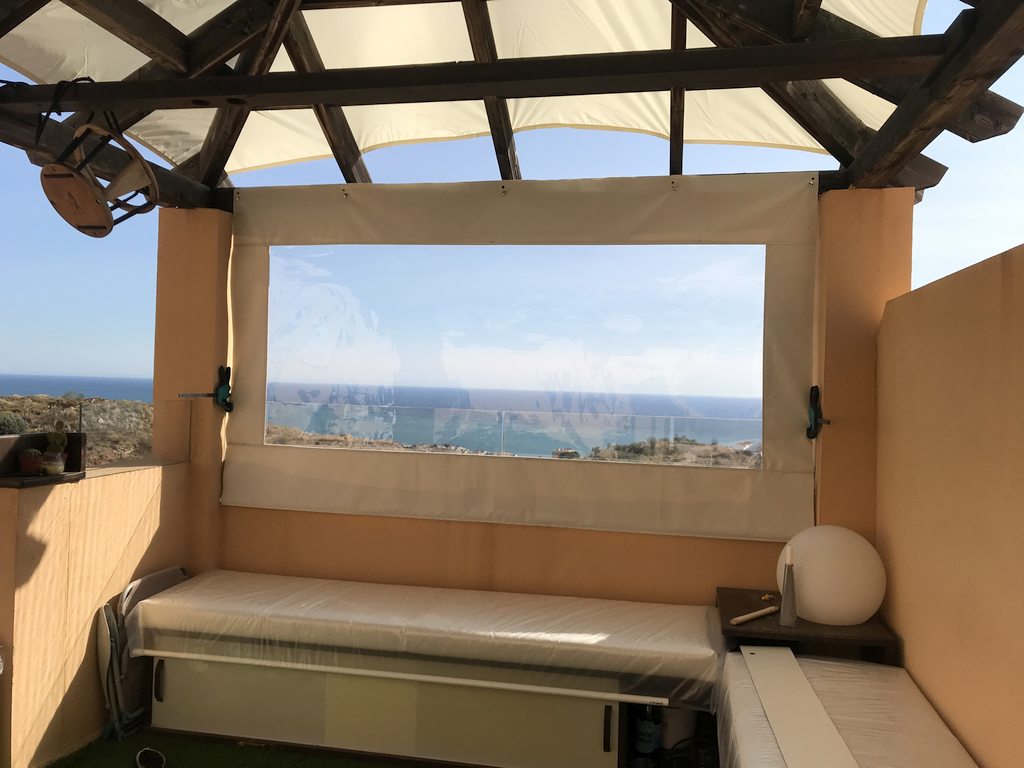
rooftop enclosure
Who wouldn’t want to enjoy this gorgeous seaside view year-round?

The cushions turned out great, and Javier was excited to tackle his next sewing project. This one would be much bigger and more involved: a four-sided enclosure with a zippered opening for his rooftop pergola. 

DIY Pergola Enclosure

The pergola enclosure consisted of four large squares of material — no curves or shaping. Javier first mocked up a sketch to figure out window placement, sizing and overall construction. Once he had the design figured out, he cleared out his living room to create enough flat space for measuring and patterning. 

“I cut the sides long so they could be trimmed later, assembled almost everything (including windows) using just your semi-flat felled seam tutorial, installed the LOXX® hardware, hung them for final trimming, added the Stayput™ fastener cords for windproofing, added the bottom Stayput tensioners to both the fabric and the wall, and that’s it!”

Two years later the enclosure still works great. And though the project was sometimes grueling and difficult, Javier learned a lot from the experience. He’s still very happy and proud of his accomplishment. “The vinyl windows stuck on every surface while pulling. I had bad luck with thread breaking and the process was time-consuming. … I sweated each and every one of the three-meter-long (approximately 10 feet) seams — and there are a few of them! Anyway, it was really fun and kind of a challenge to myself. I had a really good time and the results were fabulous and, most importantly, still are two years later.”

This slideshow requires JavaScript.

After installing the four-sided enclosure and getting everything zipped and snapped in place, he added a final finishing touch: a small gas heater. That way, the rooftop could be enjoyed year-round. Javier finished the project in time for Christmas dinner, and the windproof enclosure kept everyone warm and comfortable all night. In fact, Javier’s daughters — 5 and 7 years old at the time — named the enclosure “Villa Calorcito,” which loosely translates to “Cozyville.”

Neighbors keep asking me where I bought the rooftop enclosure, and they can’t believe me when I tell them I did it myself (They think I don’t want to give them the name of the contractor!). I just point them to your website and videos.”

And speaking of neighbors, Javier has received several requests for pergola enclosures from friends and neighbors. He’s not against the idea. In fact, he’s already thinking of ways he could improve his original design. He’s considering using sewable keder rail awning track instead of fasteners as that would more evenly distribute tension and minimize wrinkles in the fabric panels. “The Loxx fasteners make the panels easy to remove with a few pulls when the weather is hot. I still have the desire to try to sew a rail awning someday. Maybe for version 2.0 for some of the neighbors!”

New DIY Adventures

With the success of his rooftop enclosure projects behind him, Javier is enjoying his new skill set and is sewing up a storm. “Once you start, you can’t stop! I made a few box cushions for several different spaces, a gigantic sunshade for the adjacent rooftop space, and I hacked an IKEA sofa to gain lots of storage space. When you just add your first zipper or button or any other fabric hardware to anything, providing some functionality to an otherwise static and boring piece of fabric, you can’t stop thinking about adding zippers to everything else!”
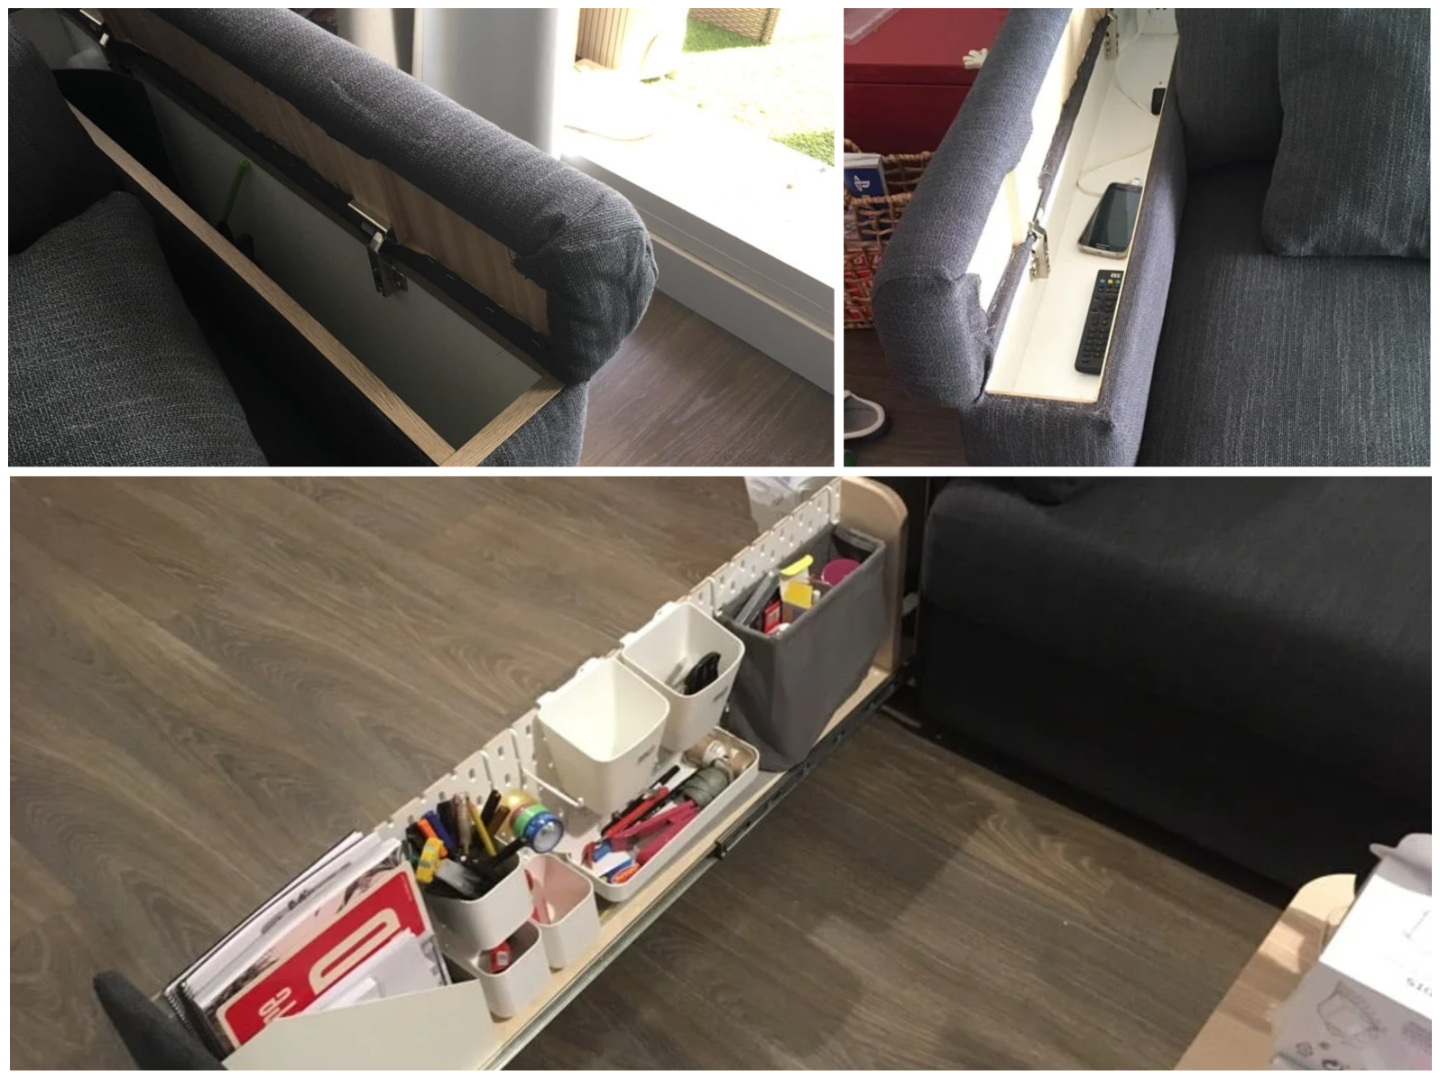
sofa storage hack
Javier’s IKEA sofa storage modification was named “Best Hack of the Year” by the website IKEA Hackers.

We asked Javier if he has advice for anyone thinking about learning to sew and tackling their first project. Here’s what he said:

Go for it! The basic techniques are quite easy to learn (mastering them is a totally different story). But even as a first-timer, the results will absolutely blow your mind! … Start small, make a few mistakes early in the project, analyze and understand what worked for you and what didn’t, and learn something every day. Just try, make some errors and adjust. But even with the ugliest seams (me!), the results look awesome and you will be the only one looking at how bad your seams are. No one else will notice a twisted seam, even if you point at it with your finger.”

“Just try” — what simple yet great advice. Isn’t trying at the heart of the DIY process? Make mistakes, learn from them and never give up. And don’t forget to be patient with yourself and let go of those small mishaps. As Javier said — no one will notice them but you. 

Thank you for sharing your story with us, Javier. We’re thrilled that Sailrite could be your introduction to the fun and exciting world of sewing. Good luck with all your future DIYs.
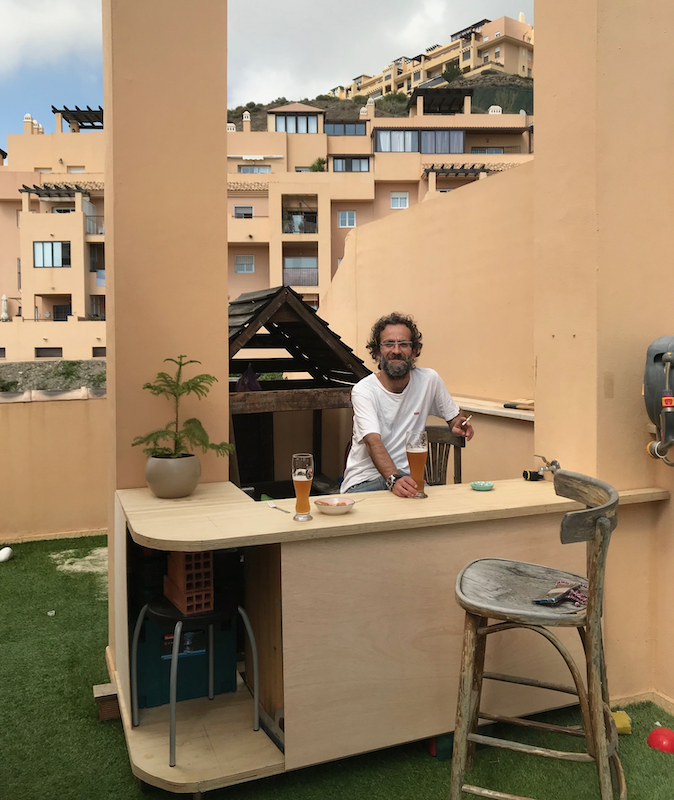
rooftop bar diy
What’s next for Javier? Updating the terrace’s bar area. This DIYer never slows down!


Who We Are

Sailrite is your one-stop DIY shop! We are a passionate crew of do-it-yourselfers who strive to equip you with the supplies and how-to knowledge you need to tackle your next project. Do you want to learn upholstery, leatherwork, canvaswork, hobby sewing, bag making or more? We have the fabric, tools, hardware, sewing machines and notions you need to master any DIY. And even if you’ve never sewn before, our tutorials and how-to videos are designed for beginners and experienced crafters alike.

Start your DIY journey today: www.sailrite.com

Jim Norman: Building a Houseboat of His Dreams

We’ve all heard the expression, “When life gives you lemons, make lemonade.” Well, that sentiment couldn’t be truer for New Jersey native and retired newspaperman Jim Norman. In 2009, Jim was unfortunately part of a round of layoffs at The New York Times, where he worked as an editor. He and his wife made the tough decision to sell their vacation home, and future retirement home, in Maine.

Jim vowed that he would somehow get a toehold in Maine again. Years later, his prediction would come true, just not in the way he originally thought. While researching the “tiny home” phenomenon in 2014, he stumbled upon the story of a man who, instead of building his dream tiny home, built a houseboat instead. Jim knew this was the path for him and a clever and inventive way to get back to Maine — or wherever he wanted to go. He knew wherever he and his wife vacationed it would be on the water. So why not live on the water? “The more I thought about it, the more it made sense. Wherever I decided to vacation with it, we would be on waterfront property. And no real estate taxes! What could be better than that?”

jim with boat
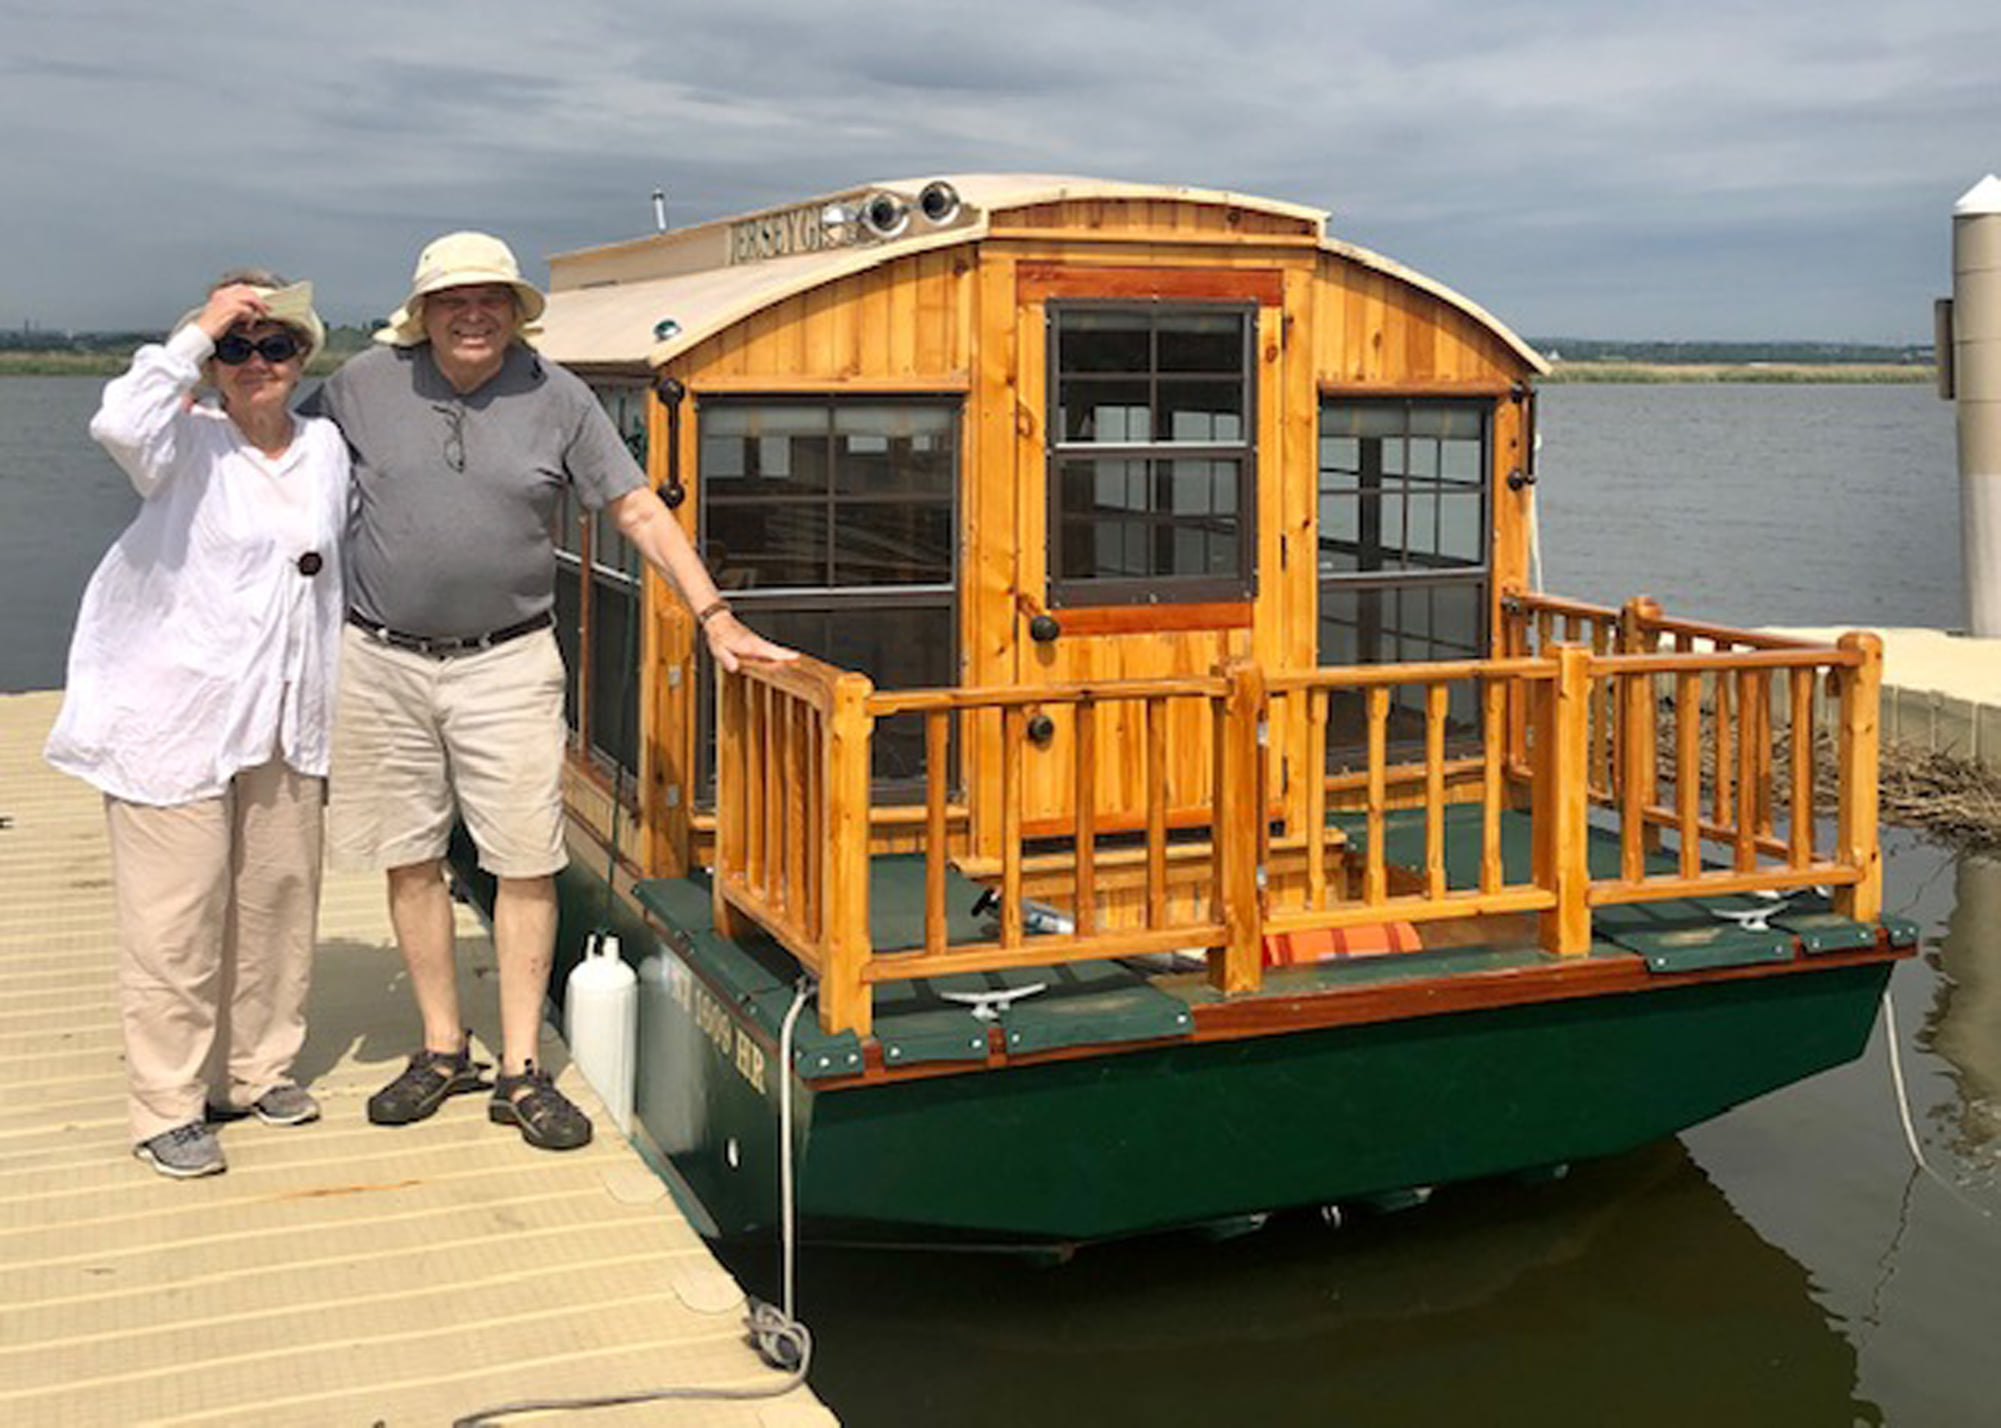
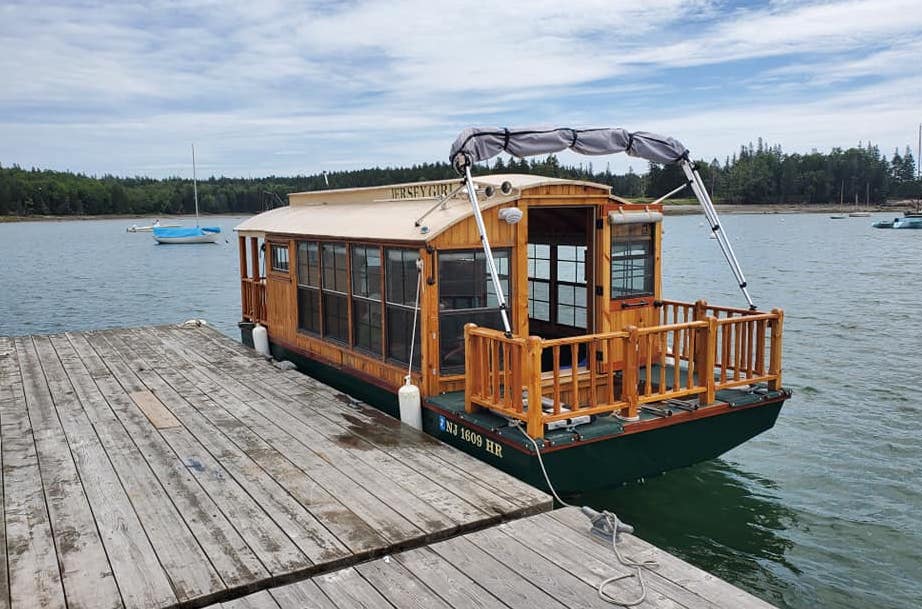
Jim and his wife, Ginger, are all smiles taking Jersey Girl out on the Hackensack River in New Jersey.

To Build a Boat

Jim contacted the designer of the “tiny houseboat” and bought a set of digital plans. In May 2015, he started building his future vacation home on the water. At first, Jim worked on the boat in his spare time, as he was still working in the newspaper industry. By the spring of 2016, he found himself looking for another editing or writing job. He came to the conclusion the next year that, at the age of 74, he was past due for a happy and well-deserved retirement. From 2017 on, Jim was able to focus on the boat with his full attention and made it his retirement project.

Jim built the houseboat without any assistance from professionals. But that didn’t worry him. Jersey Girl is actually the ninth boat Jim has built! “The obsession started in 1995 when I built an 11-foot sailing/rowing dinghy. … Next came two cedar-strip kayaks, followed by kid-sized plywood kayaks for three grandsons and a full-sized plywood touring kayak for me.” And just as with the dinghy, Jim modified the plans of the houseboat and made it partially his own design, adding 3 extra feet of length to the boat’s original schematics and a hinged hatch opening to make it easier to climb aboard, among other modifications.

roof hatch
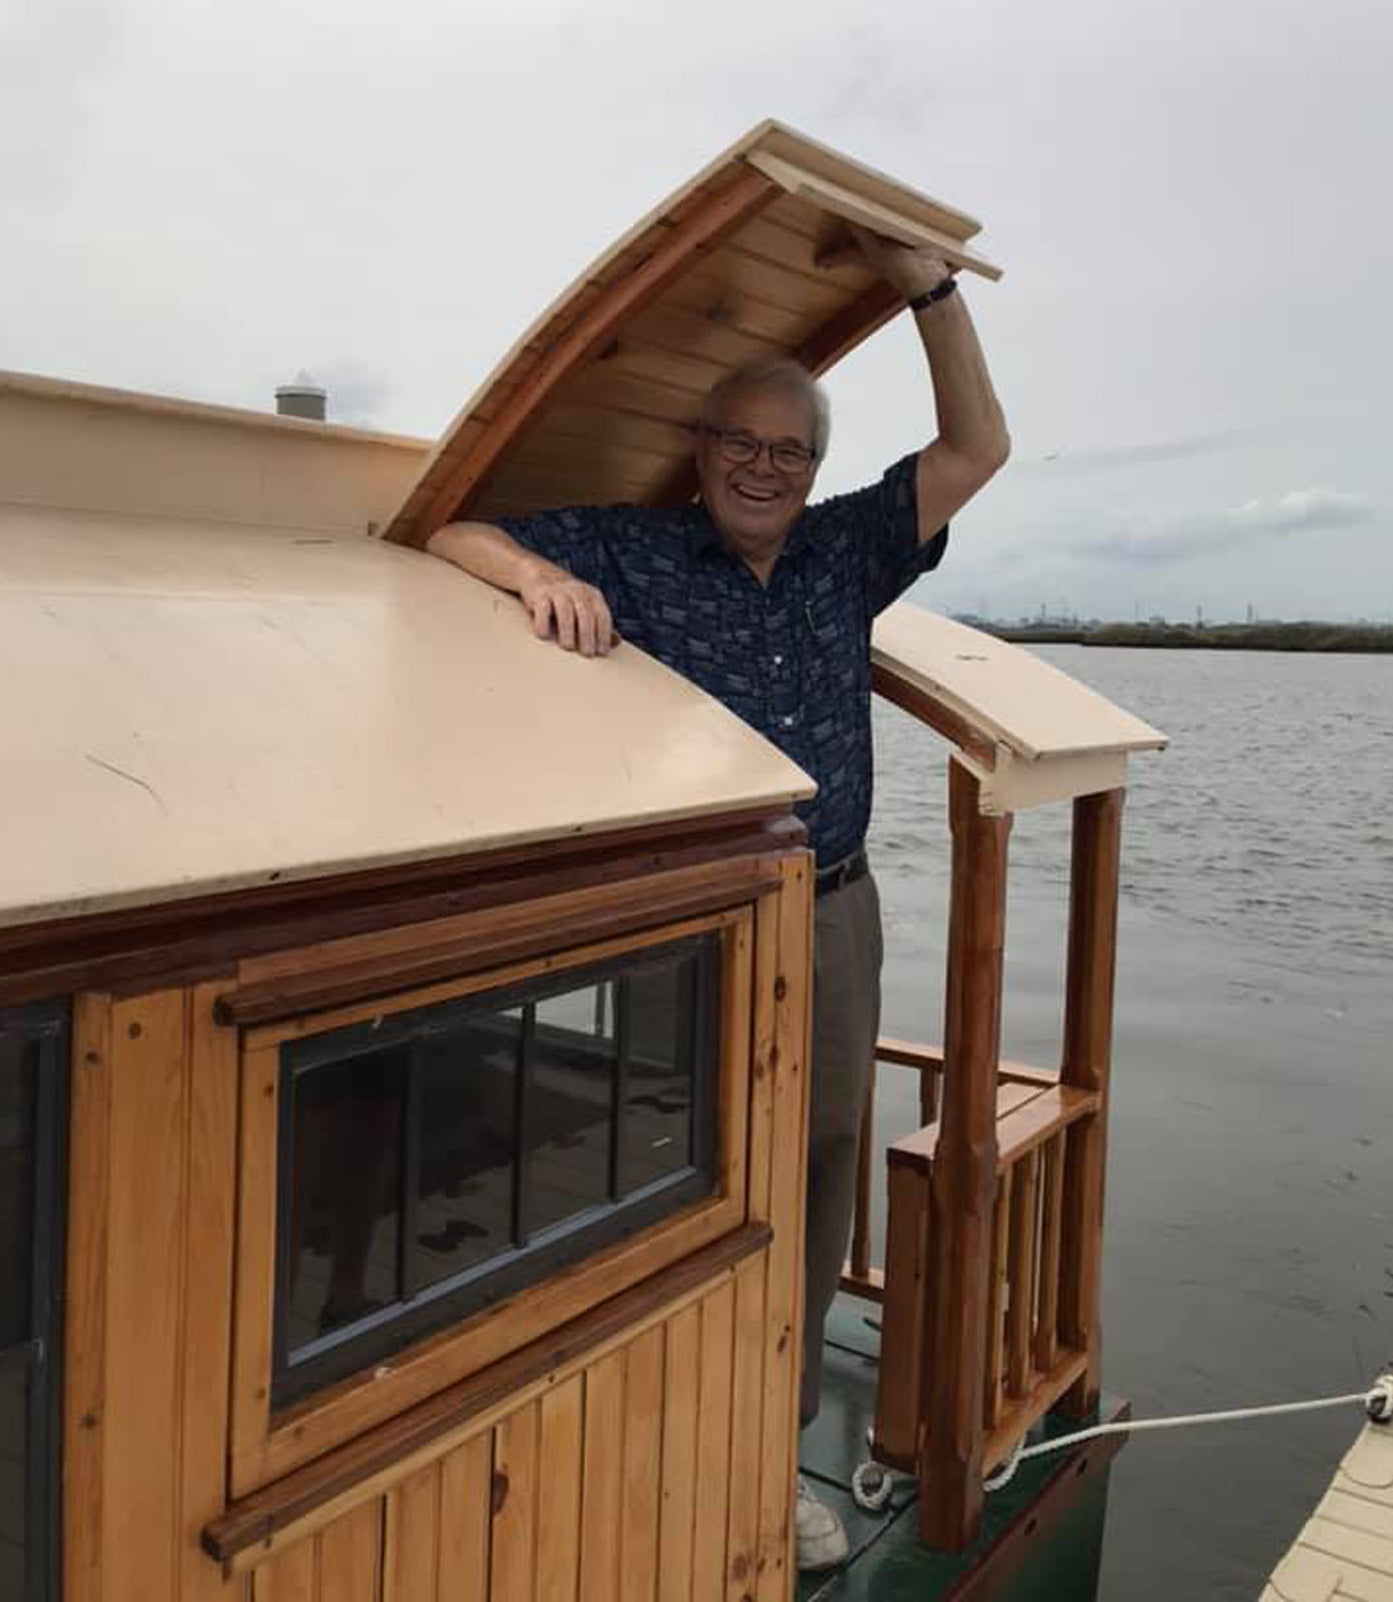
Jim shows how the hinged roof hatch allows for easy exit and entry.

Occasionally, friends and neighborhood kids asked to help out with Jersey Girl, and Jim was always willing to let others get involved in the fun. “Several times, just for the fun of it, I held ‘work parties,’ opportunities for friends and neighbors to come and help out. On one occasion, I invited folks over for the experience of gluing and screwing a bottom panel onto the upside-down frame structure. When it was done, they all signed their names with a Sharpie pen, and those names are still there, although covered with layers of fiberglass, epoxy and paint. A couple of times, neighbors asked me if I would let their kids do something. So I outfitted them with disposable gloves and old work shirts and let them do a few swipes of paint with a roller.”

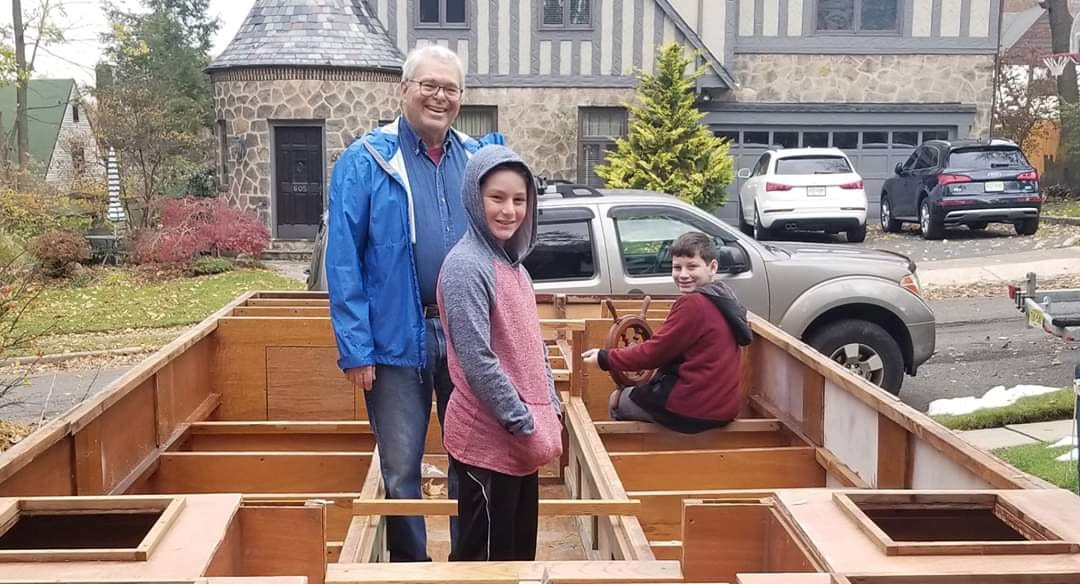
What exactly does it take to build a wooden houseboat from the hull up? Here’s a brief rundown with photos of the boat’s construction and assembly from start to finish.

This slideshow requires JavaScript.

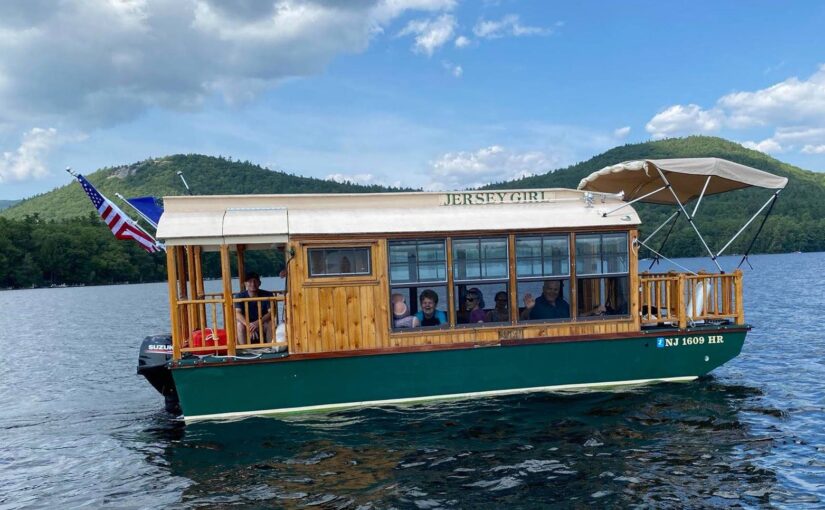
In May of 2021, Jim launched Jersey Girl for the first time in the Hackensack River, near his home. He followed this up with outings in Lake Hopatcong, New Jersey’s largest lake, and in Maine’s Eggemoggin Reach and New Hampshire’s Squam Lake. In the six years it took to complete her, he learned a lot about building your own boat, perseverance and, most importantly, himself. We asked Jim some questions about his experience building a wooden houseboat, and all the ups and downs that come with such a daunting DIY project. He was happy to share more details about the build with us and offer his advice to anyone thinking of tackling a similar project.

Q. Is Jersey Girl for day trips or is she fit for liveaboard?

A. She’s not quite ready for overnighting, but I hope she will be by summer 2022. Plywood inserts fasten between the two settees on the port and starboard sides, and the seatback cushions are sized to exactly fill the gap to make a queen-sized bed. … Three projects planned for the spring are a slide-out shelf for a small refrigerator under the galley counter, a shower arrangement on the aft deck, and two solar panels on the roof to keep the batteries charged up when we’re not connected to shore power. So my hope is to make JG self-sufficient off-grid for a week or more at a time.

Q. How did you feel the first time you launched Jersey Girl?

A. I felt great! Because I had made so many modifications to the plan, and she wound up being almost three times her as-designed weight, I really did not know what to expect. Would I have a boat, or an interesting camper trailer? As it turned out, she not only floated, but she floated right side up, a major triumph right there. More than that, she floated exactly to where I estimated her waterline to be, with a draft of only about eight inches – meaning I can poke around in really shallow water without worry. Also, she’s incredibly well balanced, level in the water no matter where or how passengers like to sit or stand. She easily takes as many as 10 people at a time for day trips (only two for overnighters), and she’s beautifully behaved over the wakes of passing boats. I could not be more pleased.

Q. What was the inspiration behind the name?

A. Well, I’m a Jersey Boy! I grew up in New Jersey and, although I have lived and worked in many different places, I really appreciate all that New Jersey has to offer. So, the name is in honor of all the Jersey Girls, who seem to share a sassy, bossy, somewhat lovingly entitled attitude. … And by coincidence, I keep running into Jersey Girl references: There’s a diner near Lake Hopatcong called the Jersey Girl Café, and a popular local craft brewery that sells cans of Jersey Girl beer.

Two of Jim’s grandchildren visit during the winter of 2018 and give their approval.

Q. What was the hardest part of building her? Did you run into any unforeseen complications or problems? If so, how did you solve them?

A. That’s a good question! Boatbuilding is nothing BUT a serial exercise in problem-solving. And because I made so many modifications in the existing plan, and developed so many methods for doing what I wanted to do, I turned out to be an expert in creating more problems for myself. In fact, I seem to have derived what I call Jim’s First Law of boatbuilding: Every solution begets a new problem. And so on.

One of the most persistent problems during construction was how to keep rainwater from filling the unsheltered hull before fully enclosing it with the decks and cabin. No matter how tightly tarped and covered the hull was, it seemed that rain always managed to find a way in. Ultimately the answer was that water accumulation was simply unavoidable, and I just had to budget time for bailing and mopping in my construction schedule.

Because I was doing so many of the things that I did for the first time in my life, I encountered problems that I just had to sit for a while and think about – and consider the future consequences – before going on.

Q. What do you like most about the do-it-yourself lifestyle?

A. Not only is it very satisfying to do things oneself, but it makes it possible to get things just the way you like them, without having to settle for some manufacturer’s or retailer’s idea of what you need. I’ve never been frightened of DIY, no matter what the field. I’ve learned to do carpentry, boatbuilding, mechanical work, electrical work, plumbing, brazing, welding… People often ask me, “Is there anything you can’t do?” I tell them I’ve never tried my hand at brain surgery, and that’s probably a good thing.

diy fabric projects
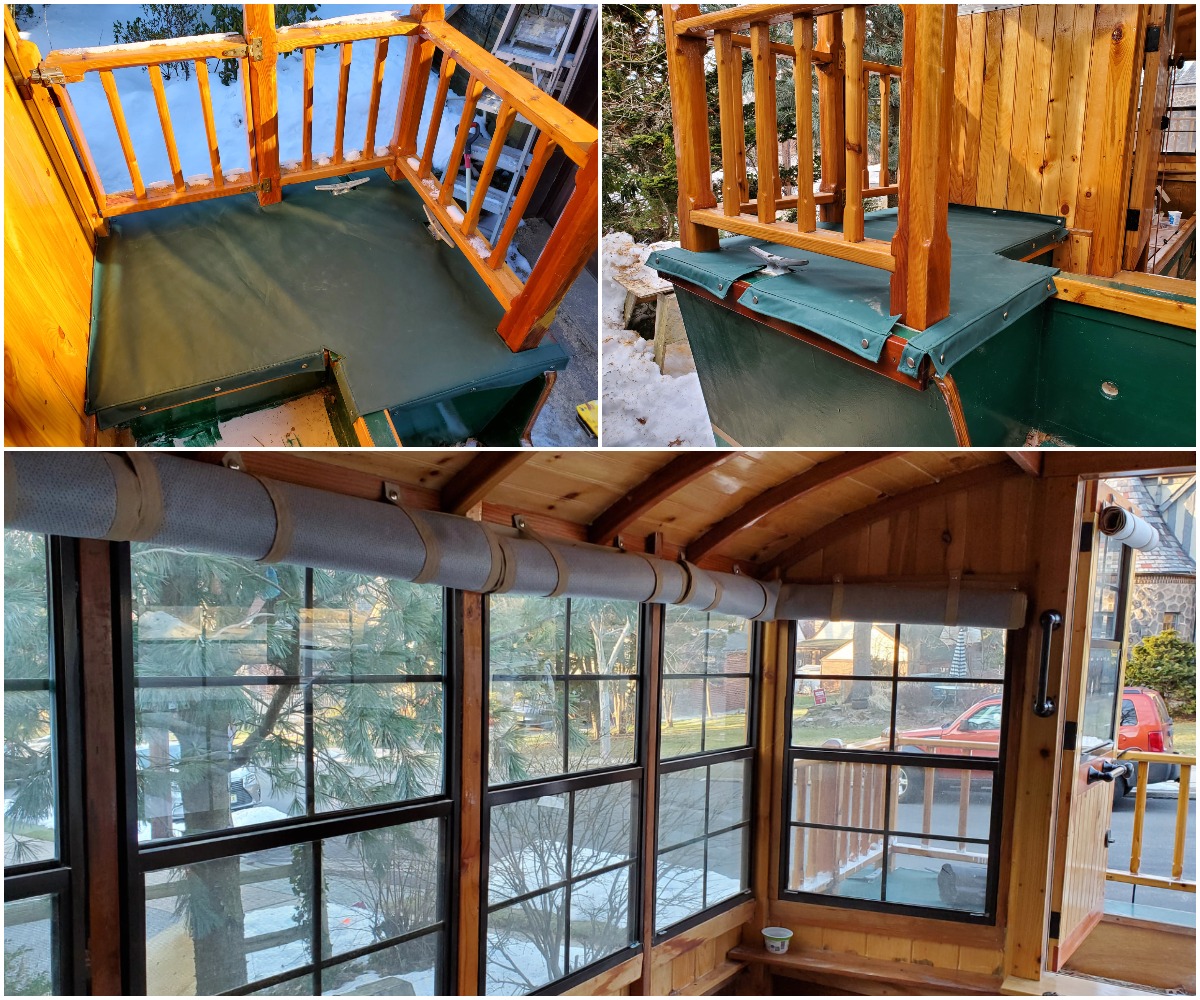
Top: Jim made protective deck covers using Softouch® fabric. Bottom: Roll-up window shades using Top Gun® and Protect-It™ fabric.

Q. What advice would you offer to someone interested in building a boat or tackling a big project like this?

A. I guess I’d say if you have a dream for something big, don’t put it off for as long as I did. Get started on it when you’re young. And if you do put it off as long as I did, don’t listen to the naysayers, even if they are the people you love and respect. Just find a way to get started; you’ll quickly pass the point of no return and then you won’t have any choice but to finish it.

Sewing for Jersey Girl

One of the final steps of the boat’s creation was the interior finishing. This is where Sailrite came in. Jim had never sewn prior to the projects he made for Jersey Girl. But as we’ve learned so far, that wasn’t going to stop him. “I bought the least expensive consumer-grade heavy-duty sewing machine I could find, watched a couple of online videos on how to use it, bought a remnant of heavy fabric from a nearby fabric store, practiced sewing in a straight line for a half hour, and that was it! The rest, as they say, is history. It turns out I like sewing, and one of these days I’ll probably find a way to justify one of Sailrite’s machines!”

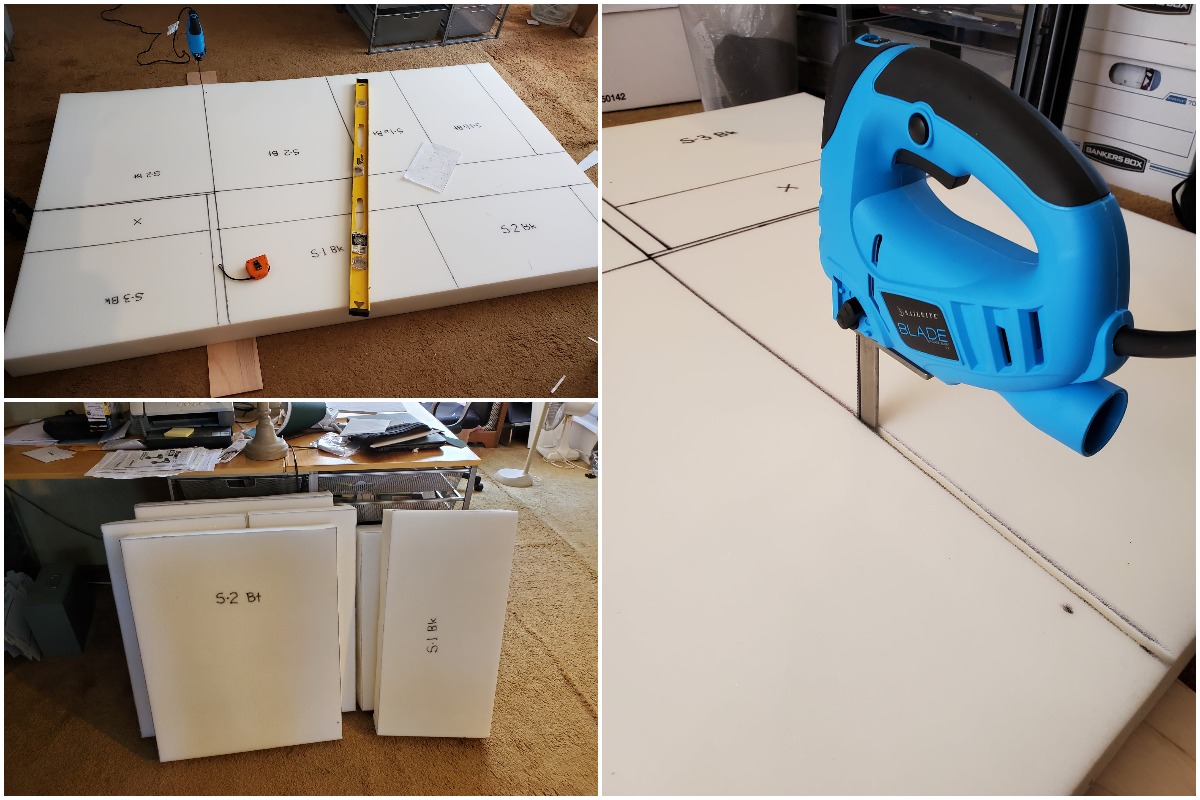
Jim purchased Sunbrella® Canvas upholstery fabric, high density foam and the Sailrite® Blade Foam Saw and made cushions for the seats and seat backs (15 in total) that will double up as the mattress for sleeping. He turned to Sailrite’s popular 30-Minute Box Corner Cushion tutorial to help him make the cushions.

foam cutting
Measuring, plotting and cutting foam for the cushions.

He also sewed interior roll-up window shades that also attach to the outside to protect the windows when trailering the boat. He used Top Gun for the window shades with an inner layer of a soft protective lining fabric to protect the windows during transportation on the highway. Finally, he patterned and created exterior deck covers to help prevent rainwater and spray from seeping in through the hinged hatch covers.

Watching the 30-Minute Box Corner Cushion video is what convinced Jim that he could tackle these sewing projects, even though he’d never sewn before. While using Sailrite’s Fabric Calculator to help lay out the fabric for patterning and cutting, he contacted Sailrite customer service wanting to know if Sailrite also offered a Foam Calculator. We didn’t at the time, but Sailrite has always listened to customer suggestions and ideas. We now offer a Foam Calculator that shows DIYers how to nest foam pieces to get the most usage out of their foam sheet and to help save money.

cabin interior
The finished cabin interior. We think Jim did a fantastic job on the box corner cushions!

What’s Next for Jim & Jersey Girl?

Now that Jersey Girl is finished (mostly!), Jim is ready to get her on the water and enjoy his six years of hard work and determination. But that doesn’t mean he’s ready to slow down. Even though the bulk of his work on Jersey Girl is done, he’s not planning on slipping into a life of inactivity in front of the TV. “Now that I am retired, with all of my other interests, I often wonder where I ever found the time to work for a living. If you ever see Jersey Girl on a waterway near you, be sure to stop me to say hello!”

Jim will turn 80 in May 2022, and he says he’s probably through with big building projects. Instead, he’s putting his hands to work on a new venture — writing a book. The book will chronicle his adventure building Jersey Girl and all that came with the experience. “Now that most of the work is done, the chronicle will also be about the places we travel together, the things we see, and the people we meet along the way.” Jim plans on taking Jersey Girl up the Hudson River and possibly to Canada for a rendezvous with other boatbuilders, painting and photographing what he sees along the way, two other passions of his.

And even though Jersey Girl’s sewing projects are complete, Jim isn’t putting his sewing machine away anytime soon. He has plans to redo his patio furniture cushions that have seen better days. He also has an idea for a line of educational plush toys for children.

If you’d like to learn more about Jersey Girl and follow Jim’s adventures on the water, you can follow his Facebook page: Jersey Girl the Houseboat.

jersey girl on the water


Who We Are

Sailrite is your one-stop DIY shop! We are a passionate crew of do-it-yourselfers who strive to equip you with the supplies and how-to knowledge you need to tackle your next project. Do you want to learn upholstery, leatherwork, canvaswork, hobby sewing, bag making or more? We have the fabric, tools, hardware, sewing machines and notions you need to master any DIY. And even if you’ve never sewn before, our tutorials and how-to videos are designed for beginners and experienced crafters alike.

Start your DIY journey today: www.sailrite.com