A DIY Rooftop Transformation

It all started with an idea. How many of us have been frustrated or disappointed by store-bought patio cushions and other mass-produced furniture? Your store-bought cushions last a season or two on your patio, and then the fabric begins to fade. Or stains from birds and food spills don’t come out no matter how hard you scrub. 

Javier Guerrero Garcia felt the same way. He and his family have a lovely private rooftop terrace above their apartment in La Cala de Mijas, an Andalusian province in southern Spain. He purchased IKEA cushions for the terrace benches and was disappointed in their performance. They were smaller than what he wanted and kept slipping off the benches.

Custom-size cushions were available — but at astronomical prices. While searching on the internet one day, Javier found the Sailrite 30-Minute Box Cushion video tutorial. Then he watched another Sailrite cushion video. And another. Soon enough he thought to himself, “Well it doesn’t look that hard, right?” And so his DIY journey began. 

With video tutorials and materials from Sailrite, Javier transformed his rooftop terrace into a cozy oasis with custom-fit cushions and a fabric enclosure so his family could enjoy the view year-round. Keep reading to learn more about this industrious DIYer and how he went from someone who had never touched a sewing machine to the go-to DIY guy his neighbors and family turn to for their sewing needs.
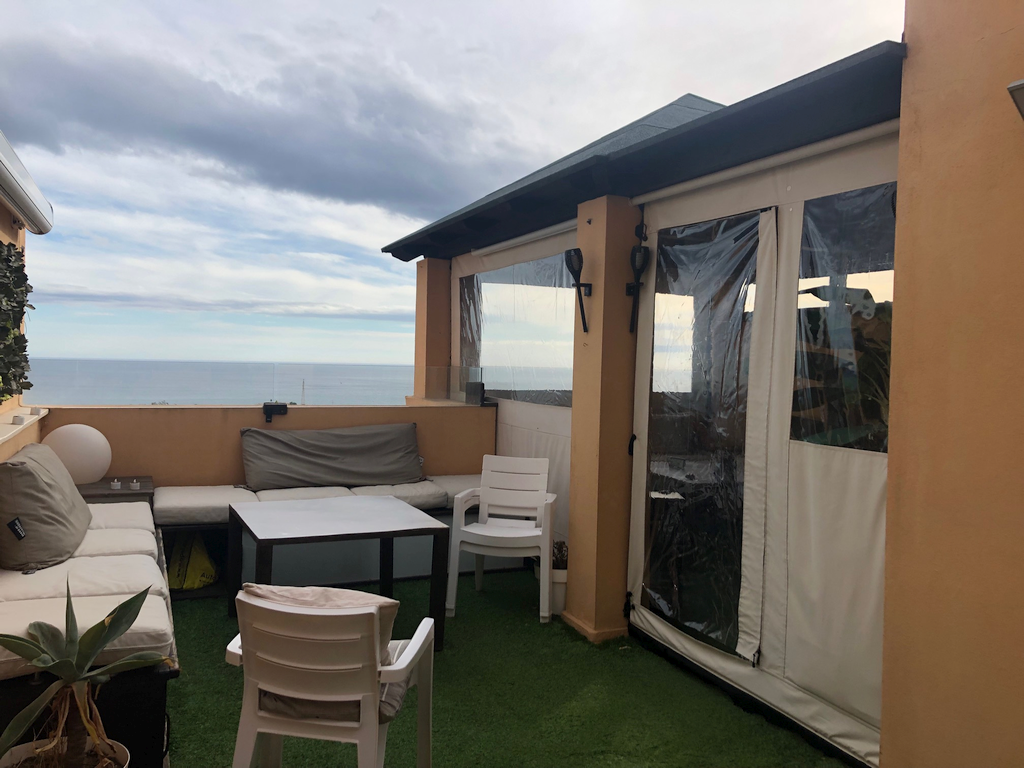
diy box cushions
Here’s a look ahead at the box cushions and enclosure Javier made using Sailrite resources.

Learning to Sew

The cushions project was fairly straightforward for Javier and a great way to learn how to sew. He had never sewn before, but he was determined to make cushions that fit his patio benches perfectly. In addition to the 30-Minute Box Cushion video, Javier also used the Sailrite Fabric Calculator to help him determine how much fabric and other materials he would need for his cushion covers.

Because he had never sewn before, Javier relied on Sailrite how-to videos to tackle his rooftop projects. We asked him — as a sewing newbie — what he thought of the Sailrite videos and if they were easy to follow. Here’s what he told us:

Absolutely! The shots were clear (not easy when you watch many other “sewing” videos where you only see hands moving), explanations on the whys and hows were completely reasonable and understandable, and they covered every aspect and foreseeable problem (like the fabric shrink when sewing). [The Sailrite videos] were the one and only reason for me to think that I could learn to sew by myself and tackle the first cushion project. … Even my mother-in-law is still surprised about how it all finally came along.”
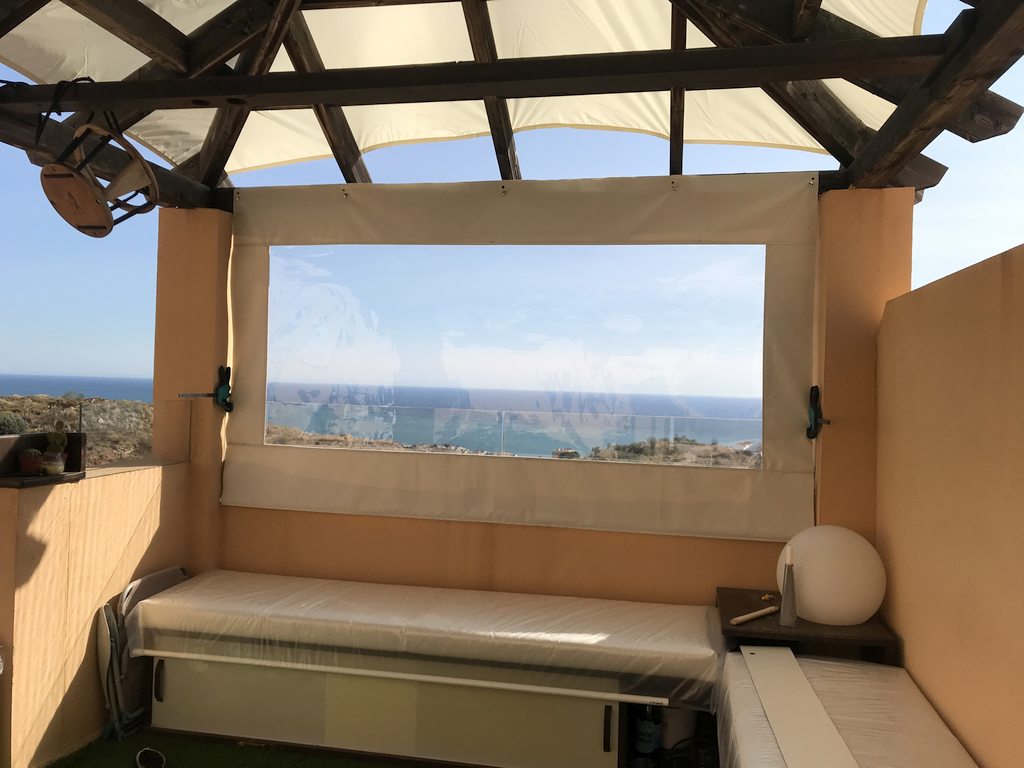
rooftop enclosure
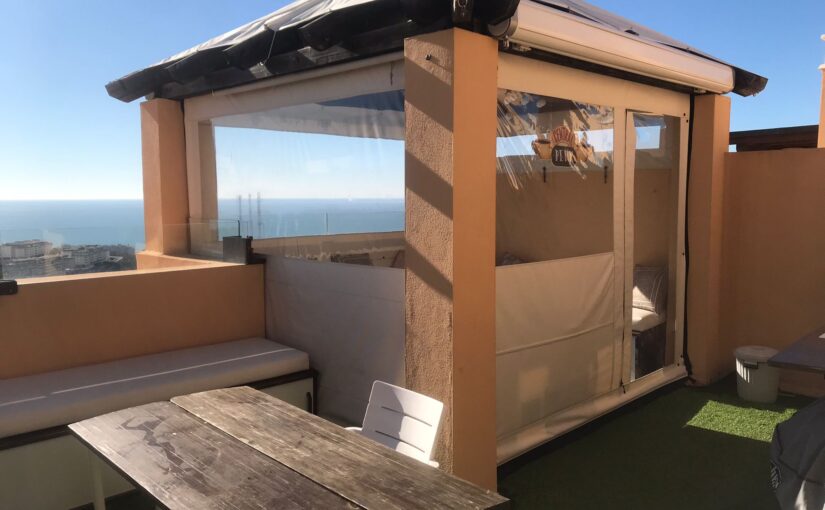
Who wouldn’t want to enjoy this gorgeous seaside view year-round?

The cushions turned out great, and Javier was excited to tackle his next sewing project. This one would be much bigger and more involved: a four-sided enclosure with a zippered opening for his rooftop pergola. 

DIY Pergola Enclosure

The pergola enclosure consisted of four large squares of material — no curves or shaping. Javier first mocked up a sketch to figure out window placement, sizing and overall construction. Once he had the design figured out, he cleared out his living room to create enough flat space for measuring and patterning. 

“I cut the sides long so they could be trimmed later, assembled almost everything (including windows) using just your semi-flat felled seam tutorial, installed the LOXX® hardware, hung them for final trimming, added the Stayput™ fastener cords for windproofing, added the bottom Stayput tensioners to both the fabric and the wall, and that’s it!”

Two years later the enclosure still works great. And though the project was sometimes grueling and difficult, Javier learned a lot from the experience. He’s still very happy and proud of his accomplishment. “The vinyl windows stuck on every surface while pulling. I had bad luck with thread breaking and the process was time-consuming. … I sweated each and every one of the three-meter-long (approximately 10 feet) seams — and there are a few of them! Anyway, it was really fun and kind of a challenge to myself. I had a really good time and the results were fabulous and, most importantly, still are two years later.”

This slideshow requires JavaScript.

After installing the four-sided enclosure and getting everything zipped and snapped in place, he added a final finishing touch: a small gas heater. That way, the rooftop could be enjoyed year-round. Javier finished the project in time for Christmas dinner, and the windproof enclosure kept everyone warm and comfortable all night. In fact, Javier’s daughters — 5 and 7 years old at the time — named the enclosure “Villa Calorcito,” which loosely translates to “Cozyville.”

Neighbors keep asking me where I bought the rooftop enclosure, and they can’t believe me when I tell them I did it myself (They think I don’t want to give them the name of the contractor!). I just point them to your website and videos.”

And speaking of neighbors, Javier has received several requests for pergola enclosures from friends and neighbors. He’s not against the idea. In fact, he’s already thinking of ways he could improve his original design. He’s considering using sewable keder rail awning track instead of fasteners as that would more evenly distribute tension and minimize wrinkles in the fabric panels. “The Loxx fasteners make the panels easy to remove with a few pulls when the weather is hot. I still have the desire to try to sew a rail awning someday. Maybe for version 2.0 for some of the neighbors!”

New DIY Adventures

With the success of his rooftop enclosure projects behind him, Javier is enjoying his new skill set and is sewing up a storm. “Once you start, you can’t stop! I made a few box cushions for several different spaces, a gigantic sunshade for the adjacent rooftop space, and I hacked an IKEA sofa to gain lots of storage space. When you just add your first zipper or button or any other fabric hardware to anything, providing some functionality to an otherwise static and boring piece of fabric, you can’t stop thinking about adding zippers to everything else!”
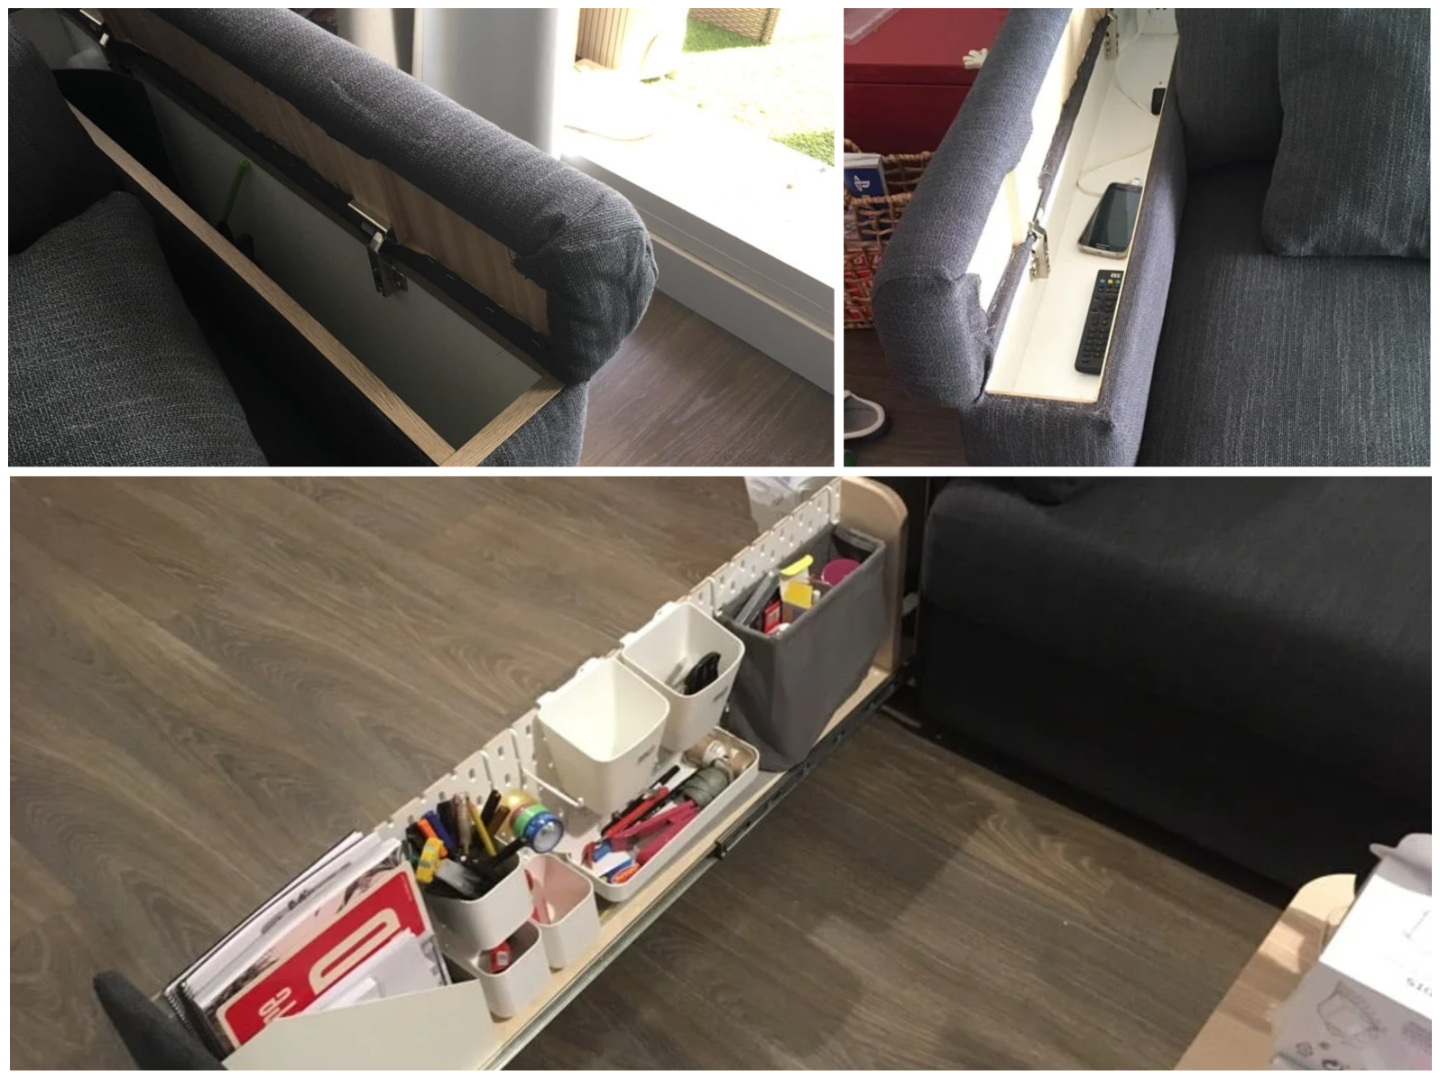
sofa storage hack
Javier’s IKEA sofa storage modification was named “Best Hack of the Year” by the website IKEA Hackers.

We asked Javier if he has advice for anyone thinking about learning to sew and tackling their first project. Here’s what he said:

Go for it! The basic techniques are quite easy to learn (mastering them is a totally different story). But even as a first-timer, the results will absolutely blow your mind! … Start small, make a few mistakes early in the project, analyze and understand what worked for you and what didn’t, and learn something every day. Just try, make some errors and adjust. But even with the ugliest seams (me!), the results look awesome and you will be the only one looking at how bad your seams are. No one else will notice a twisted seam, even if you point at it with your finger.”

“Just try” — what simple yet great advice. Isn’t trying at the heart of the DIY process? Make mistakes, learn from them and never give up. And don’t forget to be patient with yourself and let go of those small mishaps. As Javier said — no one will notice them but you. 

Thank you for sharing your story with us, Javier. We’re thrilled that Sailrite could be your introduction to the fun and exciting world of sewing. Good luck with all your future DIYs.
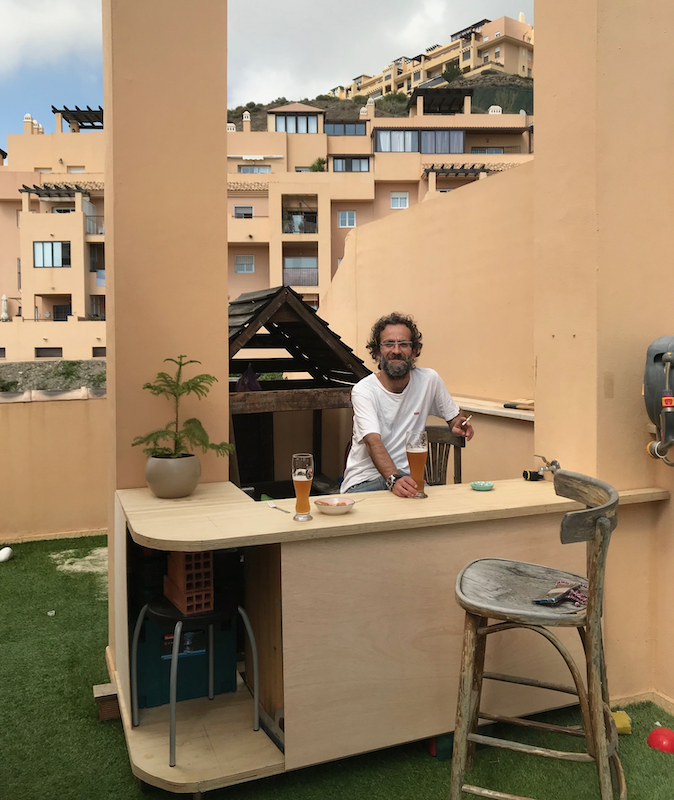
rooftop bar diy
What’s next for Javier? Updating the terrace’s bar area. This DIYer never slows down!


Who We Are

Sailrite is your one-stop DIY shop! We are a passionate crew of do-it-yourselfers who strive to equip you with the supplies and how-to knowledge you need to tackle your next project. Do you want to learn upholstery, leatherwork, canvaswork, hobby sewing, bag making or more? We have the fabric, tools, hardware, sewing machines and notions you need to master any DIY. And even if you’ve never sewn before, our tutorials and how-to videos are designed for beginners and experienced crafters alike.

Start your DIY journey today: www.sailrite.com

The Drive to Learn: One DIYer’s Roadmap to Sewing Mastery

Restoring well-worn or damaged items has become very popular in the last few years. Just look at the dozens of TV shows about home renovations, antiquing and swap meets as proof of this trend. Many people renovate to give historical items their shine back or to reduce waste — giving items with a story a new lease on life instead of letting them go to a landfill.

Sailrite® customer Jerry Bartlett is one such restorer. He’s interested in reducing waste and refreshing historical pieces too — but he’s not looking for retro clothing, antique furniture or old-school knickknacks.

Instead, Jerry often brings home vintage automobiles. This self-sufficient DIYer loves nothing more than getting his hands dirty restoring classic cars, and he frequently turns to Sailrite for project materials.

How does a sewing company like Sailrite come into the picture of car restorations? Upholstery, of course! Restoring a car isn’t just about what’s under the hood or how it looks on the outside. From the seats and door panels to the headliner and more, there are plenty of places for fabric and foam inside a car.

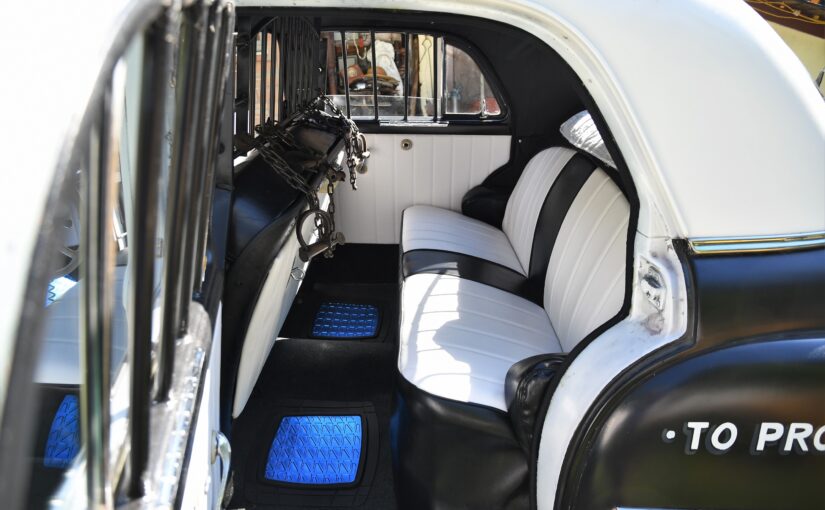
Jerry proved this by redoing the interior of a 1950 Plymouth Special Deluxe. He did all the upholstery work with a Sailrite® Fabricator® and other tools and materials from Sailrite.

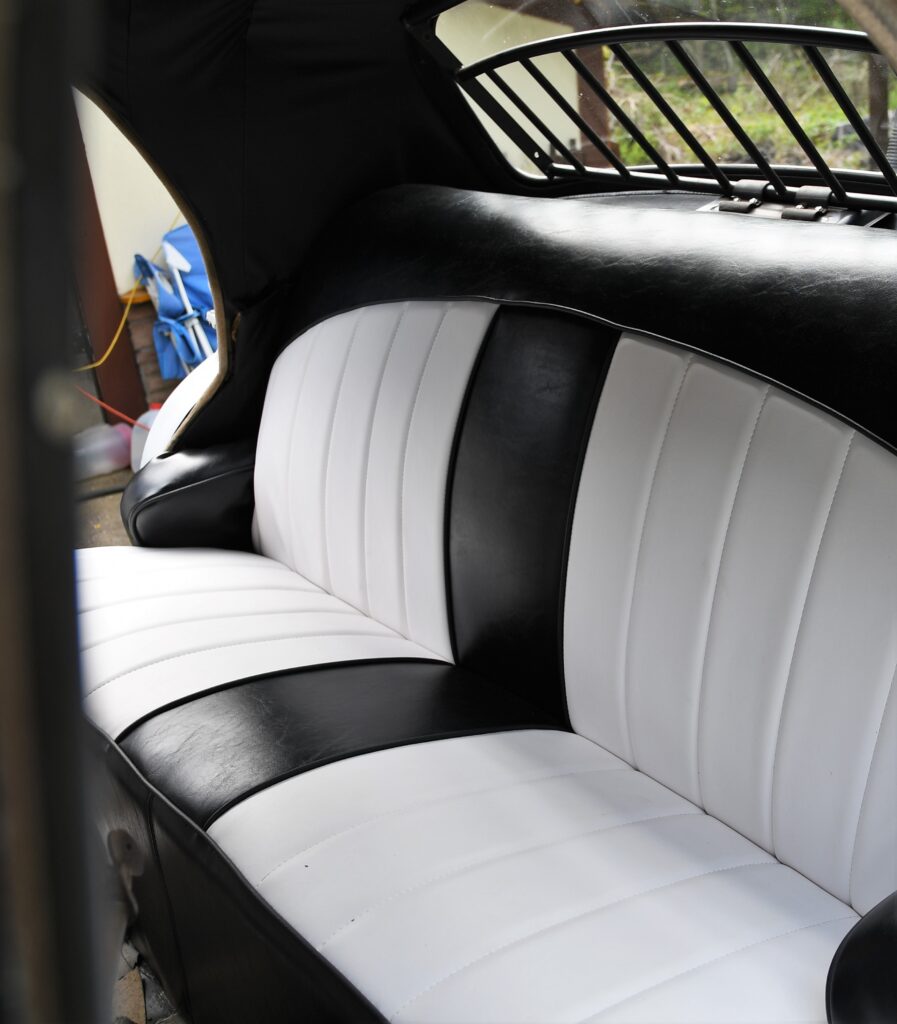
A preview of the finished upholstery.

This seat looks professionally done, right? From the outstanding results, you’d never guess that this car’s upholstery was Jerry’s first sewing project ever. In fact, Jerry taught himself to sew (with help from Sailrite) specifically to reupholster this unique Special Deluxe.

The Need & the Potential

This particular car is reminiscent of a County Highway Patrol cruiser used in New York in the early 1950s. A fan of the explosive innovation in the automobile industry in the 1950s and ’60s, Jerry was immediately drawn by the overall aesthetic and history behind the vintage cruiser when he saw it at a car show. As luck would have it, the car was for sale — and Jerry bought it right away.

“It spoke to me,” he said of the cruiser. “This thing had lots of potential, and with some work and creativity, it could be a historical piece.”

Seeing the potential in the car was a major first step to transforming it into the showpiece it is today. The car needed some mechanical work and a few touch-ups to the already restored exterior. But its interior was, in Jerry’s words, “in dire need of help.”

“The seats, door panels and sun visors were beyond hope. There was no headliner or bows, no carpet, and all the window channel liners were mostly gone.”

This slideshow requires JavaScript.

He was already well acquainted with the mechanical portions of the refurbishment — an interest that began when he was a child. “I was the kid who always had the desire within my DNA to take things apart to find out what made them tick,” Jerry remembered.

During his high school years, Jerry took classes in auto body work at a local technical career center. After graduating high school, he spent four years as a mechanic in the U.S. Army. Then he spent 10 years working in auto body and fender repair before becoming a fleet mechanic.

Even while working on cars for a living, Jerry always had a “hobby” car that he restored on the side. It all started in 1990; that’s when he said he found “the car of [his] dreams: a 1959 Cadillac Coupe DeVille.”

Despite all his work experience, his first hobby project wasn’t easy. “[The DeVille] was a disaster. The only two good panels on it were the roof and trunk lid. It ran rather poorly, needed a windshield, interior and tons of TLC, but I was up to the challenge,” he said.

And since he didn’t go easy on himself for his first renovation project, you can bet that the many projects that followed weren’t cakewalks either. The long list of cars that Jerry has restored includes such notable models as a 1979 Pontiac Firebird, a 1961 Ford F-100 and a 1969 Pontiac Trans Am.

Learning to Sew With Sailrite

So, you can see that Jerry was more than equipped to take care of the patrol cruiser’s mechanical needs. But while he was eager to make the car look like new on the inside, he had some important research to do first.

“Reupholstering an auto interior [was] the last horizon in the automotive world for me,” Jerry said. Even sewing in general was completely new territory. While scouring the internet to learn about automotive upholstery, he found Sailrite’s classic car reupholstery project video series and decided to watch it.

“I was very impressed with Sailrite’s website from top to bottom. Everything was so well organized and easily accessible, I found myself actually wanting to return every time I had a question or idea,” he said.

Although first overwhelmed by how much he had to learn about sewing, Jerry soon found that Sailrite’s huge library of how-to videos told him everything he needed to know. “The learning process initially is a lot to digest since it’s not just operating a sewing machine,” he said.

“Once you’ve watched one or more of Sailrite’s well-produced, clear and concise videos, that [overwhelmed] feeling just kind of melts away, and it becomes quite easy to imagine yourself as the person in the video. This is what gave me confidence … to enter the exciting world of sewing!”

After nearly a year of thorough research and watching how-to videos, Jerry bought a Fabricator Sewing Machine for his project. It’s saying something that Sailrite’s largest machine won his vote. Space is at a premium in Jerry’s work area, and he couldn’t afford to give even an inch to a machine that wouldn’t make the cut.

He told us more about his workspace: “I’m working off the lid of a 36-inch by 28-inch chest-style refrigerator [and] a 60-inch by 30-inch section of kitchen floor, or plywood and sawhorses if the weather is good so a car in storage can go outside. The Fabricator occupies a small 6-foot by 8-foot area.”

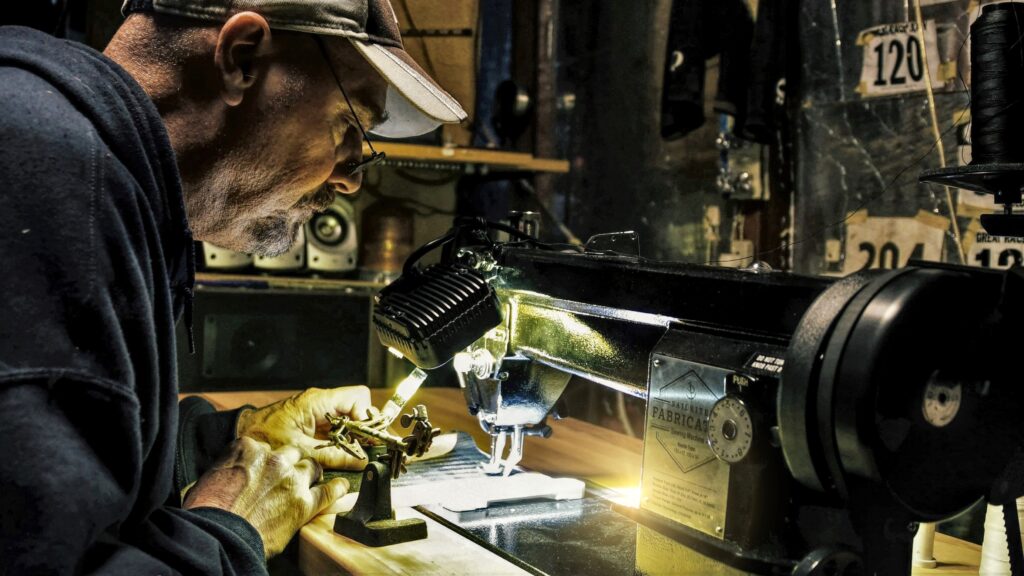
Jerry sewing with his Fabricator machine.
The Fabricator helps Jerry make the most of his limited workspace.

The industrial machine had to be everything Jerry needed to justify taking up so much of his already tight workspace. “Through my research, there were common things that a sewing machine should have and be able to do regarding automotive upholstery. [The] Fabricator repeatedly checked off all those boxes,” he said.

But that wasn’t the only hurdle the Fabricator had to clear to win its spot in Jerry’s workshop. This DIY enthusiast’s home isn’t connected to the local power grid, so he generates his own electricity with solar panels and wind turbines. “Power usage for anything added to the system is always a concern,” he shared. Luckily, the Fabricator fell well within the usage limits of his self-reliant electrical system.

After getting all the tools and materials he needed for what he calls his “very first sewing adventure,” Jerry’s next step was to get some hands-on experience with the Fabricator. “I was a bit nervous having only seen [the Fabricator] on the web and reading user reviews about it,” he told us. “To my delight, setup wasn’t difficult, and it really helped for me to do this and learn about everything connected to the unit.”

Jerry’s favorite feature of the Fabricator is the programmable Workhorse® Servo Motor. While getting started, he found it helpful to lower the motor’s speed to sew one stitch at a time. “This feature is truly what allowed me the ability to learn as I went. … Regardless of speed, every stitch turned out as perfectly as the previous one. It’s a brute of a machine that can be as gentle as a kitten, so yes, you really can do this at a snail’s pace just like I did!”

Overcoming Project Roadblocks

Buoyed by his success setting up and testing the powerful machine, Jerry jumped right into the cruiser upholstery project. First, he had to disassemble and pattern the seats and door panels. That’s when things began to fall apart — literally.

“What was left of the original interior was mostly useless, as it fell apart on disassembly,” Jerry told us. The few useful-looking pieces he was able to salvage had unfortunately hosted rodents some time before he bought the car; he was forced to throw those pieces out for sanitary reasons and start completely from scratch.

This slideshow requires JavaScript.

But like the rest of his sewing adventure, the unusable cushion material presented a learning opportunity. From the experience, Jerry learned to make patterns exactly how he wanted them, measure multiple times and cut once, and look for guidance from more experienced DIYers instead of trying to “reinvent the wheel.”

Although he did triumph in the end, Jerry told us that patterning from the ground up was the most challenging part of restoring the car’s interior — especially since he had a very specific vision for how it should look.

“The goal was to make the new patterns work with the curves of the roof and cagework, so the top of both front and rear seats would need a matching arch,” he said. “I also wanted great big pleats — something not available in a 1950 Plymouth Special Deluxe. … Overcoming these challenges required several reviews of Sailrite’s video series, and attention to detail with measuring and markings.”

This slideshow requires JavaScript.

After hours of painstaking work creating patterns, cutting material pieces and sewing stitch by stitch on his Fabricator, Jerry finished the upholstery renovation with professional-looking results!

Driving Off Into the Sunset

Aside from the “feeling of self-satisfaction in taking on something [he’s] never done before,” Jerry’s favorite thing about the finished upholstery is getting to show it off. “The icing on the cake is when people, especially those who’ve been sewing for decades, say, ‘This is really nice. Where did you have this done?’” he said.

This slideshow requires JavaScript.

A perfect example is a recent project Jerry did for his mother, whom he said has high standards and calls things like she sees them. After he sewed cushions for her four-chair outdoor table set, she “scrutinized [them] even more thoroughly than a jeweler would with diamonds. The final verdict was, ‘These are perfect.’”

Jerry’s mom isn’t the only person impressed by his newfound sewing skills. Earlier this year, he entered the patrol cruiser in the 2022 Adirondack Nationals car show, held in Lake George, New York. The show’s attendees loved the cruiser!

“I cannot even tell you how many compliments there were about the interior,” Jerry shared. “It’s now my belief that with all the ‘eye candy’ the car has to offer, the upholstery is the real showcase that ties everything together!”

This slideshow requires JavaScript.

The show’s judges thought so too. The police cruiser won a big award at the show — appropriately, the Sheriff’s Pick award. Congratulations, Jerry!

More Projects Down the Road

We asked Jerry what he plans to do now that the cruiser restoration is done. “Are these ever really done?” he laughed. “So far this has been an off-and-on project for the last two and a half years. Out of all the extensive work completed, the interior revamp has been the biggest chunk and the most rewarding by a long shot.”

For now, Jerry is taking a break from the cruiser to do a couple of other upholstery projects. He’s partially completed one: “I have a 1953 Pontiac Chieftain that’s essentially the equivalent of a ‘shop truck’ that goes everywhere. The seats were terrible in that one too but are now reupholstered — again using everything obtained from Sailrite.”

This slideshow requires JavaScript.

Jerry plans to restore the Chieftain’s side panels, door pads and headliner, but he’s put those on the backburner for now to work on something even more exciting.

“The next project is an interior (mainly the four bucket seats) of a 1961 Chrysler 300G. These cars may have had the most incredible factory interior ever … I will need to really think this one through and make it as good as the original or better. These are high-profile cars, and the sharpest critics tend to seek them out. Challenge accepted — and armed with the Fabricator, it’s game on!”

If there’s anything we’ve learned about Jerry, it’s that he’s no stranger to a challenge. We’re sure that the restored Chrysler will draw nothing but praise from critics and car show judges alike.

Before we wrapped up our interview, we asked Jerry what he would say to someone else who has a big project in mind but needs to learn to sew first. He had a checklist of advice ready:

“Educate yourself on the topic. That may involve getting together with someone close to you that has experience in this field. … Think of things you would like to make for yourself or others. This will give a project some context that’s relevant to you. Once you’ve read, watched and learned as much as you want, imagine yourself actually creating and sewing that item. And lastly, be persistent! Like anything one wishes to become good at … a skill will come with time and experience.”

Jerry, you’ve certainly proved that patience and dedication can help a person accomplish just about any goal they set. Thank you for sharing your inspiring story to encourage your fellow DIYers. We can’t wait to see what you make next!


Who We Are

Sailrite is your one-stop DIY shop! We are a passionate crew of do-it-yourselfers who strive to equip you with the supplies and how-to knowledge you need to tackle your next project. Do you want to learn upholstery, leatherwork, canvaswork, hobby sewing, bag making or more? We have the fabric, tools, hardware, sewing machines and notions you need to master any DIY. And even if you’ve never sewn before, our tutorials and how-to videos are designed for beginners and experienced crafters alike.

Start your DIY journey today: www.sailrite.com