Outdoor Awnings: A Dream Home DIY

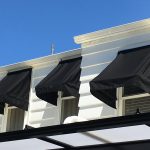
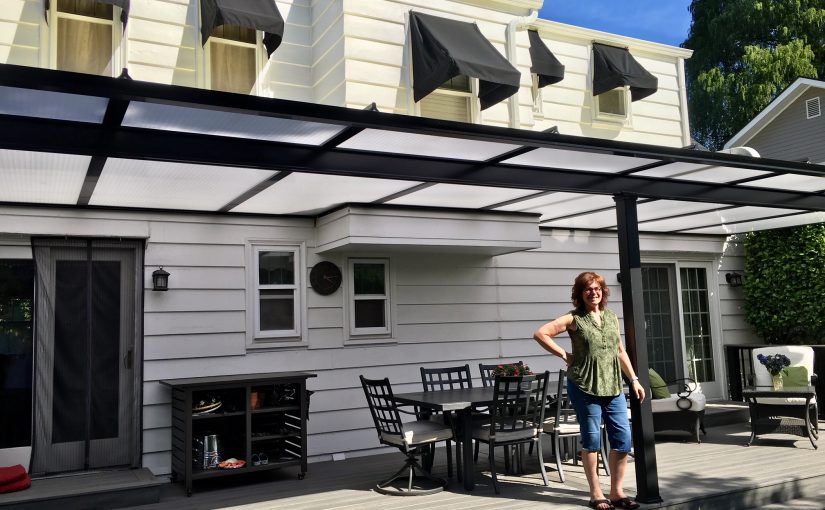
Debra Brown is well acquainted with the world of sewing, having started her first project as a teenager. But what began as a fun, sporadic hobby turned into necessity years later when Debra and her husband moved to Portland, Oregon, and purchased a beautiful Cape Cod home built in 1937. After moving in, they quickly noticed their dream home was not without flaws. “The back of the house faces west and the August sun in Portland can be brutal. The house came with seasonal awnings for each window to mitigate the heat, but unfortunately, they were old and tattered. The awning company wanted $4,000 to remake them — seven in all!” 

Bolstered by her “can do” attitude and sewing skill set, Debra set off to find a way to perfect her new home by creating her own awnings. This would prove to be her greatest sewing adventure yet, and would eventually lead her to Sailrite’s tools and supplies. We’re happy to have been a part of the journey, and Debra was kind enough to share her success story with us.


This slideshow requires JavaScript.

Q: What’s your history like with sewing? How long have you been doing it and how did you learn?

I learned to sew in middle school and still recall my very first projects as a 14-year-old — a simple gym bag and a dirndl skirt. Since then, over the years I’ve enjoyed sewing clothing and simple home décor items. When my husband and I moved to Portland, Oregon, and bought an 80-year-old house, my brother, Jesse, encouraged me to take on more ambitious sewing projects including draperies, duvet covers and Roman Shades. Jesse had been sewing custom home décor items for decades and taught me everything I know about sewing with heavier weight fabrics. He had also loaned me one of his industrial sewing machines to complete my projects in the past.

Q: What was the process like of creating your awnings? 

When I decided to try making new awnings for our house, I knew it would be challenging. I had no idea what types of fabric were available, or what tools and notions I’d need. I began by taking apart one of the old awnings and documenting each step so I’d know how to construct a new one. My brother suggested I visit the Sailrite website to learn about appropriate fabrics and thread. I was amazed by the selection available and settled on Sunbrella® Marine Grade Fabric, based on Sailrite’s recommendations for awning construction. 

I ordered just enough fabric to complete the first awning, as it would be a test as to whether or not I could really do this. Next, I needed the right tools. My best friends turned out to be the Sailrite® Edge Hotknife and Seamstick Basting Tape. I could never have managed the Sunbrella without these two lifesavers. Construction of the first awning was slow going. I borrowed two different sewing machines from Jesse just to get started. 

It took me two entire days to create the test awning. I made lots of mistakes but also learned a lot about working with large pieces of Sunbrella. Sailrite’s videos on sewing flat-felled seams were incredibly helpful and helped me gain confidence in my abilities. I knew that if I was going to proceed with constructing six more awnings, I’d need a lot more fabric. But most importantly, I knew I’d need a heavy duty walking foot sewing machine that could handle the project, and that I could easily set up and move around in my sewing area.

image1
The Sailrite Edge Hotknife was an invaluable tool for cutting Sunbrella.

Q: How did you decide on selecting a Sailrite Ultrafeed® Sewing Machine? What are your thoughts on the machine so far?

I spent a lot of time on Sailrite’s website researching machines and watching videos on working with Sunbrella Marine Grade Fabric. I decided on Sailrite’s Ultrafeed LS machine. I was not disappointed. The day my machine arrived, I spent time watching Sailrite’s assembly video and videos on winding bobbins, threading the machine, and sewing basic seams. Without these videos, I would not have felt comfortable setting up my machine and getting started sewing. They were incredibly helpful. 

After completing six more awnings — the last one in a record time of three hours — I can say with confidence that the Ultrafeed LS is an elegant workhorse that seems to have been made for my project. The machine easily handled multiple layers of Sunbrella fabric. I never experienced stuck fabric, the machine losing its timing, or any of the other issues that I had with the borrowed sewing machines I’d used in the past.

image3
Working with layers of thick Sunbrella required the Ultrafeed LS.

Q: Do you plan to sew other projects using the Ultrafeed? 

Now that I’ve finished the awnings, I’m excited to try other projects that utilize Sunbrella, such as patio cushions or maybe a heavy duty tent for my husband’s hunting trips. He’s already asked me to do some repairs on one of his canvas backpacks. Now that I have the experience, the tools and the Ultrafeed LS machine, I’m thinking the sky’s the limit! 

Q: What was the most rewarding, and most challenging, part of constructing this project?

One of the most rewarding parts of the project was simply the realization that I could recreate a large custom item from scratch if I invested in the right tools and materials. The other big rewards are the energy savings on the second floor of my house, which, in the absence of awnings, can be very hot in the summer, not to mention saving over $2,500 by making the awnings myself. That’s even after my investment in the LS, the fabric, and the tools and supplies needed. 

The greatest challenge was not having an existing pattern or sewing instructions for these custom awnings. Sailrite made the sewing easy. It was the cognitive piece — thinking through the steps involved — that was the most challenging.


Q: What was the reaction of your family and friends to the new project? 

My family was really impressed with the new awnings. They watched me sew them over a couple of weeks, and were amazed at how professional they look. At first, some of my friends didn’t believe that I actually made them myself. “No way!” was the most common response I received after revealing the beautiful new awnings on the back of my house. Thank you, Sailrite!


Who We Are

Sailrite is your one-stop DIY shop! We are a passionate crew of do-it-yourselfers who strive to equip you with the supplies and how-to knowledge you need to tackle your next project. Do you want to learn upholstery, leatherwork, canvaswork, hobby sewing, bag making or more? We have the fabric, tools, hardware, sewing machines and notions you need to master any DIY. And even if you’ve never sewn before, our tutorials and how-to videos are designed for beginners and experienced crafters alike.

Start your DIY journey today: www.sailrite.com

“Glamping” With Jean Buchanan

For Jean Buchanan, sewing is not just a hobby and career, but it also may very well be her destiny. She’s been sewing for over 50 years and comes from a long line of sewists. Her great-grandmother was a tailor of men’s suits, and her grandmothers, aunts and mother have all sewn and quilted through the years. Jean first learned to sew from her mother-in-law, and she’s never looked back. With a little help from Sailrite®, Jean’s taken her talent to the next level and made a name for herself in the process.

After five decades of sewing children’s clothes and stuffed animals, plus clothing for herself and her husband, Jean encountered a project that she had never attempted before and one she never thought she would stumble upon in her lifetime. But always being an adventurous sewist open to new ideas and experiences, she took a cue from her daughter to try out a different kind of DIY, which would lead her to her largest project yet. 

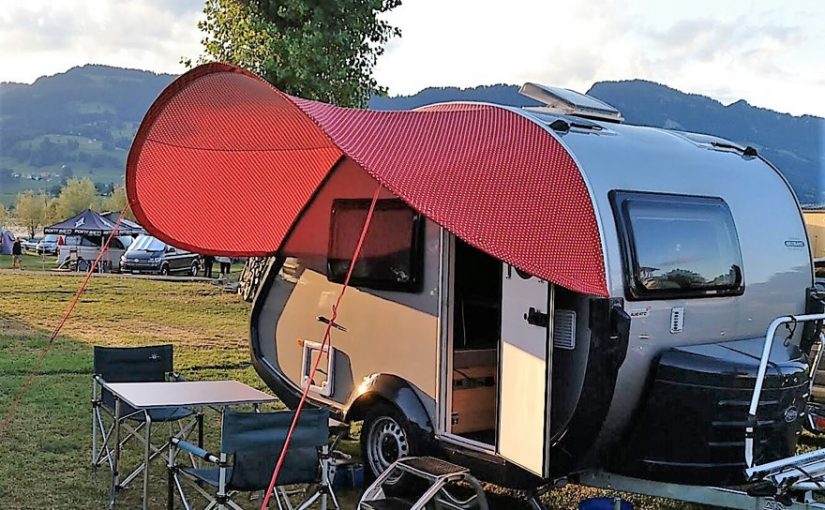
“One day my daughter brought me a southwestern printed tarp and asked me to make her a visor for her T@B 320 trailer. It took many more tarps and three attempts to get the patterns tweaked — it fit the T@B pretty well.” 

36B811D4D7C4461F87D5A2D2A7DAAEBD
One of Jean’s latest sunshade designs on a TAB camper.

If you’re not familiar, T@B (or TAB) is a brand of trailerable camper with a sleek teardrop design. These charming, pint-sized campers blend European design with Ohio Amish craftsmanship for cozy living on-the-go. After Jean finished her daughter’s project, she found that these campers were perfectly complemented by her custom sunshades with their petite, visor-like design. Not only was her first sunshade good-looking, but it also functioned as a way to protect the camper’s occupants from the sun and rain while maintaining convenient portability for those looking to get up and go.

Spurred by her first success, Jean decided she enjoyed the work and wanted to continue the process. The next step was to make efforts to reach a larger customer base and make sure she could streamline her sunshades for more efficient sewing. She first began by creating a shop on Etsy (an e-commerce site focused on handmade or vintage items), based out of North Olmsted, Ohio. She later launched her own website and enlisted the help of a professional engineer to create a dependable design for the T@B 400 trailer — and success! A small business was born.

But when your business revolves around sewing, you need a dependable sewing machine to carry you through your toughest assemblies. So with this new business resting in her capable hands, Jean decided that none of her work could be completed without a heavy-duty industrial sewing machine to sew through multiple layers of fabric. The hunt for such a machine was what led Jean to Sailrite in the first place.

AA2A7E98C99A4256A1431236146B1CD0
Fabricator in tow, Jean is ready to tackle any project.

She explained, “I chose the Fabricator® Sewing Machine after looking at many industrial machines because it was advertised as a small awning shop machine. I read reviews that were positive concerning the machine and watched videos. Based on what I read and what I watched, I decided it was the right one and I have not been disappointed.” 

With her husband, Clyde, by her side, Jean has expanded her creations and has now launched her own website to showcase and sell her unique camper sunshades worldwide. With a customer base reaching as far as Spain, Germany, Poland, Switzerland and Canada, it’s hard to deny the growing popularity of these adorable additions. Not only are these unique sunshades a way for campers to express their creativity, but they’re also a way for Jean to utilize her adept sewing skills for a practical cause.

She was happy to explain the painstaking steps that go into the creation of the TAB sunshades, as they’re tailored to the requests of each customer. First, each piece of fabric and webbing is cut with the Sailrite® Edge Hotknife, then a convenient carrying bag is sewn, followed by a reinforcement of webbing to the places where the visor pole begins and ends. Next comes the construction of the sleeve for the pole followed by the main fabric assembly. Each part of the process that requires sewing is done using the Fabricator Sewing Machine — and the results speak for themselves.

Here at Sailrite, it gives us great joy to be there every step of the way to help make things a little easier. “Not only do I use the Fabricator Sewing Machine and the Sailrite Edge Hotknife, but I just started using some of Sailrite’s 300 denier polyester outdoor fabric [Odyssey]. The quality and support are outstanding! One could not go wrong using any of their products. I especially love the magnetic sewing guide and zipper feet for sewing keder rope!”

With a thriving business to attend to, what lies ahead for crafty creator Jean? She explained, “I plan to go back to regular sewing when I can no longer physically sew these sunshades. But who knows, I’m always ready for a challenge. My daughter is full of ideas for me.” And although her daughter does not share her passion for sewing, she helps with the business as a public relations assistant and is always ready to bring Jean more ideas to practice her sewing on. 

At this point in time, Jean’s future is wide open, but regardless, she is confident that she and the Fabricator can tackle anything that may come. We can’t wait to see what she creates next!

9638F320E97C4E5B8734BDBA8377D090
Jean’s ingenious designs make “glamping” possible.


Who We Are

Sailrite is your one-stop DIY shop! We are a passionate crew of do-it-yourselfers who strive to equip you with the supplies and how-to knowledge you need to tackle your next project. Do you want to learn upholstery, leatherwork, canvaswork, hobby sewing, bag making or more? We have the fabric, tools, hardware, sewing machines and notions you need to master any DIY. And even if you’ve never sewn before, our tutorials and how-to videos are designed for beginners and experienced crafters alike.

Start your DIY journey today: www.sailrite.com
Winter Camping: A Cold Case DIY

Mark Carter is not your typical Sailrite® customer. He doesn’t sew for his boat or RV, and he doesn’t do any home sewing or upholstery work. Instead, his hobby is a bit more … cold. He enjoys winter tent camping with his family in the upper Midwest United States. Winter camping might sound bitterly unpleasant, but Mark has found a way — with a little ingenuity and a can-do DIY spirit — to turn this frigid hobby into a pleasant activity for him and his family.

Mark and his family began winter camping around 10 years ago. They connected with other winter campers from online camping forums, including HammockForums, Bushcraft USA and WinterTrekking.com — plus camping groups on Facebook — and found a community of like-minded outdoor enthusiasts. They soon began winter camping together as one big group. There’s a camp going on almost every week throughout the year among the woodsy friends in these online groups. Mark and his family join in as often as they can.

“Most camps last three to five days, but I’ve done up to two weeks in Canada,” he recounted.

IMG_1675
Mark with one of his custom-made hammock hot tents.

“People from all over the United States and Canada meet up in places like the Huron-Manistee National Forests [extending across the northern lower peninsula of Michigan],” said Mark. “The camps can last for three days up to a week with campers staying however long they can.”

The Carters camp year-round, mostly in the Midwest and Canada. Although his sons are grown now, they still enjoy spending quality time outdoors with their father and other family members. Winter camping is a bit of a tradition for the Carter Clan. “My son Carl and his wife, Jessica, my son Corey, my brother James and a few cousins camp with me,” Mark stated.

IMG_1698
Mark (on the left) and several family members including his youngest son (on the right) enjoying a winter camping reunion in 2014.

Through his winter camping hobby, Mark realized there was a void in the camping gear and equipment industry for hammock tents. So what does any self-reliant, determined hobbyist do? He made his own, of course! Mark first learned to sew practicing on his mom’s old Singer, repairing his camping gear. He later purchased a used Singer that he uses to sew his tents and hammocks.

Mark was inspired to sew his own hammock hot tent after watching a YouTube video his friend, and fellow winter camper, Tom Brown had posted. The video featured a tour of Tom’s handmade hammock hot tent as he explained how he’d constructed and sewn it. In the video, Tom mentioned using double-sided Seamstick Basting Tape on the tent’s seams, and that’s how Mark first learned about Sailrite.

Why sew a DIY hammock hot tent instead of buying one? “No one makes them commercially to the specifications I’m looking for,” Mark explained. “Sewing allows me to make the things I dream up a reality. I can make them the way I want them to look — a tent that weighs 4 lbs. that lets you sleep in a hammock and stays heated with a small wood stove. By sewing the tent myself, I can save money and build a tent with quality materials.”

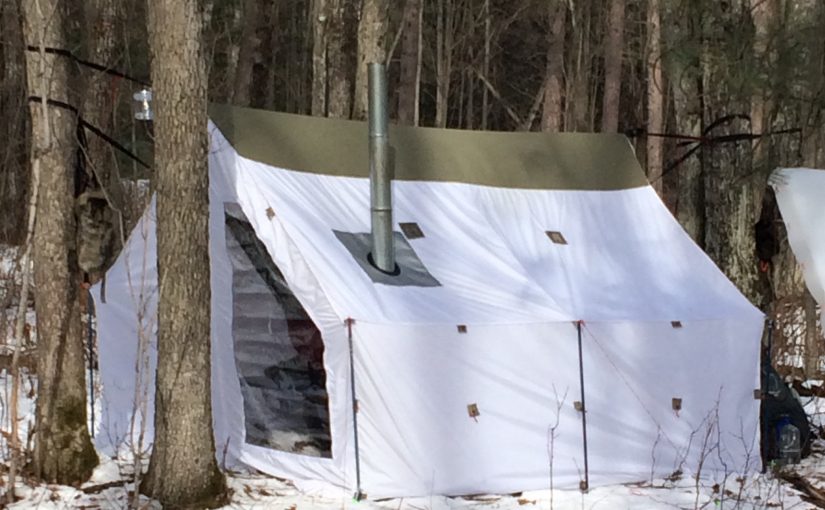
Mark has sewn two tents so far, as well as hammocks. His first tent was based on a wall tent, also known as a safari tent, and sleeps three. With more experience under his sewing belt, he kicked his design skills up a notch for his next tent. “My second tent was based on a Dogger TZ Brown design. I modified it for additional height and simplified it for easier construction and faster set up.”

pjimage
The two photos on the left show Mark’s tent panels laid out and matched up with tape lines. The photo on the right is a 12-foot toboggan Mark uses to haul his supplies to the campsite.

When designing and constructing a tent, Mark always begins with a paper drawing. He scales it down and decides how he wants it to look and the features he needs. He then figures out the dimensions and measurements. Next he plots out a full-size pattern on the floor in his home using painter’s tape to map out the pieces. After that, he marks and cuts the fabric to match the taped pattern on the floor.

Next come the sewing and construction process. Mark uses Sailrite basting tape to sew the slippery silpoly tent panels together. “Silpoly is very slippery fabric to sew and you want to avoid using pins through the fabric as it can create work waterproofing all those extra holes. After I assemble the tent, I set it up to evaluate how I did and look for ways to make it better the next time.”

In addition to basting tape, Mark also orders the other materials for his tents and hammocks from Sailrite, basically everything but the fabric. “I started buying supplies from Sailrite after watching Tom Brown’s YouTube video. I order #10 Vislon zippers, 1-inch webbing, binding and vinyl window material. Hammock campers are DIY types, and Sailrite is well-known in the community.”

IMG_0534
The wood burning stove inside his tent keeps Mark warm and dry.

Altogether Mark’s tent weighs about 5 lbs. It’s heated with a small wood burning stove with an opening in the roof that fits the pipe for the smoke to escape. He can cook food protected from the elements and he can dry his clothes and gear in the comfort of his tent. Plus, sleeping in a hammock means he’s protected from the cold, hard ground.

Mark loves the tents and hammocks he’s custom made to fit his camping pastime. For him, it’s not just a way to be creative and experience the joy and pride that comes with making something with your hands. Camping is also his family’s way of coming together for good laughs, good fun and a little adventure. And at the end of the day, isn’t that what life’s all about?

“My hammock hot tent lets me travel to remote areas and sleep in comfort,” Mark said. “Winter camping is peaceful. Give it a try!”

IMG_0464
Mark kicks back in his hammock while enjoying the view outside.


Who We Are

Sailrite is your one-stop DIY shop! We are a passionate crew of do-it-yourselfers who strive to equip you with the supplies and how-to knowledge you need to tackle your next project. Do you want to learn upholstery, leatherwork, canvaswork, hobby sewing, bag making or more? We have the fabric, tools, hardware, sewing machines and notions you need to master any DIY. And even if you’ve never sewn before, our tutorials and how-to videos are designed for beginners and experienced crafters alike.

Start your DIY journey today: www.sailrite.com
The {Bike} Path Less Traveled: One Man’s Creative Journey

Creativity is the common denominator that exists in all crafters regardless of their preferred medium. Whether it’s the need to feel productive, to channel restless energy, or to unwind and relax after a stressful day, having a creative outlet is good for the soul. Having a hobby, especially a craft such as sewing in which you make something with your hands, engages the mind, promotes wellness and is a great way to connect with like-minded people in your community. It’s the perfect remedy for the overwhelming dominance of our technology-dependent lives.

Brett Walker has searched for a creative outlet his entire life. A hobbyist at heart, he describes himself as a “DIY type of person” who enjoys learning how to do things himself. He learned how to sew about eight years ago by watching videos online. He wanted to get into puppet design and stop-motion filmmaking, but when this idea didn’t work out, he switched to live-action filmmaking to channel his creativity.

biking 1
Brett saw a need for well-made, custom bicycle bags for storing essentials.

“I always try to find hobbies to keep myself busy and have an artistic outlet. I’ve done a lot of drawing and painting, then filmmaking, and now cycling and bag making.”

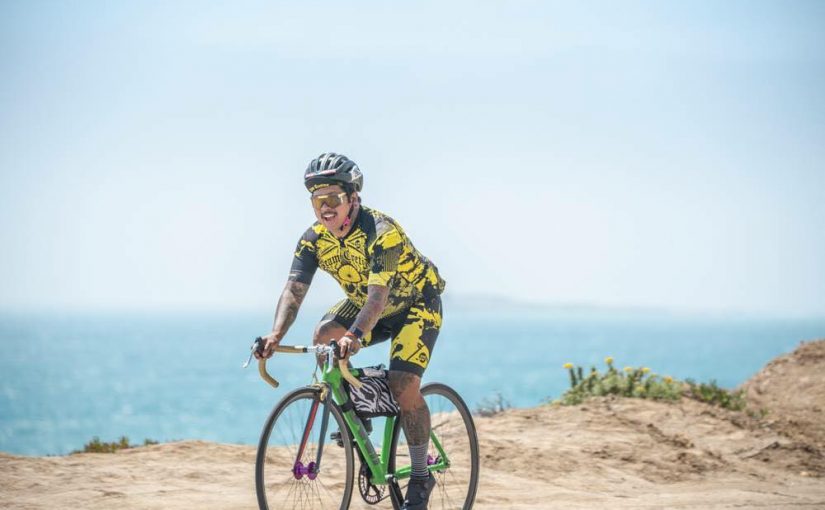
It’s his cycling hobby that propelled his desire to get back into sewing. “After cycling for a while and more than a few flat tires, I realized I needed a bag to carry my flat tire repair kit with me. The custom ones I wanted kept selling out, so I figured I could just make my own. I had also started to hear about bike camping and wanted to buy panniers (a pair of bags or containers attached to the sides of a bicycle for storage), but found out that they are pretty pricey, so that led me to want to make my own as well.”

bike camping
Some panniers that Brett made for bike camping to carry all his supplies.

Ready to pick up his sewing hobby again, he needed to test the waters and find out if he still had his sewing skills. It had been a few years since Brett had sewn anything, so his best friend’s wife let him borrow her machine to see if he could relearn how to sew; he practiced making a few bags and instantly fell back in love with the craft. With his hobby firmly reestablished, he began sewing his own bags to carry things on his cycling adventures.

Enjoying making bags for himself and his cycling excursions wasn’t enough. He recognized a need in his cycling community for locally made, custom bags and decided to turn his sewing hobby into a small side business. He named his business Canal Workshop, inspired by the canal located next to his apartment in Phoenix, Arizona, which provides miles of traffic-free bike paths. It’s this canal that spurred Brett to get back into cycling as an adult, which he’d dropped after outgrowing his childhood BMX bike.

bag collage
A sampling of the bicycle bags Brett custom designs through his business, Canal Workshop.

For about a year and a half, he’d been sewing bags with a Singer Heavy Duty sewing machine, but he found that it wasn’t handling the workload as well as he needed. So he began his search for a more powerful and dependable machine that could handle the thick Cordura canvas, packcloth and nylon webbing he uses for his bags. “I was talking to a cyclist friend of mine and he told me about Sailrite®. He mentioned that their machines were more economical and could just as easily get the job done [compared to more expensive heavy duty machines on the market].”

Brett initially looked at the Ultrafeed®, but Sailrite happened to be running a sale on the Fabricator® Sewing Machine, so he decided to take a look at an industrial sewing machine instead. “I figured that an industrial machine was more suited for the work I was doing. I liked that it had a classic steel look, was all black, and the name of the machine spoke to the type of work I was doing. When it went on sale, I thought this was a no-brainer.”

He’s been sewing with his new Fabricator for about six months and has no regrets about his choice of machine. “It’s strong, straightforward, and when I see it, I just want to sit down and work. The machine hums along and causes me no real issues. I love that it’s inset into the table that it came with and that you can wind the bobbins while you work. It works like a charm.”

brett sewing
Brett sewing a bag with his Fabricator set in its industrial sewing table.

The sewing process has been a bit of trial and error for Brett, as it is with most hobbies, and he’s learned some valuable lessons along the way about how to sew with skill and professional results. “One of the most important things I’ve learned is to take my time. Like in filmmaking, the more time and effort you put into preproduction (planning, pattern making and cutting), the faster and more efficient the production (sewing) is. I like to make one panel of a bag at a time, then put them all together. When I first started I was so eager to see the final product that I often left off important parts like a handle or my label.”

“It’s such a timesaver to take your time with a project. Planning out the process and then executing it correctly the first time means spending way less time with a seam ripper. One thing I’ve learned, and am still trying to perfect, is setting the tension properly. I had a hard time sewing certain lightweight materials before I learned to dial back the tension.”

triangle bag
Brett’s bags are truly unique, like this custom-fit frame bag.

When asked what he enjoys most about the sewing experience, Brett mentioned the sense of accomplishment he feels when making something himself and how his sewing hobby has led to new friendships. “I enjoy that I can make something for myself that is exactly the style, size and quality that I look for in a bike bag. I also really enjoy that I can provide that same service to the cycling community in Phoenix. What I love most is I’ve made a ton of new friends; a lot of my customers have gone on to become close friends because we’re all into cycling so much.”

While the majority of his sewing projects are for his bike bag business, Brett has put his Fabricator to other uses. “I’ll hem some pants or make some pillowcases for my girlfriend. I did recently make a regular backpack. I’ve also got an order for a bike bag with leather accents, which will be new territory for me. I did some research on that through the Sailrite website and am putting in an order for diamond tip needles from Sailrite for that project.” 

bike and lake
Where will your sewing adventure take you?

With a restless, creative spirit, Brett is constantly searching for the next project to tackle and a new skill to learn. “I’m always looking for ways to grow and add to my skill set. I recently learned that custom bags for off-road vehicles is a thing, so I’m going to try that out. My buddy actually put a bug in my ear about making some bags to organize his new truck. Another project I’ve got on deck is blackout window coverings for a van.”

The creative vein through it all is Brett’s need to channel his artistry into something tangible. Whether you’re a sewer, woodworker, painter or knitter, the pure joy of creating something with your hands is the thread that ties us all together. 


Who We Are

Sailrite is your one-stop DIY shop! We are a passionate crew of do-it-yourselfers who strive to equip you with the supplies and how-to knowledge you need to tackle your next project. Do you want to learn upholstery, leatherwork, canvaswork, hobby sewing, bag making or more? We have the fabric, tools, hardware, sewing machines and notions you need to master any DIY. And even if you’ve never sewn before, our tutorials and how-to videos are designed for beginners and experienced crafters alike.

Start your DIY journey today: www.sailrite.com
Best Seat on the Patio

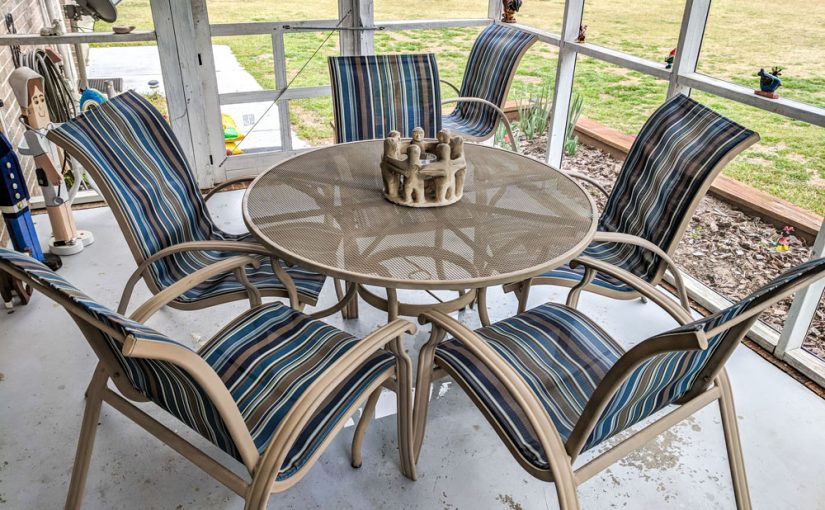
Sometimes, the only thing standing between you and your dream DIY is a few supplies, some research and a little encouragement. Sailrite® customer and crafty creator Anita Jackson learned that with the right tools and the right attitude, you can accomplish anything you put your mind to. As a retired nurse, Air Force and Navy Reserve veteran and mother of five, Anita is no stranger to hard work and perseverance.

It all began with six old patio chairs. What had once been white sling fabric was now torn, dirty and covered in what appeared to be mold. Everyone told her to throw them out, but Anita had a better idea. Why not just clean them up and replace the sling fabric? It seemed like an easy enough project. Besides, it wasn’t as if Anita was without sewing experience. Both her parents were skilled at sewing and she’d had many lessons starting from the age of 10. As one of her favorite hobbies, Anita often sewed small cellphone bags, purses and quilts in her spare time. However, the closest thing she had done to patio chairs was re-covering dining room chairs.

pjimage (6)
The chairs were in need of a major upgrade.

Armed with her previous sewing knowledge, Phifertex® sling fabric and a Sailrite how-to video, Anita set to work completely revamping all six chairs. It wasn’t long before the entire thing turned into a family affair. Her husband and two of her sons offered much-needed help by taking the chairs apart, cleaning, spray painting, fitting the sling fabric and putting them back together.

Although the Sailrite video was straightforward and easy to follow, the project was not without its hiccups. Originally, Anita had cut out all the pieces of sling fabric to replace her chairs. “Next time, I would cut and sew one to check the fit before cutting the rest. I sewed the seams as instructed in the video for all six chairs. I enlisted the help of my son and my husband to install the fabric into the frames. No matter how hard I tried, the fabric was sewn too small to install!”

Just like with any project, it’s natural for mistakes to happen. Her husband, Tim, was very supportive and further encouraged her to continue. He said, “The only way to not make mistakes is to not get up when the alarm clock rings.” Thankfully, the sling fabric was very forgiving and it was easy to rip out the old seams and adjust them so they would fit correctly on the chairs. There’s no doubt that it was hard work, but the entire DIY process gave Anita a new outlook on the creative possibilities that come from having the right tools and the right attitude. There’s a special feeling that comes from turning something old and worn into something completely one of a kind.

pjimage (4)
Before and after Anita’s hard work.

“I was so proud of the job that I sent photos to friends and relatives. I got a lot of compliments and some people said they didn’t realize the slingback chairs could be re-covered. I told them about the Sailrite videos and wonderful products all on one website.”

Through her adventurous DIY efforts, Anita was able to finish all six chairs just in time for her grandchildren’s spring break visit. “This project definitely boosted my confidence in trying new projects with Sailrite. Maybe they’re not perfect, but we enjoy using the chairs again. I’m ready for another project!”

IMG_20180403_111219
Anita’s chairs were finished just in time for a visit from her grandchildren.

For our full selection of sling chair fabric shop Sailrite and to see the full how-to video on replacing sling chair fabric, click here!


Who We Are

Sailrite is your one-stop DIY shop! We are a passionate crew of do-it-yourselfers who strive to equip you with the supplies and how-to knowledge you need to tackle your next project. Do you want to learn upholstery, leatherwork, canvaswork, hobby sewing, bag making or more? We have the fabric, tools, hardware, sewing machines and notions you need to master any DIY. And even if you’ve never sewn before, our tutorials and how-to videos are designed for beginners and experienced crafters alike.

Start your DIY journey today: www.sailrite.com
Sewing Through the Generations

Every family has a legacy — something defining that has been carried through the years between its members. In Dave Moore’s case, his family has been passing down the creative gene through the skill of sewing. We’re quite familiar with the idea of creating custom projects here at Sailrite®, so we were eager to learn more.

As a graphic artist from Ohio, Dave is no stranger to the idea of creating one-of-a-kind projects. He had a unique upbringing with his parents owning and operating their own sewing and upholstery shop directly from their home. Growing up, he took part in numerous aspects of the upholstery process, from tearing apart old marine furniture to patterning and cutting fabric and even woodworking. As it turns out, this family endeavor would eventually serve him well in his biggest DIY quest yet, along with a little help from a certain Sailrite sewing machine.

“It wasn’t until later in life that I developed an interest in the sewing aspect of the work in order to pursue my own projects. I was always intimidated by the big industrial machines my parents used, which is one reason I was so attracted to the Ultrafeed® LS machine … industrial capability in a more accessible package.”

IMG_3055
“Make it work, then make it better.” -The motto on Dave’s Ultrafeed LS

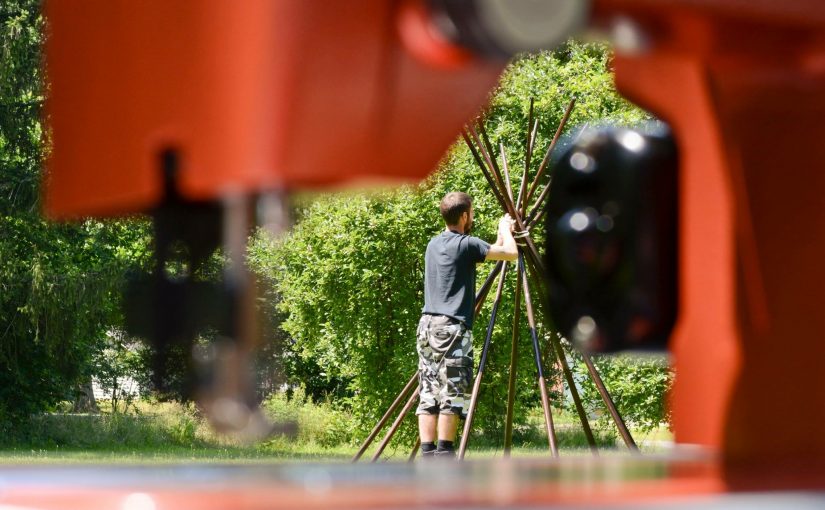
It all started with what should have been a simple idea. Dave had always wanted his own tipi, so he decided to do some research to see what it would take to have one in his backyard. After all, most things can be ordered online nowadays. After gathering all the information he could and comparing the prices of pre-made, full-sized tipis, Dave decided that instead of purchasing one, his best bet would be to take things into his own hands (quite literally) and make his own.

But the process of creating your own tipi is no small feat. Dave had to gather a plethora of information and do some serious pre-planning to turn his DIY dream into a reality. He drew heavily from his formal training as a graphic artist and his experiences with the family business in order to create detailed plans and 3D models to ensure material efficiency, assembly, geometry and general design guidelines.

IMG_0990

IMG_1225
Some of the more intricate tipi designs created by Dave.

“During my research, I learned a lot about the methods and techniques of traditional native tipi making. Some of this ‘tribal knowledge’ carried over to my designs, but I also wanted to put an emphasis on merging traditional designs with modern materials and techniques. I started out small, crafting two 9-foot tipi covers on 12-foot poles, and grew from there.”

Just like with any new project, there were plenty of hiccups along the way. Between perfecting his topstitch and handling large amounts of fabric, Dave’s family background made a world of difference when it came to mastering this massive DIY. Two years later, Dave has maintained his hobby of making tipis.

pjimage (2)
The finished product!

Based on the reaction he received after building his own, he set out to make tipis for anyone who shared the same interest in owning one as he had. He created all of his previous tipis at his own expense and sold them through social media and word of mouth, with each one selling within two weeks for a respectable price. His most recent (and largest) tipi is 22 feet tall with 26-foot poles and is the first one to be officially commissioned.  

While building tipis was his main motivation for sewing, Dave has also created several other projects using his Ultrafeed LS Sewing Machine, many of them closely involving his family. He’s crafted items for his three- and four-year-old daughters. Dave explained, “They adore the little things I make for them…a stuffed dinosaur, small drawstring bags for toys and their tablets. I even made my youngest a pair of pig ears for her Charlotte’s Web Halloween costume. Small things they’ll hopefully never forget.” He’s also created backdrops for his wife’s photography studio and a number of versatile bags.

pjimage (3)
Dave’s other amazing sewing projects.

Dave plans to continue introducing the world of sewing into the lives of his young daughters and his wife. In the future, his hope is to allow his daughters to decide what they’re going to create and provide all the guidance and resources needed to make their projects come to life. His parents are very pleased that he’s continued sewing and are thrilled to see him familiarize his little ones with the skill set and trade that supported the family for so many years.

For the Moore family, the future’s looking bright and carefully handcrafted. And while there are some generational traits we have no control over, the legacy of creativity and sewing seems to have been carefully passed down through the years in the Moore household, leading to some amazing results.

“Sewing has brought me closer to my wife and kids by simply involving them in my hobby. It’s our hobby! My girls sit beside me and play with scraps of fabric and webbing. I’ll hold rulers and let them mark the material for me. It takes a lot of patience, but you can almost see their little synapses firing! They get a huge thrill when I let them step on that foot pedal to wind bobbins! Even at their age, I think they recognize performance.”


Who We Are

Sailrite is your one-stop DIY shop! We are a passionate crew of do-it-yourselfers who strive to equip you with the supplies and how-to knowledge you need to tackle your next project. Do you want to learn upholstery, leatherwork, canvaswork, hobby sewing, bag making or more? We have the fabric, tools, hardware, sewing machines and notions you need to master any DIY. And even if you’ve never sewn before, our tutorials and how-to videos are designed for beginners and experienced crafters alike.

Start your DIY journey today: www.sailrite.com