Sometimes, the only thing standing between you and your dream DIY is a few supplies, some research and a little encouragement. Sailrite® customer and crafty creator Anita Jackson learned that with the right tools and the right attitude, you can accomplish anything you put your mind to. As a retired nurse, Air Force and Navy Reserve veteran and mother of five, Anita is no stranger to hard work and perseverance.
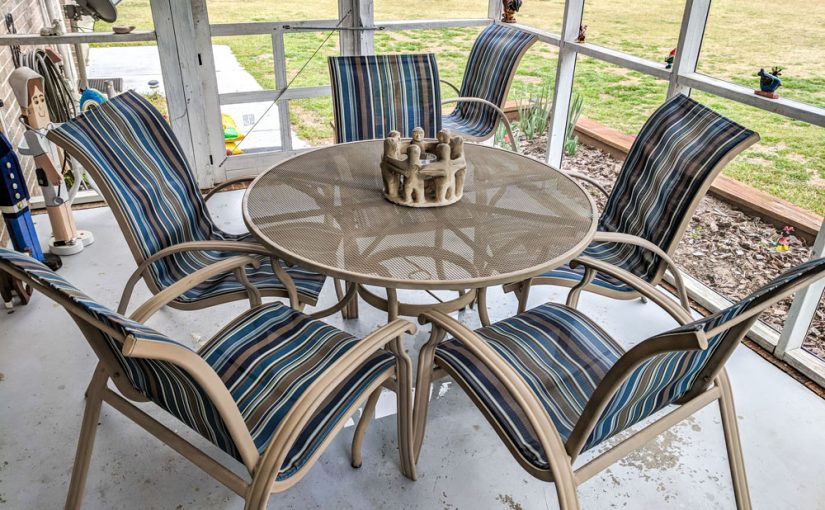
It all began with six old patio chairs. What had once been white sling fabric was now torn, dirty and covered in what appeared to be mold. Everyone told her to throw them out, but Anita had a better idea. Why not just clean them up and replace the sling fabric? It seemed like an easy enough project. Besides, it wasn’t as if Anita was without sewing experience. Both her parents were skilled at sewing and she’d had many lessons starting from the age of 10. As one of her favorite hobbies, Anita often sewed small cellphone bags, purses and quilts in her spare time. However, the closest thing she had done to patio chairs was re-covering dining room chairs.

Armed with her previous sewing knowledge, Phifertex® sling fabric and a Sailrite how-to video, Anita set to work completely revamping all six chairs. It wasn’t long before the entire thing turned into a family affair. Her husband and two of her sons offered much-needed help by taking the chairs apart, cleaning, spray painting, fitting the sling fabric and putting them back together.
Although the Sailrite video was straightforward and easy to follow, the project was not without its hiccups. Originally, Anita had cut out all the pieces of sling fabric to replace her chairs. “Next time, I would cut and sew one to check the fit before cutting the rest. I sewed the seams as instructed in the video for all six chairs. I enlisted the help of my son and my husband to install the fabric into the frames. No matter how hard I tried, the fabric was sewn too small to install!”
Just like with any project, it’s natural for mistakes to happen. Her husband, Tim, was very supportive and further encouraged her to continue. He said, “The only way to not make mistakes is to not get up when the alarm clock rings.” Thankfully, the sling fabric was very forgiving and it was easy to rip out the old seams and adjust them so they would fit correctly on the chairs. There’s no doubt that it was hard work, but the entire DIY process gave Anita a new outlook on the creative possibilities that come from having the right tools and the right attitude. There’s a special feeling that comes from turning something old and worn into something completely one of a kind.

“I was so proud of the job that I sent photos to friends and relatives. I got a lot of compliments and some people said they didn’t realize the slingback chairs could be re-covered. I told them about the Sailrite videos and wonderful products all on one website.”
Through her adventurous DIY efforts, Anita was able to finish all six chairs just in time for her grandchildren’s spring break visit. “This project definitely boosted my confidence in trying new projects with Sailrite. Maybe they’re not perfect, but we enjoy using the chairs again. I’m ready for another project!”

For our full selection of sling chair fabric shop Sailrite and to see the full how-to video on replacing sling chair fabric, click here!
Who We Are
Sailrite is your one-stop DIY shop! We are a passionate crew of do-it-yourselfers who strive to equip you with the supplies and how-to knowledge you need to tackle your next project. Do you want to learn upholstery, leatherwork, canvaswork, hobby sewing, bag making or more? We have the fabric, tools, hardware, sewing machines and notions you need to master any DIY. And even if you’ve never sewn before, our tutorials and how-to videos are designed for beginners and experienced crafters alike.
Start your DIY journey today: www.sailrite.com