Welcome to Sailrite’s "Meet Our Customers” page where we feature fascinating interviews and interest pieces submitted by our customers. This page enables us to spotlight our loyal and creative customers and tell their stories. From tales of complete canvas refits to testimonials about how Sailrite products and services have greatly enhanced and improved their DIY lifestyles, these stories are sure to inspire you as much as they inspire us.
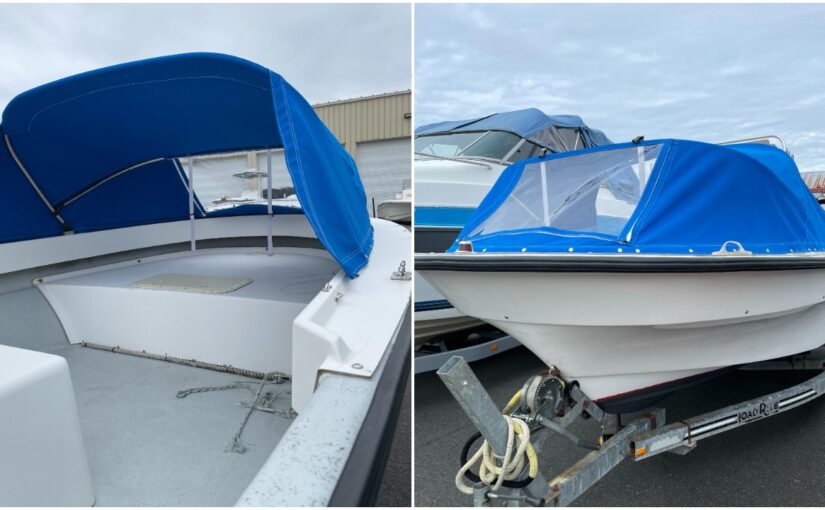
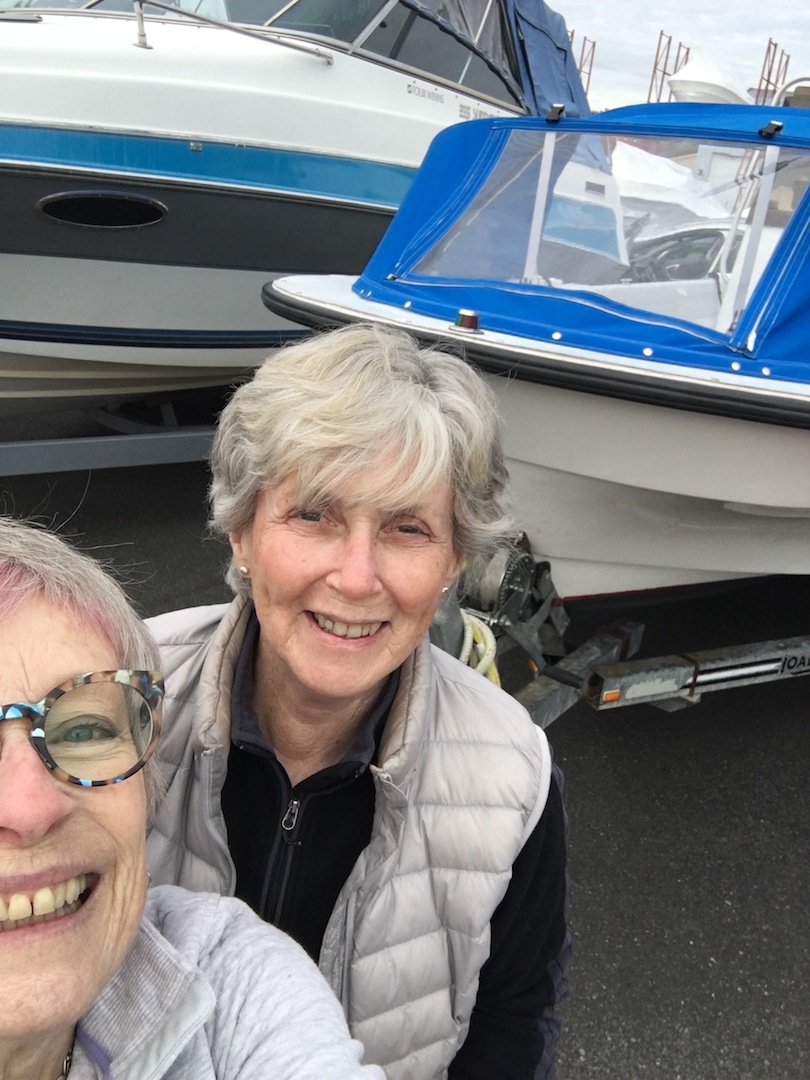
When the time came to replace the dodger on Ellen Bell-Irving’s 18-foot Maritime Skiff, she turned to her good friend of 30 years and fellow sewer, Pat Kane. Both women have a long history of sewing, but neither had tackled such a large marine project before. They put their heads together and put their trust in Sailrite® to provide them with the products, techniques and confidence to take on the boat dodger with an Ultrafeed® LSZ and Sunbrella® Marine Grade fabric. Read on to learn how their first foray into marine sewing went!
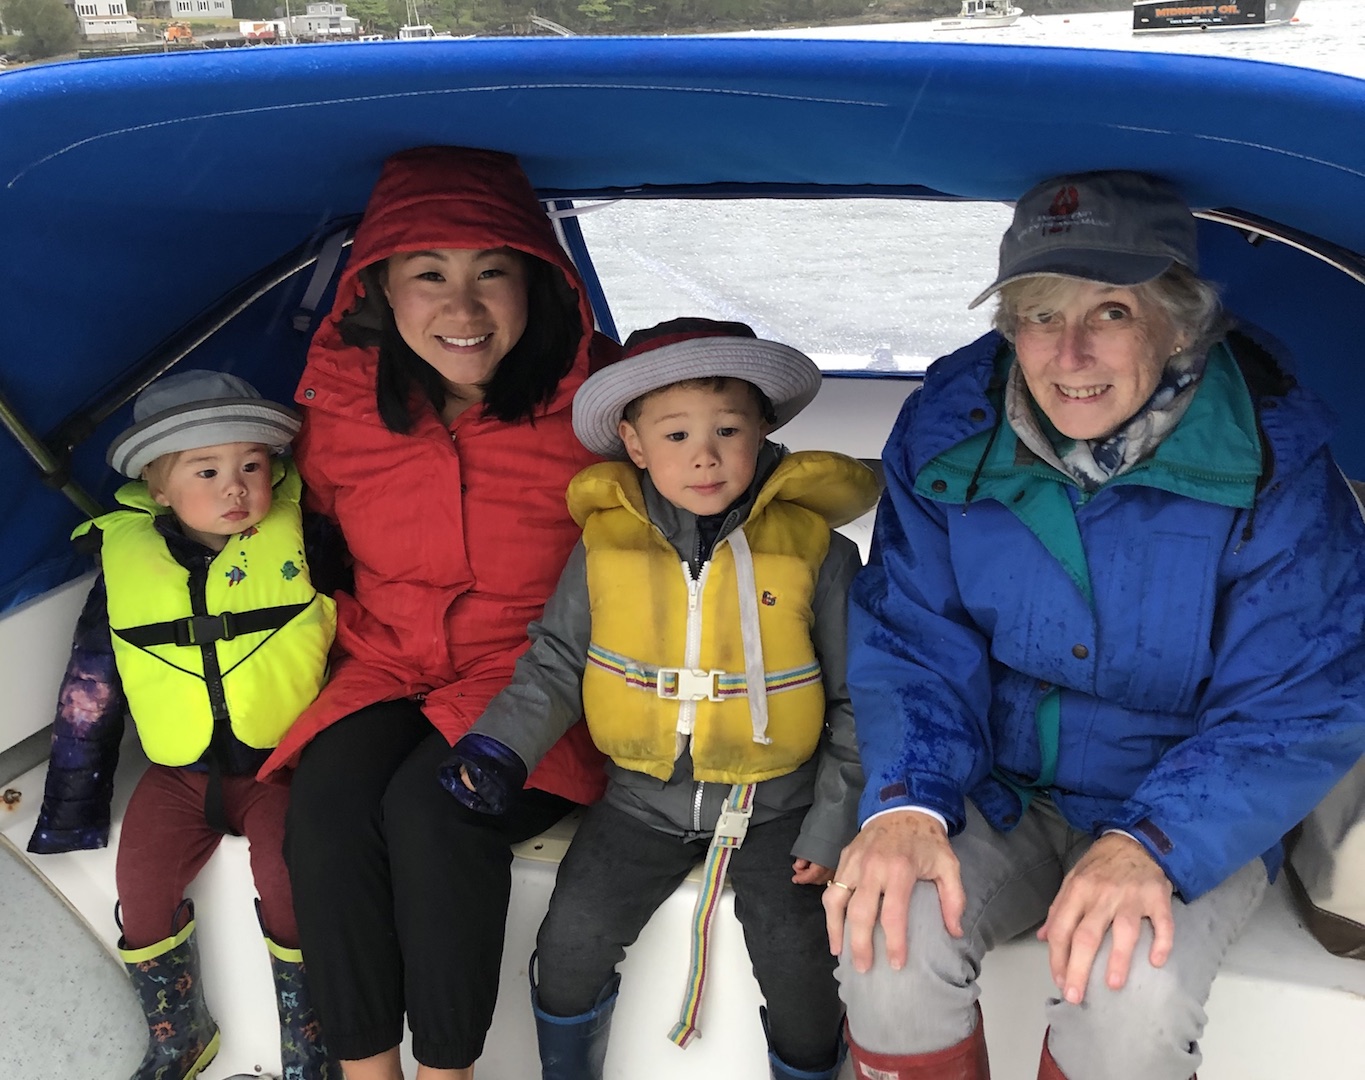
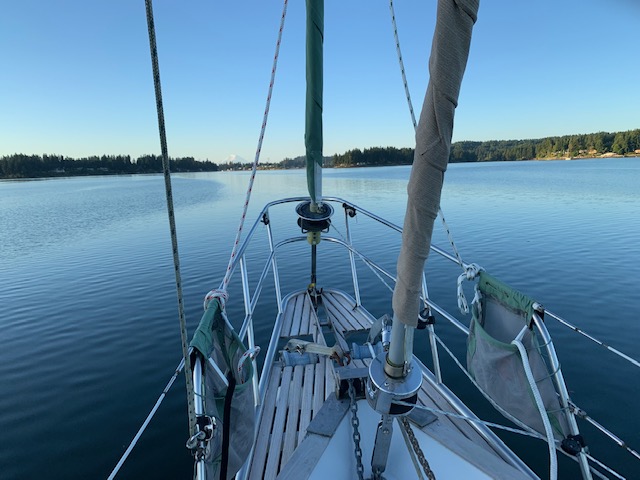
Ellen and her family use their boat for sailing around Casco Bay in Maine.
Ellen’s center console boat, the “Alibelle,” is used for general transportation to and from the island where she and Pat met in the spring of 1988. The 30-acre island in Casco Bay, Maine was newly subdivided and they were building their summer homes at the same time. Their first homeowners’ association meeting was the beginning of a new friendship. When they learned that their permanent residences were just a few towns apart in Massachusetts, summer parties turned into skiing trips and winter get-togethers. Thirty years on, Pat and Ellen still enjoy spending time together for dinners and family occasions. And, of course, for sharing their love of sewing.
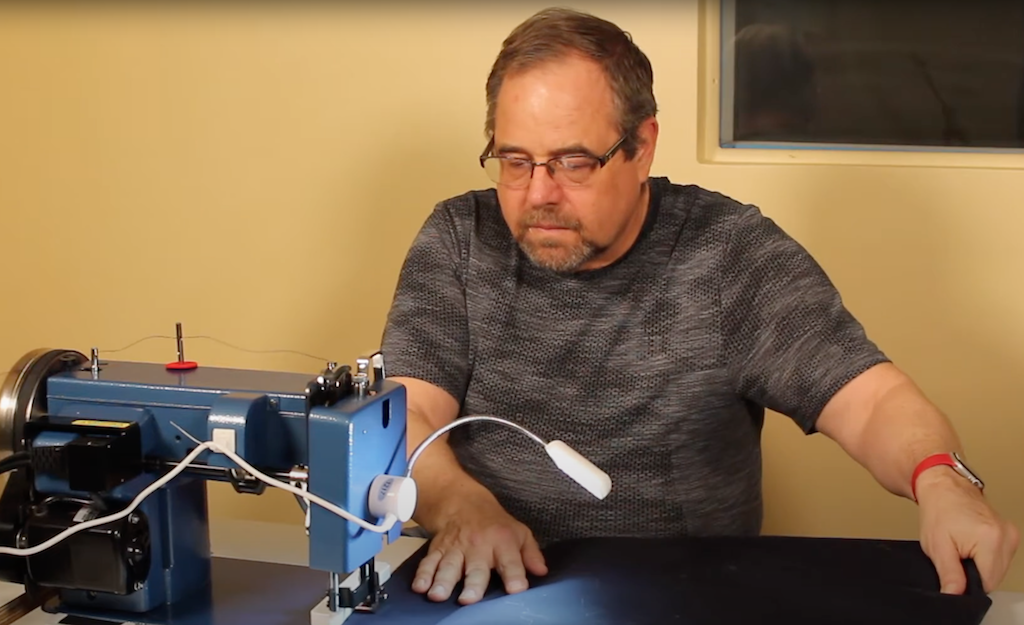
No stranger to sewing, Ellen felt comfortable repairing her old dodger. She learned to sew by taking a course in the 1970s. After learning the basics, she bought her first sewing machine: a Viking® she named Betty after her sewing teacher. “I made a few clothing items and made pinch pleat drapes for my house,” Ellen said of her sewing background. Over the years, Ellen also used her skills to sew costumes and clothing for her family. And when it had finally gotten to the point that a new dodger was needed, it was an easy choice to make it herself, noting, “it’s only seven pieces of material.” How hard could it be, right?
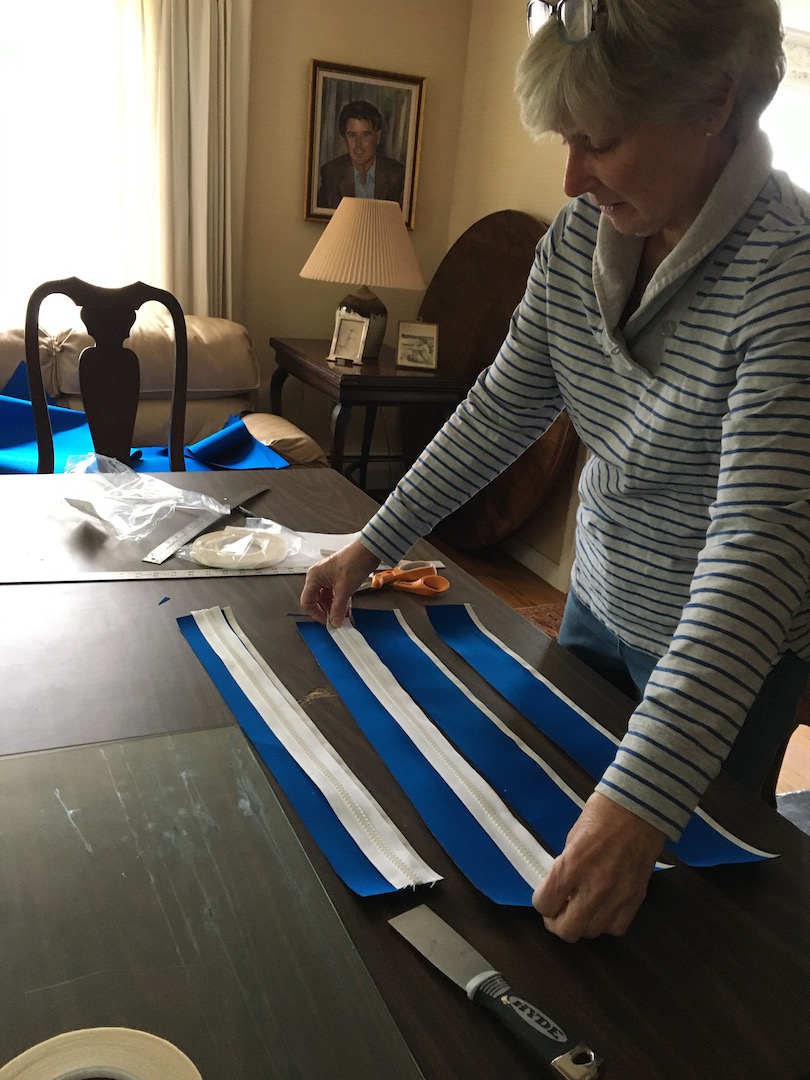
Ellen is no stranger to sewing! Here she is looking at a zipper.
Well, turns out it was more complicated than anticipated. Realizing she couldn’t do it alone, Ellen called on Pat for help. Pat, a professional seamstress, learned how to sew from her mother on a treadle sewing machine (“eons ago,” she said!). Her earliest sewing projects were clothes for her Barbie® doll. From there, Pat was hooked. “I have sewn ever since — costumes for high school plays, uniforms, clothing for others, clothing for myself and family.” Pat loves sewing so much, she made it her business. “I took classes in couture work…and started my business, Costumes and Custom Clothing, around 2000.” Pat’s business keeps her busy with custom theater costumes and bridal alterations; she even altered Ellen’s daughter’s wedding dress.
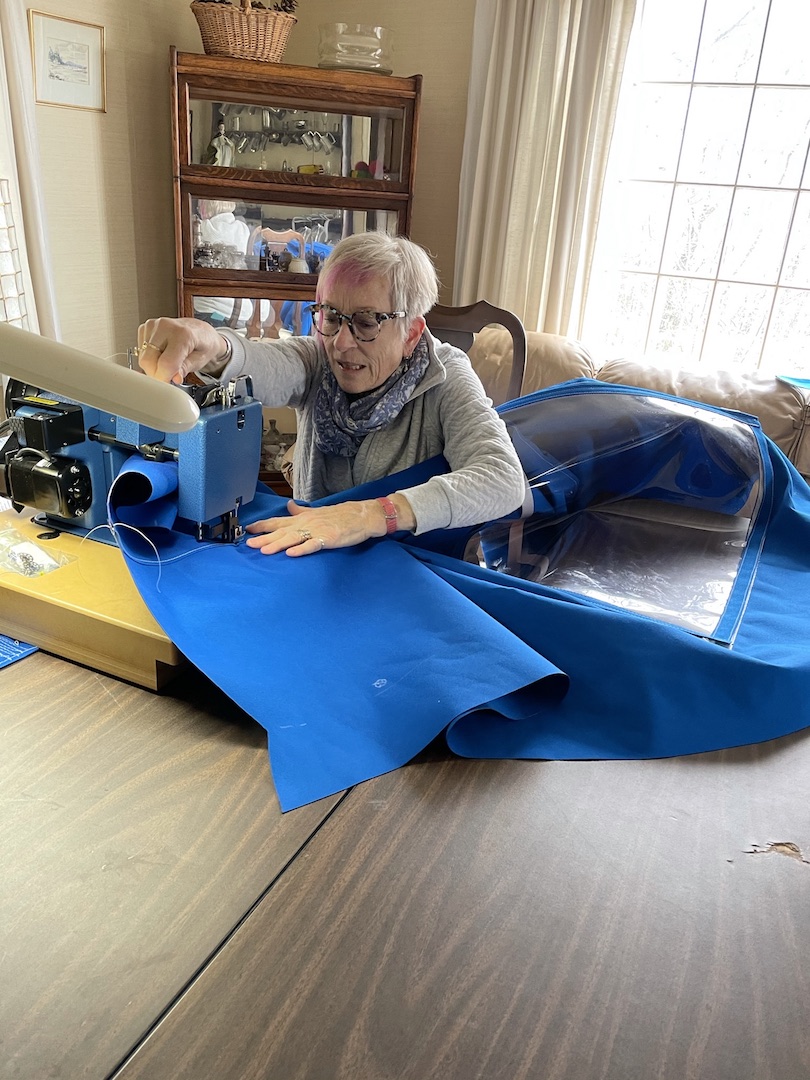
A professional seamstress, Pat is comfortable behind a sewing machine.
Given their backgrounds, Pat and Ellen certainly had the skills required to sew a dodger. What they needed now was supplies. Ellen’s research on Sunbrella fabrics led her to the Sailrite website, and another friend recommended the Ultrafeed LSZ to Pat: “I heard about Sailrite from a friend who sails a 42-foot sloop. She bought an LSZ to make everything for the boat, and recommended it highly.” Together, Pat and Ellen decided to place an order for a new Ultrafeed, which they named Maxine, plus Sunbrella Marine Grade fabric, the Sailrite Edge Hotknife and all the notions they needed to make their dodger. The Ultrafeed came so highly recommended that once it was delivered, Pat immediately set it up and started sewing tote bags out of old sailcloth. She definitely understood the hype: “My home machine would not sew this material, but Maxine sewed through it like butter. So fun!”
Over the course of the winter, Pat and Ellen set up folding tables and turned Ellen’s living room into a canvas workshop. Then they got to work.
The pair watched Sailrite videos to figure out where to start. “Your videos show how to create a pattern on the boat, but this was February 2021 and the boat was in storage in Maine,” Ellen said. So they fell back on Pat’s seamstress training. They took apart the existing dodger and used it to create a pattern. From there, they made a muslin mock-up and proceeded through a series of fittings. “We made a day trip to Maine to fit the mock-up. We marked it up, noting the positions of the snaps and other details,” Ellen explained.
Pat and Ellen are all smiles in front of their completed boat dodger!
Using the muslin as a guide, they altered the pattern, cut out the dodger pieces using the hotknife and sewed them together. They relied heavily on Sailrite’s instructional videos for every step. Pat described their process: “We carefully watched the videos of dodger-making, especially the one about inserting a window into canvas. We paused the video, sewed, then restarted, watched the next step, paused and sewed. It worked!”
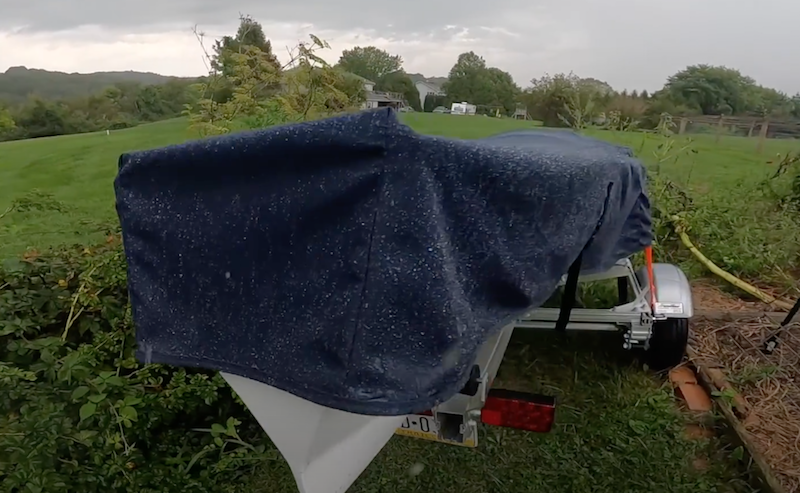
Pat and Ellen took the finished dodger to the boatyard in Maine for a final fitting and borrowed a tool from the boatyard to install the snaps. It was a perfect fit! They weren’t the only ones impressed with their handiwork; “The boatyard owners wanted to know then and there if we wanted more work!”
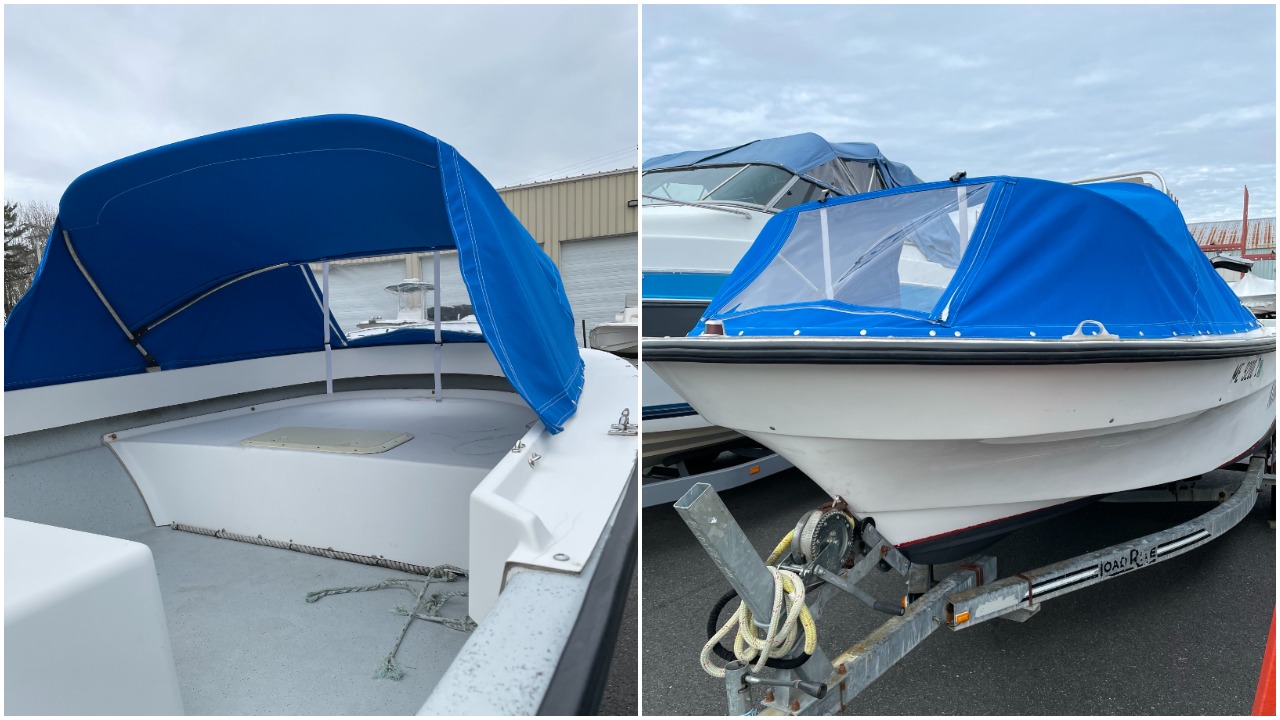
Here it is! The finished boat dodger.
They may not be ready for more dodgers, but these two friends aren’t done creating together. They’ve got more “couture canvas” projects they can’t wait to start. Up next is a console cover for the “Alibelle” and new cushions for the 25-foot Mako Ellen’s daughter and son-in-law have recently purchased. They’re also making bags out of Sunbrella fabric to give as Christmas gifts, which Pat will embroider.
With so many projects on the docket, we’re so glad Pat and Ellen have an Ultrafeed on their side. We can’t wait to see what Pat, Ellen and Maxine the Ultrafeed make next!
Who We Are
Sailrite is your one-stop DIY shop! We are a passionate crew of do-it-yourselfers who strive to equip you with the supplies and how-to knowledge you need to tackle your next project. Do you want to learn upholstery, leatherwork, canvaswork, hobby sewing, bag making or more? We have the fabric, tools, hardware, sewing machines and notions you need to master any DIY. And even if you’ve never sewn before, our tutorials and how-to videos are designed for beginners and experienced crafters alike.
Heidi West’s creativity knows no bounds. From her modest start selling her handmade goods at weekend craft shows to launching a thriving online and brick-and-mortar store, Heidi has learned one valuable lesson: Success can go as far as your creativity and determination can take it. A crucial part of that success has been her Sailrite® Fabricator® Sewing Machine. Sailrite’s powerful, industrial machine keeps up with the relentless demand of her ever-growing business. Keep reading to learn more about this self-starter and creative entrepreneur and the amazing things she’s making with her Fabricator!
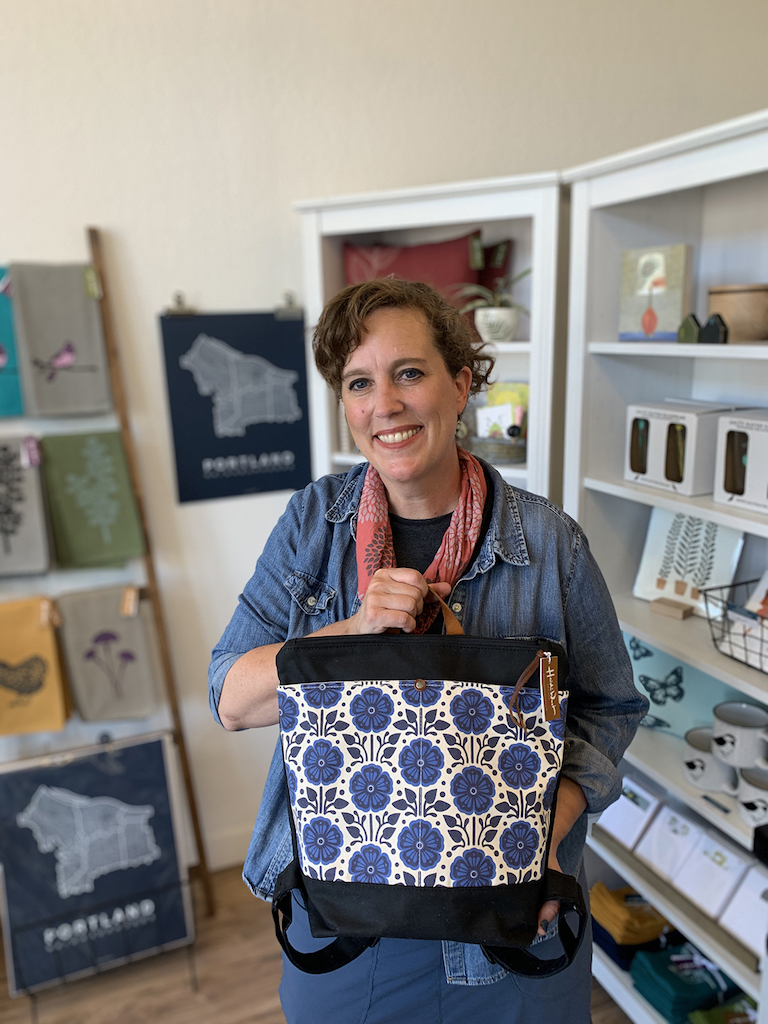
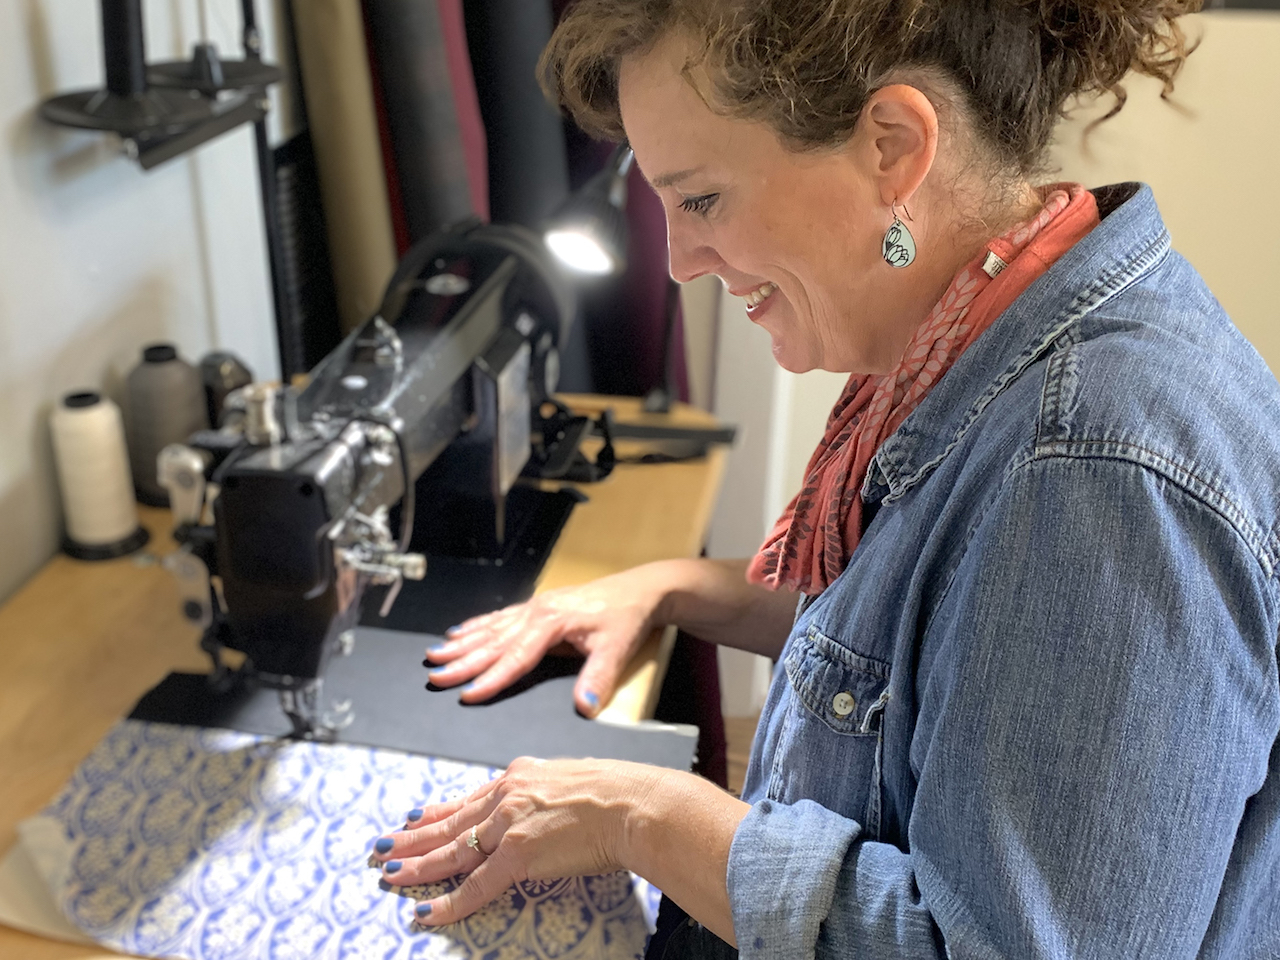
Here’s Heidi showing off a bag sewn with the Fabricator.
The Spark of an Idea
It started with a simple curiosity. In 2015, Heidi bought a screen printing kit. She’d always been intrigued by screen printing and wanted to learn how it worked. After some trial and error, she successfully created her first print. Heidi then screen printed some fabric with a pattern of her own design and sewed some cosmetic bags for her friends. Screen printing was not an easy skill to learn, but Heidi was determined to master it. She took some classes, practiced in her free time and — most importantly — never gave up.
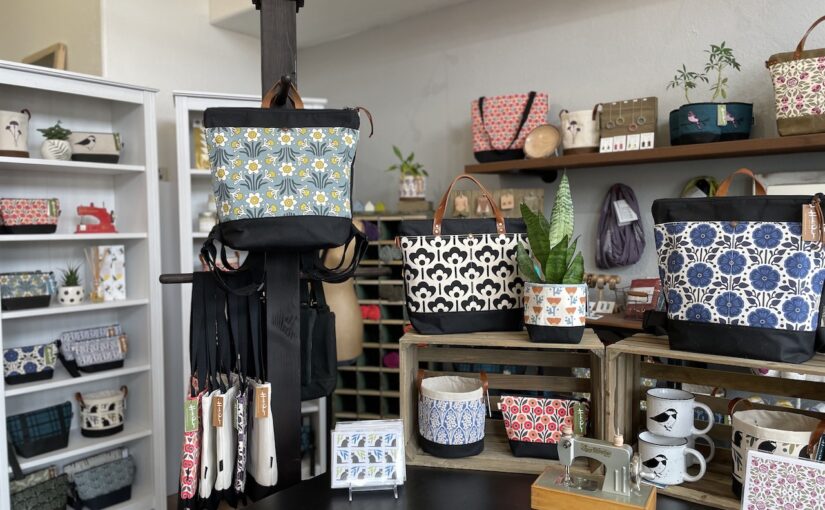
A short year later, Heidi opened an online store selling cosmetic bags, small zippered pouches, eyeglass cases, totes and more. All of her handmade goods are screen printed from her own charming designs and sewn by her as well. At that point, she was still working full time as a marketing project manager, but the demands of her marketing job and her growing business were taking a toll. “I was busy almost every minute of the day, while also raising two small kids, but I loved every minute of it. In 2018, I left my job to run my business full time. In 2019, I moved my sewing studio from my home into a commercial space, allowing me to set up a little retail shop, too.”
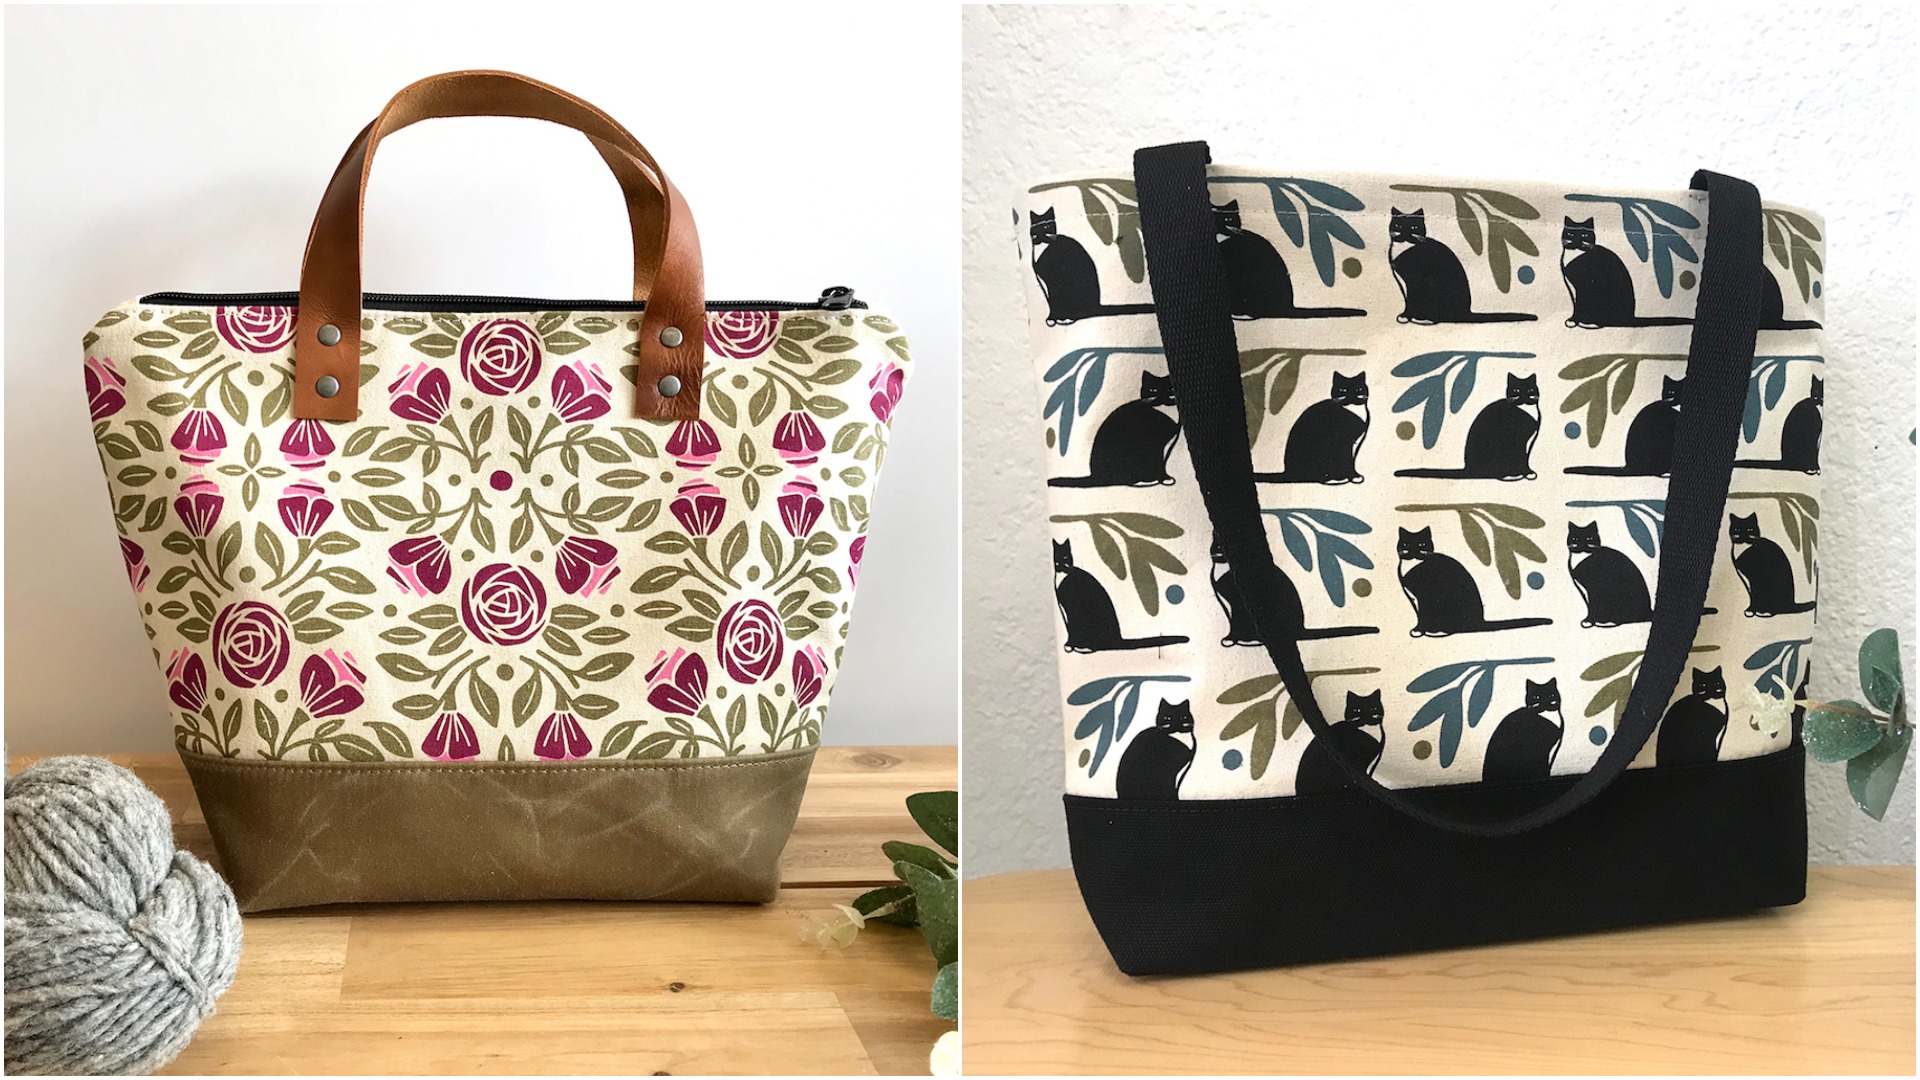
A Portland Rose patterned tote on the left and a fun Tuxedo Cat pattern on the right!
In just five years, Heidi went from picking up a screen printing kit for the first time to launching a successful, full-time business. Along the way, she realized that her home machine wouldn’t cut it anymore; she needed something bigger, stronger and tougher to take her small business — and the quality of her sewn goods — to the next level. “At first, I was using a home sewing machine, but when it couldn’t handle all the use, I upgraded to a mini-industrial machine. It worked well, but I was always concerned about quality. Because I use multiple layers of interfacing and fabric in my bags and pouches, I was concerned that standard thread wasn’t enough to hold all the layers together. It was clear that I needed an industrial sewing machine to ensure that my bags were built to last.”
Hunting for the Right Machine
Heidi began her search for an industrial machine by turning to fellow sewists and creatives, seeking their advice and experience. “I started talking to people within the sewing community and the Fabricator was highly recommended. I was able to try one out and fell in love with how it worked, as well has how beautiful it is. I considered buying one for several years and finally went for it in December 2020. Prior to my purchase, I watched all the marketing YouTube videos and memorized all the specifications. I was obsessed.”
Now that Heidi has been using her Fabricator to sew items for her business, Heidi West Designs, she knows she made the right choice in the Fabricator. “It’s an amazing sewing machine and I really love using it. When I was putting my Fabricator together, I must have watched the videos at least three or four times so I could put it together correctly. The videos were super helpful.”
Heidi loves her Fabricator Deluxe Sewing Machine!
Sewing Beginnings & Creative Pursuits
Heidi learned to sew from her mother when she was 6 or 7 years old. By age 10, her mother had taught her how to read patterns, and Heidi was happily sewing clothes for her doll collection. “I didn’t sew too much in high school or college, but when I was pregnant with both of my kids, the sewing urge really hit me, so I started sewing simple things like bibs, swaddle blankets and hats. After that, I started really having fun making pouches. And then that grew into bags.”
Heidi is a DIYer at heart. The challenge of designing and constructing something of her unique vision and imagination is the mark of a creative spirit. The spark of creativity is something all DIYers have in common. “I love the challenge of trying to figure out how a particular bag or other item was made. I’m super fascinated by different construction methods in sewing. And there’s nothing better than having an idea pop into my head and then being able to create it.”
Heidi has a degree in fine arts with a focus in graphic design. These skills are evident in the quality and precision of her design work. “I also have a degree in interior design. I’ve always loved all parts of design, and I’ve always loved patterns. At the beginning of 2021, I started a year-long project that involves creating a new pattern each month for the 12 birth month flowers. It’s been such a valuable experience and has definitely pushed my design skills and style to a new level.”
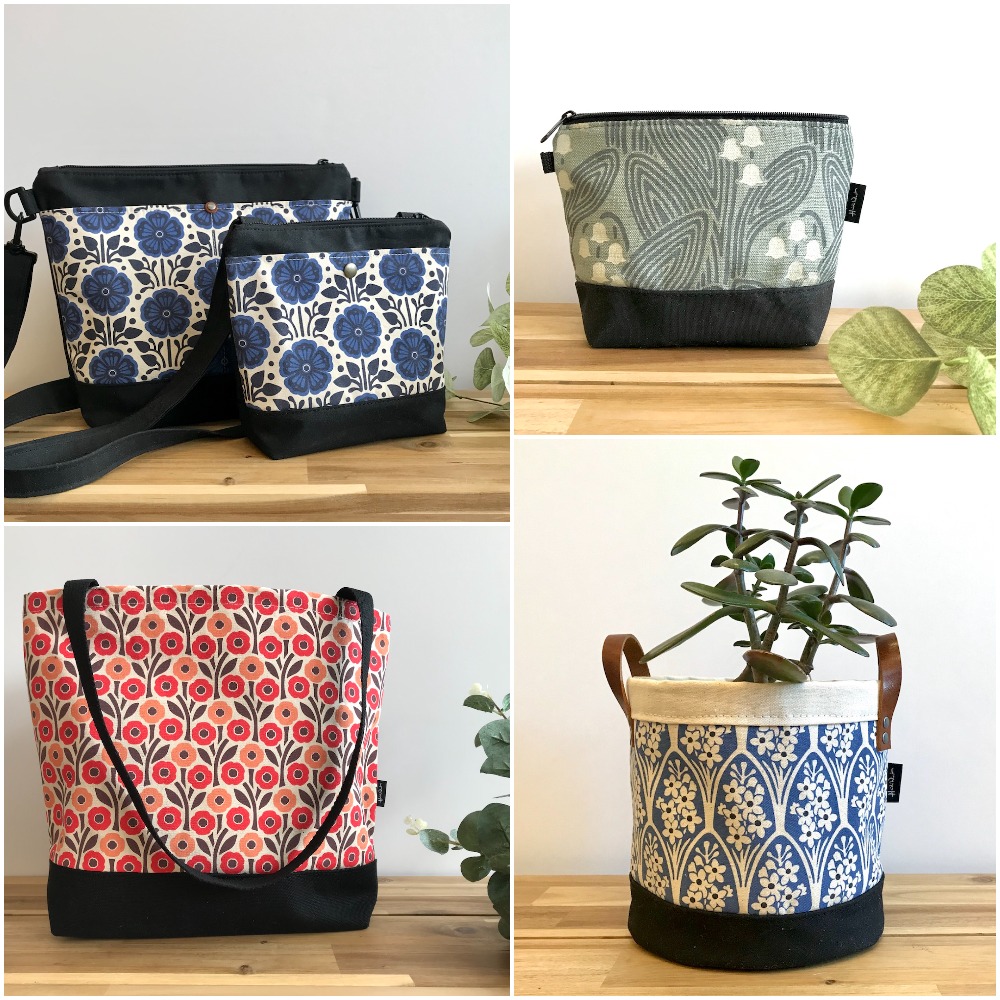
Some of Heidi’s Flower of the Month collection. From top left: Violet (February), Lily of the Valley (May), Poppy (August) and Larkspur (July).
Transitioning from a corporate career to the freedom of a creative pursuit has been incredibly fulfilling for Heidi. “I absolutely love that I don’t have to attend pointless meetings anymore! Really though, when larger teams are involved, I feel like processes and policies can get in the way of delivering the customer what they really want in a timely manner. There have to be so many hoops to go through and since it’s just me in my business, I get to make superfast decisions and then execute them. I love it.”
Screen Printing: A Labor of Love
If you’re unfamiliar with the technique of screen printing a pattern onto fabric, you’re not alone. We asked Heidi the same question. Here’s how she describes her process from initial concept to finished printed fabric:
“The first part of my process is to draw a rough motif using my iPad and then finesse it and put it into a pattern using Adobe Illustrator on my Mac. After the pattern is created, I output transparencies to make the screens. The screen-making process took me several years to fine-tune, but now I have it down to a science. It involves coating the screens with emulsion in a darkroom and then exposing them to light using UV light table. Exact timing is crucial. I then wash them out with the perfect amount of water pressure. After the screens are made (one for each color in the pattern), I can start screen printing.”
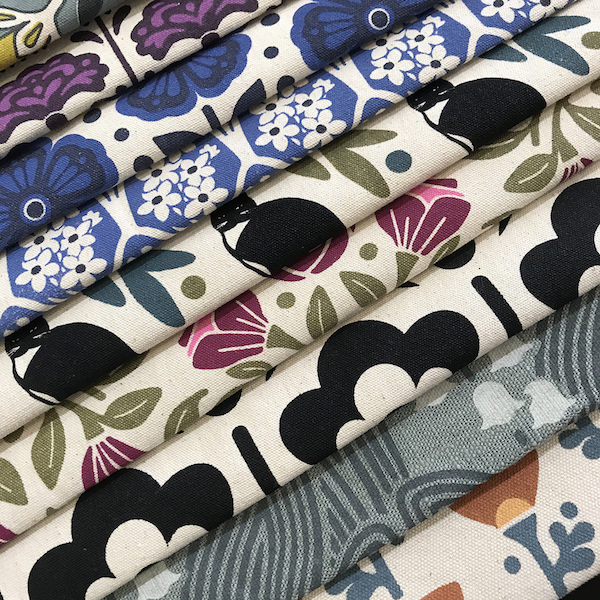
A close-up look at some of Heidi’s unique screen printed fabrics.
What Heidi loves most about the screen printing process is the depth to the craft. “It looks so much more handcrafted. I also just really love the process of making the screens and then getting the press all set up for printing. It definitely has serious challenges, but I guess that’s what keeps me coming back to it. Each new design I create requires me to think about how it’s going to work on press. I have to consider technicalities such as registration, how to minimize drying time between colors, and how I’m going to achieve the colors I want. Screen printing my own fabric really pushes me to use both sides of my brain and that’s what I love about it.”
“Every day, I’m just so grateful to be able to use my creativity in my job. I spent over 20 years in jobs that weren’t fulfilling and didn’t inspire me. I just appreciate it so much now.” For all those DIYers and dreamers out there who are thinking of pursuing their own creative paths, Heidi has some advice to share: “Don’t wait until things are perfect to get started. Just start anywhere and refine and change things from there.”
If you’d like to see more of the unique goods Heidi is making with her Fabricator, you can follow her on Instagram at @heidiwestdesigns.
Heidi’s store in her hometown of Portland, Oregon.
Who We Are
Sailrite is your one-stop DIY shop! We are a passionate crew of do-it-yourselfers who strive to equip you with the supplies and how-to knowledge you need to tackle your next project. Do you want to learn upholstery, leatherwork, canvaswork, hobby sewing, bag making or more? We have the fabric, tools, hardware, sewing machines and notions you need to master any DIY. And even if you’ve never sewn before, our tutorials and how-to videos are designed for beginners and experienced crafters alike.
What do you do when a global pandemic halts your international travel plans and you’re forced to remain stateside? You tackle the sewing project of your DIY career, of course! That’s exactly what Lynn Ringseis did. She spent summer 2020 on a friend’s Westsail 42-foot sailboat in Poulsbo, Washington, riding out the COVID-19 quarantine. Not one to let a change of plans damper her spirit, Lynn offered to tackle several sewing projects for her friend, one of which was designing and sewing a full enclosure for the cockpit attached to the hardtop bimini. Learn how she conquered this difficult project using a borrowed Ultrafeed® LSZ Sewing Machine and Sailrite supplies and free video content.
2020 was supposed to be a fresh start for Lynn. When her captain and husband, John, passed away, she decided that she needed a change of scenery and a new adventure. She found renters for her house and planned a global expedition, visiting the vast network of worldwide nautical friends she and John had made over the years. Lynn has spent most of her adult life traveling the world, working on sailboats, and discovering a passion for ocean conservancy and wildlife protection.
It was March 12, 2020, and Lynn was just hours away from boarding her flight from San Francisco to Fiji. “As the pandemic news grew more alarming, I pulled the plug on my trip as I didn’t want to take any chances of unwittingly spreading a virus to my dear Fijian friends. Time for a pandemic pivot.” Having already rented her house, Lynn needed a place to stay. Luckily, a fellow sailing friend asked her to “boat sit” for him for the summer and she happily accepted.
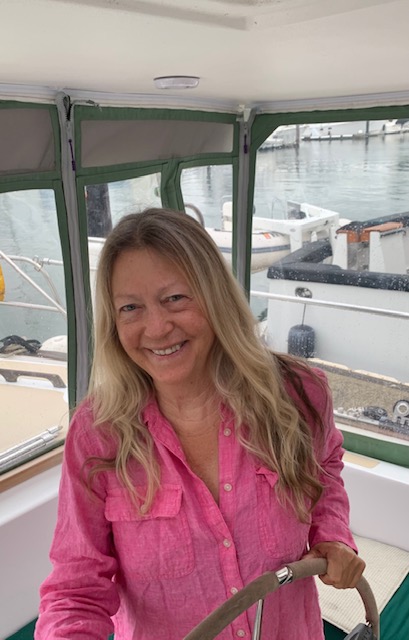
Lynn is all smiles at the helm of her friend’s boat!
On the water is Lynn’s favorite place to be, so she didn’t see the temporary delay in her travel plans as too much of an inconvenience. The marina had every amenity she could need — laundry, showers, a grocery store and carry out dining. “It wasn’t exactly the tropical waters I had planned, but I became enamored with the wildlife and the beauty of the Pacific Northwest.”
She arrived in Washington eager to help out her friend, Christian — who was away most of the summer working as an aerial firefighter — and tackle some needed boat projects, the first of which was the daunting cockpit enclosure. The wet, temperate climate of the Pacific Northwest meant Lynn was in desperate need of a dry cockpit to ride out her stay. Lynn had never attempted such a complicated project, so she first checked local canvas shops to commission a cockpit enclosure. All of the shops were booked for months out.
Luckily, Christian is a Sailrite customer and had an Ultrafeed LSZ on board. With time on her hands and an Ultrafeed at her disposal, Lynn set out to tackle the project herself. “This was by far my largest and most complicated sewing project, with unusual angles, curves and geometry to figure out. But, to me, that was more fun than straight lines! I pushed myself to accomplish something beyond what I perceived as my ability. I sourced materials through Sailrite and began receiving shipments at the marina.”
Keep reading to learn more about Lynn, her sailing career and how she conquered her list of quarantine projects.
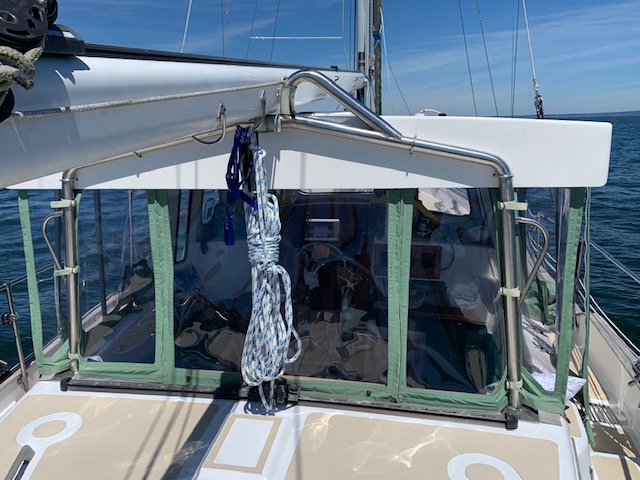
A look at the daunting full cockpit enclosure Lynn tacked on her friend’s sailboat.
This slideshow requires JavaScript.
Q. Do you have a sailboat currently?
A. Currently, I do not own a sailboat, but I am a fortunate member of the OPB (Other People’s Boats) Yacht Club! I do enjoy puttering with friends on my Duffy electric boat. She is named “Bootlegger” and she acts as our speakeasy with her quiet, electric engine.
Captain John and I owned a Catalina 30 that we cruised in Mexico in the early 1990s. She was a sweet and relatively simple boat and didn’t require major projects. We cruised from the Sea of Cortez as far south as Acapulco and gunkholed everywhere in between. We then got a job working on crewed sailing yachts in the Eastern Caribbean.
Over many years, we hosted guests on Beneteau sailboats, Jeanneau yachts and a brand-new Leopard 45 catamaran. We loved working on and sailing the catamaran so much that we decided to buy a Lagoon 41. We commissioned her in the fall of 2003, named her “Moonshine,” and sailed across the Atlantic to the French West Indies and eventually to the British Virgin Islands to start our own charter operation.
Q. When did you learn how to sail and who taught you?
A. I was living and working in Africa with my then boyfriend, Tom, in 1984, and our French friends offered us a crewing position to cross the Atlantic to Martinique. We met our French Captain Daniel in Marseille, France, that fall. My only prior sailing experience was on Mission Bay, San Diego, on little Sabots. Neither of us spoke French, but that didn’t stop us from jumping on this adventure!
We met our ride, a 33-foot Gibsea and our assortment of crewmates: a fellow hitchhiker from the U.S. and three French crew who spoke little English. Our language barrier helped us all get along tremendously. At the dinner table, we would all talk about each other and laugh as no one understood anything! I tried very hard to learn about sailing from Captain Daniel, as he was a superb skipper.
This was long before GPS, and Daniel would shoot the sun and stars with a sextant. I was fascinated, especially when we pulled into Fort-de-France, Martinique, after 24 days, spot on from the Cape Verde islands, situated at the westernmost point of the African continent. I was hooked on sailing!
Q. What do you love about sailing?
A. I have a lifelong passion for being on the ocean. Being a San Diego native, I would visit the beach at every opportunity. Sailboats bring you closer and quieter to the environment that I love. I enjoy the challenge of sailing and there is no sweeter place to be than on a beam reach with soft, tropical trade winds kissing your sails as you scour the sea for whales and wildlife. One of the most invigorating things for me is to arrive at a new port after being at sea on a long journey as all your senses come alive at navigating toward land and an unfamiliar harbor or anchorage.
Q. Can you describe the various canvas projects you completed when quarantined on your friend’s boat in summer 2020?
A. The full enclosure started with installing two parallel Flex-A-Rail awning tracks on the ceiling of the hardtop, as I wanted sliding doors for ease of entry. I used a heat gun to shape the track to fit the vertical curves on the outside as an anchor for the first panels. I used Dura-Skrim® Patterning Material and cut and taped each panel. My measuring tape became my constant companion.
This was the first time I had worked with awning track and Keder awning rope products. I integrated Phifertex® into the top of the aft panels for ventilation. Working with O’Sea 40 gauge window material was easier than I expected. I marked the outline with a yellow grease marking pencil. Cutting and sewing to Sunbrella® was a breeze, especially with the help of Seamstick basting tape. I chose Cadet Grey V-92 Bonded Polyester 4 oz. Thread, and my color choice of Sunbrella Marine Grade fabric is officially named Basil, but I called it “Margarita,” as it just sounded more fun!
This slideshow requires JavaScript.
I referenced several of Sailrite’s how-to videos to help me with the boat projects. I watched videos on how to make winch covers, how to bend and install Flex-A-Rail and how to make an aft curtain. Many thanks for the great videos and support from the Sailrite team!
I continued to craft unusual projects for the boat, such as fender holders I fashioned from Sunbrella and Phifertex, which I designed to go over the aft railing like saddlebags. The bags held the fenders on the outside with an inner bag for lines and other equipment.
Q. Was sewing these projects for your friend’s boat the first time you used the Ultrafeed LSZ Sewing Machine? What are your impressions of the machine after using it for a handful of projects?
A. Yes, it was my first time getting acquainted with the LSZ. I think of her as the Jeep of sewing machines and super tough. I got to know her most intimately. With the detailed instructions Sailrite provides, I was able to make all necessary adjustments and the ease of accessing the machine for applying oil was remarkable. She is a well-built, sturdy tool.
The Ultrafeed LSZ sure kept me company while I was on the boat for months. I named her Tiburón, for my love of sharks. She and I spent a lot of time together.
Q. Since the full boat enclosure for your friend, have you sewed any other big projects that challenged your sewing skills?
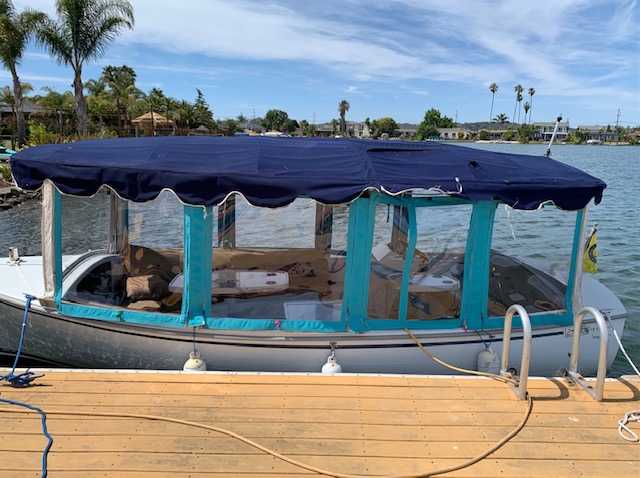
A. The next project I tackled was side panels and windows for my little Duffy electric 18-foot boat in California. I was there for a quick trip and took lots of photos and measurements and proceeded to tackle that project back onboard in Poulsbo. Mind you, I had the machine set up on the Sailrite Ultrafeed Collapsible Table in the lower salon area, which measures 5 feet by 8 feet. Working in a relatively small space was all part of the fun challenge! I chose Sunbrella Marine Grade in Aruba. When I got back to California, I installed the windows and they fit like a charm, but they make the surrey top look a little sad. I just may be learning how to make a surrey top next!
Here’s Lynn’s Duffy boat with the new side panels and windows.
Q. Can you tell us what’s next for your DIY sewing adventures?
A. During quarantine, I became acquainted with some of the livaboards at the marina, which reminds me of one of my favorite quotes: “A tourist remains an outsider throughout his visit; but a sailor is part of the local scene from the moment he arrives.” (Anne Davison) The sailing community has always felt like my “tribe.”
After seeing the enclosure, one of my sailboat neighbors at the marina asked me to create some mesh shade screens for his side windows. I used Phifertex Plus vinyl mesh, Sunbrella frames and Stamoid™ bias binding tape to finish the edges. I still feel new enough not to charge money, so we are making a swap for some of his expert woodworking skills in the galley. The pandemic may have been the catalyst for my newfound “Covid Career.”
Q. Is there anything else you’d like our readers to know about you, your love of sailing or your DIY lifestyle?
A. The cockpit has been transformed into a protected sunroom or, as I like to call it, the lanai — almost as warm as Fiji.
I also have been through a transformation of life, blessed to find seafaring mates to continue living a nautical journey. You may be wondering, how did my client, Christian, like my custom cockpit enclosure? Well, the enclosure received an enthusiastic two thumbs up. I am still onboard, and we are planning voyages, adventures and ocean environmental projects. Perhaps I’ll get my trip to Fiji after all, this time on a gorgeous sailboat! A happy ending to my sewing story.
My deep devotion to the sea prompted me to volunteer for Sea Shepherd Conservation Society, a nonprofit marine conservation organization, aboard one of their vessels. I spent three months crewing on their former Coast Guard Cutter named “MV John Paul Dejoria,” engaging in several campaigns in the Sea of Cortez to Peru, with a brief stop in the Galapagos Islands. Christian shares the same passion and he has also served aboard Sea Shepherd vessels.
Sea Shepherd’s mission is to partner with governments around the world to assist them with the detection and capture of criminal enterprises that are engaged in illegal, unreported and unregulated fishing operations.
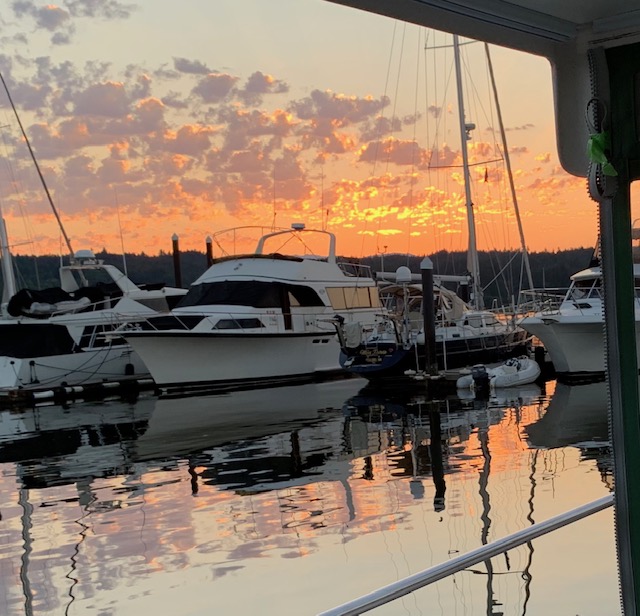
Lynn captured a stunning sunset during her stay at the marina.
Thank you so much for sharing your story with us, Lynn. We’re thrilled that Sailrite could be part of your DIY journey. Good luck with your future travels, and we hope you make it to Fiji soon!
If you’d like to tag along with Lynn on her oceanic adventures and other travels, you can follow her personal blog: www.bootleggerbay.com.
Who We Are
Sailrite is your one-stop DIY shop! We are a passionate crew of do-it-yourselfers who strive to equip you with the supplies and how-to knowledge you need to tackle your next project. Do you want to learn upholstery, leatherwork, canvaswork, hobby sewing, bag making or more? We have the fabric, tools, hardware, sewing machines and notions you need to master any DIY. And even if you’ve never sewn before, our tutorials and how-to videos are designed for beginners and experienced crafters alike.
Ted Levitt lives according to two main principles: service and quality. He grew up watching his parents run a very successful diner, and he credits them for his success in business and his drive to succeed in everything he does. What does all this have to do with DIY? Keep reading to learn more about Ted, his fascinating life’s story, and his passion for car restoration and how it lead him to Sailrite® and the Ultrafeed® LS Sewing Machine.
Growing up in his parents’ diner — Chick and Ruth’s Delly in Annapolis, Maryland — instilled in Ted an appreciation for and belief in honesty and hard work. “I loved working with my parents starting at 8 years old. I worked every weekend and after school. I guess I thought it was fun being with them; I didn’t really think of it as work.” The lessons learned in his parents’ diner would prepare Ted for a life of success in the hospitality and food service industry.
Ted graduated high school a year early, and he intended to work at the diner full-time. His parents, however, had other plans. “They told me to get a college degree and that the business would be waiting for me after I graduated.” He graduated from the Culinary Institute of America with a degree in culinary arts. He then went on to receive a Bachelor of Science degree in hotel and restaurant management from Florida International University.
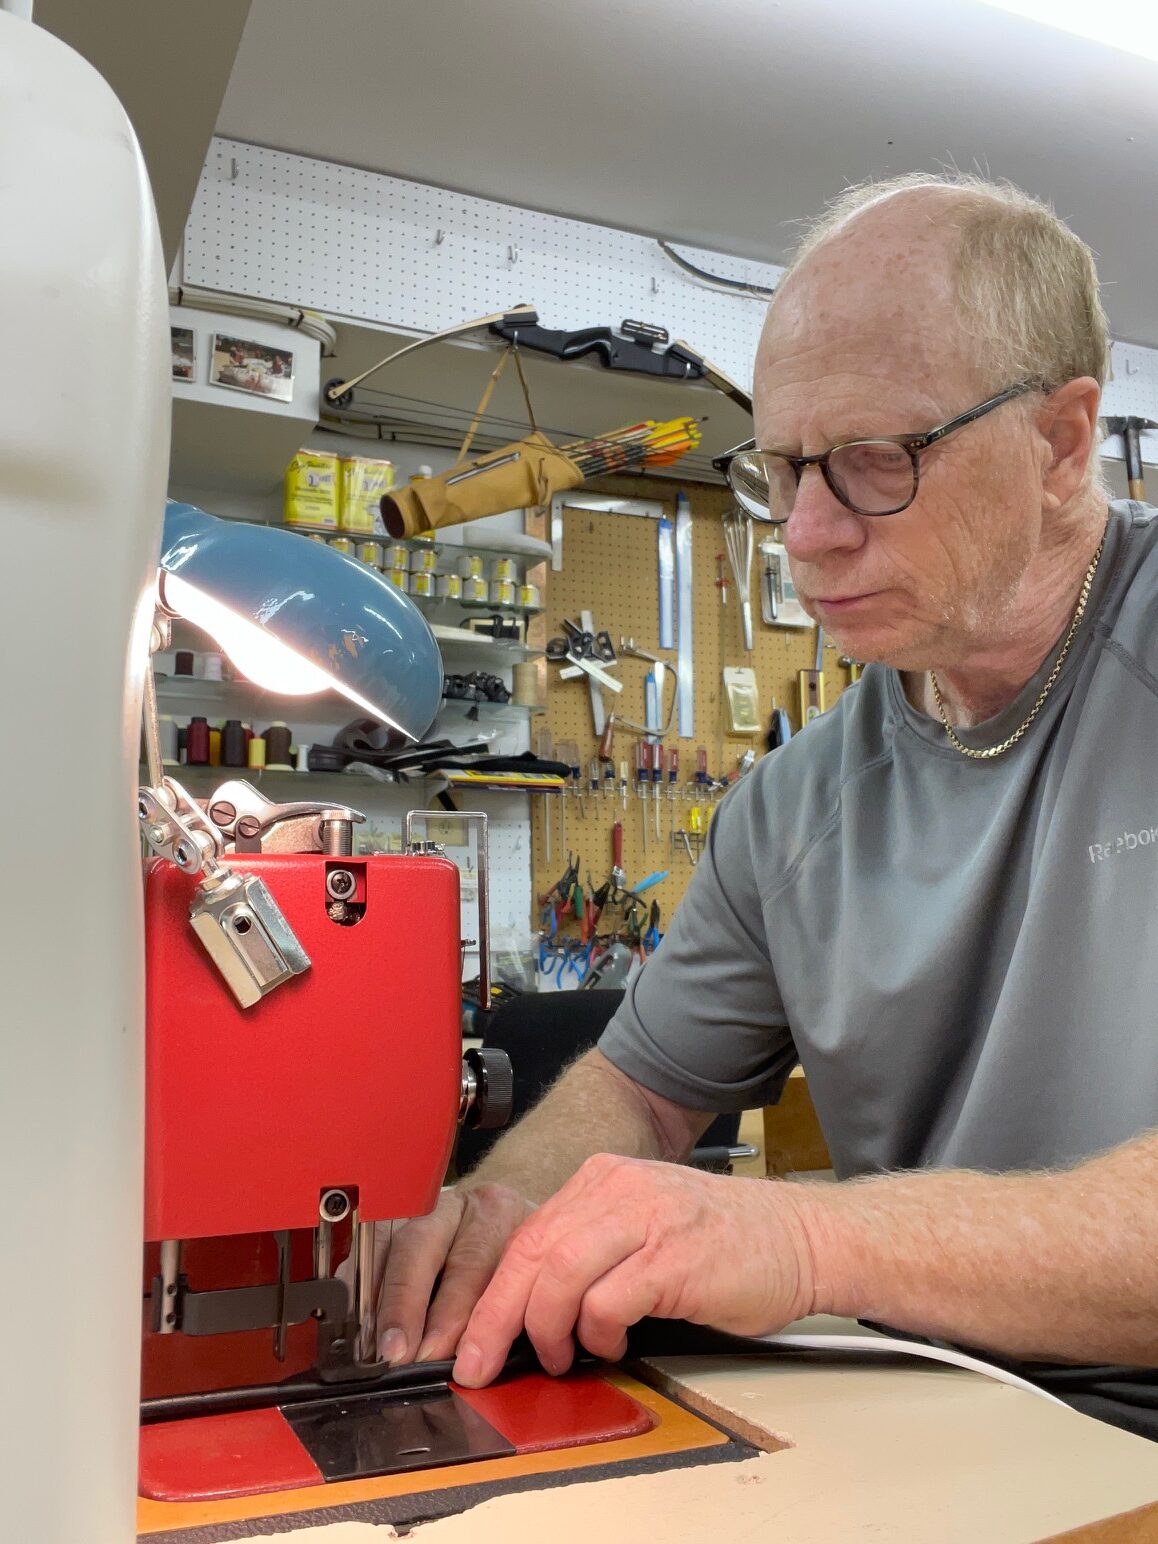
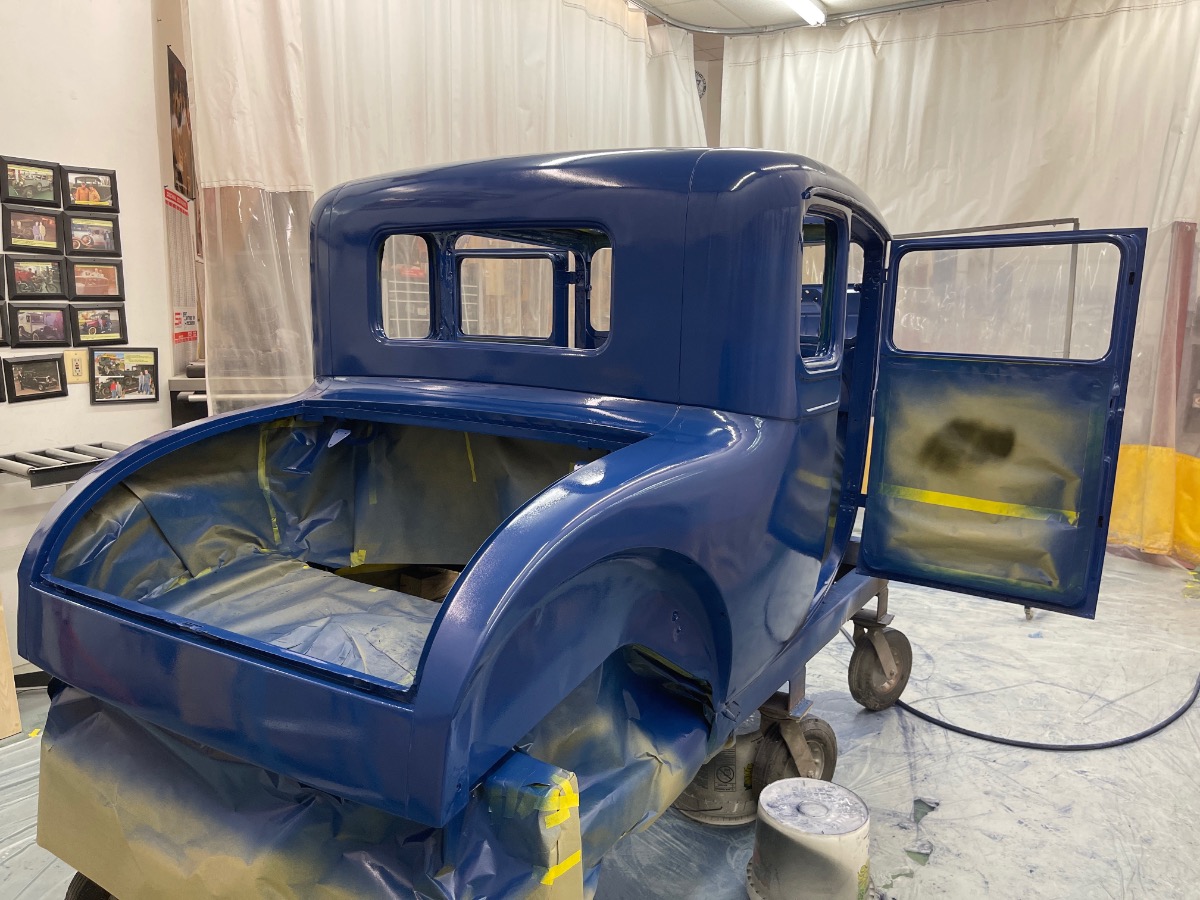
Ted sews piping for a car upholstery project.
He returned to Annapolis and took over his parents’ business at the age of 24. In addition to managing the family diner, Ted opened a 10-room bed-and-breakfast and started a very successful vending machine company. The diner was known for its hand-rolled fresh-baked soft pretzels. Ted was asked to sell his soft pretzels at Camden Yards, the Major League Baseball ballpark home to the Baltimore Orioles. His pretzels were so popular he eventually opened 33 other locations in the area.
For most of his life, Ted has had a passion for car restoration. It’s a pursuit that started when he was a teenager and has grown and flourished through the years. Work and raising a family stalled this incredibly detailed and time-consuming pastime. So when Ted retired in 2017, it finally gave him the time to dedicate to his car restorations.
More Than a Hobby
When did Ted’s love of antique car restoration begin? It’s a fascinating story. “When I was 17 years old and in high school, I found a 1933 Dodge Brothers car in the woods on the side of a road. I found the person who owned the property and asked to buy it for $75 — even with a tree growing up through the roof! Later, I found out that it was the same model of car my parents owned for five years back in 1947. I restored it over the next few years not really knowing what I was doing. But it turned out OK and I still own it today.”
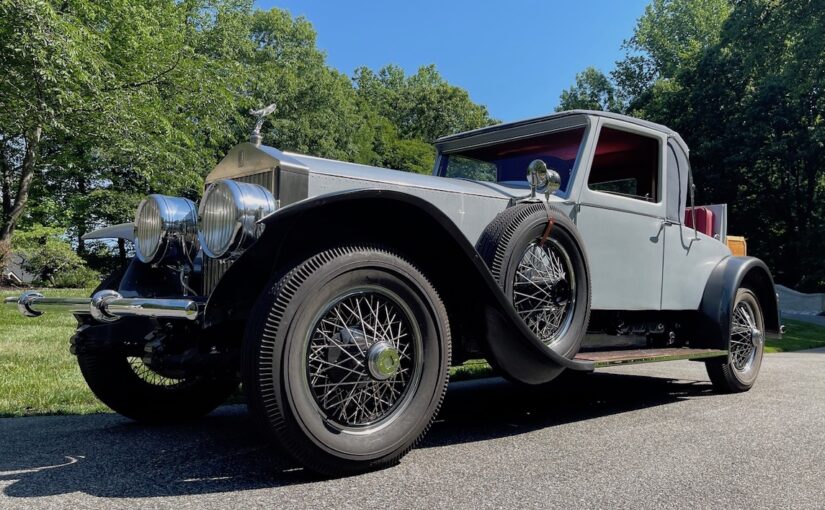
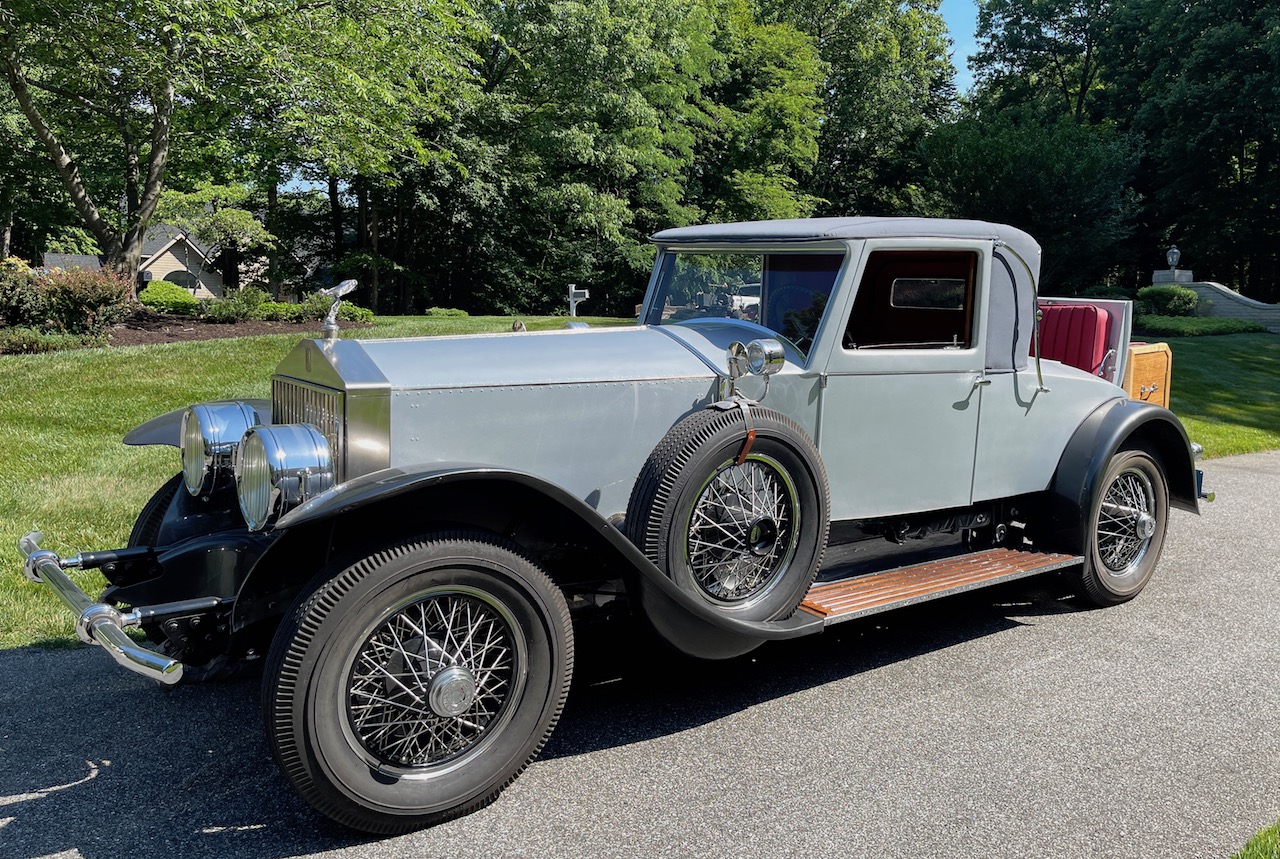
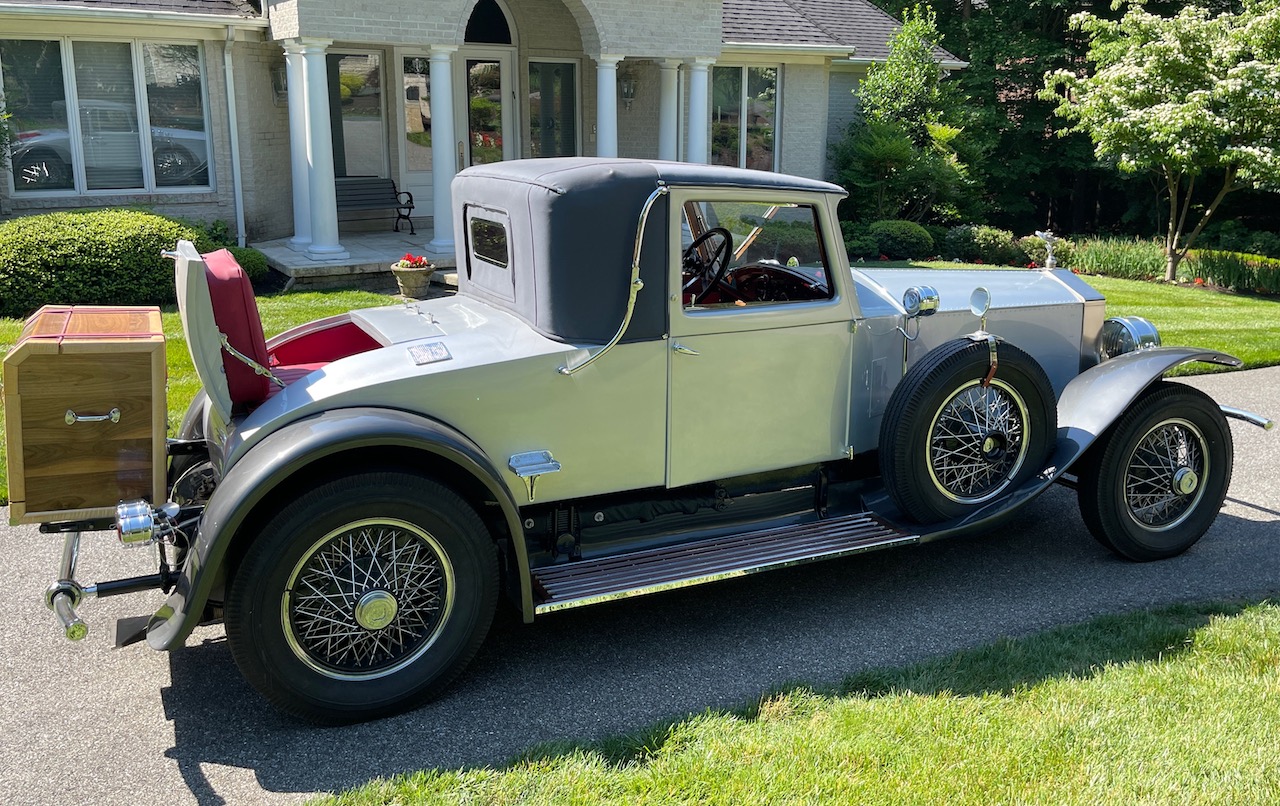
Ted’s completed 1928 Rolls Royce Phantom. What a beauty!
What is it about car restoration that Ted enjoys so much? “I always liked working with my hands, and I’ve always loved learning new things. After I played with the 1933 Dodge Brothers as a teenager, I wanted to learn how to properly restore cars.” It’s not just car restoration where Ted applies his hands-on, do-it-yourself mentality. When he took over his parents’ diner, he did most of the electric, plumbing and repair work himself. “I took a heating and air conditioning class at a local community college and I took welding classes in the evenings. Most everything else I’ve learned by reading or asking people and learning on my own. I’m not afraid to try anything. My dad taught me I could do anything I put my mind to and I believed him.”
View of the upholstered rumble seat and trunk.
Like many DIYers, Ted is fascinated by the magic of experiencing something evolve from nothing. Where does Ted find all these vintage cars in need of restoration work? He finds them all over the country searching through magazines and online forums, or even through word of mouth. “I always drive to pick up the car myself so I can meet the owner and hear the car’s history firsthand.”
“As with everything else involved in restoring a car, I want to say I did it all. Over the years I’ve learned to work on engines, learned to weld, took English Wheel metal shaping classes to learn how to make fenders and body parts, and learned how to use a mill and lathe. Everything I’ve learned has been through classes, reading books, watching YouTube videos, and with a lot of help from knowledgeable friends. I guess I am a jack of all and master of none. My work is not the best but I think it turns out OK. But most importantly, I know I did it myself and learned something new every day.”
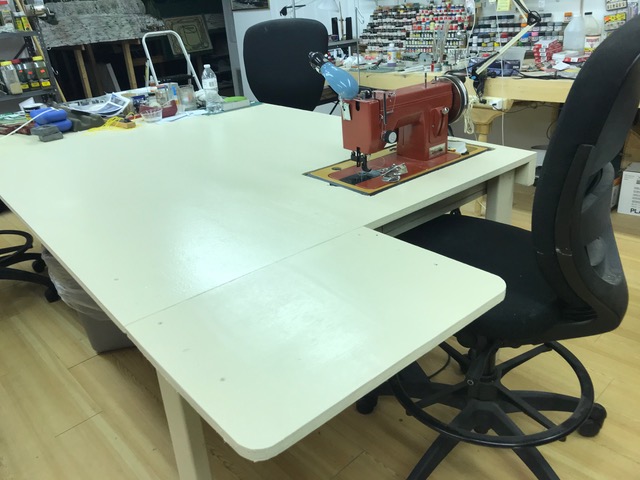
Ted put his Ultrafeed in a custom table so he’d have plenty of room to work on projects.
Learning to Sew
Being a deep-rooted DIY guy and wanting to be involved in every aspect of his car restorations, Ted wanted to do his own upholstery work. Never having sewn before, Ted didn’t know where to get started. Luckily, he had a friend who was well acquainted with Sailrite. “I had never sewn before I bought the Ultrafeed. My friend told me about Sailrite, and there was a location in Annapolis just a few minutes from my home.” Ted bought his Ultrafeed LS in 2009 at Sailrite’s Annapolis, Maryland, retail store location (we have since closed our retail stores).
Through his friend’s recommendation, Ted explored the Sailrite website and knew the Ultrafeed was the right machine for his antique car upholstery work. Before he jumped right in with upholstery sewing, he knew he needed to practice and familiarize him with the machine and basic sewing skills. Again, he turned to Sailrite for help. Ted used Sailrite’s free how-to videos, and other resources on the internet, to teach him how to sew. “The Sailrite videos are amazing. I have also called in a few times and spoken to your DIY guys. The service is amazing. It made it so easy for me to learn how to sew.”
This slideshow requires JavaScript.
One of his most impressive restoration projects was working on a 1928 Rolls Royce Phantom. He converted the car into a rumble seat body style and did the entire restoration himself. He used the sewing skills he learned over the years to sew the upholstery for the new rumble seat and car interior seating. After years of sewing car upholstery with his Ultrafeed, Ted is still happy with his machine. “It has worked amazingly. And if there were any problems, it was the lack of knowledge from me, the user. But when I called for assistance, your staff talked me through the problem or sent me videos to walk me through it.”
What’s Next
As if he wasn’t busy enough in his retirement, car restoration isn’t Ted’s only hobby. When Ted’s not bringing classic cars back to pristine condition, you can find him working on his impressive model train collection. “I’ve been building an HO scale train layout for many years. I build everything from scratch.” Ted also enjoys woodworking. He builds beautiful wood furniture and music boxes for friends and family.
This slideshow requires JavaScript.
Ted finished his full Phantom restoration project in January 2021 after countless hours of work. Never one to remain idle for too long, he’s already moved on to his next project. “Now I am working on a 1928 Dodge Brothers Victory Six 5 Window Coupe. I just painted the body and the chassis is done. I hope to have the body on in a couple of months and then I will start on the interior of that car.”
Ted now owns 11 antique cars originating from 1915 to 1933 and he has restored them all. “Some of them were in pretty good shape and some should have been stripped for parts. But I wanted to bring them back to life, and I enjoyed the restoration process on all of them.” With no plans to sell, he enjoys driving them around town and sharing the history of the cars with others.
Progress on Ted’s latest project, a 1928 Dodge Brothers Coupe.
Who We Are
Sailrite is your one-stop DIY shop! We are a passionate crew of do-it-yourselfers who strive to equip you with the supplies and how-to knowledge you need to tackle your next project. Do you want to learn upholstery, leatherwork, canvaswork, hobby sewing, bag making or more? We have the fabric, tools, hardware, sewing machines and notions you need to master any DIY. And even if you’ve never sewn before, our tutorials and how-to videos are designed for beginners and experienced crafters alike.
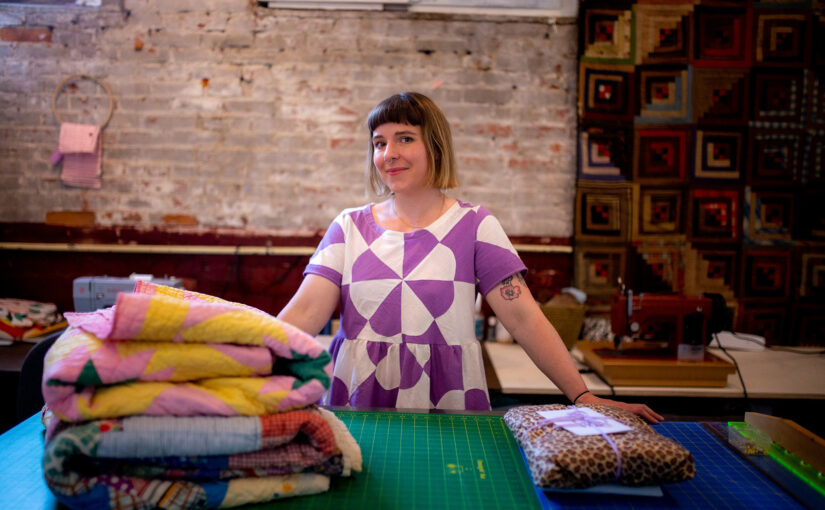
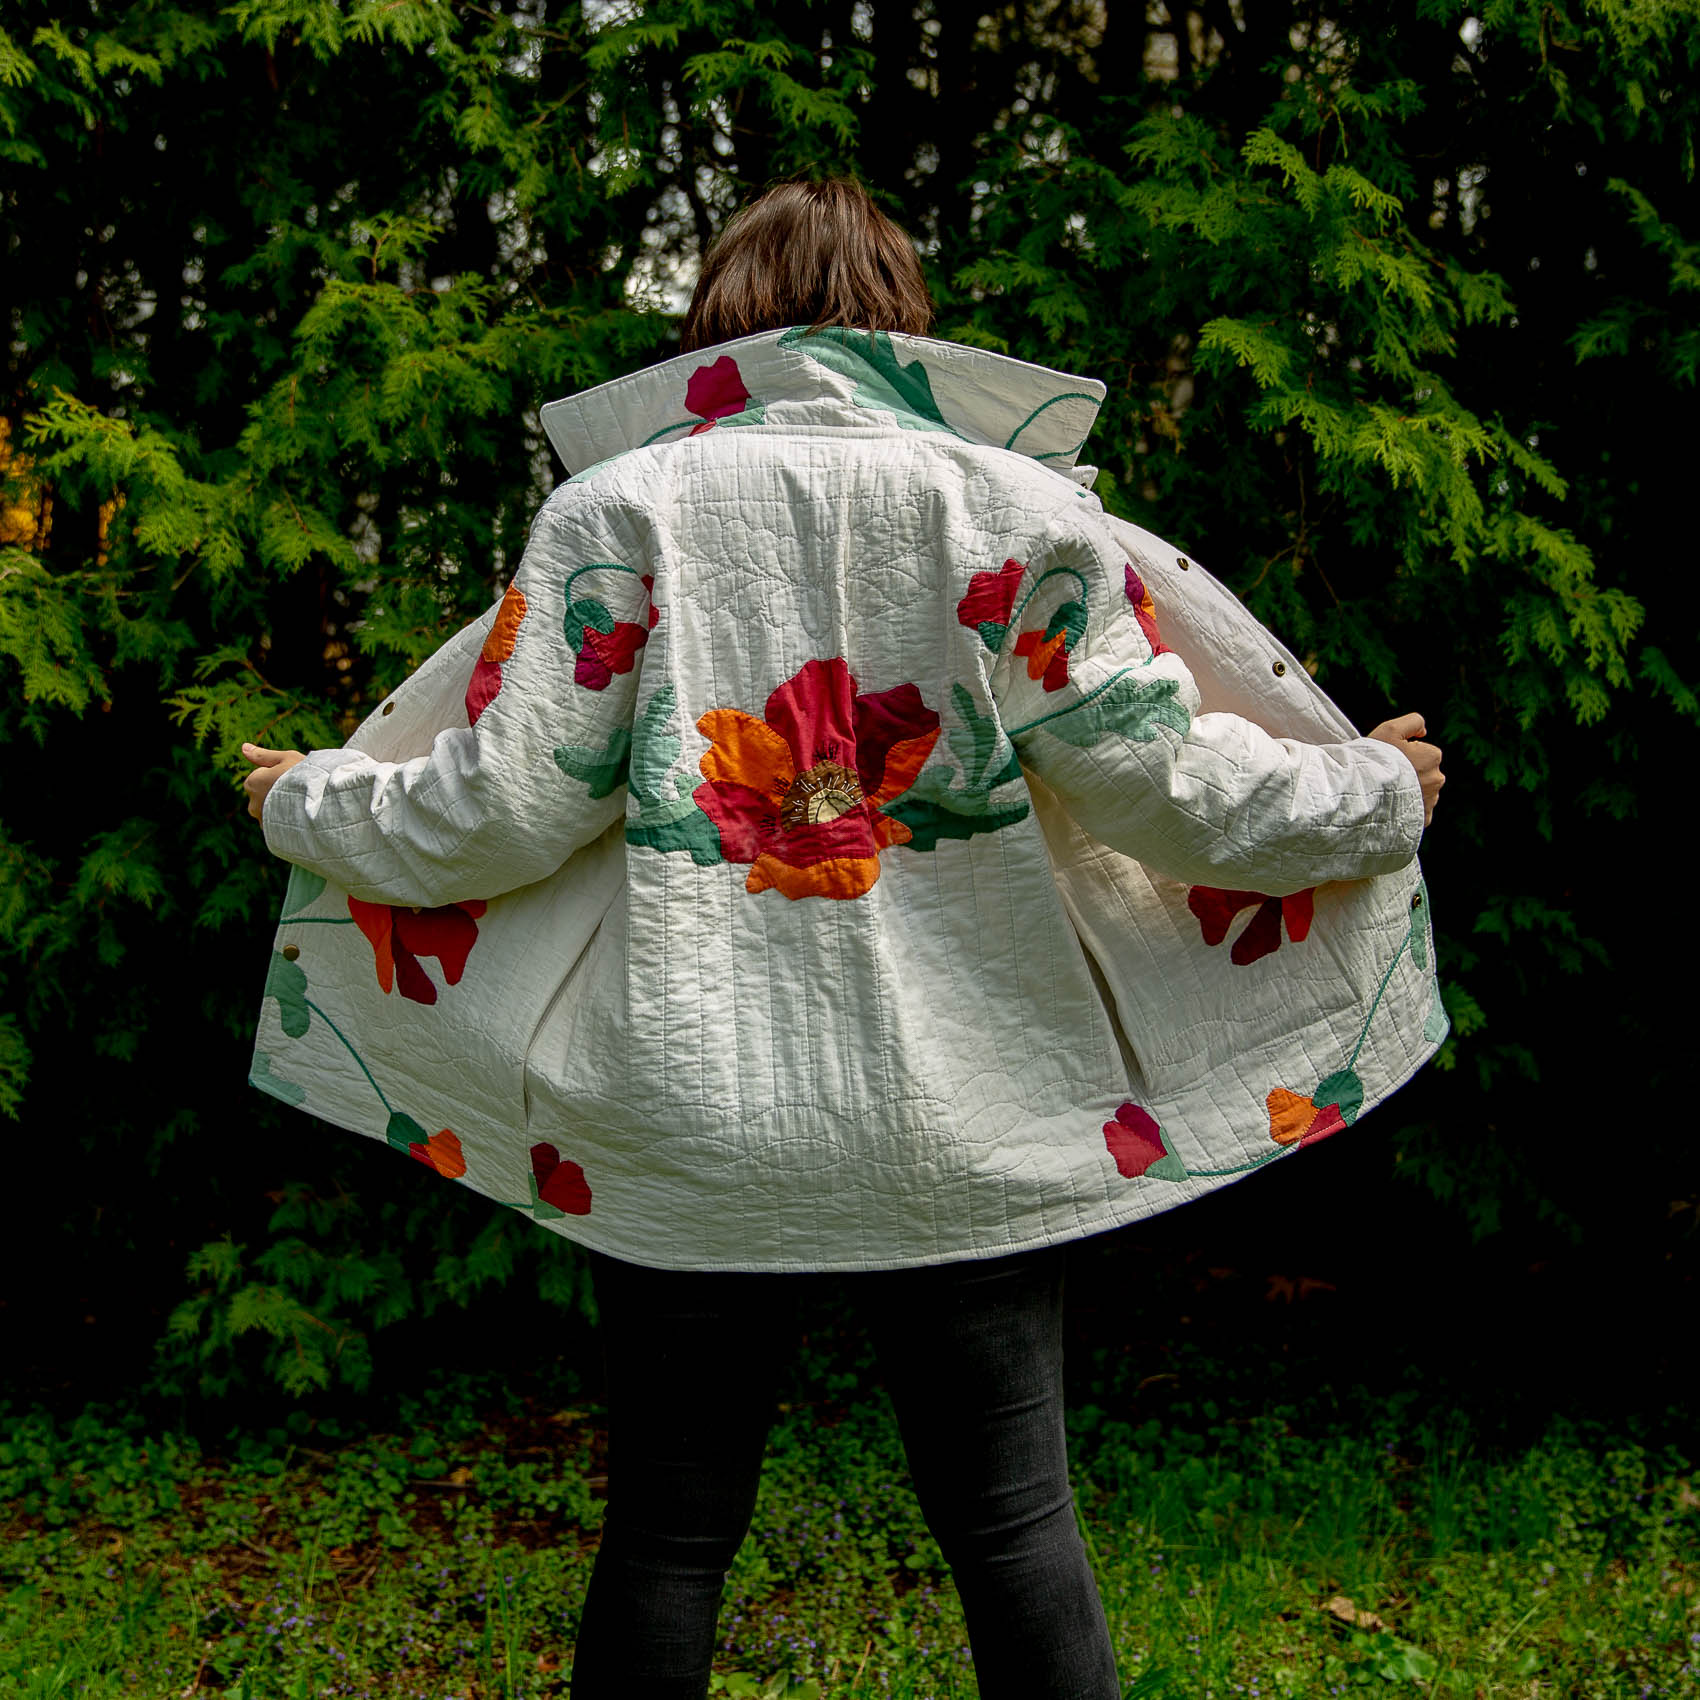
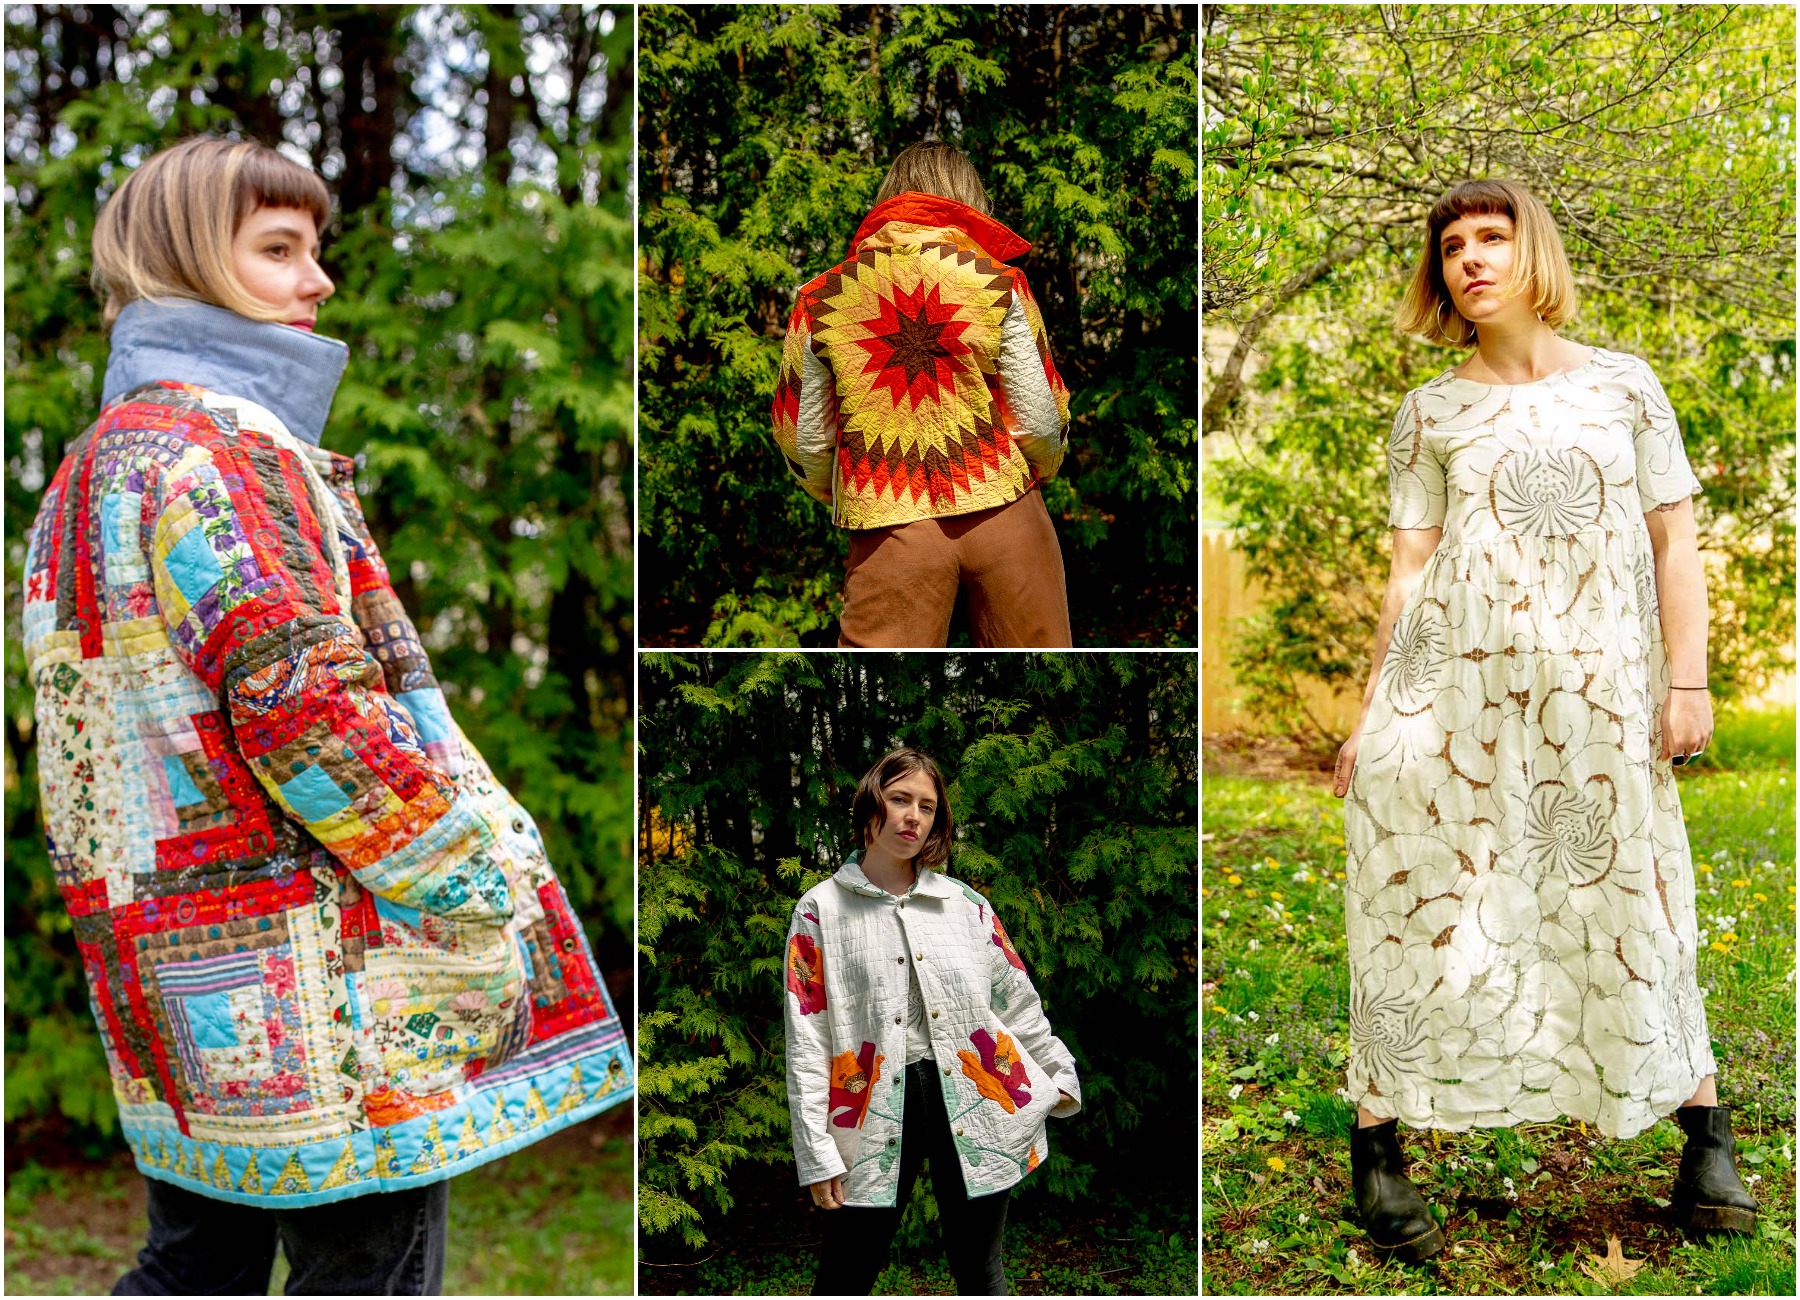
What do you see when you look at a quilt? An old-fashioned bedspread? Something your mother or grandmother used to sew? Most of us only see what’s in front of us: cotton, batting and thread. We don’t look past what it is to envision what it could become. That’s what sets Kathleen McVeigh apart. She doesn’t see just a quilt. She sees a coat, a dress, a top, a bag — she sees endless possibility and potential. With care, thoughtfulness and great consideration, Kathleen transforms handmade vintage quilts into one-of-a-kind garments and accessories. With the help of her Ultrafeed® LS Sewing Machine, she is bridging the past to the present and creating something truly unique.
One of Kathleen’s unique quilted coat designs.
Transformation. It’s the core of all DIY. To take something and turn it into something else. Breathing new life into heirloom quilts is Kathleen’s calling. With a background in fine art, she has used her creative talents and eye for design to transform these forgotten treasures into beautiful coats, dresses and bags for a new generation to fall in love with and cherish all over again.
Kathleen’s love of quilting runs deep. She grew up watching her grandmother quilt and, later, taught herself to quilt as an adult. “My grandmother taught me to sew when I was 4 or 5. I would go over to her house for visits or sleepovers and she would give me some of the triangle pieces she was quilting to sew together while we watched movies. I have really good memories of sewing with my grandmother and learning about the different fabrics we were using, mostly from old family clothes, linens, sheets or curtains.”
You can imagine that a great deal of consideration goes into cutting apart quilts and piecing them together, creating something completely new yet that retains the beauty and personality of the original quilt. Considering how much time goes into making a quilt — vintage quilts took anywhere from several months or even years to complete — you can tell that Kathleen has the utmost respect and appreciation for the original quilter, and she reflects that in the care and attention she puts into creating her coats and other quilted goods.
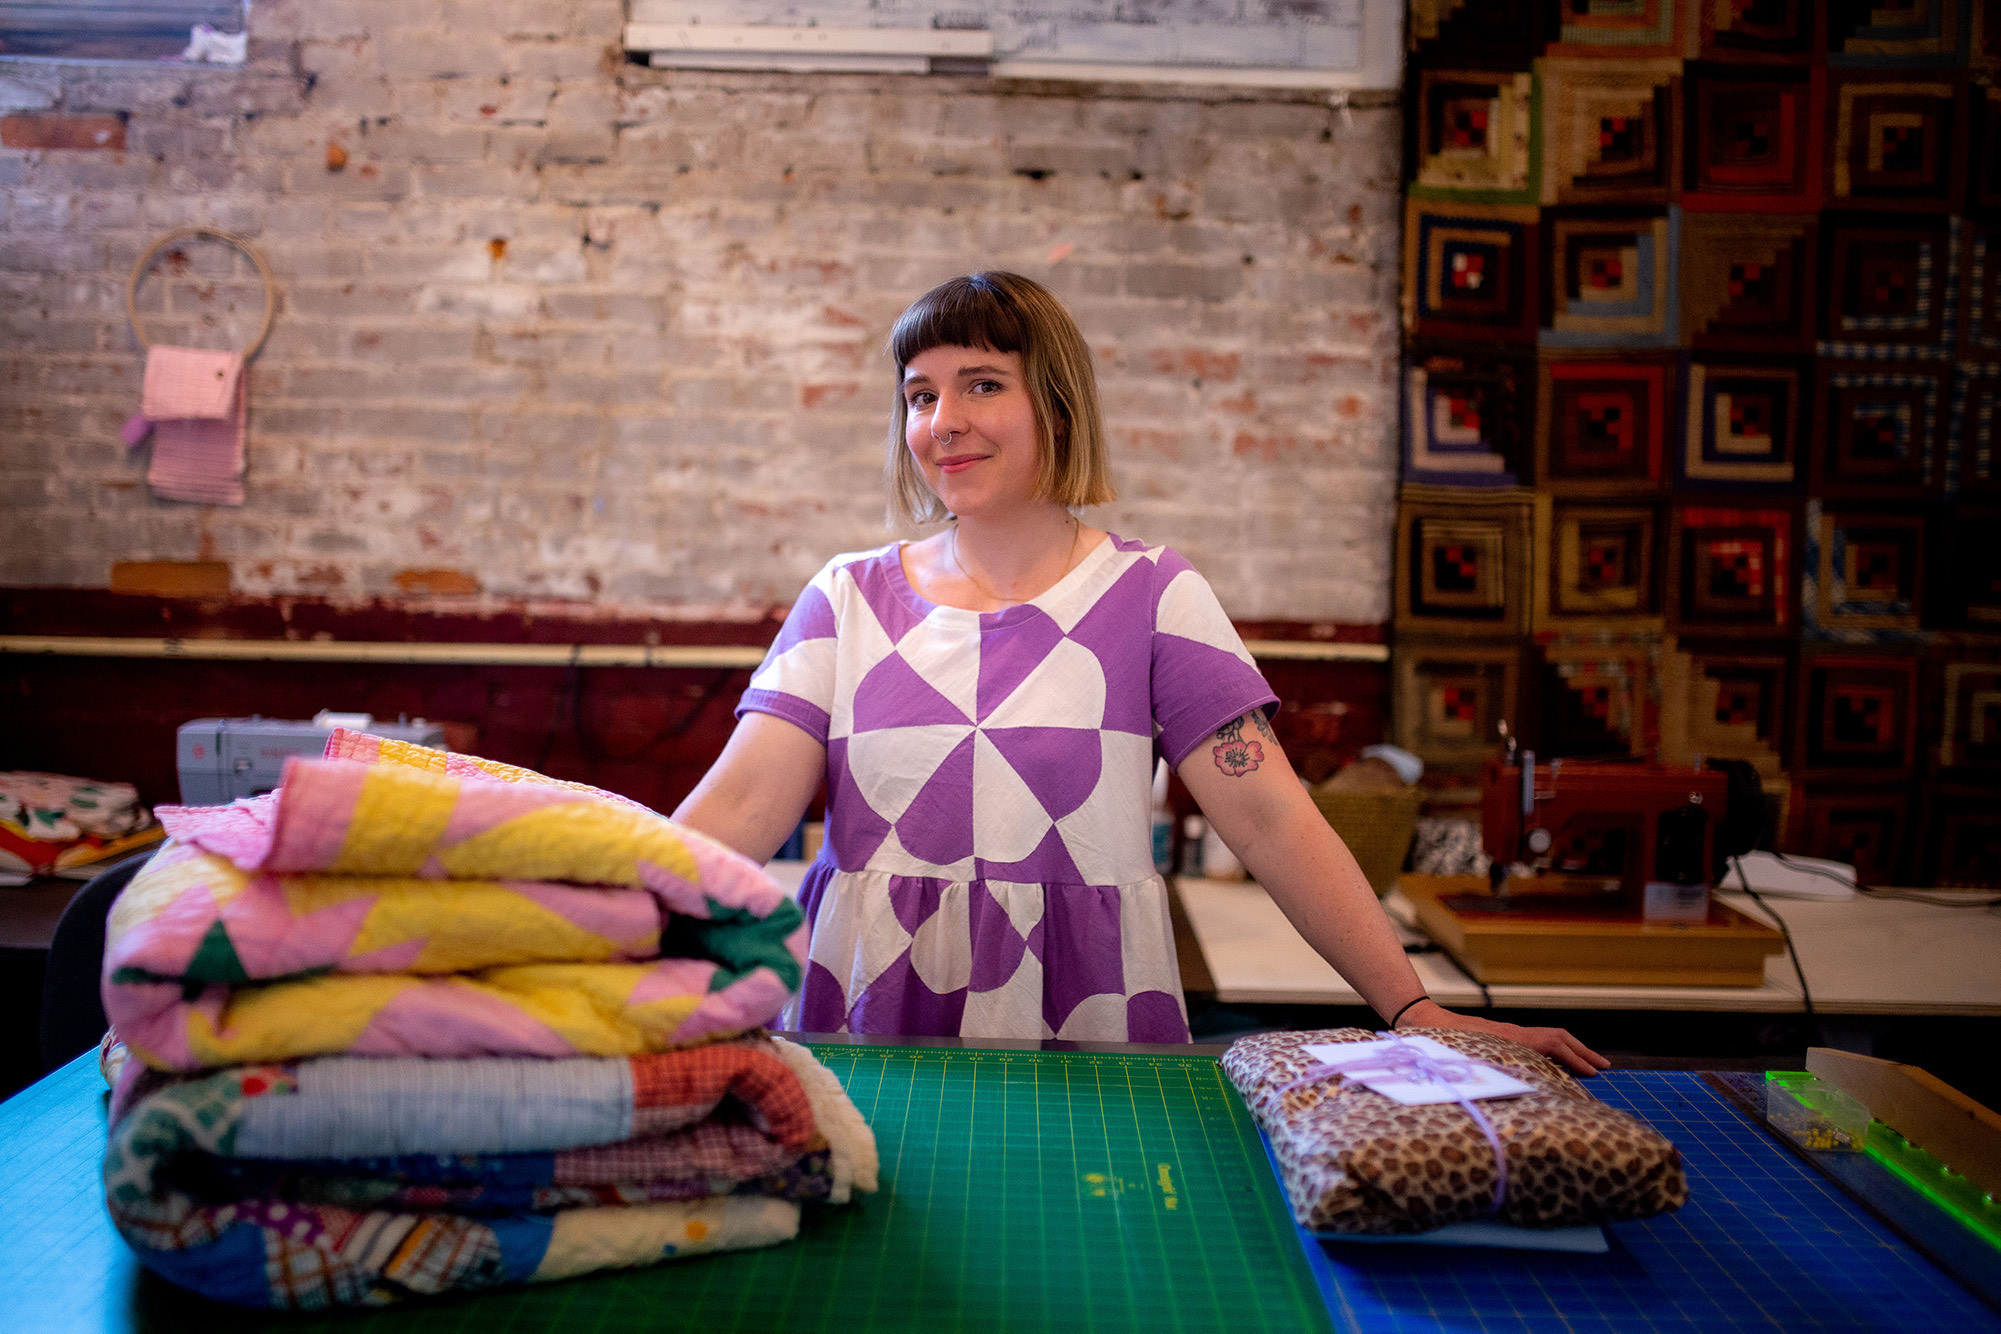
Kathleen started her business, Kitty Badhands, in 2016. At the time, she focused solely on handcrafting minimalist modern quilts and custom, made-to-order quilts. Due to time limitations, it was a part-time hobby. In 2020, she relocated her sewing studio to her apartment and space became a major issue. So, she decided to make a quilted coat because it was a project that she could work on in her dining room. What she intended as a personal side project turned into the future of her business and brand. “The response from friends also wanting a coat was overwhelming, and it grew from there into a full-time job fairly quickly.”
We sat down with Kathleen to learn more about her DIY inspiration, her history with sewing and quilting, and why she chose the Sailrite Ultrafeed to help her turn quilts into unique and wearable works of art.
This slideshow requires JavaScript.
Q. Do you consider yourself a creative person?
A. I do. I think almost everyone is creative in their own way, and my creativity manifests itself visually. I love dreaming up forms in my head and being able to create those forms with my hands. Whether that’s making a coat, a sketch, the way I decorate a room, or cook a meal, I think creativity is a huge part of what makes everyday life interesting and exciting.
Q. What do you love about the DIY and creative lifestyle?
A. The DIY/creative lifestyle, in my case, has been about creating and building the Kitty Badhands brand. There is so much to love about running my own business. I get to do what I love every day, on my terms, and I get to be my own boss. I worked in the service and restaurant industry for 12 years. Every day, when I would go to work, I would think: “This isn’t what I’m supposed to be doing. This isn’t a good use of my energy and it doesn’t make me happy.” Having a creative and DIY lifestyle for me means living on my own terms and being responsible for my own happiness and survival. It’s a dream.
A handful of Kathleen’s stunning creations!
Q. How did you get the idea to turn vintage quilts into one-of-a-kind coats?
A. I had a beloved wool coat that was passed down to me by a friend. The cut of it was very unique and it was beginning to fall apart. I tried to mend it, and when that didn’t work, I decided to cut the coat apart and try to use the pieces as a pattern to recreate the same coat from a new material. I think I naturally gravitated toward remaking the coat out of a quilt because I felt very comfortable working with quilts (I had already been quilting for several years), and the quilt I had in mind to use was a similar weight and thickness to the wool from the coat. This was just a personal side project for me, but friends were really interested in the coat I made and wanted one of their own. So I started making them for friends and, eventually, folks I had never met started asking for their own quilt coats.
Q. Can you describe the process of turning a quilt into a coat?
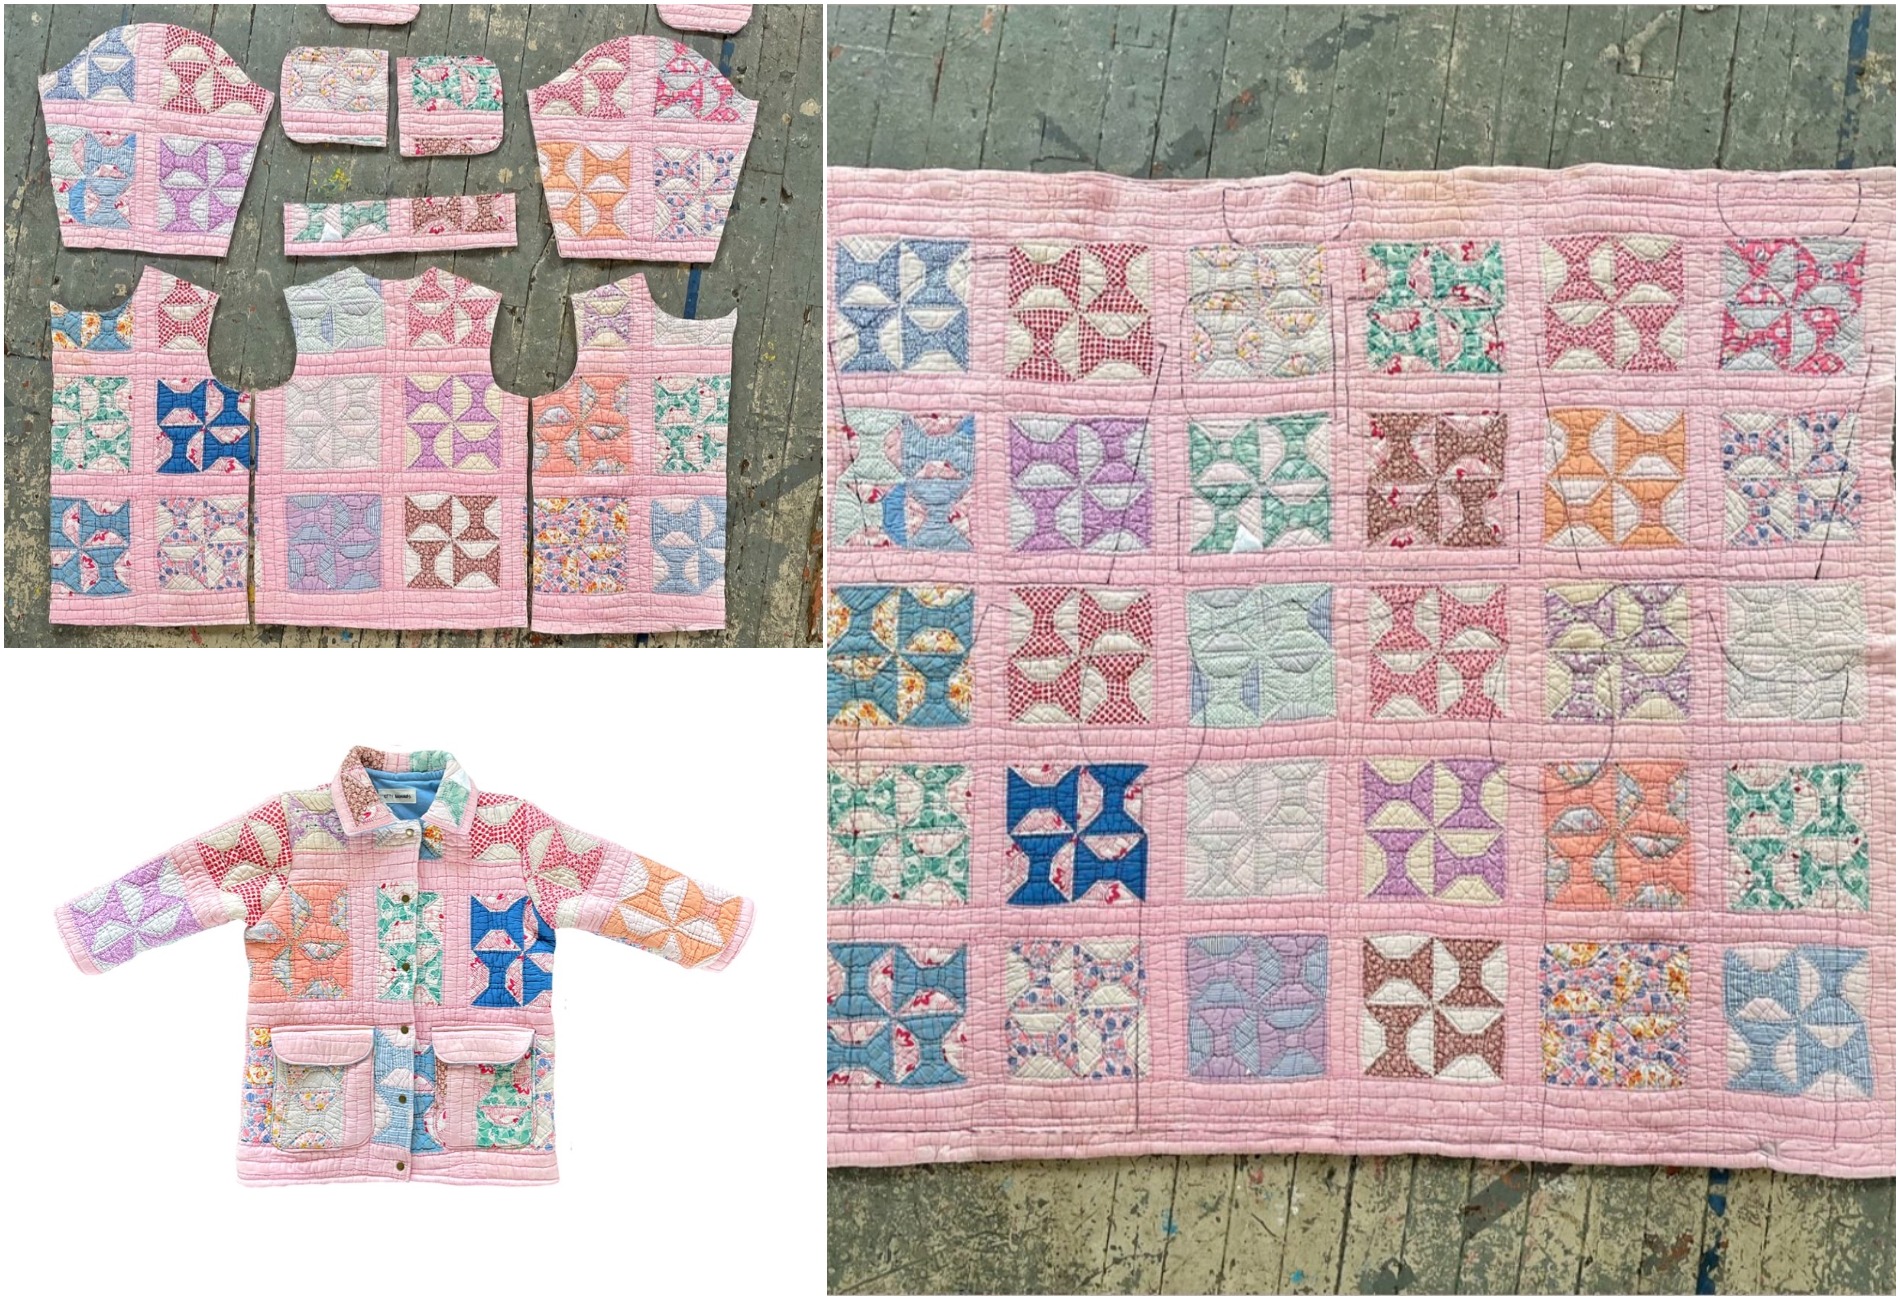
A. I first spend a lot of time looking at the quilt and thinking about how I will cut it up. I only ever cut into vintage quilts that are damaged in some way and in need of new life (stains, rips, holes, etc.). If I find an heirloom quilt in pristine condition, I leave it alone, as it would be wrong to cut into something like that. Once I have an idea of how I want the coat to look, I lay my coat pattern pieces over the quilt, making sure I have enough quilt to work with (sometimes I find out that I don’t and then I have to rethink the placement and design), and then trace them with a chalk marker. I cut all of the pieces and now I’m ready to sew.
First, I work on lining up and attaching pockets first. Next I sew up the sleeves. Lastly, I attach the front panels to the back panels. Then I serge all of the seams together before attaching the sleeves to the body of the coat. I use a mannequin to pin and adjust as I work. After serging the armholes, I work on either a collar or a hood and attach it to the neckline of the coat. The last part of the sewing process is all of the topstitching to keep seams folded and to give it a more professional finish. I use antique brass snaps for my coats, and I measure and mark where the snaps will go so that the coat will come together evenly when snapped. I either use a snap fastener or a hammer, depending on how thick the quilt I’m working with is. My final step is sewing in my tags; it feels like I’m “signing” the work and deciding that it’s finished.
From quilt to coat!
Q. How do you acquire the quilts and where do they come from?
A. They come from all over. When I started, I had a small collection of handmade quilts that I had collected from thrift stores and estate sales throughout the years, but those ran out very quickly. Right now, because of COVID, I am mostly finding my quilts on websites that do online auction and estate sales. I am excited that in-person estate sales and antique shops are beginning to open back up in my area. A nice surprise has been that as my business has grown, folks have begun to reach out to me with quilts that they want to sell, or local people will tip me off to a quilt that is for sale in one of the thrift/antique stores in town. Searching for and finding old quilts that speak to me is one of my favorite parts of the job.
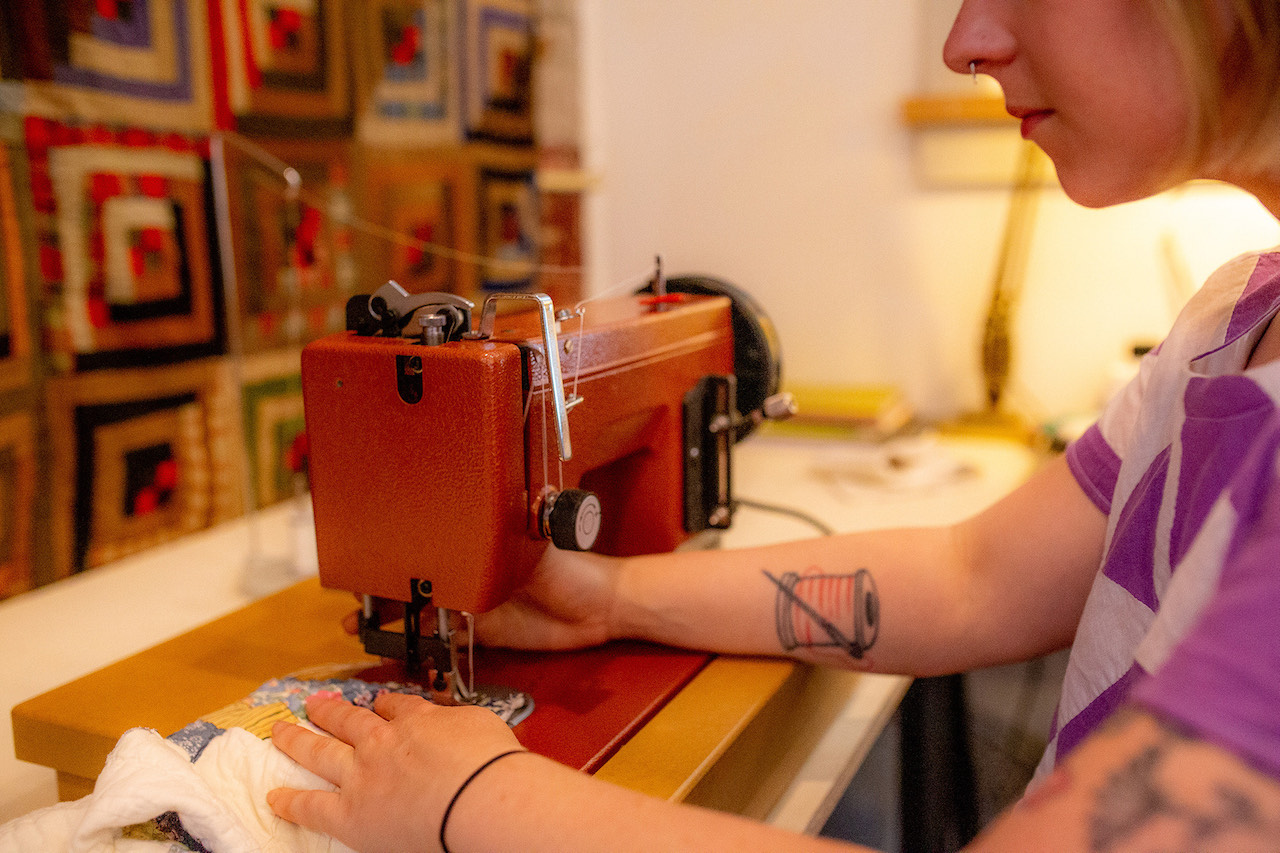
Q. What made you decide on an Ultrafeed Sewing Machine?
A. What first caught my eye was the design and look of the machine itself: I think it’s quite beautiful and stylish. What made me decide to pull the trigger on purchasing one was that Sailrite seems to be a very involved company that cares about its customers. There were lots of glowing reviews, lots of troubleshooting videos on YouTube, and I heard that the manual was very easy to follow (super important for me). I’m a visual person, so I used the Sailrite videos almost exclusively instead of the guidebook to set up my machine, learn how to thread the machine, and how to wind the bobbin. They were super clear and helpful.
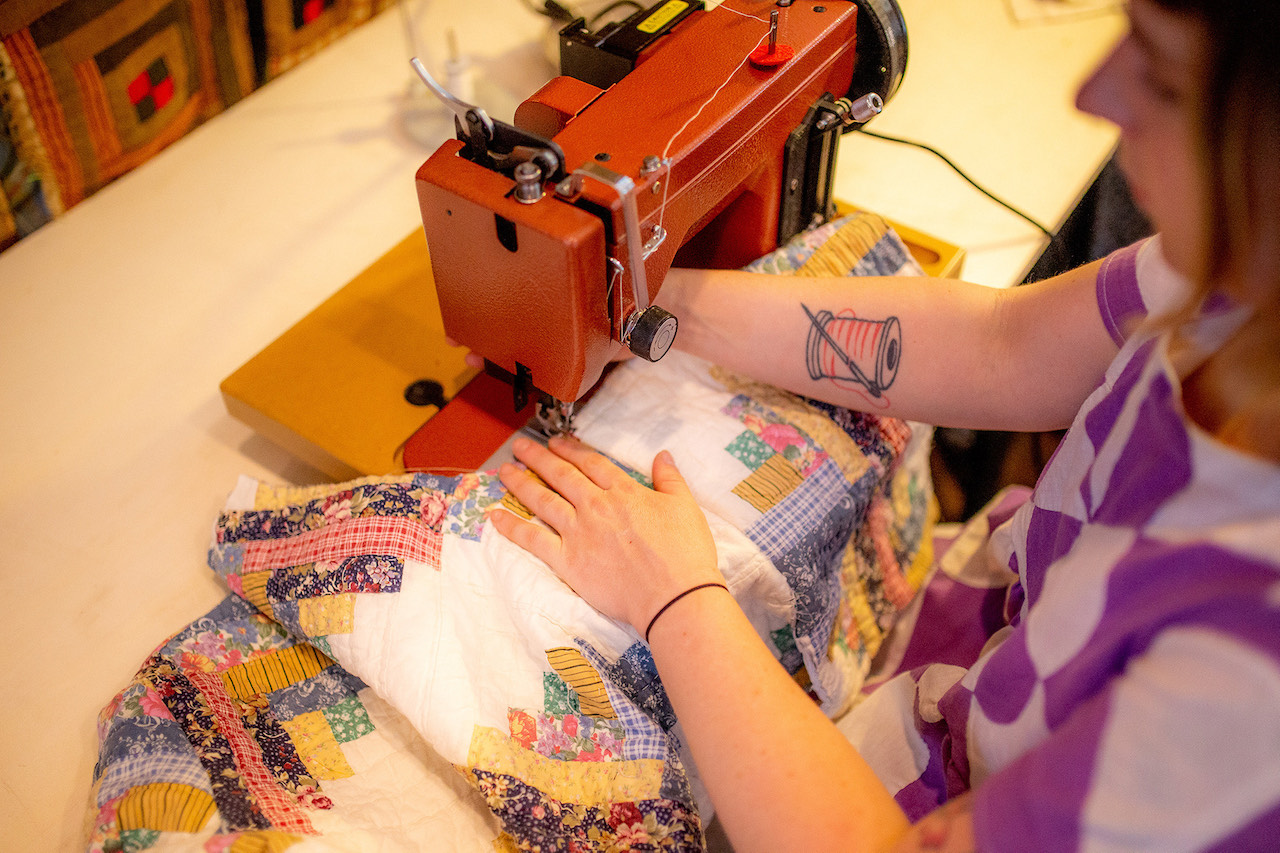
Kathleen works on a quilted project with her Ultrafeed LS.
Q. How has the machine performed for you?
A. It’s been a business-saver. It has been able to sew through many thick layers of heavy quilts. I have a stack of thick quilts that have just been sitting on my shelves because my other sewing machine could not handle them. So far, the Ultrafeed hasn’t encountered a single quilt that it can’t sew through.
Q. Where does your design inspiration come from?
A. When I first started out, I didn’t really “design” the coat at all. I would just start cutting and the finished pattern was a surprise (sometimes good and sometimes not so good). It was by doing this and seeing the different results that I started to understand how the different pieces of the quilted coat would come together. Now, I can look at a quilt and the coat jumps out at me. I can visualize how different parts of the quilt would lend themselves to a sleeve or a pocket, or where the patterns will come together at the seams of the back and front. It’s very important to me that the pattern flows seamlessly throughout the coat to create one cohesive piece and that there is a balance of different colors and shapes throughout. The most exciting, and also excruciating, part of the design process is that I can often see many different ways a quilt could be cut to make a coat. Each option would create something that looks entirely different, but there is only one quilt and one opportunity to make the coat. Deciding which direction to go can be difficult.
Recently, Kathleen has expanded her quilted offerings to include dresses, tops, totes and clutches. With the weather getting warmer, she wasn’t sure customers would be interested in purchasing coats during the summer months. Adding warm-weather wearables was a natural next step in her new and growing online business. Her quilted totes incorporate a waxed canvas base and strap, adding a modern look and finish to her classic quilted style. Kathleen relies on her Ultrafeed to handle the thickness of the combined waxed canvas and quilt layers.
It takes a special person to appreciate the artistry and dedication that goes into cutting, piecing, sewing and binding a quilt. Kathleen gives these once-loved quilts the care and attention they deserve. They are in good hands with Kathleen. Someone’s beloved heirloom is no longer lost to history. She gives these family treasures a new life as they find their way into the hands of someone who will cherish them as much as their original creators.
If you’d like to see more of Kathleen’s quilted creations, you can follow her on Instagram at @kittybadhands.
Who We Are
Sailrite is your one-stop DIY shop! We are a passionate crew of do-it-yourselfers who strive to equip you with the supplies and how-to knowledge you need to tackle your next project. Do you want to learn upholstery, leatherwork, canvaswork, hobby sewing, bag making or more? We have the fabric, tools, hardware, sewing machines and notions you need to master any DIY. And even if you’ve never sewn before, our tutorials and how-to videos are designed for beginners and experienced crafters alike.
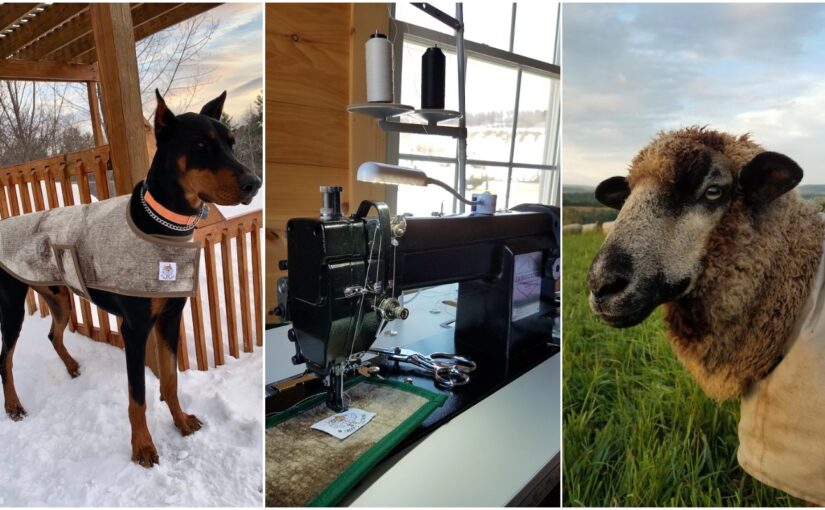
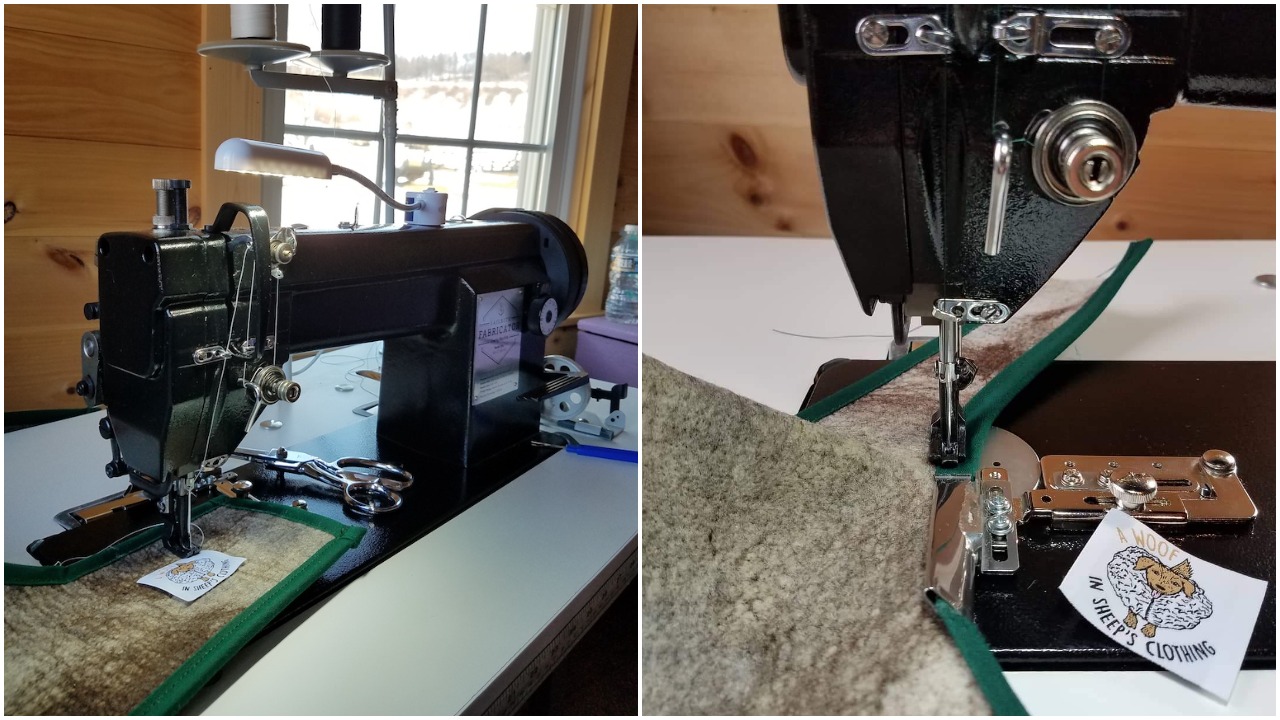
What do a sheep farm in Pennsylvania, Sunbrella® binding and the Fabricator® Sewing Machine have in common? Heather Loomis. This creative DIYer uses her Fabricator machine to sew dog coats made from warm and protective wool felt. The wool comes from her very own sheep raised on her family farm. Learn more about Heather, her sheep, and how she got the idea to sew dog coats from their wool!
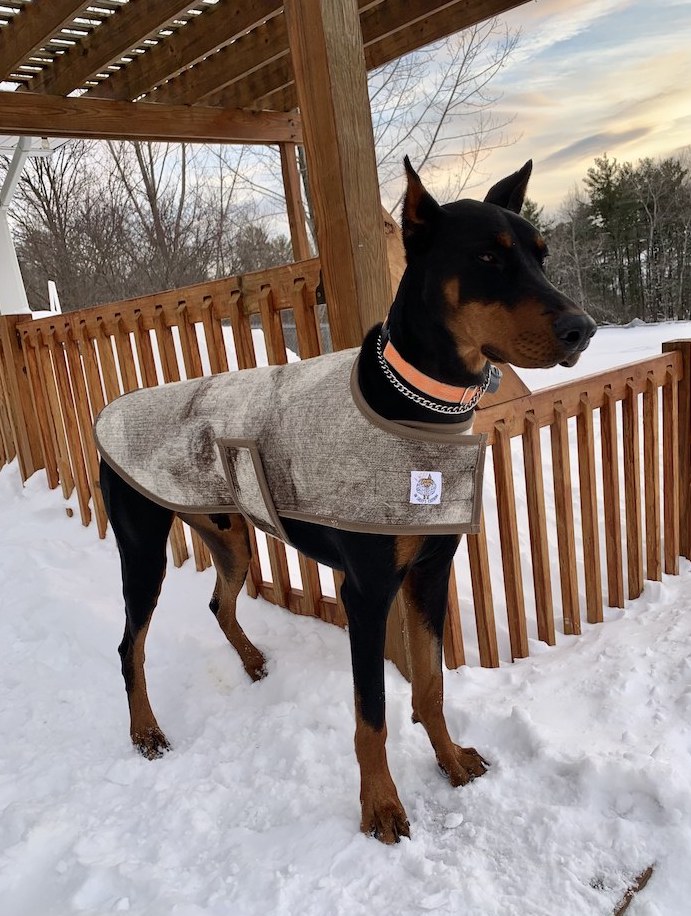
Heather’s dog, Fiat, is one happy and warm pup in her custom-made dog coat!
Down on the Farm
Heather and her husband, David, have owned, maintained and operated their farm, Bohlayer’s Orchards, for 16 years. They are the fifth generation to steward the land. Though there’s no such thing as a typical day in farm life, here’s what Heather shared with us regarding her daily routine: “Our days always begin and end with chores to feed and care for the animals.The rest of our work is driven by the season and can include pruning the orchard, skirting wool fleeces, moving sheep to different pastures, making hay, harvesting fruit, packaging and shipping wool, and on and on!”
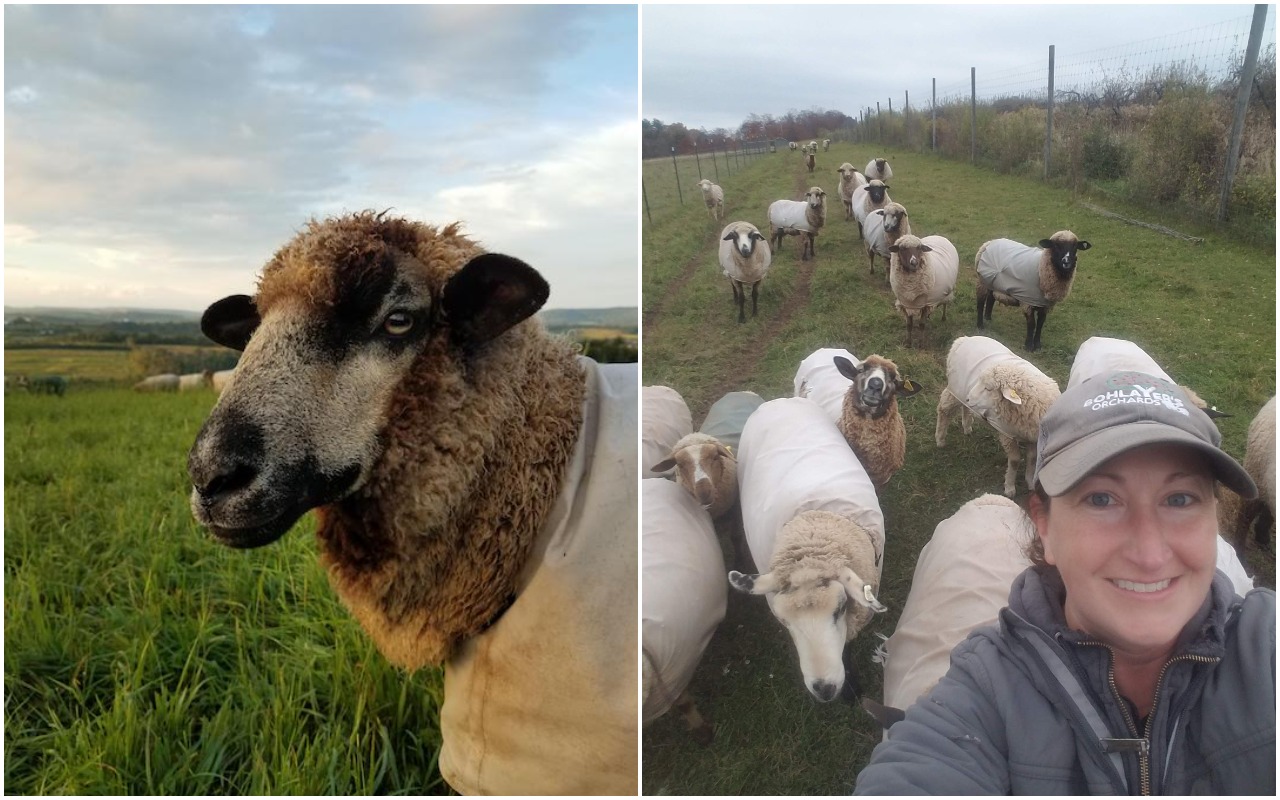
They harvest apples and pears and raise sheep on their 130-acre orchard and farm. “We have a flock of 70 Romeldale CVM sheep. The number can ebb and flow as we welcome new lambs each year and sell breeding stock or fiber sheep to other farms.” Romeldale CVM sheep are a breed of domestic sheep native to the United States. They are a very rare breed known for their unusual coloring.
Here’s Heather with her Romeldale CVM sheep on her beautiful Pennsylvania farm.
The soft wool and unusual colors of the breed’s fleece are sought after by hand spinners to create high-quality wool yarn and roving. “They produce a soft (fine) wool in many different natural colors, including white, gray, brown and black.” Heather sells spun yarn and wool roving made from her sheep’s fleece. Turning the wool roving into water-resistant and insulated dog coats was a natural next step.
Dog Days of Winter
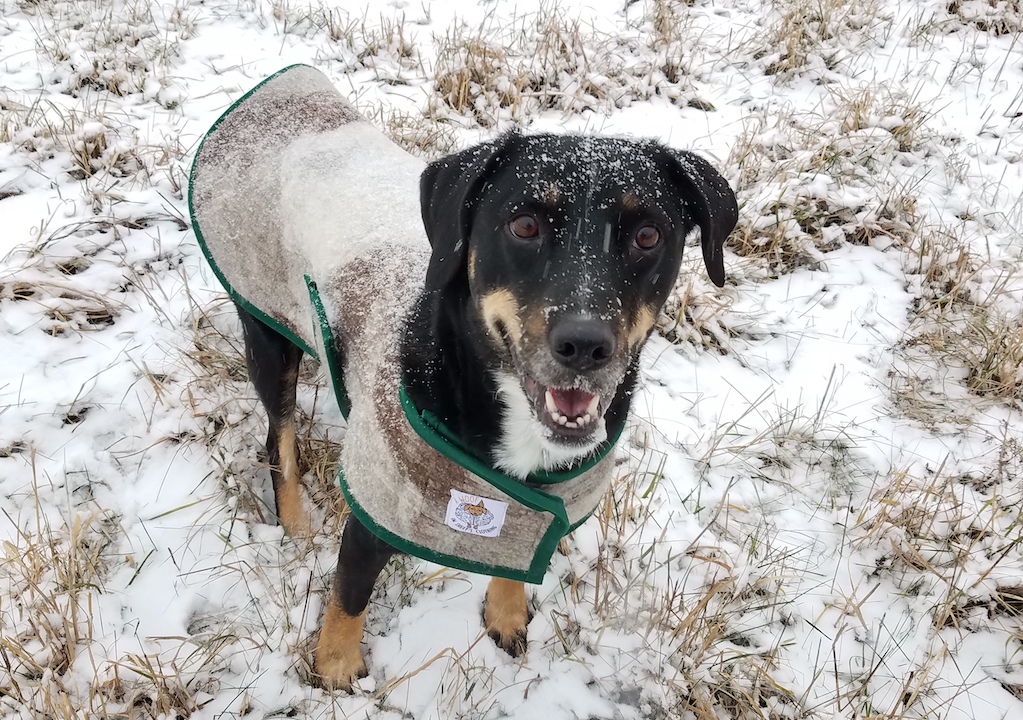
Where did Heather get the idea to sew dog coats from her sheep’s wool? “The idea for dog coats came out of a need to keep our own dogs warm and dry during cold and wet winter days. We knew the wool felt would be a perfect material for a dog coat. The wool would keep the dogs warm, and it naturally has some resistance to wet conditions.”
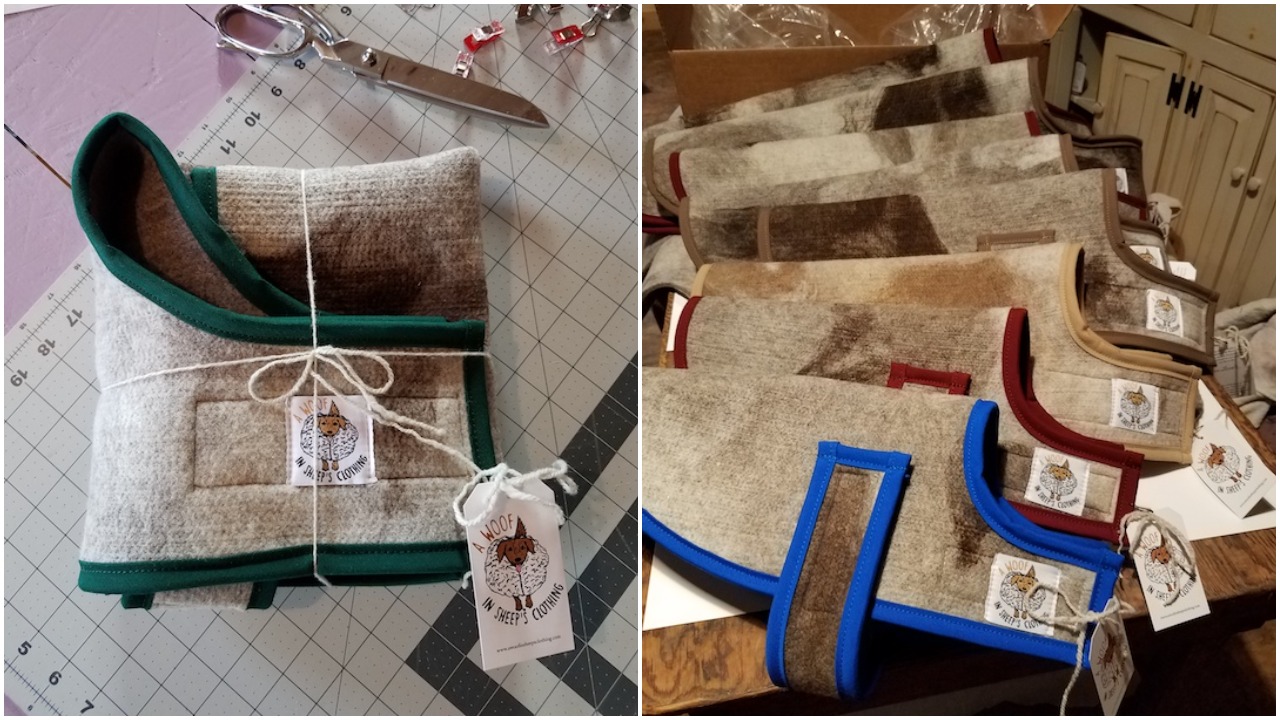
Heather learned to sew at a young age from her mother, a skilled seamstress and quilter. With her sewing background, she felt comfortable designing and creating the dog coats. “I spent time developing a pattern. As this project came together, [my husband and I] realized others were interested in having a coat made for their dog. I created prototypes in different sizes using our friends’ dogs as models to get the right fit and shape.” After months of designing, patterning and sewing, the dog coats were officially ready. Heather named her new side business A Woof In Sheep’s Clothing and began selling the dog coats seasonally at their farm store, at local festivals and on their farm’s website.
No two dog coats are exactly the same, making these special coats truly one of a kind!
When Heather started prototyping and sewing early versions of the dog coats, she realized her home sewing machine wasn’t going to cut it. “Due to the thickness of the wool felt, a typical sewing machine struggled to handle the material. I began asking others for ideas and doing internet searches. Someone told me about Sailrite and I began to research the company’s website.”
Testing the Fabricator
Heather liked the look and features of the Fabricator, but she wasn’t certain it would sew through the thickness of the wool. Luckily, she used the Live Chat feature on the Sailrite website to message a customer service representative who had the perfect solution. “They suggested I send a sample of my material. I mailed a sample of the wool felt to Sailrite headquarters in Indiana. They quickly responded with videos of the Fabricator easily sewing through multiple layers of the felt. Their prompt customer service and quality products meant that I did not need to look any further!”
Heather has owned her Fabricator for a few years now and is just as happy with it as she was on day one. “The Fabricator has given me the opportunity to expand my product line on my own terms. Anything I can think of to sew is possible with the Fabricator, the accessories and the how-to videos. This machine has been worth every penny.”
The Fabricator handles the thick wool felt and binding material beautifully.
The wool felt from her flock has inspired a lot of project ideas. In addition to dog coats, Heather also makes felt accessory bags, coasters, felt knitting project bags, hot water bottle covers, teapot cozies and cold drink koozies. The Fabricator has enabled Heather to increase her productivity and boost sales. “I can produce a complete coat in approximately an hour. If someone has a dog that doesn’t match one of our established sizes, I make a custom-sized coat for their dog.”
To give the dog coats a beautiful, professional look, Heather uses Sunbrella binding to finish the edges. And the coats attach with easy-to-position hook-and-loop tape (also known as Velcro®). Heather purchases all of the supplies needed to make the dog coats from Sailrite. “I searched Sailrite’s how-to videos to see how I could attach the binding. Any time I have a question about the Fabricator or its accessories (like the binder), I go directly to the video library and find what I am looking for. I always learn something and sometimes get new ideas! And any time I have a question about a product, I use the chat feature on the website and get a prompt and helpful response.”
The reaction from customers has been nothing but positive. “We have received rave reviews from customers and their pups! Customers are thrilled to finally have a coat that fits their dog well. Some told us that their otherwise anxious dog seems to enjoy the warm fit and often does not want the coat removed when they come back inside. Others express appreciation for their dogs staying dry in the snow and cold rains of winter as well as for the fact that the coats dry quickly.”
Producing wool products from her flock’s fleece serves more than just one purpose. “Part of what can help to save rare breeds is to find jobs for them to fulfill. Creating a demand for the wool of this beautiful, personable breed is important for their survival. We love to share with customers that their purchase of a rare breed wool product from our small family farm makes a difference.”
Thank you for sharing your story with us, Heather! We’re thrilled that Sailrite is part of your DIY journey and that your one-of-a-kind dog coats are bringing awareness to rare-breed sheep and helping with conservation efforts.
Who We Are
Sailrite is your one-stop DIY shop! We are a passionate crew of do-it-yourselfers who strive to equip you with the supplies and how-to knowledge you need to tackle your next project. Do you want to learn upholstery, leatherwork, canvaswork, hobby sewing, bag making or more? We have the fabric, tools, hardware, sewing machines and notions you need to master any DIY. And even if you’ve never sewn before, our tutorials and how-to videos are designed for beginners and experienced crafters alike.
This is a story of changing circumstances, making the best of a bad situation, and venturing out in a new direction. It’s a story of finding your own path while paying tribute to where you came from and honoring those who taught you life’s greatest lessons. It’s also a story that’s becoming increasingly well-known and relatable to many.
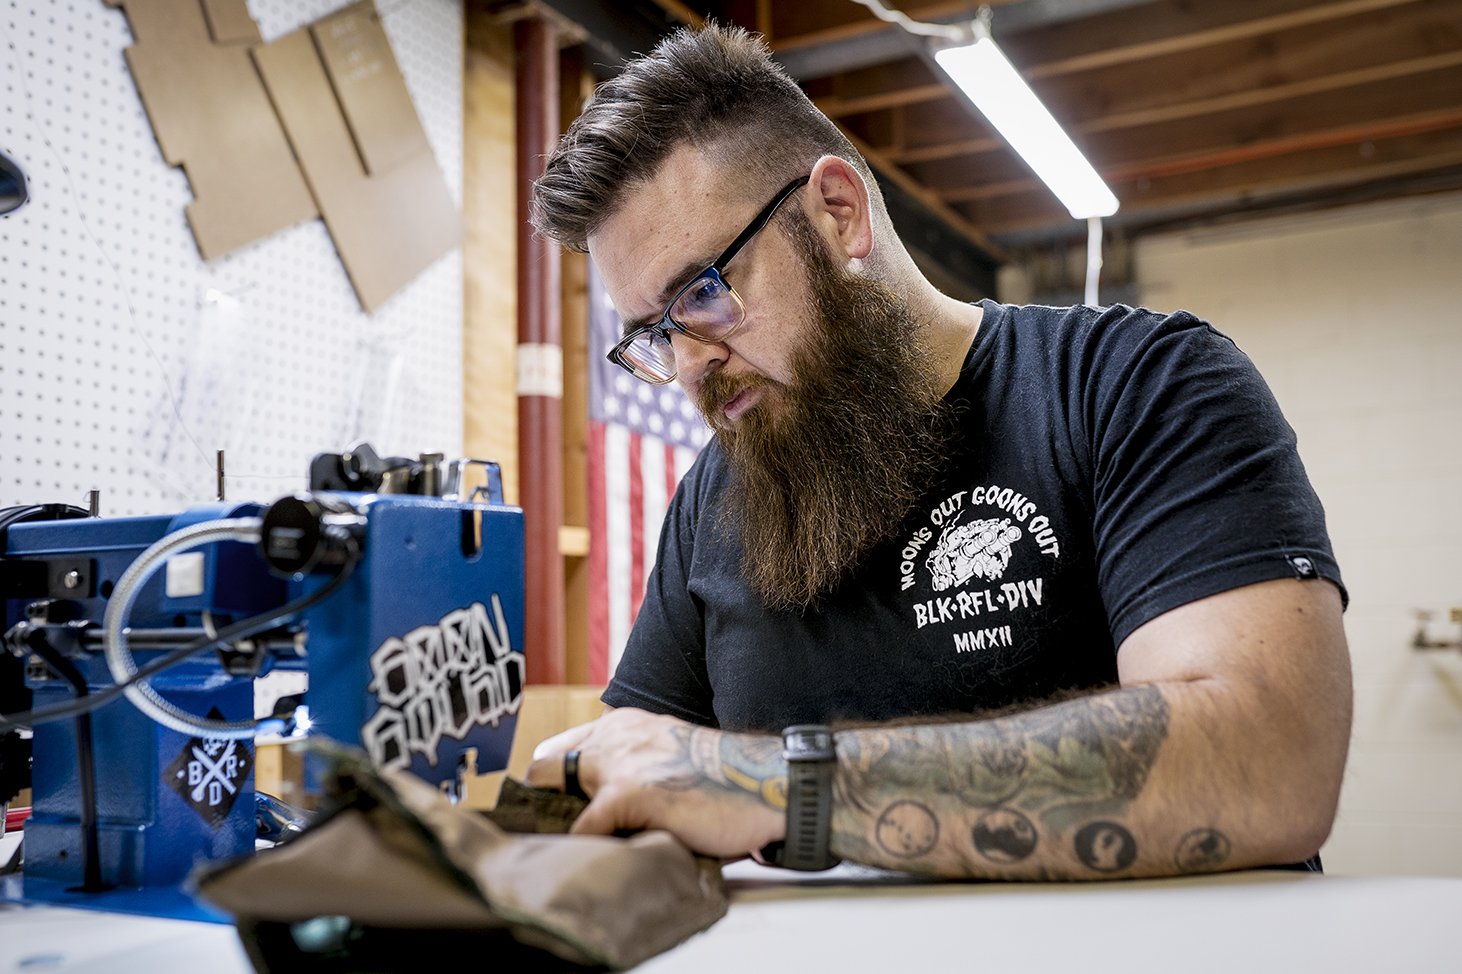
Caleb Arthur was laid off from his job at a sheet metal factory in early 2020 due to circumstances surrounding the COVID-19 pandemic. With time on his hands, he decided to revisit a dormant interest in leather crafting. Months after the layoff and with no call back to work, he decided to get serious about his leather crafting hobby and see if he could turn his leatherwork into a source of income.
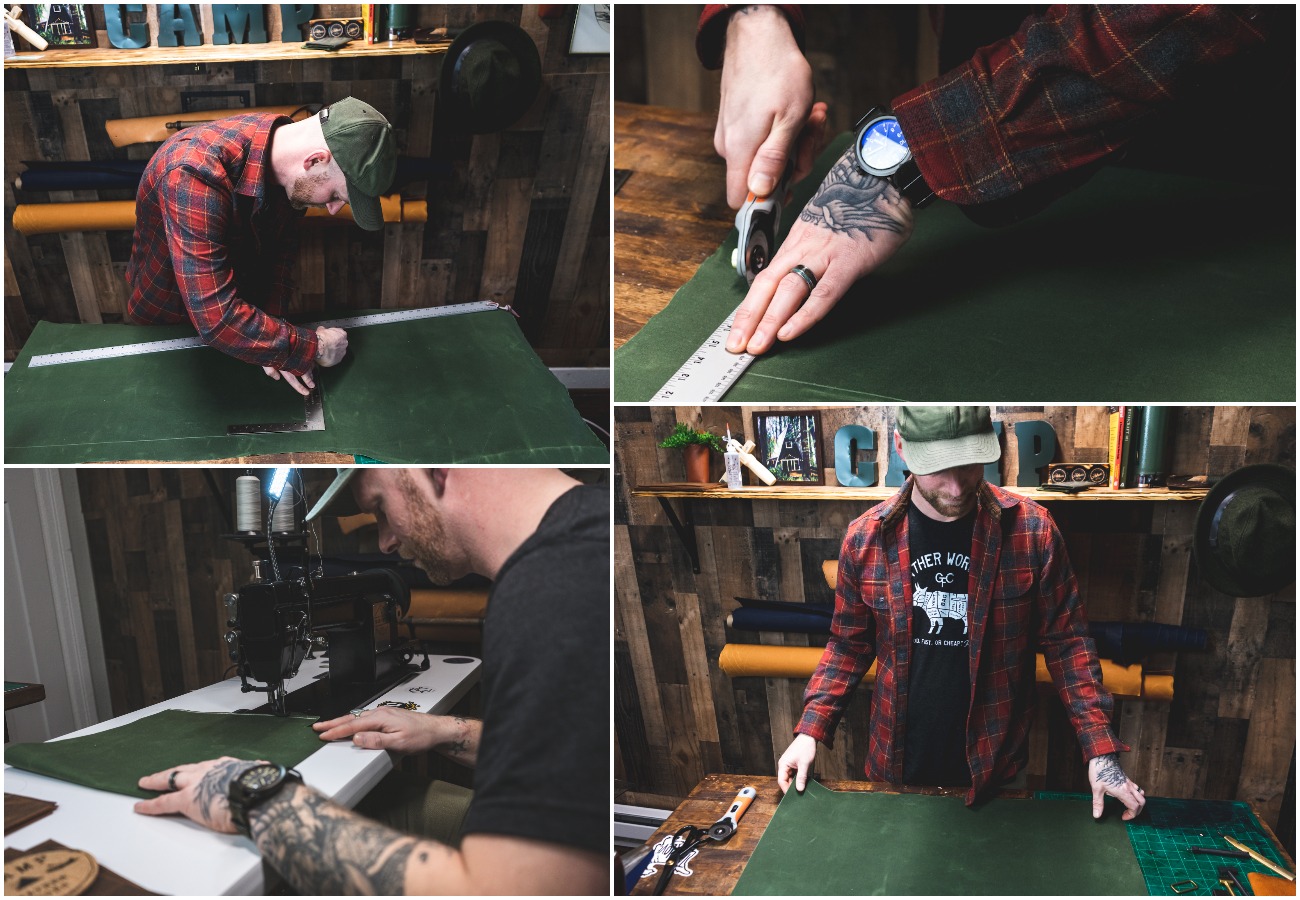
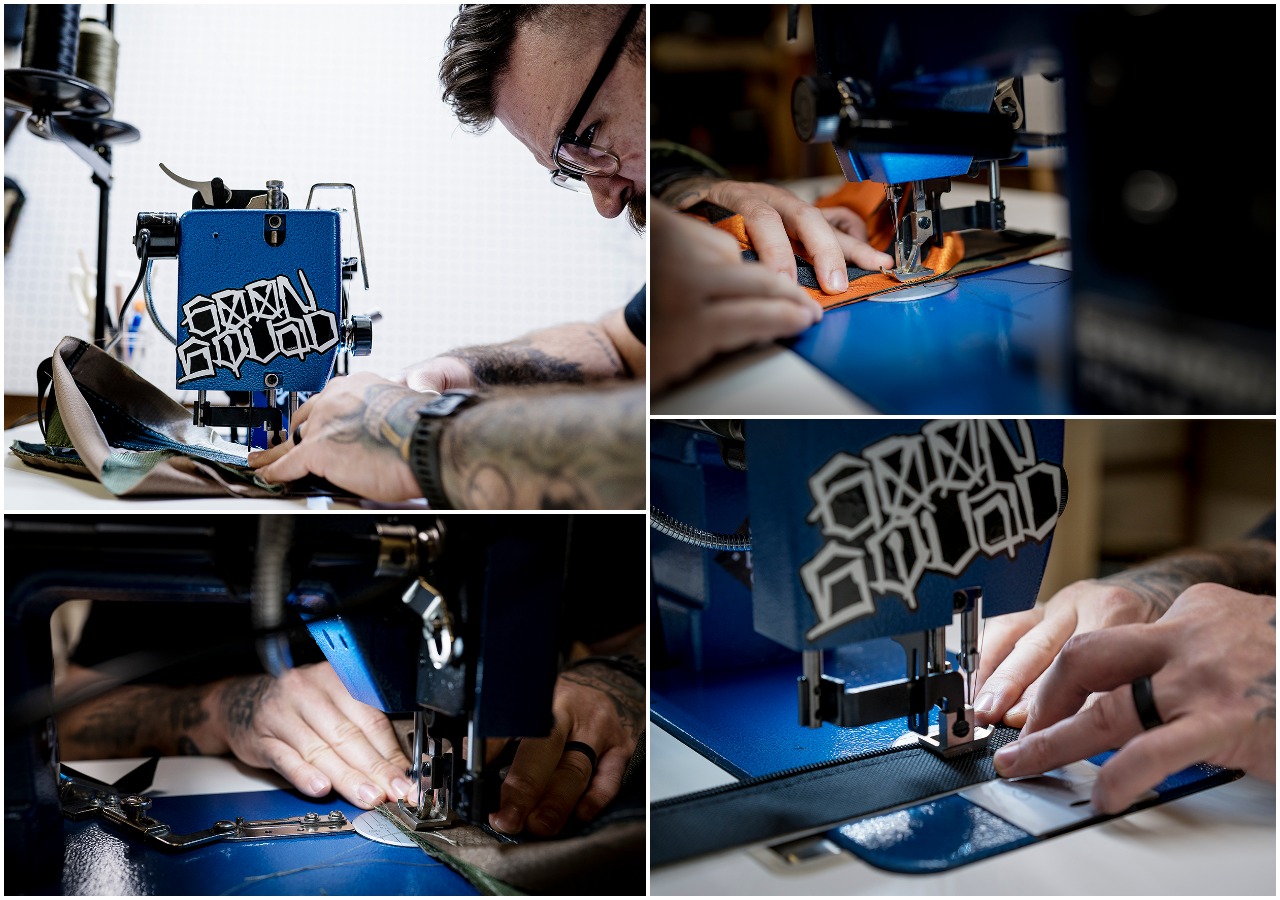
As a beginner, he was hand stitching his leather goods. He quickly realized he needed something more efficient and productive if he was going to pursue leatherwork as a business. He needed a leather sewing machine. That’s when Caleb discovered Sailrite® and the Fabricator® Sewing Machine. With the quiet, energy-saving Workhorse® Servo Motor and the ability to sew one stitch at a time, the Fabricator delivered the precision and control Caleb was looking for. “I was attracted to the Fabricator’s wider throat for fitting larger projects through. I knew it was a heavy, solid machine and I had to have it.”
Caleb with his Fabricator in his sewing studio. Photography by Marc Montes
With the addition of the Fabricator to his sewing studio, Caleb has been able to tackle bigger leather projects and dramatically speed up his productivity — a huge upgrade in more ways than one for a new business getting its feet off the ground. “What is so exciting to me now is the ability to take on projects that I never would have if I were solely hand stitching.” When he was hand stitching, small items like bifold wallets, skillet handle covers and passport holders could take hours to pattern and stitch. With the Fabricator, Caleb has added items like leather and waxed canvas tote bags to his product offerings. “I can now assemble the body of a tote in minutes as opposed to hours. The ability to dial in my stitch length and distance with the material guide keeps my stitches looking uniform.”
We sat down with Caleb to discuss his sewing roots, what DIY means to him, his leather crafting business and much more. Join us as we get to know this creative old soul and find out how the Fabricator has allowed him to greatly increase his productivity and stitch quality. When COVID-19 closed the door on his career, he found a window. And that window is even better than he could have imagined. Here’s Caleb’s story, in his own words.
Q. When and how did you learn to sew? Are you self-taught?
A. Since I was a baby, I have always been surrounded by sewing and the DIY lifestyle. I was co-raised by my grandparents, and my grandma always had her own separate sewing room where I spent a lot of my time. My grandma worked for a tiny little company called Eddie Bauer back when they still made their goods here in the United States. She was a seamstress for them and also repaired sailboat sails for a short period. The majority of my clothes were handmade by her as a kid. I never took an interest in sewing myself until recently. My grandpa had a workshop in the garage where I found more interest at the time. He built and fixed most things around the house, so I adapted that from him. I have always kind of lived by the motto of, “What would Grandpa do?”
Caleb keeps his grandmother company in her sewing room.
I would like to give a ton of credit and thanks to Ryan over at “Little King Goods.” I came across his videos and company via YouTube, and it is safe to say that I have learned so much about sewing and leather craft through his amazing videos. I don’t think I would have made the full plunge into leatherwork if it weren’t for his motivational and inspirational videos. He really made me feel like it was attainable for me. Super nice guy too. Thanks, Ryan! So, I’m self-taught but with great mentors.
Q. What type of leather goods do you make?
A. Right now, I am focusing on making the best classic, functional leather goods I possibly can. Wallets are my most popular item, and I recently dove into the world of tote bags and guitar straps. I make field note covers and clutches for the ladies and gents. I’m really open to just challenging myself and trying a bit of everything. If I think it’s a good fit for my permanent catalog on my website, then I put it up. My theme or logo for my branding is that of the great outdoors, as I have a huge respect for nature. I feel so gifted and lucky to have spent most of my life in the state of Washington. While, yes, it is true about the constant rain, it just makes those clear sunny days even more special. We really know how to take advantage. Mount Rainier overlooks our amazing city of Tacoma and is a constant reminder of the power of Mother Nature.
This slideshow requires JavaScript.
Q. How did you get started in leatherwork?
A. My first dive into leatherwork was around five or six years ago when I was working as a merchant mariner. My wife (girlfriend at the time) had bought me a really nice leatherworking kit that included everything I needed to make a few very basic leather items — wallet, keychain, coin pouch. In my downtime on the ship, I would head down to the workshop and tinker away at making those items. I found much enjoyment from dying the leather and learning the basics of stamping and tooling. It was a nice way to pass the time as we would sail back and forth from California to Alaska, but it was a hobby I would not revisit until 2020.
Q. What do you love about leather crafting?
A. For me, leatherwork has become a form of stress relief. I find so much pleasure in creating and turning nothing into something. The entire process of working with leather — from the texture, the smell (OH THAT SMELL!), to the way you can form it into anything imaginable. I’m a bit of an old soul and I love the fact that leatherwork has been around for ages and has stood the test of time. I love the way that people are drawn to a classic, well-crafted leather good. To me it carries a bit of respect and class, and I believe that we should treat it as such. I always hold onto even the tiniest of scraps as I always find another purpose for them in a future project.
Caleb patterns, cuts and assembles a tote bag using DuraWax™ Waxed Canvas from Sailrite. Photography by Marc Montes
Q. Do you consider yourself a creative person?
A. I have always felt that I had a creative side to me but more so a strong desire to create. I’ve always wanted to make things with my hands, to be able to show something/anything to the world that I was proud of. With leather crafting, I fill that desire to create and share with the world. Creating my Etsy page and personal website was a huge moment for me, allowing the entire world to have access to my craft. I have received great feedback and the support has been amazing thus far. I would like to thank my customers for their support as I grow and improve.
Q. What do you love or relate to about the DIY/handcrafting lifestyle?
DIY is pretty much my motto for most things. I learned from my seven years in the U.S. Navy that if you want something done right, it’s best to do it yourself. At home, my wife and I rarely hire outside work if we think it’s something we can take on, or at least learn ourselves. For one, it saves a ton of money; two, we get to learn and educate ourselves in the process; and, thirdly, there’s nothing like the sense of pride you get from taking on a project that you did yourself.
Photography by Marc Montes
Q. What would you say is your design aesthetic with your leather goods?
A. I spent a lot of my childhood with my grandparents and I think it’s safe to say that I was taking mental notes of what my Grandpa Clyde had around and what he depended on, from his beat-up old Redwing work boots to his tool-stamped leather wallet to his belts. I try to make the best durable, made-to-last goods that I can that have a classic, old-fashioned look to them. Simple design, classic colors and built to last. I’m a big fan of natural earth tones.
Q. Is there a special meaning or significance to your business name, CAMP Leather Goods?
A. Yes! So my company, CAMP, has a few things going on — one being my obvious passion for camping and nature and wanting to make goods geared toward outdoor use. But it started off with me wanting to incorporate my initials, CA (Caleb Arthur), into the name. While I was driving around town one day, I was thinking of my Grandpa Clyde who passed away a couple years ago. He was really my greatest mentor and I observed him build and create my whole life; he was truly an exceptional man. My Grandpa never once called me by my birth name but instead chose “Mutty” for my name. He gave all of us grandkids a sort of nickname, so I became “Mutt,” or “Mutty” or “Old Man Mutt.” As I feel that I am still striving to make him proud, I created an acronym for CAMP that has a more personal meaning for me, and that is the “Clyde And Mutty Project.” It’s my way of keeping his spirit alive with every product I put out.
Photography by Marc Montes
Q. Is there anything you’d like our readers to know about you, your business or your DIY philosophy?
A. While at the end of the day I am a crafter/leatherworker, I hope to inspire anyone who may feel like they are struggling to find their drive or passion. I have spent a lot of time waiting for the answers to land in my lap, and I can tell you that has been wasted time. If you want something, or you want to be something, study the craft, make those mistakes — make big ones! That is the only way we are going to learn and improve. Ask questions; ask for help! Adapt the notion that failure or giving up simply is not an option. Don’t be held back with the idea of, “What if this doesn’t succeed?” Instead, take on the action of, “What do I need to do now to make this succeed?” Define what success is and what it looks like to you.
One last thing: I would like to thank my beautiful wife, Katie, and the recent mother of our newborn, Lincoln. Without her support, I would be working a job that I couldn’t stand, always wanting something else. She motivates me and supports me in doing what makes me happy and I absolutely adore her for that. When the busy holiday rush of orders hit, she was right next to me cutting leather staying caught up. I really hit the jackpot with her!
Caleb and Katie at their home in Tacoma, Washington. Photography by Marc Montes
Congratulations on turning your dream into a reality, Caleb! We’re so thrilled that Sailrite and the Fabricator could be part of your DIY journey. Keep on creating!
If you’d like to follow Caleb on Instagram and see what he’s making with his Fabricator, you can follow him at @campleathergoods.
Who We Are
Sailrite is your one-stop DIY shop! We are a passionate crew of do-it-yourselfers who strive to equip you with the supplies and how-to knowledge you need to tackle your next project. Do you want to learn upholstery, leatherwork, canvaswork, hobby sewing, bag making or more? We have the fabric, tools, hardware, sewing machines and notions you need to master any DIY. And even if you’ve never sewn before, our tutorials and how-to videos are designed for beginners and experienced crafters alike.
What is EDC? It stands for “everyday carry” and it represents a lifestyle of utility and preparedness. EDC items consist of pouches, bags or backpacks containing everyday essentials. A person’s EDC kit is very personal, containing items they think are essential to their daily life. Typical EDC items include things like keys, wallet and phone, but also a small flashlight, pen and notebook, lighter, pocket knife or multitool — things that all serve a purpose and have a useful function. Having these essentials with you every day means that you’re ready for anything and prepared for the unexpected — should the need arise.
What do EDC and DIY have in common? More than you’d think. At its core, EDC embodies a belief in always being prepared but also being able to take control of a situation and handle it on your own. That kind of self-reliance and self-accountability is echoed in the heart of every DIYer. Having the right tools to handle any situation has a common thread in the DIY lifestyle.
Tim Galloway is a newcomer to both the DIY and EDC communities. He’s a professional photographer who has worked in news and done some commercial work for the past 10 years. But when the COVID-19 pandemic hit, it put an indefinite hold on his photography business. With time on his hands and a desire to stay busy and productive, he turned his attention to something that has always piqued his interest: sewing EDC items.
Tim sews an EDC bag using his Ultrafeed LSZ Sewing Machine.
The EDC community is popular and growing, and Tim is carving out his own space with his small business, goodwerks. Right now, it’s a one-man operation. Tim cuts the patterns for his bags and EDC accessories and sews everything himself. At first, he was using a home sewing machine. But he quickly realized it wasn’t powerful enough to sew through the heavy-duty layers of his bags and straps. He discovered the Sailrite® website and ordered the Ultrafeed® LSZ Sewing Machine. With the Ultrafeed, he’s been able to sew with professional results and deliver the quality that the EDC industry demands.
Join us as we get to know this small-business owner, his DIY philosophy, and how Sailrite could be part of his sewing journey.
Sewing & Sailrite
Tim had never sewn before he decided to give his EDC hobby a real shot at success. But he didn’t let that small hiccup stop him. “I learned to sew in May of 2020 mainly through YouTube tutorials and trial and error. My mom helped me search for a domestic machine that would be able to handle heavier materials as I sew primarily Cordura and webbing. I grew out of that machine very quickly as I realized that it wouldn’t be able to handle the layers as smoothly as I had hoped and certainly not the volume. Especially if I’m sewing daily or close to it.”
In need of a heavy-duty machine that could handle materials like Cordura, ripstop and webbing, Tim started his search. “I did a bunch of research. I looked at a lot of other machines, peeking at Juki, Consew, etc. Frankly, the price point was a bit out of reach for me for a Juki setup, and I really wanted a new machine. I watched a ton of videos and read a bunch of articles. The thing that drew me to the LSZ was the walking foot, ease that it dealt with heavier materials (like, you know, sails), the optional Workhorse® Servo Motor (which I use with the full table setup) and the fabled legendary customer service.”
He received his Ultrafeed LSZ in July of 2020 and has been sewing with it regularly. Even though Tim is a new sewer, he still had a lot to say about the machine. “The machine works really well for flat work. I think with the correct thread and needle setup, it is pretty smooth sailing (see what I did there?). I really enjoy having the servo motor so I can sew at night when my wife is sleeping. With this being the only industrial-type machine I’ve used, there are a lot of things I don’t know about how they operate. So there was a bit of a learning curve. I refer to the manual somewhat often and have had to learn to have a few extra parts on hand in the event of a maligned needle strike, etc.”
The EDC Community
Tim’s bags and pouches are simple in design and are made with high-quality fabrics and hardware pieces. He uses 1000D Cordura fabric with a ripstop liner for a professional look and to help with water resistance. Cordura is well-known in the hiking, camping and rucking communities for its incredible durability and water resistance. Tim’s most popular design is the Boogie Bag, which is a fanny pack with zippered compartments to keep everything organized. “I based it off of other, similar bags but addressed a few things I did or didn’t like on others. I want my products to ooze quality and durability. My company slogan, if you’d call it that, is ‘Simple. Durable. Handmade.’ I’m not really looking to reinvent the wheel but just bring quality into small soft goods.”
Tim’s current demographic is people in the rucking community. Rucking is a form of endurance training that involves marching at a fast pace carrying a weighted pack. Anyone can ruck as a form of exercise, but those who participate in GORUCK events are serious endurance athletes who expect a lot from their gear. And they have started turning to goodwerks for their rucking needs. “I’ve been very fortunate to have made fantastic friends in that community who have supported my small business and buy from me every time I drop goods. I mainly sell out of my stuff but am slowly building stock. Ideally, I want to transition more to the EDC community. I want my products to be accessible for all folks that are interested in quality gear for their everyday organization and needs.”
“I hold high the value of handmade goods and small businesses. From personal experience, I know how challenging it is to run your own business. How you have to wear a lot of different hats to make things come together. The late nights, early mornings, weekends you sacrifice, and so on. I think that when people can find something that they care about enough to devote to that, it deserves praise. When I make my products I know that they’re not going to be perfect every time, but I do the best I can to make them look like they were produced on a mass scale. I take a lot of pride in my gear, and it’s incredibly rewarding getting positive feedback.”
This slideshow requires JavaScript.
Doing Good Works
Part of Tim’s mission with goodwerks is to become a contributing member of his local community and to, in essence, put good into the world. Where did the name “goodwerks” come from? We’ll let Tim explain: “goodwerks came about with the help of a friend. I initially was going to call it ‘threadwerks’ or something similar. But my friend Dan told me to take a look at the back of my right hand, which is tattooed with the word “good” and an ax through the letters. It’s a reminder to ‘sharpen my axe’ daily and to make the best of all situations.”
Good isn’t just part of his business’s name. It’s also fundamental to Tim’s personal philosophy and a guiding principle for the way he lives his life each and every day. “A large part of my business is to give back and to create good in the world. Each month, people that follow my Instagram account nominate others to receive some free gear from me. It’s a simple gesture to show others appreciation. I also am working on having regular raffles that benefit nonprofit organizations, mainly organizations that are veteran-oriented. In November 2020, with the help of my favorite local coffee shop donating some coffee, and a slap/patch maker, we raised $1,250 for One More Wave, a foundation that helps wounded veterans get surf therapy.”
Tim recently held his second nonprofit raffle and raised $1,700. Proceeds went to The Enduring Campaign, a Michigan-based nonprofit that offers job placement and other support to the homeless veteran community. Good works and gratitude keep Tim humble through the growing success of his sewing business. “There’s no way I’d still be running with this little business without the community that’s helped support me. The people that have spent their hard-earned money with me have helped me stay afloat during the shutdowns. It’s incredibly humbling every time I get an email with an order. goodwerks doesn’t exist without the community surrounding it.”
Tim’s positive outlook on life and his desire to pay it forward is something we can all appreciate and strive toward. It’s a nice reminder that anyone can give back and put some goodness into the world, whether that’s through DIY or by other means. The world could use a few more people like Tim. Putting good into the world, even in a small way, has a ripple effect that grows and expands beyond our sight. Let’s all go do some good.
If you’d like to follow Tim’s EDC sewing adventures you can follow him on Instagram @goodwerks.
Who We Are
Sailrite is your one-stop DIY shop! We are a passionate crew of do-it-yourselfers who strive to equip you with the supplies and how-to knowledge you need to tackle your next project. Do you want to learn upholstery, leatherwork, canvaswork, hobby sewing, bag making or more? We have the fabric, tools, hardware, sewing machines and notions you need to master any DIY. And even if you’ve never sewn before, our tutorials and how-to videos are designed for beginners and experienced crafters alike.
The world is full of dreamers and doers. Those who think big and shoot for the moon. Go-getters who make a plan, put in the time, sweat and dedication, and create something truly spectacular. Shawn Moyer has a dream. He wants to row the length of the Chesapeake Bay. But not just that. He wanted to row the Chesapeake in a boat he built himself.
With limited woodworking skills, some help and a lot of hard work, he built his own rowboat using the Angus RowCruiser kit and instructions. But one thing was missing. He needed a well-made, durable cover to protect his beautiful creation. That’s where Sailrite® came in. With Sailrite materials, how-to videos and the incomparable Ultrafeed® Sewing Machine, Shawn crafted a cover worthy of his wooden masterpiece. Get ready to reach for the DIY stars with this inspiring story!
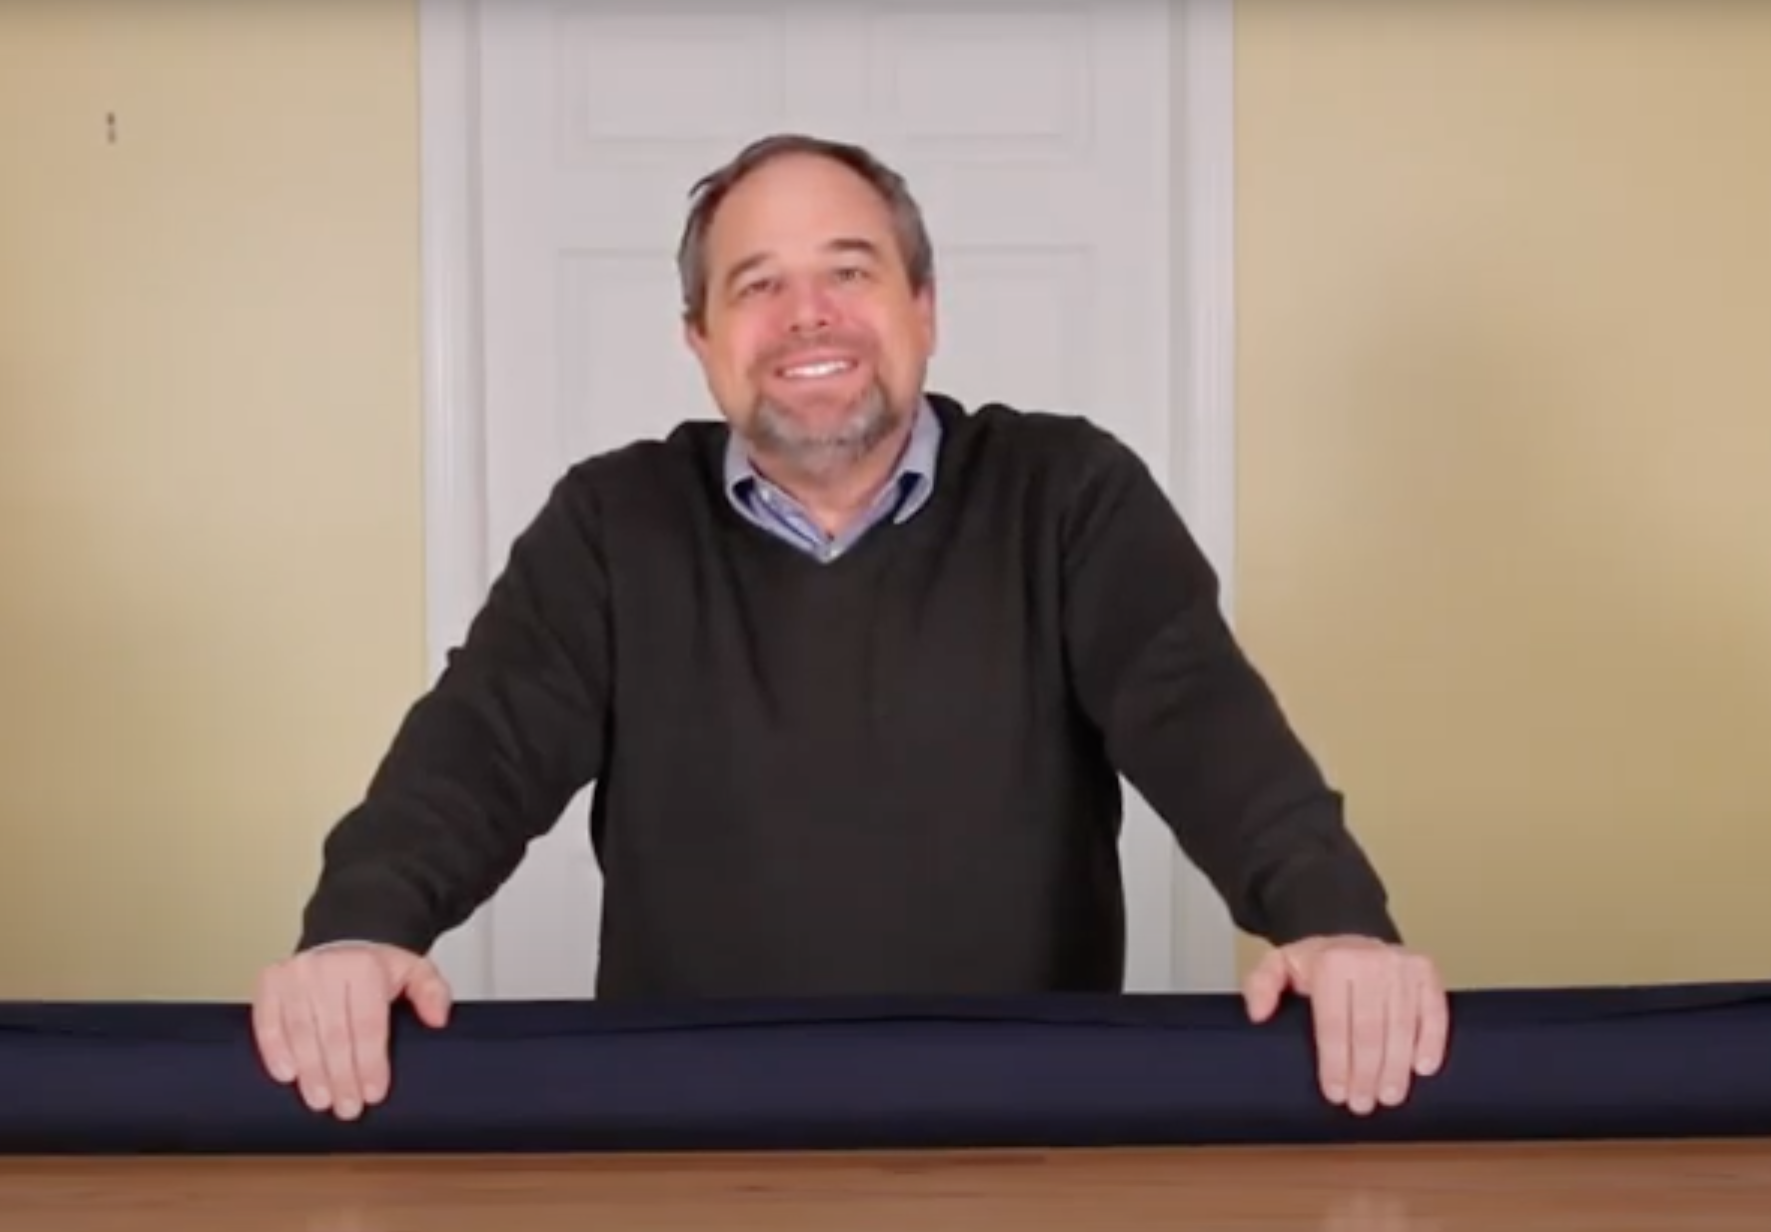
Shawn chose Sunbrella® Marine Grade for his boat cover. He looks eager to get sewing!
Building a Rowboat
Several years ago, Shawn had the idea of rowing the length of the Chesapeake Bay. He lives in south-central Pennsylvania — less than an hour from the northern end of the Chesapeake. The bay is the largest estuary (a body of water where fresh and saltwater mix) in the United States. It is approximately 200 miles long, stretches from Maryland to Virginia, and empties into the Atlantic Ocean.
Shawn worked for months building the rowboat whenever he had time in his schedule. He had very little building experience, and limited woodworking skills, prior to constructing the rowboat, but he didn’t let that stop him! And not only that, he had absolutely zero rowing experience!
This slideshow requires JavaScript.
He was looking for a specific model rowboat, and that’s when he learned about Angus Rowboats. He chose the RowCruiser design because it met his functional and aesthetic needs. The 19-foot boat features a one-person sleeping cabin, which Shawn will use for sleeping and to get out of the rain when he attempts to row the Chesapeake.
To build the rowboat, Shawn had to learn some new skills. “I learned how to lay fiberglass, how to apply epoxy, and how to do some woodworking. The RowCruiser kit is well put together, but there were several hurdles to overcome. I thought the process of building the boat would be fun. My buddy Tom is an experienced woodworker, and he kept me out of trouble. I wouldn’t have finished the boat without him.”
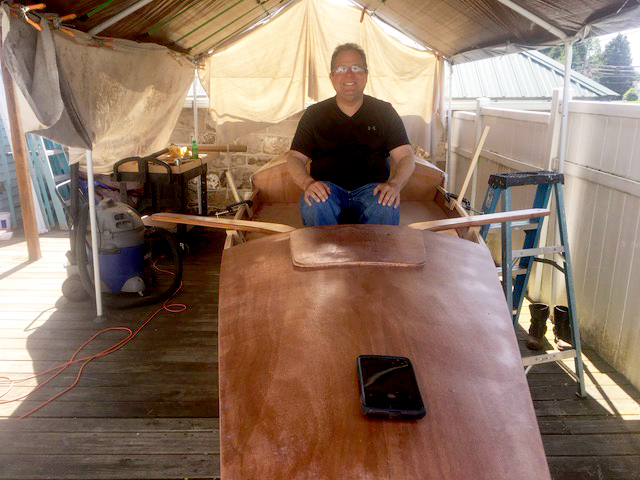
Taking the boat for a test-drive before the final paint and polish.
Sewing a Boat Cover
After building his rowboat, Shawn decided that he needed a cover to keep the boat protected when not in use. A sailing friend introduced him to Sailrite, and he knew Sailrite was the right place to find the materials for his boat cover. “I bought the Ultrafeed in order to sew the cover for the rowboat. The cost of buying the machine and materials was close to the cost of buying a custom-made cover.” And with the investment of such a versatile, heavy-duty machine, Shawn will be able to sew a variety of projects for years to come.
Before sewing the boat cover, Shawn practiced his sewing skills by making a grill cover. “I thought it would be a smaller but similar project to the boat cover. I was pleased with how the grill cover turned out using a similar Sunbrella fabric, and I used all of the techniques I learned to sew the boat cover.” To prepare for the cover, Shawn educated himself by watching several of Sailrite’s free tutorial and project videos. “I have watched hours and hours of Sailrite videos. They are fantastic! Frequently there is a trick to finishing a sewing project, and your videos give you the confidence to try it.”
Shawn works on his boat cover with his new Ultrafeed.
And how did it go navigating his new sewing machine? “The Ultrafeed is an easy machine to learn. I was up and sewing the first day. I learned new techniques and ripped a lot of seams until I got it down.”
More Stitching on the Horizon
Now that Shawn successfully completed the boat cover, what other projects has he tackled? “I have made tool rolls and I’ve repaired some jackets and done some leather horse tack repair. And I made a dog blanket — all with my Ultrafeed. I have had a lot of fun with it. I can always count on Sailrite to answer my questions.”
In addition to his new rowboat, Shawn also owns a Bayfield 29 sailboat. “Sailing is a new hobby. I’ve been sailing for two years and I keep the boat in the Chesapeake.” He has taken full advantage of his Ultrafeed and new sewing skills to stitch projects for his sailboat. “I have sewn winch covers, a tiller cover, and I’m working on a mainsail cover right now. I’m also working on reupholstering my salon cushions.”
The finished cover! Water-resistant Sunbrella Marine Grade keeps the interior protected from the elements.
To get ready for his big rowing excursion, Shawn has taken the boat out several times to practice rowing on local lakes. “My goal is to row the Chesapeake in the fall of 2021 to raise money for the Children’s Organ Transplant Association.” Shawn is a physician specializing in Family Medicine and the organization is very close to his heart. COTA is a premier nonprofit organization providing fundraising assistance to transplant families across the United States.
If you have a dream and you make a plan, you can truly achieve anything! Look how far Shawn has come in his dream to row the Chesapeake Bay. If Shawn’s success in building his rowboat and teaching himself how to sew is any indication, his rowboat expedition this fall will be nothing short of a triumph. Good luck, Shawn. We’re rooting for you!
Shawn looks ready to conquer the Chesapeake!
Who We Are
Sailrite is your one-stop DIY shop! We are a passionate crew of do-it-yourselfers who strive to equip you with the supplies and how-to knowledge you need to tackle your next project. Do you want to learn upholstery, leatherwork, canvaswork, hobby sewing, bag making or more? We have the fabric, tools, hardware, sewing machines and notions you need to master any DIY. And even if you’ve never sewn before, our tutorials and how-to videos are designed for beginners and experienced crafters alike.
Sometimes the perfect project comes along that lets you put all your DIY skills to use. That’s what happened to Ronnie Miller. This talented DIYer found a powerboat for sale online that needed A LOT of work — a complete overhaul. He bought the boat in February 2019, for only $1,000 and worked hard to get it water-ready by June. Keep reading to learn more about this powerboat transformation and how Sailrite® supplies and project videos helped Ronnie tackle this massive DIY endeavor.
Like a lot of DIYers, Ronnie learned the ropes as a young boy. “My grandmother taught me to hand sew when I was 5 years old. My uncle was a tailor and he gave me swatches to work with.” From those humble beginnings, his talent grew and grew.
Keep scrolling to see the “before” photos!
In addition to sewing, Ronnie enjoys a variety of other hands-on hobbies. “Projects are my hobby. I have always been good with my hands, fixing and rebuilding things.” Ronnie recently moved into a condominium, and he has been enjoying remodeling it himself and turning it into a proper home. “I’ve been working on carpentry and woodworking projects. I laid the vinyl floor, painted and fixed sheetrock. I have installed a mosquito mister at the house, a new metal fence to see the lake, a new wood fence, and I installed an entire sprinkler system for the front yard and back.”
Let’s learn more about the big powerboat project! “I always wanted a boat. This was the first one I ever owned, towed, worked on and completed in just three months.” What an accomplishment! So, exactly how much work went into the powerboat transformation? We’ll let Ronnie explain in his own words.
This slideshow requires JavaScript.
“I found the boat on a for-sale website and thought if I failed, I couldn’t lose too much considering I only paid $1,000 for it. I later put in an additional $6,000 including the engine, materials and tools, which I am always using now. I didn’t realize I had to replace the engine, floor or dashboard with all-new electronics until I started tearing it apart.”
After all the hard gutting and rebuilding work, Ronnie was ready to tackle the upholstery. That’s where Sailrite came in. “I needed vinyl to cover the seats and I found Sailrite online.” He chose a striking combination of white, silver and black Morbern® vinyl fabrics. He also ordered Medium Density Polyurethane Antimicrobial Foam from Sailrite — a great choice for powerboat upholstery.
In-progress photos.
The project went fairly smoothly, and Ronnie only hit a few minor snags along the way. “Once I got started, I wanted everything to look new. I had the trailer sandblasted and had to replace parts there. I needed a new gas tank float and a new dashboard with new Bluetooth® radio. I replaced the old carpet with gray-and-black striped flooring, and I installed lights on the front for boating at night.”
Before his recent move, he lived just five short minutes from Lake Houston, a reservoir on the San Jacinto River northeast of Houston, Texas. Ronnie took the boat out almost every week. After enjoying the water and the boat for a while, he decided to sell it and made a whopping $5,000 profit! He credits the eye-catching upholstery work for garnering such a big profit. True to his DIY nature and need to keep busy, Ronnie bought and restored a second boat and made $6,000 on that sale!
This slideshow requires JavaScript.
So, what’s he working on now? “Since completing the boat I have now started a wall covering of large fabric-covered squares behind my bed. It’s still a work in progress, but I should be finished soon.” Ronnie is using the Sailrite how-to video “How to Make Upholstered Wall Panels” to help complete the project.
“I find that working on a project is great for the mind; it gives you time to think alone. I also get great satisfaction by looking at it and saying, ‘Hey, I did that!’” Way to go, Ronnie! We love your positive attitude and can-do spirit. Good luck on all of your future DIYs. We’re sure they’re going to be huge successes.
Who We Are
Sailrite is your one-stop DIY shop! We are a passionate crew of do-it-yourselfers who strive to equip you with the supplies and how-to knowledge you need to tackle your next project. Do you want to learn upholstery, leatherwork, canvaswork, hobby sewing, bag making or more? We have the fabric, tools, hardware, sewing machines and notions you need to master any DIY. And even if you’ve never sewn before, our tutorials and how-to videos are designed for beginners and experienced crafters alike.